The Jacobite Clan
Jacobite Rising ( 1689- 1692)
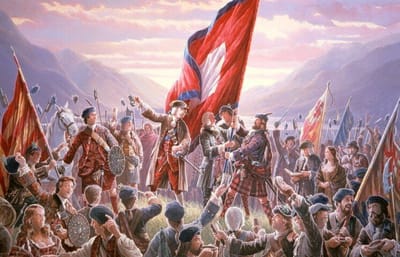
After the wars of the three kingdoms has ended about seventy eight covenanters were executed between 1684-85 without trail for refusing to retract their allegiance to the declaration, while others were executed after a show trail. Among them was James Muir who was hanged for his beliefs on February 22,1684 in Edinburgh. This led to three Jacobite risings to restore the Stewart's kingship over Britain and once again pinned Catholics against the Protestants. The most famous Jacobite family is the Moirs of Stoneywood, and their clansmen. In this rising, we don't know the exact number of Moirs, Moore, and the other spellings joined up in this rising.
Now according to Moir Genealogy and Collateral lines, with historical notes claimed that "Alexander Moir, being a Protestant, and the contestants were Roman Catholics. He joined the Cameronians staunch and true to the last, and fought the last battle of wild Killiecrankie." The Battle of Killeicrankie was fought on July 27, 1689 in Killiecrankie, Scotland. The Jacobite was victorious in this battle even thou Claverhouse, 1st Viscount Dundee was killed.
Battle of Killiecrankie
Sir Ewen Cameron of Lochiel, Chief of Clan Cameron, had set about forming a confederation of Highland clans loyal to James as soon as William had arrived in England, and Dundee was in contact with him. When Dundee went north, he was pursued by a governmental force of about 3,500, led by General Hugh Mackay of Scourie, a Highlander who had been in Dutch service with the Scots Brigade for many years. Dundee, moving quickly, outmaneuvered Mackay, and on 16 May arrived in Glenroy, where the clans had been summoned to meet him on 18 May. With a total of some 1800 men, Dundee marched, in hopes of meeting Mackay on grounds favorable to the Highlanders. Unable to do so, he retreated back to Glenroy, where he arrived on 11 June. Many of the Highlanders returned to their homes, but some remained. Blair Castle was in a key position that controlled access to the Lowlands.
It was owned by the Marquis of Atholl; he promptly headed south to Bath to take the waters for his health. His heir, Lord Murray, was on the government's side. Dundee ordered Patrick Stuart of Ballechin, a relative of the Murrays, to hold Blair Castle for the King; Lord Murray ended up besieging his own castle. Dundee learned that Mackay was at Perth, on his way to assist in taking Blair Castle. Dundee was determined to intercept Mackay near Blair Atholl, astride the road through the hills that Mackay would have to pass. Many of the clans had not arrived yet, but he set out anyway and ordered them to follow "with all haste." Ewen himself also had a force of about 240 Camerons with him at the time, and tried to catch up while he dispatched his sons to raise support along the path of march. Ewen overtook Dundee just before he reached Athole, where they were joined by about 300 Irish, under the command of Major-General Cannon.
Dundee held a quick war council with those clan leaders who had arrived, and then immediately set out for the field with his force, now numbering about 2,400. He arrived at the pass before Mackay and set up position on a ridge above the pass. When Mackay's troops arrived, they saw they had no hope of attacking Dundee's force. They instead deployed in a line and started firing on them with muskets. The Jacobite line was shorter than the Government's, due to the disparity in numbers, leaving Ewen in the middle with an open flank on the left. By the time all of the forces were formed up, it was late afternoon, and the Jacobites had the sun in their eyes, so they simply waited for sunset under the desultory fire from Mackay's forces.
At seven o'clock, Dundee gave the order to advance, at which point the entirety of the Highlanders dropped their gear, fired what muskets they had, and charged. Mackay's forces, realizing the battle was on, stepped up their rate of fire; however, due to a shallow terrace on the hillside shielding the advancing Jacobites, this fire was partly masked. Eventually the lines met, and Mackay's men in the center were "swept away by the furious onset of the Camerons". So fast was the Jacobite charge that many government troops had insufficient time to fix their bayonets, leaving them defenseless at close quarters. (During this period, the plug bayonet was used, which fitted into the barrel of the musket and prevented further reloading or firing--this meant that fixing bayonets was delayed until the last possible moment.)
The battle soon ended with the entirety of Mackay's force fleeing the field, quickly turning into a rout in which 2,000 were killed. However, the cost of victory was enormous. About one-third of the Highlander force was killed, and Dundee was fatally wounded towards the end of the battle. The Jacobite advance continued until it was stopped by government forces at the Battle of Dunkeld. It is belief that Alexander Moir, fought only at Killiecrankie, but if he decided to continue to fight for the Cameronians, then he would most likely have been presented at the battle of Dunkeld, and Cromdale. We also don't know if any other Moirs, Moore, Mor, ect... were involved in the 1689 rising.
Massacre of Glencoe
On February 12-13, 1692, the Macdonalds of Glencoe was massacre by Earl of Argyll's Regiment of Foot ( Clan Campbell and other Lowland Scots), led by Robert Campbell of Glenlyon. In this infamous massacre, John Moore was shot dead in his garden. His wife, finding him dead, covered his body with a sheet, and fled to a malt-kiln for safety. That night she was delivered of a son, the John Moor , who was among the early settlers of Londonderry, New Hampshire. Mrs. Moor had two daughters, Elizabeth and Beatrix, whom she left in the care of a servant while she fled for safety. She remained in the malt kiln three days, when she took her young son and returned to her house.
She found the body of her husband had been taken away, and the daughters and servant had gone, and the house deserted and she alone with her babe. Her husband's brother, Samuel Moor, with most of her family relatives, had removed some time before this event, to Antrim Co., Ireland. By the help of friends, she Joined her relatives in Ireland. Two years later, the servant brought the two daughters to her. On 27 August 1691, William offered all Highland clans a pardon for their part in the Jacobite uprising, as long as they took an oath of allegiance before 1 January 1692 in front of a magistrate. He also threatened them with reprisals if they did not sign. The Highland chiefs sent word to James, now in exile in France, asking for his permission to take the oath. James dithered over his decision, convinced that he was close to returning to Britain to reclaim his throne.
When it became apparent that this was not going to happen before the deadline, James sent orders back to Scotland authorizing the chiefs to take the oath. This message reached its recipients in mid-December, in difficult winter conditions, only a few weeks before the deadline. A few managed to comply promptly but others did not, including Alastair Maclain, 12th Chief of Glencoe, who waited until the last day before setting out to take the oath. On 31 December 1691 MacIain travelled to Fort William to ask the governor, Colonel Hill, to administer the required oath, but Hill demurred on the grounds that he was not authorized to receive it. He instructed MacIain to proceed quickly to Inveraray to make his oath before Sir Colin Campbell, sheriff of Argyll. Hill gave Maclain a letter of protection and a letter to Sir Colin asking that he receive Maclain's oath since Maclain had come to him within the allotted time.
Hill also reassured MacIain that no action would be taken against him without him having the opportunity to make his case before the King or the King's privy council. It took Maclain three days to reach Inveraray, partly due to winter weather, partly due to his being detained for a day at Barcaldine Castle by the 1st company of the Earl of Argyll's Regiment of Foot, at the command of Captain Drummond, as a ruse to delay him. On arrival at Inveraray, he then had to wait three days for the arrival of Sir Colin, who was spending the New Year with his family across the waters of Loch Fyne. Upon his return, Sir Colin reluctantly accepted Maclain's oath. Maclain had satisfied the spirit of the oath, and was confident there would be no action against him or his people. However, he reckoned without the Secretary of State over Scotland and Lord Advocate, John Dalrymple, Master of Stair.
Dalrymple was a Lowlander who disliked the Highlanders and thought their way of life was a hindrance to Scotland, which he thought would be better served in union with England. Copy of order to Capt. Campbell by Maj. Duncanson You are hereby ordered to fall upon the rebels, the McDonalds of Glencoe, and put all to the sword under seventy. you are to have a special care that the old Fox and his sones doe upon no account escape your hands, you are to secure all the avenues that no man escape. This you are to putt in execution at five of the clock precisely; and by that time, or very shortly after it, I’ll strive to be at you with a stronger party: if I doe not come to you at five, you are not to tarry for me, but to fall on.
This is by the Kings special command, for the good & safety of the Country, that these miscreants be cut off root and branch. See that this be putt in execution without feud or favor, else you may expect to be dealt with as one not true to King nor Government, nor a man fit to carry Commissioned in the Kings service. Expecting you will not fail in the full-filling hereof, as you love your self, I subscribe these with my hand at Balicholis Feb: 12, 1692.
For their Majesties service (signed) R. Duncanson To Capt. Robert Campbell of Glenlyon In late January or early February 1692 the first and second companies of the Earl of Argyll's Regiment of Foot, which consisted of approximately 120 men under the command of Captain Robert Campbell of Glenlyon, were billeted on the MacDonalds in Glencoe, who received them in the hospitable tradition of the Highlands. Most of the regiment was recruited from the Argyll estates but only a minority actually bore the Campbell name. Others, including many of the officers, came from the Lowlands. Captain Campbell was related by marriage to old MacIain himself and so it was natural that he should be billeted at the Chief's own house.
Each morning for about two weeks, Captain Campbell visited the home of Alexander MacDonald, MacIain's youngest son, who was married to Campbell's niece, the sister of Rob Roy MacGregor. At this stage, it is not clear that Campbell knew the nature of their mission; ostensibly they were there to collect the Cess tax, a property tax or assessment instituted by the Scots Parliament in 1690.
The planning was meticulous enough for them to be able to produce legitimate orders to this effect from Colonel Hill, the man who had tried to help MacIain complete his oath in the first place, thus dispelling any suspicions the MacDonalds may have had. However, it was Colonel Hill who issued the orders to begin the massacre two weeks later. On 12 February 1692, Captain Drummond arrived. Due to his role in ensuring MacIain was late in giving his oath, Drummond would not have been welcomed. As the captain of the 1st company of the regiment, the Grenadiers, he was the ranking officer, yet did not take command. Drummond was bearing instructions (see inset) for Robert Campbell, from his superior officer, Major Duncanson. He spent the evening playing cards with his unsuspecting victims and upon retiring, wished them goodnight and accepted an invitation to dine with MacIain, the chief, the following day.
Alasdair MacIain was killed while trying to rise from his bed by Lt Lindsay and Ensign Lundie but his sons escaped, as initially did his wife. In all, 38 men were murdered either in their homes or as they tried to flee the glen. Another 40 women and children died of exposure after their homes were burned. The first clansman to be killed was Duncan Rankin. He was shot down as he tried to escape by crossing the River Coe near the chief's house. Elsewhere, various members of the two companies found ways of warning their hosts. Two lieutenants, Lt Francis Farquhar and Lt Gilbert Kennedy even broke their swords rather than carry out their orders. They were arrested and imprisoned, but were exonerated, released and later gave evidence for the prosecution against their superior officers.
In addition to the soldiers who were actually in Glencoe that night, two other detachments, each of four hundred men were, according to the plan, to have converged on the escape routes. Both were late in taking up their positions. It is possible that a snowstorm made arrival on time quite difficult especially for those approaching over the Devil's staircase from Kinlochleven. It is equally possible that they simply didn't want to play any part in what they knew to be a heinous crime. Under Scots law there was a special category of murder, known as "murder under trust", which was considered to be even more heinous than ordinary murder.
The Glencoe massacre was a clear example of this, as shown by the results of the inquiry: Though the command of superior officers be very absolute, yet no command against the laws of nature is binding; so that a soldier, retaining his commission, ought to refuse to execute any barbarity, as if a soldier should be commanded to shoot a man passing by inoffensively, upon the street, no such command would exempt him from the punishment of murder. The challenge to the inquiry which had been established, was to apportion blame on those responsible for the massacre, and yet the orders which led to it were signed by the King himself, who could not be seen to be responsible. The scandal was further enhanced when the leading Scottish jurist Sir John Lauder, Lord Fountain hall was, in 1692, offered the post of Lord Advocate but declined it because the condition was attached that he should not prosecute the persons implicated in the Glencoe Massacre.
Sir George Mackenzie, who had been Lord Advocate under King Charles II, also refused to concur in this partial application of the penal laws but, unlike Fountain hall, his refusal led to his temporary disgrace. The Glencoe massacre became a propaganda piece for Jacobite sympathies, which were to come to a head in the next generation in the Jacobite risings of 1715 and 1745. Due to the involvement of Argyll's regiment under Glenlyon's command, the massacre was regarded by many (who were schooled in the romantic 19th-century school of Scottish history) not as a government action, but as a consequence of the ancient MacDonald–Campbell rivalry. Memory of this massacre has been kept alive by continued ill feeling between MacDonalds and Campbells.
Since the late 20th century the Clachaig Inn, a hotel and pub in Glencoe popular with climbers, has had a sign on its door saying "No Hawkers or Campbells" although it has been said that this is probably more for the amusement of tourists than from any lasting sense of revenge. In 1883 Macdonald of Aberdeen sculpted the Upper Carnoch memorial to the massacre, a tapering Celtic cross on a cairn which stands at the eastern end of Glencoe village, which was formerly known as Carnoch.
Each year, on 13 February, the Clan Donald Society of Edinburgh arranges an annual wreath laying ceremony at the memorial to the Massacre of Glencoe. Clansmen from Clan Donald, from across the world, attend the ceremony, along with local people. The ceremony originated in 1930 when the late Miss Mary Rankin, Taigh a’phuirt, Glencoe, decided that a wreath should be laid annually on the monument. Miss Rankin, who supplied the wreath up to the time of her death in 1944, commissioned the late Mr. Angus MacDonald to lay it on her behalf. On Mr. MacDonald’s death in 1936, his second son Robert took over the duty, the wreath being supplied after Miss Rankin's death by Robert’s sister, Miss Annie MacDonald.
Jacobite Rising of 1715
Just like the first Jacobite rebellion of 1689-1692; the Moirs have not been a major factor of the second rising of 1715. There was a tenant William Moir of David Lumsden of Cushnie who was force into the 1715 rebellion by the threats of the Earl of Mar. William Moir fought at the battle of Preston and was taken prisoner. It is also said that both the James Moir III and IV were active during this rising. We are not sure how many Moirs fought in this rebellion.
Battle of Preston
The Battle of Preston (9–14 November 1715), also referred to as the Preston Fight, was fought during the Jacobite Rising of 1715 (often referred to as the First Jacobite Rising, or Rebellion by supporters of the Hanoverian government).The Jacobites moved south into England with little opposition, and by the time they reached Preston in Lancashire had grown to about 4,000 in number. Their horse troops entered Preston on the night of 9 November 1715, and as they approached two troops of dragoons and part of a militia regiment retreated to Wigan.
General Charles Wills was ordered to halt their advance, and left Manchester on 11 November with six regiments, arriving on the 12th. The Jacobite leader Thomas Forster, a Northumberland squire, had intended to move on that day, but, learning of Wills's approach, decided to stay and made the mistake of withdrawing troops from a strong defensive position at Ribble bridge, 0.5 miles (0.80 km) outside Preston.
The Jacobites had barricaded the principal streets of Preston, and Wills ordered an immediate attack, which met with fire from the barricades and from houses, resulting in the Hanoverian attack being repulsed with heavy losses. Wills then had houses set on fire, with the aim of fires spreading along to the Jacobite positions, and the Jacobites tried to do the same to houses taken as government positions.
At night, Wills's order to light the government-held positions for identification helped the Jacobite snipers, but overnight many Jacobites left the town. The legend of these actions is recounted in a well-known Lancashire ballad, Lo! The Bird is Fallen. On the morning of Sunday 13 November more government forces arrived and, finding that the town was insufficiently encircled, Wills stationed more troops to prevent the besieged Jacobite army from escaping. The Jacobites had also suffered losses in the fighting, as well as losing defectors overnight, and although the Highlanders' full intention was to fight on and take the attack to the enemy, Forster agreed to an offer from his officer Colonel Oxburgh to open negotiations with Wills for capitulation on favorable terms. This was done without informing the Highlanders, but Wills refused to treat with rebels.
When the Highlanders learned of this that night, they were infuriated and paraded the streets threatening any Jacobites who might even allude to a surrender, killing or wounding several people. James Moir III, rescue of the Earl of Winton in 1715, then under sentence of death in the Tower of London for his concern in the Rebellion of that period. At seven o'clock on the morning of Monday 14 November, Forster offered an unconditional surrender, which was turned down unless it applied to the Highlanders. Forster then sent back confirmation that the Scots noblemen would surrender on the same terms.
When the government forces entered the town, the Highlanders were drawn up under arms in the market-place ready to surrender. 1,468 Jacobites were taken prisoner, 463 of them English. George Seton, 5th Earl of Winton, William Gordon, 6th Viscount of Kenmure, William Maxwell, 5th Earl of Nithsdale, James Radclyffe, 3rd Earl of Derwentwater, and William Murray, 2nd Lord Nairne, were among those captured and later sentenced to be executed for treason under an act of attainder. However, Winton and Nithsdale escaped from the Tower of London.
All surviving prisoners except for members of the Clan Gregor were later pardoned by the Indemnity Act 1717. Seventeen Jacobites were killed and twenty-five wounded. Government casualties were close to 300 killed and wounded. Of the ordinary Highland clansmen defeated at the Battle of Preston, many were transported to the Americas. If the Moirs were part of the Gordons, Earl of Sutherland, then they were most likely fighting on the Government side during the 1715 rising (stated by Clan Gordon of Australia). The Moirs would of fought at the battles of Sheriffmuir, Skirmish at Alness, Siege of Brahan and battle of Glen Sheil.
Jacobite Rising of 1745
During the third Jacobite rising also known as the forty fifth was the only rebellion that came so close to achieving it's goal of returning the Stewarts back on the throne. During the last two rebellions have failed miserably. In this rebellion there were loads of Moirs who joined the ranks of the Jacobites. The list below will contain the names of clansmen who ended up in joining Prince Charles army:
James Moir IV of Stoneywood
Charles Moir of Stoneywood
Moirs of Stoneywood
Moirs of Aberdeenshire
John Moir
Donald Moir
Charles Moir (Aberdeen)
Allister Moir
Charles Moir
Alexander Moir
William Moir (Dundee)
Andrew Moir
Dr. Henery Moir ( Kelso)
Captain Charles Moir
John Moir (Templand)
Francis Moir
Kenneth Moir ( Miltoun of Ord)
Henry Moir
Robert Moir ( Kelso)
James Moir
William Moir of Lonmay
William Moir
Moirs of Cromar
Robert Moir
Henry Moir
William Mair
Robert Moir
William Moar ( Dundee)
William Moir( Peterhead)
LT. Moore
William Moore ( Dundee)
Angus Mor ( Glenfinnan)
Evan More ( Teanclan)
Private George Moir
Moirs of Leckie
Charles Longmuir
William Moir
Robert Muir
James Moir
Capt. Charles Moir
John Moir
Kenneth Moir
William Moir
William Moir of Longmay
Alex Muir
Peter More
William Moor
Adolphus Muir
Robert Moir
William Moir Esq.
James Moir
John More
There are probably others as well. Not all these Moirs, Mor, Moore, More, Mair, O'Moores and others fought in the same regiments. Most of them served in the Stoneywood's Battalion also known as the Stoneywood's Aberdeen Regiment, Capt. Lord Lewis Gordon’s Regiment, Ogilvy’s Regiment, Pitsligo’s Horse Cavalry, Bannerman of Elsick’s, Lord Balmerino's troop of the Lifeguards, Fitz James Horse, Irish Brigade of France and others. Some were prisoners, wounded, banished, and probably killed in action.
Battle of Prestonpan
There were few Moirs at this battle under the battalions of Duke of Perth and also Tullibardine regiment under the command of Lord George Murray. The battle of Prestonpans was fought September 21, 1745. This battle was a decisive win for the Jacobites. Despite the poor state of his cavalry and artillery, Cope determined to engage the Jacobite army. He had good intelligence that the Jacobite army numbered just under 2,000 men, mostly composed of fit and hardy men, but badly armed.
His officers apparently believed that the rebels would never attack a single force including both infantry and cavalry. They assured locals during their march that there would be no battle. Although the Jacobite army had secured the high ground to the south of Cope's army, they were dismayed by the natural advantages of Cope's position. A frontal Highland charge would flounder in the marshy ground in front of the Royalist army's center and be shot to pieces by musket and cannon fire.
Although there was much argument among the senior Jacobite officers, Lord George Murray was convinced that only an attack against the open left flank of Cope's army stood any chance of success. However, Jacobite Lieutenant Anderson was a local farmer's son who knew the area well and convinced Murray that he knew an excellent route through the marshlands. Following his advice, Murray began to move the entire Jacobite force at 4 am walking three abreast along the Riggonhead Defile far to the east of Cope's position. Cope, meanwhile, had observed some eastward movement of the Jacobite army as it grew dark, though this move was the result of confusion in the Jacobite ranks and was abandoned. He feared an attack against both his flanks, and realigned his army on a northsouth front, in the position in which they would fight on the next day.
Three companies of Loudon's Highlanders were detailed to guard the baggage park in Cockenzie. Some 100 Volunteers were dismissed and ordered to report again the next morning, thus missing the ensuing battle. Cope also made a last-minute attempt to get some artillerymen from Edinburgh Castle. Some half-dozen gunners left the Castle disguised as tradesmen but their guide became lost. To prevent a surprise attack during the night, Cope kept fires burning in front of his position and posted no fewer than 200 dragoons and 300 infantry as pickets. At the crack of dawn, however, at 6 am on 21 September 1745, Cope's dragoons beheld the spectacle of 1,400 Highlanders charging through the early mist, making "wild Highland war cries and with the bloodcurdling skirl of the pipes....". Cope's inexperienced army wheeled to its left by platoons to face the Highlanders, who were charging in from the east following their night march. Cope managed to scramble some cannon up onto his right flank.
Although most of his artillerymen (most of whom were aged or "invalids") fled, the two officers in charge of them opened fire as soon as the Highlanders were in range. Undaunted by the light, inaccurate guns, the Highlander army continued its charge; however, the center became bogged down in marshy terrain, and, as they continued forward, their different speeds of advance caused them to form into a "V". The wings on either side met the inexperienced dragoons on either side of the British center, and the dragoons immediately fled the field. This left the British center, containing the experienced royal infantry, facing the center of the "V" on their front, and the two unopposed wings on either side. The effect of this unplanned flanking maneuver meant that the royal foot soldiers were effectively sandwiched.
They suffered heavy casualties and gave way. The battle was over in less than 10 minutes, with hundreds of government troops killed or wounded and 1500 taken prisoner. Cope's baggage train at Cockenzie was captured, with only a single shot fired. It contained £5000, many muskets and ammunition. The Jacobite Army suffered fewer than 100 troops killed or wounded. The wounded and prisoners were given the best care possible at Prince Charles Stuart's insistence. Cope tried to rally his men, but could only lead about two hundred stragglers up a side lane (Johnnie Cope's Road) to reorganize in an adjacent field, where they refused further engagement. Cope and his aide-de-camp had no choice but to travel southwards to Lauder and Coldstream and then on to the safety of Berwick-upon-Tweed, 50 miles (80 km) away, the following day, Brigadier Fowke causing scandal by arriving ahead of the troops. Out of the 2,300 men in the royal army, only 170 troops managed to escape.
Colonel James Gardiner, a senior royal commander, who stayed at Bankton House close by the scene of battle, was mortally wounded in a final skirmish that included Sir Thomas Hay of Park who fought by his side and survived. Colonel Gardiner's fatal wounds were inflicted beneath a white thorntree, of which a portion is today in Edinburgh's Naval and Military Museum. Gardiner was stripped to the waist after his possessions were looted by the Highlanders. A servant took the mortally wounded Colonel after the battle, to The Manse at Tranent, where he died in the arms of the Minister's daughter during the night. An obelisk to Gardiner's memory was raised in the mid 19th century.
Others battles and sieges that the Moirs, Moore, More were apart of during the forty fifth.
The battles, skirmishes and sieges that they fought in include: Battle of Clifton Moor, Battle of 1st Crlislie, Siege of Stirling, Siege of Ruthven Barracks (1746), Siege of Inverness (1746) ,Siege of Fort William , and Battle of Littleferry. Stoneywood Battalions/ Regiment James Moir IV of stoneywood founding the regiment. James Moir was a Lieutenant General of the Stoneywood's Aberdeen Regiment, part of Lord Gordon forces. Moir of Stoneywood set out with this little fleet in the beginning of the night, got safe across the firth of Moray, and arrived in the morning at Tain, where the Duke of Perth, whom the Prince had sent to command this expedition, was ready. They will play a major part in the rising.
James Moir IV Of Stoneywood
His battalion or regiment was at the battle of Inverurie and eventually meet up with the main Jacobite force. Lord Lewis Gordon had been raising Jacobite forces and had managed to create two battalions. James Moir of Stoneywood commanded one battalion and Gordon of Abbachy commanded the other.
Battle of Inverurie
This battle was fought on December 23, 1745, and the Jacobite was victorious. This battle was between 450 of Clan Macleod, and two hundred Monroes and other volunteers commanded by Monroe of Culcarin, against Lord Lewis Gordon who brought up seven hundred men under arms and chiefly lowland men of Aberdeenshire under Moir of Stoneywood. The casualties of the Macleod independent Highland regiment has suffered many killed, and fifty were taken prisoners, which the Gordon lost were sixty killed and twenty wound, but according to another source from Wiki... says Lord Lewis Gordon had been raising Jacobite forces and had managed to create two battalions.
James Moir of Stoneywood commanded one battalion and Gordon of Abbachy commanded the other. Lord Lewis Gordon had also raised a considerable sum of money, but he was thwarted by his brother; Cosmo George Gordon, 3rd Duke of Gordon, who supported the British Government. To put an end to Lord Lewis Gordon's Jacobite recruitment, John Campbell, 4th Earl of Loudoun who was the King's commander in chief in the North, despatched the Laird MacLeod of MacLeod from Inverness with 500 men. MacLeod gained support from George Munro of Culcairn with 200 men and the Laird of Grant with 500 men. Lord Lewis Gordon ordered his men to fall back to Aberdeen where he was joined by a number of men from Forfarshire and Kincardineshire.
He was also joined by Lord Drummon's French troops who had just landed in Montrose. Later he was also joined by 300 men of the Clan Farquharson as well as his own two battalions under James Moir of Stoneywood. The Laird of Grant fearing for his own country decided to return home and George Munro of Culcairn held post at Oldmeldrum. MacLeod however thought otherwise, he advanced and occupied the town of Inverurie, 16 miles north-west of Aberdeen. Lord Lewis Gordon on hearing of MacLeod's incautious movement was determined to attack his opponent. Lord Lewis Gordon moved from Aberdeen on 23 December with 1,100 men and 5 pieces of cannon which had been taken off a ship in the harbour.
With the main body of his army he crossed the Bridge of Don and took the route by Fintray up the left bank of the river, while he sent a detachment of 300 men, French and others, by the Tyrebagger road, the main road to Inverurie, so as to deceive the Macleods with their real intentions. At about four o'clock in the afternoon the French party, who had marched by the right bank of the River Don, dashed into the river and waded across. They then attacked the Macleods on the southwest side of Inverurie. Lord Lewis Gordon then immediately crossed the River Ury on the east side of the town near Inverurie Parish Church, (The Auld Kirk of Inverurie) now known as St Andrew's Parish Church, Inverurie, and attacked the town from there where the Macleods were taken completely by surprise.
The MacLeods opened fire from the ditches and from behind walls, but were outnumbered, and being vigorously pressed, they gave way and retreated, and were pushed back to Elgin. The chief of the MacLeods gathered his men, and while retreating, fought by the moonlight. An account of MacLeod's actions are given in contemporary documents the Culloden Papers which belonged to Forbes of Culloden.:McKlaudes (MacLeods) Resolute Behavior in running to the Enemy with so few of his men about him and the stand they made with not one half of their little army against 900 till they were overpowered by numbers is much to his honor.
Ruairi MacLeod's account 20th century historian Ruairi MacLeod gives an account of the Battle of Inverurie in volume LIII of the Transactions of the Gaelic Society of Inverness, quoting from contemporary documents. Ruairi MacLeod states that the rebel advance was led by the French Picquets, crossing the river Urie at the ford south of Inverurie.
MacLeod brought about 60 of his men to the ford to engage them and it was here that the rebels lost most of their casualties, including eleven French killed. MacLeod then brought 300 men together at the south of the town and fired three or four volleys. The rebels then crossed the river, although 100 of them deserted and ran off. The MacLeods then retired down the main street of Inverurie, leaving all their possessions behind, turning once to fire. At the north of the town they turned once more to fire and then retreated northwards. According to Ruairi MacLeod the Government troops lost seven dead; five killed in battle.
The Government troops suffered fifteen wounded with the enemy, seven wounded brought back to Elgin and fifty-nine taken prisoner. The rebels concealed their number of dead but a Jacobite present at the battle admitted fourteen dead and a Government officer estimated that the rebels had lost between 30 - 40 dead. Many of MacLeod's men were killed, and about fifty were taken prisoner, including two of his main allies who were a Gordon, the younger son of Gordon of Ardoch and Forbes of Echt. Also taken prisoner was John Chalmers, formerly Principal and Professor of King's College, Aberdeen. Most of the MacLeods including their chief retreated safely back to their own country.
Another man taken prisoner by the Jacobites was Donald Ban MacCrimmon who was said to be the greatest of all Highland Pipers, from the distinguished MacCrimmon (piping family). As a mark of respect the Jacobite Pipers refused to play until he was released. The silence of the Jacobite pipers ensured his release and Donald Ban rejoined the Government Hanoverians.
Night Crossing by Moir of Stoneywood
Moir of Stoneywood, however, undertook to convey the boats to Tain and he accordingly set out one night with his little fleet and arrived at his destination by next morning without being observed by the enemey. On the flotilla reaching the Tain, the Duke of Perth divided his forces into two parts and while one of them he marched about by the head of the frith; he directed the other to cross in the boats. Under the cover of thick fog; this division upon Dornoch. When near that town, he came up with a party of two hundred men who were on their march to join up with lord Loudon. This party instantly fled but Major Mackenzie who commanded it with four or five officers and sixty privates were made prisoners. Among the officers was a son of Mr. MacDonald of Scothouse who was taken prisoner by his own father.
The main body under Lord Loudon abandoned Dornoch in great consternation and fled north towards Glenmore pursued by the Jacobite forces. Both parties marched all night but the fugitives kept ahead of their pursuers. After a chase of about thirty miles, the duke of Perth discontinued the pursuit and halted at the head of Loch Shin. While following the enemy during the night a great anxiety prevailed among the Macdonalds in the duke of Perth's detachment; lest in the event of an engagement they might not be able to withstanding their white cockades to distinguish themselves from the Macdonalds of Skye who like the other Macdonalds wore heather in their bonnets. Upon reaching the head of Sutherlandshire Lord Loudon separated his army.
Accompained by the lord president and the laird of Macleod he marched to the sea coast with eight hundred of the Macdonalds and Macleods and embarked for the isle of Skye. Part of his own regiment with several officers took refuge in Lord Reay's country. Finding that lord Loudon's troops had dispersed; the duke of Perth returned to Inverness leaving Lord Cromarty in Sutherland with a sufficient force to keep Lord Sutherland and Lord Reay's people in check. The dispersion of Lord Loudon's army was considered of such importance by Charles that he immediately dispatched an officer to France with the intelligence. In this expedition several vessels in the Firth of Dornoch having some valuable effects on board fell into the hands of the insurgents.
Battle of Falkirk Muir
In this battle both the Scottish Moirs, and the Irish O'Moores fought side by side. The Irish O'Moore was fighting in the Irish Brigade of France. This battle was fought on January 16, 1746 and the Jacobites were victorious. The Jacobite army left Glasgow on 3 January in two columns. One column of six Highland battalions, led by Lord George Murray marched towards Falkirk, via Cumbernauld, to make it appear as if they were heading towards Edinburgh. Instead he turned north before reaching Falkirk and moved just outside Stirling in Bannockburn. Murray stationed Lord Elcho at Linlithgow with a detachment of cavalry to patrol the road to Edinburgh. Charles Edward Stuart moved another column to Bannockburn via Kilsyth.
There he set his headquarters and resided at Bannockburn House as the guest of Sir Hugh Paterson, a Jacobite supporter. Lord John Drummond set forth from Perth with four thousand men and heavy artillery. Now boasting a force of 8,000 men the Jacobites sent a drummer to Stirling on 5 January demanding the surrender of the town. A garrison of 500 militiamen responded by shooting at the drummer who then ran for his life. Three days later the town council agreed to surrender. Yet, Stirling Castle itself was held by a small garrison of trained militiamen and troops under the command of Major General William Blakeney, who politely declined to surrender. Thereupon the Pretender ordered the castle to be besieged.
He entrusted this task to a French artillery 'expert' of Scottish descent, Monsieur Mirabel de Gordon. Gordon chose a poor location in digging trenches for the Jacobite cannons, lower and completely in range of the castle's own guns. Following the victory at Falkirk the cannon would be destroyed after firing a single shot. Because of the man's demonstrated incapacity, the Scots afterward referred to Mirabel as "Mr. Admirable." At the same time, dissension arose as the Highland chiefs resented the Pretender's decision to not hold councils, relying only on the advice of his Irish "Men of Moidart." Also causing concern was Charles's continued drinking. As this went on, General Hawley brought an army of 13,000 from Newcastle upon Tyne to Edinburgh, sending an advance unit to Linlithgow on 13 January.
Lord Elcho fell back to Falkirk where he met Lord George Murray. Hawley advanced with his main army of 6,000 on 15 January, intending to relieve Stirling Castle, whereupon Murray and Elcho withdrew to Bannockburn. The Jacobites planned for battle on 15 January at Plean Muir, just southeast of Bannockburn. They were expecting an attack from Hawley's forces, but it never came. Hawley was encamped at Falkirk, and showed no signs of moving. Thus, on the morning of 17 January, the Jacobites planned an offensive. The army moved cautiously towards Falkirk, avoiding the main road and heading for the Hill of Falkirk which overlooked Hawley's encampment below. With General Hawley established at nearby Callendar House, the government army was taken by surprise.At 1:00 pm an officer informed Hawley of the Jacobite approach. Hawley refused to believe the message and did not verify the information for himself. Instead, he remained at Callendar House, 2000 yards behind his camp, and only sent instructions for his troops to put on their equipment as a precaution.
By 2:00 pm the Jacobite attack was imminent and a second messenger from Major General John Huske was sent to Callendar House. Finally aware of the seriousness of the situation, Hawley arrived at his camp hatless and at the gallop. Led by the dragoons, the Hanoverian army rapidly filed south on Maggie Wood's Lane past the Bantaskin House and up the slope of the Falkirk ridge. As the leading elements reached the summit, they could see the Pretender's army bearing down on them from the northwest. Marching across the front of the Highlanders, the dragoon regiments reached a bog on the far side of the rise and faced to their right.
The infantry began to form to the right of the dragoons, facing west. About this time a storm struck the area with very heavy rain, hindering deployment and wetting the black powder cartridges. In the subsequent action one out of four muskets missed fire. From left to right, the Hanoverian front line consisted of Ligonier's (13th), Cobham's (10th) and Hamilton's (14th) Dragoon Regiments. Continuing the first line were Edward Wolfe's (8th), Cholmondeley's (34th), Pulteney's (13th), The Royal (1st), Price's (14th) and Ligonier's (59th) British Regiments of Foot. In the second line stood Blakeney's (27th), Munro's (37th), Fleming's (36th), Barrel's (4th) and Battereau's (62nd) British foot regiments. Last to arrive, Howard's (3rd Old Buffs) regiment took position in a third line. A few hundred yards behind the dragoons, the Glasgow militia were drawn up. The Argyll militia took position on the far right of Hawley's line.
Two cannon became stuck in a bog. When the battle began, the English gun crews were still trying to free them. The Jacobite army marched up and deployed in three lines, facing east. In the front line, from right to left were the MacDonalds, Camerons, Frasers, MacPhersons, Mackintoshes, Mackenzies, Farquharsons, and Stewarts of Appin. Posted in the second line were the regiments of Lord Lewis Gordon, Lord Ogilvy and the Atholl Brigade. In the third line were small units of horsemen, plus a unit of French regulars (Irish Picquets from the Irish Brigade). The Prince failed to appoint a left wing commander, though Lord George Murray took charge of the right wing. Murray dismounted and led the three MacDonald regiments on the extreme right. Because Hawley's army formed up so hurriedly, its dispositions were unusual. The dragoons on the left wing were directly opposed to the Highland right flank foot soldiers.
The left of the British infantry faced the Highland army's center. Three foot regiments on the Hanoverian right completely overlapped the Jacobite left, but there was a ravine separating the two sides. The ravine prevented the British units from flanking the Stewarts of Appin, but it also protected Hawley's right. At 4:00 pm, Colonel Francis Ligonier received orders to charge the Jacobite right with the British dragoons. Hawley apparently believed in the superiority of cavalry over the Highlanders. The Jacobites waited until the dragoons trotted into pistol range then let loose with a crushing volley. "Eighty dragoons fell dead upon the spot." A handful of the British horsemen closed with the Highlanders, but most fled. Cobham's dragoons rode north between the infantry battle lines. The other two regiments bolted to the rear. One company of the Glasgow militia was ridden over and scattered by Hamilton's fleeing dragoons.
Those horsemen who continued to fight fell victim to an unusual tactic. The Highlanders dropped their muskets and crouched on the ground, using their dirks to kill the horses and stabbing the riders as they fell. Another Highlander tactic when confronted with cavalry was to aim their swords at the horse's head rather than the rider. A horse wounded this way will tend to circle and render the rider an easy target. The complete rout of the cavalry compromised the entire Hanoverian position. Murray tried to restrain the MacDonalds, but they spontaneously rushed after the fleeing horsemen. The Highland right and center fired one volley, flung down their muskets and dashed toward the Hanoverian infantry, claymores in hand. Attacked in front and flank, with rain now beating in their faces, Hawley's left-wing infantry fired an ineffective volley and ran for the rear, carrying away the second line as well. Shielded by the ravine in their front, only the government right flank regiments held firm.
Price's and Ligonier's regiments were joined by Barrel's from the second line. General Huske marched them a short distance uphill where they fired into the flank of the Highlanders who were in pursuit of the panicked Hanoverian left and center. Soon they were joined by Cobham's rallied dragoons, who tried to attack the Jacobite rear. This attack was foiled by the Irish Picquets (French regulars) who had been held in reserve. Most of Hawley's army was routed while most of the Jacobite army was scattered in pursuit or pillaging the dead. The Atholl Brigade remained intact and Murray took charge of it and some MacDonalds. Huske soon withdrew with his three foot regiments, leaving the field to the Jacobites. It was now dark and the storm was growing fiercer; confusion ensued and Murray lost sight of the enemy.
The Hanoverian survivors retreated east towards Linlithgow, with Grenadiers pulling Hawley's remaining cannon as the artillery horses had been lost. Murray had won a huge victory but did not realize it yet. It was not until the next morning that some 300 Hanoverian soldiers were seen lying dead in the rain. The Jacobites emerged victorious, but failed to take advantage of the encounter. Hawley claimed to have suffered only 280 casualties, but his losses were much greater. Around 350 Royal troops were killed, wounded or missing, and some 300 captured.
On the Hanoverian side, Sir Robert Munro and three lieutenant-colonels were killed. Ligonier fell ill and died soon after the battle. The Jacobite losses were around 50 dead and 80 wounded. The Jacobites seized some Hanoverian tents, ammunition, wagons, and three of their cannons, but they remained in or around Falkirk for most of the month and lost any initiative they may have gained from the victory. Instead of pursuing Hawley, the Young Pretender chose to stay in Bannockburn House, where he developed a feverish cold and was taken care of by Clementina Walkinshaw. This gave Hawley the opportunity to reorganize and strengthen his army in Edinburgh.Following the Battle of Falkirk, the Royal troops were billeted at the Palace of Holyroodhouse, where they did a huge amount of damage to the famous Jacob de Wett paintings in the Great Gallery. The paintings were restored in 2003 by Brian McGlauchlen.
Battle of Culloden Moor
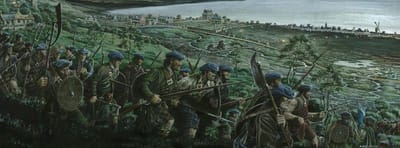
The Battle of Culloden was the biggest defeat for the Jacobite Army and this battle was the last. On this battlefield all the Moirs, Moores, O'Moores and other spelling were included at this battle. This was a decisive victory for the Government forces.the first line attack Cumberland's rear, while Perth with the left wing would attack the government's front. In support of Perth, Charles Edward Stuart would bring up the second line. The Jacobite force however started out well after dark at about 20:00. At Culloden; Moir of Stoneywood's lowland battalions were at the left wing of the second line.
Murray led the force cross country with the intention of avoiding government outposts. This however led to very slow going in the dark. Murray's one time aide-de-camp, James Chevalier de Johnstone later wrote, "this march across country in a dark night which did not allow us to follow any track, and accompanied with confusion and disorder". By the time the leading troop had reached Culraick, still 2 miles (3.2 km) from where Murray's wing was to cross the River Nairn and encircle the town, there was only one hour left before dawn. After a heated council with other officers, Murray concluded that there was not enough time to mount a surprise attack and that the offensive should be aborted. O'Sullivan went to inform Charles Edward Stuart of the change of plan, but missed him in the dark. Meanwhile, instead of retracing his path back, Murray led his men left, down the Inverness road. In the darkness, while Murray led one-third of the Jacobite forces back to camp, the other two-thirds continued towards their original objective, unaware of the change in plan.
One account of that night even records that Perth and Drummond made contact with government troops before realising the rest of the Jacobite force had turned home. Not long after the exhausted Jacobite forces had made it back to Culloden, reports came of the advancing government troops. By then, many Jacobite soldiers had dispersed in search of food, while others were asleep in ditches and outbuildings. However, military historian Jeremy Black has contended that even though the Jacobite force had become disordered and lost the element of surprise the night attack remained viable, and that if the Jacobites had advanced the conditions would have made British morale vulnerable and disrupted their fire discipline.
On 30 January, the Duke of Cumberland arrived in Scotland to take command of the government forces after the previous failures by Cope and Hawley. Cumberland decided to wait out the winter, and moved his troops northwards to Aberdeen. Around this time, the army was increased by 5,000 Hessian troops. The Hessian force, led by Prince Frederick of Hesse, took up position to the south to cut off any path of retreat for the Jacobites. The weather had improved to such an extent by 8 April that Cumberland again resumed the campaign. The government army reached Cullen on 11 April, where it was joined by six battalions and two cavalry regiments. Days later, the government army approached the River Spey, which was guarded by a Jacobite force of 2,000, made up of the Jacobite cavalry, the Lowland regiments and over half of the army's French regulars. The Jacobites quickly turned and fled, first towards Elgin and then to Nairn.
By 14 April, the Jacobites had evacuated Nairn, and Cumberland camped his army at Balblair just west of the town. The Jacobite forces of about 5,400 left their base at Inverness, leaving most of their supplies, and assembled 5 miles (8 km) to the east near Drummossie, around 12 miles (19 km) before Nairn. Charles Edward Stuart had decided to personally command his forces and took the advice of his adjutant general, Secretary O’Sullivan, who chose to stage a defensive action at Drummossie Moor, a stretch of open moorland enclosed between the walled Culloden enclosures to the North and the walls of Culloden Park to the South.
Lord George Murray "did not like the ground" and with other senior officers pointed out the unsuitability of the rough moorland terrain which was highly advantageous to the Duke with the marshy and uneven ground making the famed Highland charge somewhat more difficult while remaining open to Cumberland’s powerful artillery. They had argued for a guerrilla campaign, but Charles Edward Stuart refused to change his mind.
Night attack at Nairn
On 15 April, the government army celebrated Cumberland's twenty-fifth birthday by issuing two gallons of brandy to each regiment. At Murray's suggestion, the Jacobites tried that evening to repeat the success of Prestonpans by carrying out a night attack on the government encampment. Murray proposed that they set off at dusk and march to Nairn.
Murray planned to have the right wing of Early on a rainy 16 April, the well rested Government army struck camp and at about 05:00 set off towards the moorland around Culloden and Drummossie. Jacobite pickets first sighted the Government advance guard at about 08:00, when the advancing army came within 4 miles (6.4 km) of Drummossie. Cumberland's informers alerted him that the Jacobite army was forming up about 1 mile (1.6 km) from Culloden House--upon Culloden Moor. At about 11:00 the two armies were within sight of one another with about 2 miles (3.2 km) of open moorland between them.
As the Government forces steadily advanced across the moor, the driving rain and sleet blew from the north-east into the faces of the exhausted Jacobite army. Opening moves The Jacobite army was originally arrayed between the corners of Culloden and Culwhiniac parks (from left to right): the three Macdonald battalions; a small one of Chisholms; another small one of Macleans and Maclachlans; Lady Mackintosh and Monaltrie's regiments; Lord Lovat's Regiment; Ardsheal's Appin Stewarts; Lochiel's Regiment; and three battalions of the Atholl Brigade.
Murray who commanded the right wing, however became aware of the Leanach enclosure that lay ahead of him would become an obstacle in the event of a Jacobite advance. Without any consultation he then moved the brigade down the moor and formed into three columns. It seems probable that Murray intended to shift the axis of the Jacobite advance to a more northerly direction, thus having the right wing clear the Leanach enclosure and possibly taking advantage of the downward slope of the moor to the north. Jacobite front line skews and stretches, Government forces compensate; others break into and through Culwhiniac enclosure.
However, the Duke of Perth seems to have misinterpreted Murray's actions as only a general advance, and the Macdonalds on the far left simply ignored him. The result was the skewing of the Jacobite front line, with the (left wing) Macdonalds still rooted on the Culloden Parks wall and the (right wing) Atholl Brigade halfway down the Culwhiniac Parks wall. In consequence, large gaps immediately appeared in the severely over-stretched Jacobite lines. A shocked Sullivan had no choice but to position the meagre 'second line' to fill the gaps.
This second line was (left to right): the Irish Picquets; the Duke of Perth's Regiment; Glenbuchat's; Lord Kilmarnock's Footguards; John Roy Stuart's Regiment; two battalions of Lord Ogilvy's Regiment; the Royal Écossais; two battalions of Lord Lewis Gordon's Regiment. Farther back were cavalry units. On the left were: Lord Strathallan's Horse Bagot's Hussars and possibly Balmerino's Lifeguards. On the right were Lord Elcho's Lifeguards and Fitzjames's Horse.
In the center was Charles Edward Stuart's tiny escort made up of Fitzjames's Horse and Lifeguards. When Sullivan's redeployment was completed Perth's and Glenbuchat's regiments were standing on the extreme left wing and John Roy Stuart's was standing beside Ardsheal's. Cumberland brought forward the 13th and 62nd to extend his first and second lines. At the same time, two squadrons of Kingston's Horse were brought forward to cover the right flank. These were then joined by two troops of Cobham's 10th Dragoons.
While this was taking place, Hawley began making his way through the Culwhiniac Parks intending to outflank the Jacobite right wing. Anticipating this, the two battalions of Lord Lewis Gordon's regiment had lined the wall. However, since the Government dragoons stayed out of range, and the Jacobites were partly in dead ground they moved back and formed up on a re-entrant at Culchunaig, facing south and covering the army's rear. Once Hawley had led the dragoons through the Parks he deployed them in two lines beneath the Jacobite guarded reentrant. By this time the Jacobites were guarding the re-entrant from above with four battalions of Lord Lewis Gordon's and Lord Ogilvy's regiments, and the combined squadron of Fitzjames's Horse and Elcho's Lifeguards.
Unable to see behind the Jacobites above him, Hawley had his men stand and face the enemy. Over the next twenty minutes, Cumberland's superior artillery battered the Jacobite lines, while Charles, moved for safety out of sight of his own forces, waited for the Government forces to move. Inexplicably, he left his forces arrayed under Government fire for over half an hour.
Although the marshy terrain minimized casualties, the morale of the Jacobites began to suffer. Several clan leaders, angry at the lack of action, pressured Charles to issue the order to charge. The Clan Chattan was first of the Jacobite army to receive this order, but an area of boggy ground in front of them forced them to veer right so that they obstructed the following regiments and the attack was pushed towards the wall. The Jacobites advanced on the left flank of the Government troops, but were subjected to volleys of musket fire and the artillery which had switched from round shot to grapeshot.
Highland charge Despite this, many Jacobites reached the Government lines, and for the first time a battle was decided by a direct clash between charging highlanders and formed redcoats equipped with muskets and socket bayonets. The brunt of the Jacobite impact was taken by only two Government regiments-- Barrell's 4th Foot and Dejean's 37th Foot. Barrell's regiment lost 17 and suffered 108 wounded, out of a total of 373 officers and men.
Dejean's lost 14 and had 68 wounded, with this unit's left wing taking a disproportionately higher number of casualties. Barrell's regiment temporarily lost one of its two colors. Major-General Huske, who was in command of the Government second line, quickly organized the counter attack. Huske ordered forward all of Lord Sempill's Fourth Brigade which had a combined total of 1,078 men (Sempill's 25th Foot, Conway's 59th Foot, and Wolfe's 8th Foot).
Also sent forward to plug the gap was Bligh's 20th Foot, which took up position between Sempill's 25th and Dejean's 37th. Huske's counter formed a five battalion strong horseshoe-shaped formation which trapped the Jacobite right wing on three sides. Poor Barrell's regiment were sorely pressed by those desperadoes and outflanked. One stand of their colors was taken; Colonel Riches hand cut off in their defense... We marched up to the enemy, and our left, outflanking them, wheeled in upon them; the whole then gave them 5 or 6 fires with vast execution, while their front had nothing left to oppose us, but their pistols and broadswords; and fire from their center and rear, (as, by this time, they were 20 or 30 deep) was vastly more fatal to themselves, than us. — Captain-Lieutenant James Ashe Lee of Wolfe's 8th Foot.
Bayonet drill innovation said to have been developed to counter the "Highland charge". Each
soldier would thrust at the enemy on his right--rather than the one straight ahead--in order to bypass the targe of Highlanders.
Located on the Jacobite extreme left wing were the Macdonald regiments. Popular legend has it that these regiments refused to charge when ordered to do so, due to the perceived insult of being placed on the left wing. Even so, due to the skewing of the Jacobite front lines, the left wing had a further 200 meters (660 ft) of much boggier ground to cover than the right. When the Macdonalds charged, their progress was much slower than that of the rest of the Jacobite forces. Standing on the right of these regiments were the much smaller units of Chisholms and the combined unit of Macleans and Maclachlans. Every officer in the Chisholm unit was killed or wounded and Col. Lachlan Maclachlan, who led the combined unit of Macleans and Maclachlans, was gruesomely killed by a cannon shot.
As the Macdonalds suffered casualties they began to give way. Immediately Cumberland then pressed the advantage, ordering two troops of Cobham's 10th Dragoons to ride them down. The boggy ground however impeded the cavalry and they turned to engage the Irish Picquets whom Sullivan had brought up in an attempt to stabilise the deteriorating Jacobite left flank. Jacobite collapse and rout With the collapse of the left wing, Murray brought up the Royal Écossais and Kilmarnock's Footguards who were still at this time unengaged. However, by the time they had been brought into position, the Jacobite army was in rout. The Royal Écossais exchanged musket fire with Campbell's 21st and commenced an orderly retreat, moving along the Culwhiniac enclosure in order to shield themselves from artillery fire.
Immediately the half battalion of Highland militia commanded by Captain Colin Campbell of Ballimore which had stood inside the enclosure ambushed the Royal Écossais. Hawley had previously left this Highland unit behind the enclosure, with orders to avoid contact with the Jacobites, to limit any chance of a friendly fire incident. In the encounter Campbell of Ballimore was killed along with five of his men.
The result was that the Royal Écossais and Kilmarnock's Foot guards were forced out into the open moor and were rushed at by three squadrons of Kerr's 11th Dragoons. The fleeing Jacobites must have put up a fight for Kerr's 11th recorded at least 16 horses killed during the entirety of the battle. The Irish picquets bravely covered the Highlanders retreat from the battlefield and prevented a massacre. This action cost half of the 100 casualties suffered in the battle. The Royal Écossais appear to have retired from the field in two wings. One part of the regiment surrendered upon the field after suffering 50 killed or wounded, but their colours were not taken and a large number retired from the field with the Jacobite Lowland regiments.
This stand by the Royal Écossais may have given Charles Edward Stuart the time to make his escape. At the time when the Macdonald regiments were crumbling and fleeing the field, Stuart seems to have been rallying Perth's and Glenbuchat's regiments when O'Sullivan rode up to Captain Shea who commanded Stuart's bodyguard: "Yu see all is going to pot. Yu can be of no great succor, so before a general deroute wch will soon be, Seize upon the Prince & take him off...". Shea then led Stuart from the field along with Perth's and Glenbuchat's regiments. From this point on the fleeing Jacobite forces were split into two groups: the Lowland regiments retired in order southwards, making their way to Ruthven Barracks; the Highland regiments however were cut off by the Government cavalry, and forced to retreat down the road to Inverness.
The result was that they were a perfect target for the Government dragoons. Major-general Humphrey Bland led the charge against the fleeing Highlanders, giving "Quarter to None but about Fifty French Officers and Soldiers He picked up in his Pursuit". Conclusion: casualties and prisoners.
The total of Jacobite casualties during the battle has been estimated at about 1,500–2,000 killed or wounded. Cumberland's official list of prisoners taken includes 154 Jacobites and 222 "French" prisoners (men from the 'foreign units' in the French service). Added to the official list of those apprehended were 172 of the Earl of Cromartie's men, captured after a brief engagement the day before near Littleferry. In striking contrast to the Jacobite losses, the Government forces suffered 50 dead and 259 wounded, although a high proportion of those recorded as wounded are likely to have died of their wounds. For example, only 29 out of 104 wounded from Barrell's 4th Foot survived to claim pensions. All six of the artillerymen recorded as wounded died. The only Government casualty of high rank was Lord Robert Kerr, the son of William Kerr, 3rd Marquess of Lothian.
The Duke of Cumberland moving with all his forces had arrived at Aberdeen on the 27th and Moir of stoneywood who commanded there for the Prince was compelled to retreat to Fochabers where he and Captain Shee who accompained him met with Lord John Drummond who had advanced so far to protect the disembarkation. After the battle Moir of Cromar was wounded, some Moirs were taken prisoners and sent to the America, William Moore was transported and banished, James Moir of stoneywood and his brother escape to Sweden. It is unknown if any Moirs, O'Moores were killed but most likely some were Killed. Moir managed to take his men off Culloden with their banner and went to Ruthven. On hearing the Prince's message to disband they tore the banner off from the staff and dispersed.
The Haggis at War
In 1746, after the battle of Culloden, a small group of Jacobite soldiers, led by James Moir of Stoneywood, were on the run. They had paused on the slope of Bennachie to light a fire and cook themselves a meal, thinking to themselves safe from pursuit. Just as they were cooking haggis in a pot, they were surprised by a troop of Hanoverian soldiers. As they sprang up to flee, the pot was overturned and the haggis rolled out. An English trooper caught it on his bayonet, whereupon the Haggis disintegrated, showering him and his companions with it's boiling, hot contents, temporarily halting the chase. As the refugees made their escape, one of Stoneywood's companions, John Gunn, called out in Gaelic: " Even the Haggis, God bless her, can charge downhill."
Below is a list of Moirs, and varient of the name served in the following regiment of the Jacobite army.
1. James Moir of Stoneywood - Stoneywood’s Aberdeen Regiment
2.John Moir- Stoneywood’s Aberdeen Regiment
3. Charles Moir of Stoneywood (Brothers)- Stoneywood’s Aberdeen Regiment ( Charles Moir commanding 2nd Company of Stoneywoods 100 well equipped Lowland volunteers)- http://aberdeenwargamesclub.com/art...
4. Robert Moir
5. Charles Moir (Aberdeen)- Stoneywood’s Aberdeen Regiment
6. Charles Moir- Capt. Lord Lewis Gordon’s Regiment (https://books.google.com/books?id=c...)
7. William Moir (Dundee)- Ogilvy’s Regiment
8. Dr. Henery Moir ( Kelso)- Bannerman of Elsick’s
9. John Moir (Templand)- Pitsligo’s Horse Cavalry
10. Kenneth Moir ( Miltoun of Ord)- Pitsligo’s Horse Cavalry
11. Robert Moir ( Kelso)- Lord Balmerino's troop of the Lifeguards
12. William Moir of Lonmay- Pitsligo’s Horse Cavalry
13. ? Moir of Cromar ( wounded at Colluden)- Stoneywood’s Aberdeen Regiment
14. Henry Moir- Lord Balmerino's troop of the Lifeguards
15. Robert Moir- Lord Balmerino's troop of the Lifeguards
(https://books.google.com/books?id=N...)
16. William Moir( Peterhead)- Pitsligo’s Horse Cavalry
17. LT. Moore- Lord John Drummond’s Regiment
18. William Moore ( Dundee)
19. Angus Mor ( Glenfinnan)
20. Evan More ( Teanclan)
21. William Moar ( Dundee)
22. William Mair- Bannerman of Elsick’s
A head court of the burgh was thereupon convened by the earl in the New or East Church of St Nicholas and a Jacobite council elected on his nomination with Patrick Bannerman as provost while Moir of Stoneywood Moir of Scotston and James Bisset younger of Lessen drum country gentlemen who were also burgesses of the city were appointed councilors. In Aberdeen itself the most active of the Jacobites was James Moir of Stoneywood nephew of the governor and of the old families in the neighbourhood. Irvine of Drum Menzies of Pitfodels and Sir Alexander Bannerman espoused the Jacobite cause Francis Farquharson of Monaltry commanded the Aboyne battalion consisting to a large extent of his own kinsmen and their retainers from Upper Deeside Among the other gentlemen of Banffshire and Aberdeenshire who took part in the insurrection were Sir William Dunbar of Durn Sir William Gordon of Park the Gordons of Avochie Blelack Carnousie Cobairdy and Hallhead Ogilvie of Auchiries Byres of Tonley Hay of Rannes and Fullerton of Dudwick but the representation of the two counties is significantly meagre and confined for the most part to houses of minor importance.
Lord Lewis who was occasionally in Aberdeen zealously seconded by Moir of Stoneywood who was constantly there did his best to induce Aberdonians to enlist. Of the reluctance of the people of Aberdeenshire to rally to the standard of their lawful prince he writes to Stoneywood with much bitterness and of Banffshire with regard to raising the cess and levying men he says We have been obliged to use great threatening's although no real hardships have been used and in the lazy way the country is in together with the unnatural methods the ministers and other disaffected people make use of to restrain the people from doing their duty there is no raising the quotas of men without seeming violence 2 Another of Stoneywood's correspondents reports having engaged nine servant lads who were induced to draw back by the diabolical lies of their Presbyterian preacher.
There was no actual warfare in either county except the at Inverurie December 23 in which Lord Gordon with his Aberdeenshire Lowlanders including the Aberdeen men under Moir of Stoneywood with the Aboyne battalion under Farquharson of Monaltry surprised and defeated a body of Highlanders consisting chiefly of the two loyal clans of Macleod and Munro whom Lord Loudon had sent from Inverness to the relief of Aberdeen A few of the loyalists were killed and forty one taken prisoners The warfare at this stage was not without its chivalrous features Lord Lewis in response to an appeal addressed to him by the laird of Macleod from Gordon Castle the day after the battle undertook that all possible care should be taken of the wounded and every civility shown to the prisoners with the exception of Regent Chalmers of King's College Forbes of Echt and Maitland of Pittrichie who he said had acted the infamous part of spies and informers and the two last especially who had given a great deal of bad advice to a certain great man who shall be nameless no doubt his own ducal brother These he held it to be consistent neither with honor nor inclination to treat as prisoners of war.
The north eastern regiments had their part in the battle of Prestonpans in the expedition to England at Falkirk and at Culloden There was no bolder braver or more inspiriting warrior in the field than Old Glenbucket as he was called and the other officers Lord Lewis Gordon Lord Pitsligo Monaltry Stoneywood Gordon of Avochie and their subalterns acquitted themselves with credit and with the zeal of men who had staked everything on the issue The general direction of the campaign was not in their hands and for its blunders they were not responsible Some of the men who had been forced into the ranks were more eager to escape from them than to fight On the Government side a company of local militia lately enrolled in the Deeside Highlands as an auxiliary or reserve for the Black Watch which had been transformed into the forty third regiment of regular troops 1 refused to embark with Cope Aberdeen and from another there were numerous on the eve of the battle of Prestonpans Similar desertions occurred on the Jacobite side as in the case of a of Stoneywood's men who were ordered to embark at Find horn for a search expedition in Sutherlandshire and individual desertions appear to have been numerous But is no reason to doubt that on the whole the north regiments consisting though they did almost entirely of inexperienced soldiers fought resolutely and steadily in Jacobite cause.
Gordon of Glenbucket than whom there was no more thorough soldier was again in the forefront In Aberdeen itself the most active of the Jacobites was James Moir of Stoneywood nephew of the governor and of the old families in the neighborhood Irvine of Drum Menzies of Pitfodels and Sir Alexander Bannerman espoused the Jacobite cause. Opposed to it were the Earl of Erroll and the Earl Marischal who saw in it the loss of their hereditary offices of High Constable and great Marischal of Scotland and Moir of Stoneywood Gordon of Pitlurg and James Ogilvie younger of Boyne.