About
Welcome to Clan Muir Society International
The purpose of this site is to share historic information about Clan Muir to their clan members, and anyone who is interested in learning about Clan Muir. . Clan Muir is one of the most powerful, wealthiest, large, famous and ancient clans in Scotland. Come with us on a journey to discovering who Clan Muir was, and discovering who they came from. Clan Muir is probably the only clan that continuously went thru hardship and much suffering. Many times clan Muir have been betray, been backstab, many clans hated and were jealous of us, and many tried to get rid of us but continue to fail. We are claimed by Clan Campbell, Clan Gordon, Clan Leslie, Clan Boyd, and Clan Grant as a Sept, but because with the resurgence of Clan Muir, we are happy to call ourselves a sept of no other Clan, but a clan upon itself and invite all Clan Brothers and Sisters home.
Muir name meaning:
Muir in Gaelic means: Large or Big Mor in Gaelic means: The Great
Muir in Middle English means: Moor or Heath Moore in Irish means: Noble or stately
Muir in Pictish means: By the Sea
Scottish Mottos
Clan Muir- Durum patientia frango
Moir Mottos:
Non sibi, sed cunctis (Not just for self, but for all).
Mediocriter (with moderation) or Sur experance (upon hope).
Major opima feret (Let the worthier carry off the prize).
Virtute non aliter (by virtue, not otherwise).
Non sibi, sed cunctia (For all, not himself).
Moir of Lockie/ Leckie- Ne oublie
Irish O'Mordha Mottos
O' More of Laois/ Lexi- Motto: Conlon Abú
Moore (Earl of Drogheda)- Motto: Fortis cadere cedere non potest. - The brave may fall, but cannot yield.
Moore (Earl of Mountcashel- Motto: Vis unita fortior.- "United Strength is Stronger
Moore (Ballina Co. Mayo and Alicante, Spain)- Motto: Fortis cadere cedere non potest.- The brave may fall, but cannot yield.
Moore of Ballymacrue-Motto: Perseverando et cavendo.
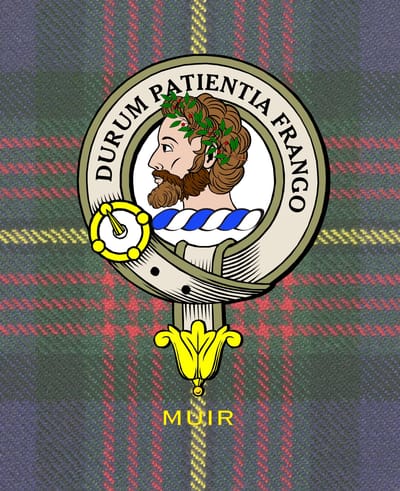
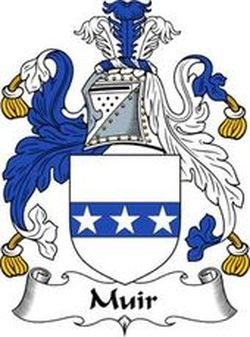
Clan Muir's Cap Badge:
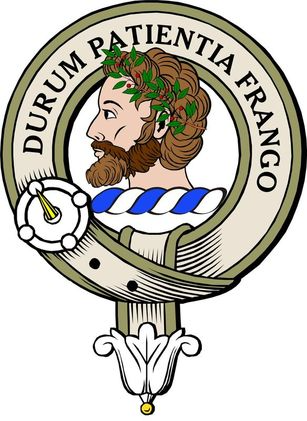
Clan's Crest Badge: This is the crest badge of clan Muir. This is the clansman's badge, comprised of the crest from the chieftain's coat of arms, surrounded by a belt and buckle with the clan's motto. It may be worn by all members of the clan. The crest is A savage head couped Proper.
Motto: Durum Patientia Frango ( I overcome difficulty by patience/By patience I break what is hard).
Region of Scotland: Highlands, Lowlands, Galloway, and Scottish Borders
Pipe music: The March of the king of Laois
Clan Plant: The Rowan Tree
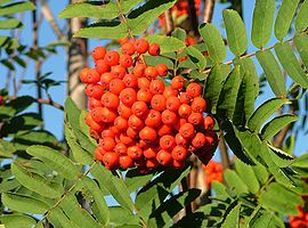
This is the clan's plant " The Rowan Tree"; The bonny rowan tree is a hardy little mountain ash tree with soft, delicate, fern-shaped leaves. Often planted as an ornamental tree for its beauty, it is also useful in providing an excellent source of shade in the summer. The rowan enjoys a rich history in its native land. Adored by many, it has been planted for its protective powers in mountain and cottage gardens for centuries. It is believed to ward off witches and evil spirits with its mystical virtues. It is also revered as the “Tree of Good Luck.” The rowan tree’s greatest virtue may simply be its benevolent gift of beauty through the seasons.
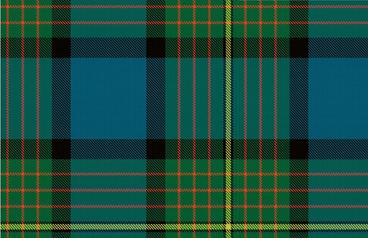
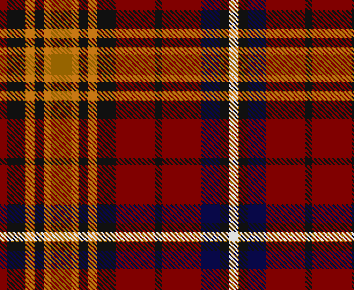
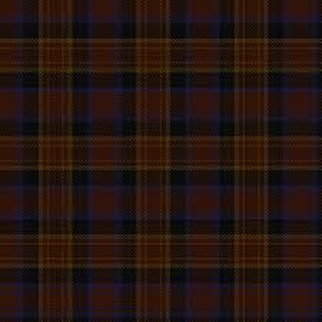
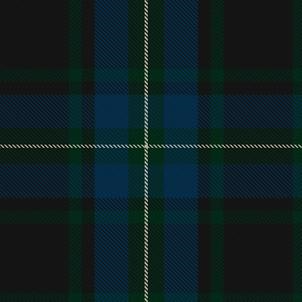
Clan Muir's Tartans
Clan Muir has four tartans in which the clansmen can wear.

Clan Muir Modern Tartan
Clan Muir Ancient Tartan

John Muir Tartan ( Dress)
Laois Tartan ( O'Mordha Tartan)
Laois Tartan 2 ( O'Modrha)
Longmuir Tartan
Coat of Arms of Clan Muir:
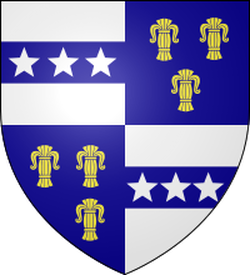 Chieftain's coat of Arms- Muir of Rowallan with the coat of arms of Comyn.
 Coat of Arms of Muir of Rowallan.
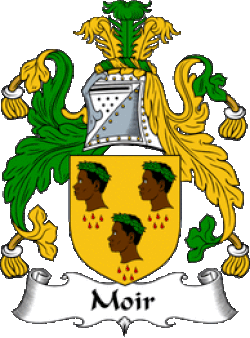 The Moirs coat of Arms of Aberdeen and the Highlands.
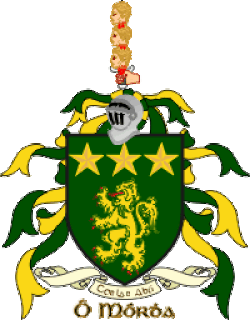 The Irish O'Mordha clan's coat of arms. The lion is the symbol of the Milesian tribe and also the symbol of the tribe of Judah; in which the Moores are apart. The three stars that are shown in this coat of arms as well the coat of arms on the chieftains of clan Muir of Rowallan. The stars may represent the holy trinity.
Other website:
https://kierenmuir.weebly.com/
The purpose of this site is to share historic information about Clan Muir to their clan members, and anyone who is interested in learning about Clan Muir. . Clan Muir is one of the most powerful, wealthiest, large, famous and ancient clans in Scotland. Come with us on a journey to discovering who Clan Muir was, and discovering who they came from. Clan Muir is probably the only clan that continuously went thru hardship and much suffering. Many times clan Muir have been betray, been backstab, many clans hated and were jealous of us, and many tried to get rid of us but continue to fail. We are claimed by Clan Campbell, Clan Gordon, Clan Leslie, Clan Boyd, and Clan Grant as a Sept, but because with the resurgence of Clan Muir, we are happy to call ourselves a sept of no other Clan, but a clan upon itself and invite all Clan Brothers and Sisters home.
Muir name meaning:
Muir in Gaelic means: Large or Big Mor in Gaelic means: The Great
Muir in Middle English means: Moor or Heath Moore in Irish means: Noble or stately
Muir in Pictish means: By the Sea
Scottish Mottos
Clan Muir- Durum patientia frango
Moir Mottos:
Non sibi, sed cunctis (Not just for self, but for all).
Mediocriter (with moderation) or Sur experance (upon hope).
Major opima feret (Let the worthier carry off the prize).
Virtute non aliter (by virtue, not otherwise).
Non sibi, sed cunctia (For all, not himself).
Moir of Lockie/ Leckie- Ne oublie
Irish O'Mordha Mottos
O' More of Laois/ Lexi- Motto: Conlon Abú
Moore (Earl of Drogheda)- Motto: Fortis cadere cedere non potest. - The brave may fall, but cannot yield.
Moore (Earl of Mountcashel- Motto: Vis unita fortior.- "United Strength is Stronger
Moore (Ballina Co. Mayo and Alicante, Spain)- Motto: Fortis cadere cedere non potest.- The brave may fall, but cannot yield.
Moore of Ballymacrue-Motto: Perseverando et cavendo.
Clan Muir's Cap Badge:
Clan's Crest Badge: This is the crest badge of clan Muir. This is the clansman's badge, comprised of the crest from the chieftain's coat of arms, surrounded by a belt and buckle with the clan's motto. It may be worn by all members of the clan. The crest is A savage head couped Proper.
Motto: Durum Patientia Frango ( I overcome difficulty by patience/By patience I break what is hard).
Region of Scotland: Highlands, Lowlands, Galloway, and Scottish Borders
Pipe music: The March of the king of Laois
Clan Plant: The Rowan Tree
This is the clan's plant " The Rowan Tree"; The bonny rowan tree is a hardy little mountain ash tree with soft, delicate, fern-shaped leaves. Often planted as an ornamental tree for its beauty, it is also useful in providing an excellent source of shade in the summer. The rowan enjoys a rich history in its native land. Adored by many, it has been planted for its protective powers in mountain and cottage gardens for centuries. It is believed to ward off witches and evil spirits with its mystical virtues. It is also revered as the “Tree of Good Luck.” The rowan tree’s greatest virtue may simply be its benevolent gift of beauty through the seasons.
Clan Muir's Tartans
Clan Muir has four tartans in which the clansmen can wear.
Clan Muir Modern Tartan
Clan Muir Ancient Tartan
John Muir Tartan ( Dress)
Laois Tartan ( O'Mordha Tartan)
Laois Tartan 2 ( O'Modrha)
Longmuir Tartan
Coat of Arms of Clan Muir:
Chieftain's coat of Arms- Muir of Rowallan with the coat of arms of Comyn. Coat of Arms of Muir of Rowallan. The Moirs coat of Arms of Aberdeen and the Highlands. The Irish O'Mordha clan's coat of arms. The lion is the symbol of the Milesian tribe and also the symbol of the tribe of Judah; in which the Moores are apart. The three stars that are shown in this coat of arms as well the coat of arms on the chieftains of clan Muir of Rowallan. The stars may represent the holy trinity.Other website:
https://kierenmuir.weebly.com/
The Milesian Tribe
Clan Muir has to be one of the most fascinating, unique, powerful, wealthiest and influential clans in Scotland. There are two main questions that has to be answer; the first question is What origins did the Mure family/ clan came from? And what's their history about? The reason these questions are so popular, is that clan Muir's history seem to have disappear over time. Well, after many years of research that I have done; I can say for certain that I can answer those two questions. According to some people that we originate in the Strathclyde Kingdom, others say that we came from the Picts of Scotland and Ireland and there are few other legends and myths about our origins. The fact is that all the variant spellings of Muir, Mur, Mure, Mor, More, Moore, ect... throughout the world, are all linked to one tribe and one point of origin.
You might ask what Tribe did the Muirs came from, and that tribe is called " The Milesian Tribe", in which the Celt race came from. The Milesians point of origin is located in Scythia. These Scythians were among the earliest people to master mounted warfare. These Scythians eventually became one of the ten lost tribes of Israel, The Milesian, then became the Celtic race, then became the Galicians, Irish and then the Scottish people. These Milesians became excellent warriors as well as wanders, and prosperous in construction, agriculture, and many other things. According to legend of the Milesians; that one of their ancestors had been married to the daughter of the Pharaoh of Egypt and is possibly connected with the presence of " Chalybes" ( or Calybes) descendants of Caleb from the tribe of Judah amongst them. The Symbol of the Milesians appears to have been a lion. The lion is also the symbols of the Tribe of Judah and the Irish O'Moores.
The Milesian Tribe
In the Lebor Gabala Erenn, a medieval Irish Christian pseudo-history, the Milesians are the final race to settle in Ireland. They represent the Irish people. The Milesians are Gaels who sail to Ireland from Hispania after spending hundreds of years travelling the earth. When they land in Ireland they contend with the Tuath De Danann, who represent the pagan gods. The two groups agree to divide Ireland between them: the Milesians take the world above, while the Tuath Dé take the world below. They are named after the character Mil Espaine, which is the Irish form of the Latin Miles Hispaniae ("Soldier of Hispania"). Scholars believe that the tale is mostly an invention of medieval Christian writers.
The Lebor Gabala, which was probably first written in the 11th century AD by Christian monks, purports to be a history of Ireland and the Irish (the Gaels). It tells us that all mankind is descended from Adam through the sons of Noah, and that a man named Fenius Farsaid ( descendant of Noah's son Japheth) is the forebear of the Gaels. Fénius, a prince of Scythia, is described as one of 72 chieftains who built the Tower of Babel ( Read Genesis 11:1-9 of the holy bible). Goídel crafts the Goidelic ( Gaelic) language from the original 72 languages that arose after the confusion of tongues. It was said that in his youth, Gaodhal, son of Niul, was bitten in the neck by a snake. He was brought to Moses, who laid his rod upon him and cured him instantly.
The snake bite left a green scar, so Gaodhal became Gaodhal Glas, because Glas means green. Gaodhal Glas also received another blessing, which was that no poisonous snake could live anywhere his posterity lived. At this time, Gaodhal Glas and his descendants painted beasts, birds, etc., on their shields in imitation of the Israelites. Asruth was a son of Gaodhal Glas. He lived in Egypt and governed his colony in peace. Sruth was a son of Asruth. Asruth frequently supported the Israelites against the Egyptians, so shortly after Asruth’s death, the Egyptians attacked Sruth and his followers.
Other ancient sources say that the Egyptians attacked Sruth after the pharaoh was drowned in the Red Sea in pursuit of the Israelites. Other accounts states that while in Egypt; Fennius the Scythian met Moses and helped the Israelites when they were free to leave Egypt after the plagues that has struck Egypt. There were some Israelites who attached themselves to Fennius and travelled with the Milesians. Versions of these legends also claim that they have kept the laws of Moses in Ancient times, and this means that they were Hebrews but also keeping a separate " Scythian" identity were also able to claim descent from Magog, son of
Japhet. It's also claim that one of the Milesian married into the tribe of Judah and settled into the areas of the ten tribes settlement.
Remember the Milesians symbol has been a lion; the same as the Judah tribe. It is also claim that the Milesian tribe wander with the Israelites and Moses for 400 years in the wilderness. The word Celt is the Anglicized form of the Greek word " Keltoi" which means " The people who are different." The Celts are part of the Ten tribes and the Milesians are part of Judah ( which the O'Mordha/ Muir clans are descendants from) and Zarahites. What is interesting is that the Irish Celtic law was based on the Torah and is further confirmation that the Celts are indeed Israelites. If you reject your birth-right as Israelites, then you are insulting God, who gave your birth right to you, along with the Covenant.
Brit ( Berit) means Covenant in Hebrew
Welsh means Man or People of in Hebrew
British means The people of the Covenant in Hebrew
Hebernia ( Ireland) means Hebrew's new land
Heberia- Iberia ( Spain) means Hebrew's land
Below is a Chart in which it claims that our Ancestors came from Zarah's line, in which her father's name is Judah; in which the " Tribe of Judah" was establish. After the chart below, I will give you the exact genealogy that connect it all. The Irish O'Mordhas ( O'Moores), the Scottish Clan Muir and other Moores/ More/ Mor/ Mure/Muir that are found worldwide in India, Mainland Europe are all connected thru the House of Ir.
The Milesian Genealogy
The following genealogy of the Milesian Tribe in which the O'Mordha clan of Ireland came from. Also to mention that the Mores in India and throughout the European Nations such as Austria, Germany, Gaul ( France) Spain, Galicia, England and other nations are from the same Milesian tribe that founded the Irish O'Mordhas, and the Scottish Muirs/ Mures. God the Father, Son, and Holy Ghost, who was from all eternity, did, in the beginning of Time, of nothing, create Red Earth; and of Red Earth framed Adam; and of a Rib out of the side of Adam fashioned Eve. After which Creation, Plasmation, and Formation, succeeded Generations, as follows."--Four Masters. The Scottish Clan Muir hail from Conmael line, brother of Ebric of the line of Ir. The line continues to Ugaine Mor, and all the way to Conaire Mor the founder of the Dal Riata Kingdom in Ireland.
1. Adam & Eve
2. Seth
3. Enos
4. Cainan
5. Mahalaleel
6. Jared
7. Enoch
8. Methuselah
9. Lamech
10. Noah divided the world amongst his three sons, begotten of his wife Titea: viz., to Shem he gave Asia, within the Euphrates, to the Indian Ocean; to Ham he gave Syria, Arabia, and Africa; and to Japhet, the rest of Asia beyond the Euphrates, together with Europe to Gades (or Cadiz).
11. Japhet was the eldest son of Noah. He had fifteen sons, amongst whom he divided Europe and the part of Asia which his father had allotted to him.
12. Magog: From whom descended the Parthians, Bactrians, Amazons, etc.; Partholan, the first planter of Ireland, about three hundred years after the Flood; and also the rest of the colonies that planted there, viz., the Nemedians, who planted Ireland, Anno Mundi three thousand and forty-six, or three hundred and eighteen years after the birth of Abraham, and two thousand one hundred and fifty-three years before Christ. The Nemedians continued in Ireland for two hundred and seventeen years; within which time a colony of theirs went into the northern parts of Scotland, under the conduct of their leader Briottan Maol, from whom Britain takes its name, and not from "Brutus," as some persons believed. From Magog were also descended the Belgarian, Belgian, Firbolgian or Firvolgian colony that succeeded the Nemedians, Anno Mundi, three thousand two hundred and sixty-six, and who first erected Ireland into a Monarchy. [According to some writers, the Fomorians invaded Ireland next after the Nemedians.]
This Belgarian or Firvolgian colony continued in Ireland for thirty-six years, under nine of their Kings; when they were supplanted by the Tuatha-de-Danans (which means, according to some authorities, "the people of the god Dan," whom they adored), who possessed Ireland for one hundred and ninety-seven years, during the reigns of nine of their kings; and who were then conquered by the Gaelic, Milesian, or Scotia Nation (the three names by which the Irish people were known), Anno Mundi three thousand five hundred. This Milesian or Scotia Irish Nation possessed and enjoyed the Kingdom of Ireland for two thousand eight hundred and eighty-five years, under one hundred and eighty-three Monarchs; until their submission to King Henry the Second of England, Anno Domini one thousand one hundred and eighty-six.
13. Baoth, one of the sons of Magog; to whom Scythia came as his lot, upon the division of the Earth by Noah amongst his sons, and by Japhet of his part thereof amongst his sons.
14. Phoeniusa Farsaidh (or Fenius Farsa) was King of Scythia, at the time that Ninus ruled the Assyrian Empire; and, being a wise man and desirous to learn the languages that not long before confounded the builders of the Tower of Babel, employed able and learned men to go among the dispersed multitude to learn their several languages; who sometime after returning well skilled in what they went for, Phoeniusa Farsaidh erected a school in the valley of Senaar, near the city of Æothena, in the forty-second year of the reign of Ninus; whereupon, having continued there with his younger son Niul for twenty years, he returned home to his kingdom, which, at his death, he left to his eldest son Nenuall: leaving to Niul no other patrimony than his learning and the benefit of the said school.
15. Niul, after his father returned to Scythia, continued some time at Æothena, teaching the languages and other laudable sciences, until upon report of his great learning he was invited into Egypt by Pharaoh, the King; who gave him the land of Campus Cyrunt, near the Red Sea to inhabit, and his daughter Scotia in marriage: from whom their posterity are ever since called Scots; but, according to some annalists, the name "Scots" is derived from the word Scythia.
It was this Niul that employed Gaodhal [Gael], son of Ethor, a learned and skillful man, to compose or rather refine and adorn the language, called Bearla Tobbai, which was common to all Niul's posterity, and afterwards called Gaodhilg (or Gaelic), from the said Gaodhal who composed or refined it; and for his sake also Niul called his own eldest son "Gaodhal." [The following is a translation of an extract from the derivation of this proper name, as given in Halliday's Vol. of Keating's Irish History, page 230:
"Antiquaries assert that the name of Gaodhal is from the compound word formed of 'gaoith' and 'dil,' which means a lover of learning; for, 'gaoith' is the same as wisdom or learning, and 'dil' is the same as loving or fond."]
16. Gaodhal (or Gathelus), the son of Niul, was the ancestor of the Clan-na-Gael, that is, "the children or descendants of Gaodhal." In his youth this Gaodhal was stung in the neck by a serpent, and was immediately brought to Moses, who, laying his rod upon the wounded place, instantly cured him: whence followed the word "Glas" to be added to his name, as Gaodhal Glas (glas: Irish, green; Lat. glaucus; Gr. glaukos), on account of the green scar which the word signifies, and which, during his life, remained on his neck after the wound was healed. And Gaodhal obtained a further blessing, namely--that no venemous beast can live any time where his posterity should inhabit; which is verified in Creta or Candia, Gothia or Getulia, Ireland, etc.
The Irish chroniclers affirm that from this time Gaodhal and his posterity did paint the figures of Beasts, Birds, etc., on their banners and shields, to distinguish their tribes and septs, in imitation of the Israelites; and that a "Thunderbolt" was the cognizance in their chief standard for many generations after this Gaodhal.
17. Asruth, after his father's death, continued in Egypt, and governed his colony in peace during his life.
18. Sruth, soon after his father's death, was set upon by the Egyptians, on account of their former animosities towards their predecessors for having taken part with the Israelites against them; which animosities until then lay raked up in the embers, and now broke out in a flame to that degree, that after many battles and conflicts, wherein most of his colony lost their lives, Sruth was forced with the few remaining to depart the country; and, after many traverses at sea, arrived at the Island of Creta (now called Candia), where he paid his last tribute to nature.
19. Heber Scut (scut: Irish, a Scot), after his father's death and a year's stay in Creta, departed thence, leaving some of his people to inhabit the Island, where some of their posterity likely still remain; "because the Island breeds no venemous serpent ever since." He and his people soon after arrived in Scythia; where his cousins, the posterity of Nenuall (eldest son of Fenius Farsa, above mentioned), refusing to allot a place of habitation for him and his colony, they fought many battles wherein Heber (with the assistance of some of the natives who were ill-affected towards their king), being always victor, he at length forced the sovereignty from the other, and settled himself and his colony in Scythia, who continued there for four generations. (Hence the epithet Scut, "a Scot" or "a Scythian," was applied to this Heber, who is accordingly called Heber Scot.) Heber Scot was afterwards slain in battle by Noemus the former king's son.
20. Beouman;
21. Ogaman;
22. Tait, were each kings of Scythia, but in constant war with the natives; so that after Tait's death his son,
23. Agnon and his followers betook themselves to sea, wandering and coasting upon the Caspian Sea for
several (some say seven) years in which time he died.
24. Lamhfionn and his fleet remained at sea for some time after his father's death, resting and refreshing themselves upon such islands as they met with. It was then that Cachear, their magician or Druid, foretold that there would be no end of their peregrinations and travel until they should arrive at the Western Island of Europe, now called Ireland, which was the place destined for their future and lasting abode and settlement; and that not they but their posterity after three hundred years should arrive there. After many traverses of fortune at sea, this little fleet with their leader arrived at last and landed at Gothia or Getulia--more recently called Lybia, where Carthage was afterwards built; and, soon after, Lamhfionn died there.
25. Heber Glunfionn was born in Getulia, where he died. His posterity continued there to the eighth generation; and were kings or chief rulers there for one hundred and fifty years--some say three hundred years.
26. Agnan Fionn; 27. Febric Glas; 28. Nenuall; 29. Nuadhad; 30. Alladh; 31. Arcadh; and 32. Deag: of these nothing remarkable is mentioned, but that they lived and died kings in Gothia or Getulia.
33. Brath was born in Gothia. Remembering the Druid's prediction, and his people having considerably multiplied during their abode in Getulia, he departed thence with a numerous fleet to seek out the country destined for their final settlement, by the prophecy of Cachear, the Druid above mentioned; and, after some time, he landed upon the coast of Spain, and by strong hand settled himself and his colony in Galicia, in the north of that country.
34. Breoghan (or Brigus) was king of Galicia, Andalusia, Murcia, Castile, and Portugal--all which he conquered. He built Breoghan's Tower or Brigantia in Galicia, and the city of Brigansa or Braganza in Portugal--called after him; and the kingdom of Castile was then also called after him Brigia. It is considered that "Castile" itself was so called from the figure of a castle which Brigus bore for his Arms on his banner. Brigus sent a colony into Britain, who settled in that territory now known as the counties of York, Lancaster, Durham, Westmoreland, and Cumberland, and, after him, were called Brigantes; whose posterity gave formidable opposition to the Romans, at the time of the Roman invasion of Britain.
35. Bilé was king of those countries after his father's death; and his son Galamh [galav] or Milesius succeeded him. This Bilé had a brother named Ithe.
36. Milesius, in his youth and during his father's life-time, went into Scythia, where he was kindly received by the king of that country, who gave him his daughter in marriage, and appointed him General of his forces. In this capacity Milesius defeated the king's enemies, gained much fame, and the love of all the king's subjects. His growing greatness and popularity excited against him the jealousy of the king; who, fearing the worst, resolved on privately despatching Milesius out of the way, for, openly, he dare not attempt it. Admonished of the king's intentions in his regard, Milesius slew him; and thereupon quitted Scythia and retired into Egypt with a fleet of sixty sail. Pharaoh Nectonibus, then king of Egypt, being informed of his arrival and of his great valor, wisdom, and conduct in arms, made him General of all his forces against the king of Ethiopia then invading his country.
Here, as in Scythia, Milesius was victorious; he forced the enemy to submit to the conqueror's own terms of peace. By these exploits Milesius found great favor with Pharaoh, who gave him, being then a widower, his daughter Scotia in marriage; and kept him eight years afterwards in Egypt.
During the sojourn of Milesius in Egypt, he employed the most ingenious and able persons among his people to be instructed in the several trades, arts, and sciences used in Egypt; in order to have them taught to the rest of his people on his return to Spain.
[The original name of Milesius of Spain was, as already mentioned, "Galamh" (gall: Irish, a stranger; amh, a negative affix), which means, no stranger: meaning that he was no stranger in Egypt, where he was called "Milethea Spaine," which was afterwards contracted to " Milé Spaine" (meaning the Spanish Hero), and finally to "Milesius" (mileadh: Irish, a hero; Lat. miles, a soldier).] At length Milesius took leave of his father-in-law, and steered towards Spain; where he arrived to the great joy and comfort of his people, who were much harasssed by the rebellion of the natives and by the intrusion of other foreign nations that forced in after his father's death, and during his own long absence from Spain. With these and those he often met; and, in fifty-four battles, victoriously fought, he routed, destroyed, and totally extirpated them out of the country, which he settled in peace and quietness.
In his reign a great dearth and famine occurred in Spain, of twenty-six years' continuance, occasioned, as well by reason of the former troubles which hindered the people from cultivating and managing the ground, as for want of rain to moisten the earth; but Milesius superstitiously believed the famine to have fallen upon him and his people as a judgment and punishment from their gods, for their negligence in seeking out the country destined for their final abode, so long before foretold by Cachear their Druid or magician, as already mentioned--the time limited by the prophecy for the accomplishment thereof being now nearly, if not fully, expired.
To expiate his fault and to comply with the will of his gods, Milesius, with the general approbation of his people, sent his uncle Ithe, with his son Lughaidh [Luy], and one hundred and fifty stout men to bring them an account of those western islands; who, accordingly, arriving at the island since then called Ireland, and landing in that part of it now called Munster, left his son with fifty of his men to guard the ship, and with the rest travelled about the island. Informed, among other things, that the three sons of Cearmad, called Mac-Cuill, MacCeacht, and MacGreine, did then and for thirty years before rule and govern the island, each for one year, in his turn; and that the country was called after the names of their three queens--Eire, Fodhla, and Banbha, respectively: one year called "Eire," the next "Fodhla," and the next "Banbha," as their husbands reigned in their regular turns; by which names the island is ever since indifferently called, but most commonly "Eire,"because that MacCuill, the husband of Eire, ruled and governed the country in his turn the year that the Clan-na-Milé (or the sons of Milesius) arrived in and conquered Ireland. And being further informed that the three brothers were then at their palace at Aileach Neid, in the north part of the country, engaged in the settlement of some disputes concerning their family jewels, Ithe directed his course thither; sending orders to his son to sail about with his ship and the rest of his men, and meet him there.
When Ithe arrived where the (Danan) brothers were, he was honourably received and entertained by them; and, finding him to be a man of great wisdom and knowledge, they referred their disputes to him for decision. That decision having met their entire satisfaction, Ithe exhorted them to mutual love, peace, and forbearance; adding much in praise of their delightful, pleasant, and fruitful country; and then took his leave, to return to his ship, and go back to Spain.
No sooner was he gone than the brothers began to reflect on the high commendations which Ithe gave of the Island; and, suspecting his design of bringing others to invade it, resolved to prevent them, and therefore pursued him with a strong party, overtook him, fought and routed his men and wounded himself to death (before his son or the rest of his men left on ship-board could come to his rescue) at a place called, from that fight and his name, Magh Ithe or "The plain of Ithe" (an extensive plain in the barony of Raphoe, county Donegal); whence his son, having found him in that condition, brought his dead and mangled body back into Spain, and there exposed it to public view, thereby to excite his friends and relations to avenge his murder.
And here I think it not amiss to notify what the Irish chroniclers, observe upon this matter, viz.--that all the invaders and planters of Ireland, namely, Partholan, Neimhedh, the Firbolgs, Tuatha-de-Danans, and Clan-na-Milé, where originally Scythians, of the line of Japhet, who had the language called Bearla-Tobbai or Gaoidhilg [Gaelic] common amongst them all; and consequently not to be wondered at, that Ithe and the Tuatha-de-Danans understood one another without an Interpreter--both speaking the same language, though perhaps with some difference in the accent.
The exposing of the dead body of Ithe had the desired effect; for, thereupon, Milesius made great preparations in order to invade Ireland--as well to avenge his uncle's death, as also in obedience to the will of his gods, signified by the prophecy of Cachear, aforesaid. But, before he could effect that object, he died, leaving the care and charge of that expedition upon his eight legitimate sons by his two wives before mentioned.
Milesius was a very valiant champion, a great warrior, and fortunate and prosperous in all his undertakings: witness his name of "Milesius," given him from the many battles (some say a thousand, which the word "Milé" signifies in Irish as well as in Latin) which he victoriously fought and won, as well in Spain, as in all the other countries and kingdoms he traversed in his younger days.
The eight brothers were neither forgetful nor negligent in the execution of their father's command; but, soon after his death, with a numerous fleet well manned and equipped, set forth from Breoghan's Tower or Brigantia (now Corunna) in Galicia, in Spain, and sailed prosperously to the coasts of Ireland or Inis-Fail, where they met many difficulties and various chances before they could land: occasioned by the diabolical arts, sorceries, and enchantments used by the Tuatha-de-Danans, to obstruct their landing; for, by their magic art, they enchanted the island so as to appear to the Milesians or Clan-na-Milé in the form of a Hog, and no way to come at it (whence the island, among the many other names it had before, was called Muc-Inis or "The Hog Island"); and withal raised so great a storm, that the Milesian fleet was thereby totally dispersed and many of them cast away, wherein five of the eight brothers, sons of Milesius, lost their lives.
That part of the fleet commanded by Heber, Heremon, and Amergin (the three surviving brothers), and Heber Donn, son of Ir (one of the brothers lost in the storm), overcame all opposition, landed safe, fought and routed the three Tuatha-de Danan Kings at Slieve-Mis, and thence pursued and overtook them at Tailten, where another bloody battle was fought; wherein the three (Tuatha-de-Danan) Kings and their Queens were slain, and their army utterly routed and destroyed: so that they could never after give any opposition to the Clan-na-Milé in their new conquest; who, having thus sufficiently avenged the death of their great uncle Ithe, gained the possession of the country foretold them by Cachear, some ages past, as already mentioned.
Heber and Heremon, the chief leading men remaining of the eight brothers, sons of Milesius aforesaid, divided the kingdom between them (allotting a proportion of land to their brother Amergin, who was their Arch-priest, Druid, or magician; and to their nephew Heber Donn, and to the rest of their chief commanders), and became jointly the first of one hundred and eighty-three Kings or sole Monarchs of the Gaelic, Milesian, or Scottish Race, that ruled and governed Ireland, successively, for two thousand eight hundred and eighty-five years from the first year of their reign, Anno Mundi three thousand five hundred, to their submission to the Crown of England in the person of King Henry the Second; who, being also of the Milesian Race by Maude, his mother, was lineally descended from Fergus Mor MacEarca, first King of Scotland, who was descended from the said Heremon--so that the succession may be truly said to continue in the Milesian Blood from before Christ one thousand six hundred and ninety-nine years down to the present time.
Heber and Heremon reigned jointly one year only, when, upon a difference between their ambitious wives, they quarreled and fought a battle at Ardcath or Geshill (Geashill, near Tullamore in the King's County), where Heber was slain by Heremon; and, soon after, Amergin, who claimed an equal share in the government, was, in another battle fought between them, likewise slain by Heremon. Thus, Heremon became sole Monarch, and made a new division of the land amongst his comrades and friends, viz.: the south part, now called Munster, he gave to his brother Heber's four sons, Er, Orba, Feron, and Fergna; the north part, now Ulster, he gave to Ir's only son Heber Donn; the east part or Coigeadh Galian, now called Leinster, he gave to Criomthann-sciath-bheil, one of his commanders; and the west part, now called Connaught, Heremon gave to Un-Mac-Oigge, another of his commanders; allotting a part of Munster to Lughaidh (the son of Ithe, the first Milesian discoverer of Ireland), amongst his brother Heber's sons.
From these three brothers, Heber, Ir, and Heremon (Amergin dying without issue), are descended all the Milesian Irish of Ireland and Scotland, viz.: from Heber, the eldest brother, the provincial Kings of Munster (of whom thirty-eight were sole Monarchs of Ireland), and most of the nobility and gentry of Munster, and many noble families in Scotland, are descended. From Ir, the second brother, all the provincial Kings of Ulster (of whom twenty-six were sole Monarchs of Ireland), and all the ancient nobility and gentry of Ulster, and many noble families in Leinster, Munster, and Connaught, derive their pedigrees; and, in Scotland, the Clan-na-Rory--the descendants of an eminent man, named Ruadhri or Roderick, who was Monarch of Ireland for seventy years (viz., from Before Christ 288 to 218).
From Heremon, the youngest of the three brothers, were descended one hundred and fourteen sole Monarchs of Ireland: the provincial Kings and Hermonian nobility and gentry of Leinster, Connaught, Meath, Orgiall, Tirowen, Tirconnell, and Clan-na-boy; the Kings of Dalriada; all the Kings of Scotland from Fergus. Mor MacEarca down to the Stuarts; and the Kings and Queens of England from Henry the Second down to the present time.
The issue of Ithe is not accounted among the Milesian Irish or Clan-na-Milé, as not being descended from Milesius, but from his uncle Ithe; of whose posterity there were also some Monarchs of Ireland (see Roll of the Irish Monarchs, infra), and many provincial or half provincial Kings of Munster: that country upon its first division being allocated to the sons of Heber and to Lughaidh, son of Ithe, whose posterity continued there accordingly.
This invasion, conquest, or plantation of Ireland by the Milesian or Scottish Nation took place in the Year of the World three thousand five hundred, or the next year after Solomon began the foundation of the Temple of Jerusalem, and one thousand six hundred and ninety-nine years before the Nativity of our Savior Jesus Christ; which, according to the Irish computation of Time, occurred Anno Mundi five thousand one hundred and ninety-nine: therein agreeing with the Septuagint, Roman Martyrologies, Eusebius, Orosius, and other ancient authors; which computation the ancient Irish chroniclers exactly observed in their Books of the Reigns of the Monarchs of Ireland, and other Antiquities of that Kingdom; out of which the Roll of the Monarchs of Ireland, from the beginning of the Milesian Monarchy to their submission to King Henry the Second of England, a Prince of their own Blood, is exactly collected.
[As the Milesian invasion of Ireland took place the next year after the laying of the foundation of the Temple of Jerusalem by Solomon, King of Israel, we may infer that Solomon was contemporary with Milesius of Spain; and that the Pharaoh King of Egypt, who (1 Kings iii. 1,) gave his daughter in marriage to Solomon, was the Pharaoh who conferred on Milesius of Spain the hand of another daughter Scotia.]
Milesius of Spain bore three Lions in his shield and standard, for the following reasons; namely, that, in his travels in his younger clays into foreign countries, passing through Africa, he, by his cunning and valor, killed in one morning three Lions; and that, in memory of so noble and valiant an exploit, he always after bore three Lions on his shield, which his two surviving sons Heber and Heremon, and his grandson Heber Donn, son of Ir, after their conquest of Ireland, divided amongst them, as well as they did the country: each of them bearing a Lion in his shield and banner, but of different colors; which the Chiefs of their posterity continue to this day: some with additions and differences; others plain and entire as they had it from their ancestors.
37. Ir: his son. This Prince was one of the chief leaders of the expedition undertaken for the conquest of Erinn, but was doomed never to set foot on the "Sacred Isle;" a violent storm scattered the fleet as it was coasting round the island in search of a landing place, the vessel commanded by him was separated from the rest of the fleet and driven upon the island since called Scellig-Mhicheal, off the Kerry coast, where it split on a rock and sank with all on board, B.C. 1700.
38. Heber Donn: his son; born in Spain; was granted by Heber and Heremon the possession of the northern part of Ireland, now called Ulster.
39. Hebric: his son; was killed in a domestic quarrel.
40. Artra: his youngest son; succeeded in the government of Uladh or Ulster; his elder brothers, Cearmna and Sobhrach, put forth their claims to sovereign authority, gave battle to the Monarch Eochaidh, whom they slew and then mounted his throne; they were at length slain: Sobhrach at Dun Sobhrach, or "Dunseverick," in the county of Antrim, by Eochaidh Meann; and Cearmna (in a sanguinary battle fought near Dun Cearmna, now called the Old Head at Kinsale, in the county of Cork, where he had his residence), by his successor Eochaidh Faobhar-glas, grandson of Heber Fionn, B.C. 1492.
41. Artrach: son of Artra.
42. Sedna: his son; slew Rotheacta, son of Maoin, of the race of Heremon, Monarch of Ireland, and, mounting his throne, became the 23rd Monarch. It was during his reign that the Dubhloingeas or "pirates of the black fleet" came to plunder the royal palace of Cruachan in Roscommon, and the King was slain, in an encounter with those plunderers, by his own son and successor, who mistook his father for a pirate chief whom he had slain and whose helmet he wore.
43. Fiacha Fionn Scothach, the 24th Monarch: son of Sedna; so called from the abundance of white flowers with which every plain in Erinn abounded during his reign; was born in the palace of Rath-Cruachan, B.C. 1402; and slain, B.C. 1332, in the 20th year of his reign, by Munmoin, of the Line of Heber.
44. Eochaidh (2): his son; better known as Ollamh Fodhla, i.e., "Ollamh, or chief poet of Fodhla" (or Ireland); began his reign, A.M. 3882, B.C. 1317 (according to the received computation of the Sep-tuagint, making A.D. 1 agree with A.M. 5199). This Eochaidh was the 27th Monarch of Ireland, and reigned 40 years. It was this Monarch who first instituted the Feis Teamhrach (or "Parliament of Tara"), which met about the time called "Samhuin" (or 1st of November) for making laws, reforming general abuses, revising antiquities, genealogies, and chronicles, and purging them from all corruption and falsehood that might have been foisted into them since the last meeting. This Triennial Convention was the first Parliament of which we have any record on the face of the globe; and was strictly observed from its first institution to A.D. 1172; and, even as late as A.D. 1258, we read in our native Annals of an Irish Parliament, at or near Newry. (See "O'Neill" Stem, No. 113.) It was this Monarch who built Mur Ollamhan at Teamhair (which means "Ollamh's fort at Tara"); he also appointed a chieftain over every cantred and a brughaidh over every townland.
According to some chroniclers, "Ulster" was first called Uladh, from Ollamh Fodhla. His posterity maintained themselves in the Monarchy of Ireland for 250 years, without any of the two other septs of Heber and Heremon intercepting them. He died at an advanced age, A.M. 3922, at his own Mur (or house) at Tara, leaving five sons, viz.: 1. Slanoll; 2. Finachta Fionnsneachta (or Elim); 3. Gead Ollghothach, and 4. Fiacha, who were successively Monarchs of Ireland; and 5. Cairbre.
45. Cairbre: son of Ollamh Fodhla; King of Uladh; d. in the 22nd year of the reign of his brother Fiacha.
46. Labhradh: his son; governed Ulster during the long reign of his cousin Oiliol, son of Slanoll.
47. Bratha: his son; was slain by Breasrigh, a prince of the Heberian race, in the 12th year of the reign of Nuadhas Fionn-Fail.
48. Fionn: his son; fought against the Monarch Eochaidh Apach at Tara, defeated him, and became the 42nd Monarch; but after a reign of 22 years was slain by Seidnae Innaraidh, his successor.
49. Siorlamh: his son; so called from the extraordinary length of his hands (Lat. "longimanus," or long-handed); slew the Monarch Lugbaidh Iardhonn, and assumed the sovereignty of the kingdom, which he held for 16 years, at the expiration of which, in B.C. 855, he was slain by Eochaidh Uarceas, son of the former King.
50. Argeadmar (or Argethamar): his son; ascended the Throne of Ireland, B.C. 777, and was the 58th Monarch; after a reign of 30 years, was slain by Duach Ladhrach. He left four sons: 1. Fiontan, whose son, Ciombaoth, was the 63rd Monarch; 2. Diomain, whose son, Dithorba, became the 62nd Monarch; 3. Badhum, who was father of Aodh Ruadh, the 61st Monarch, who was drowned at Eas Ruadh (or Assaroe), now Ballyshannon, in the county of Donegal, and grandfather of Macha Mongruadh, or "Macha of the Golden Tresses," the 64th Monarch, and the only queen Ireland ever has had, who laid the foundation of the Royal Palace of Emania, in the county of Armagh, where her consort Cimbath, died of the plague; the fourth son of Argeadmar was Fomhar.
51. Fomhar: son of Argeadmar; died during the reign of Cimbath.
52. Dubh: his son; was King of Ulster.
53. Eos: his son.
54. Srubh: his son.
55. Indereach: his son.
56. Glas: his son.
57. Carbre (or Cathair): his son.
58. Feabhardhile: his son.
59. Fomhar (2): his son.
60. Dubh (2): his son.
61. Sithrich: his son.
62. Ruadhri (or Rory) Mór: his son; was the 86th Monarch; died B.C. 218. From him the "Clan-na-Rory" were so called. He left, amongst other children 1. Bresal Bodhiobha, and 2. Congall Clareineach, who were respectively the 88th and the 90th Monarchs; 3. Conragh, the father of the 105th Monarch Eiliomh; 4. Fachna Fathach, the 92nd Monarch, who, by his wife Neasa was father of Conor; 5. Ros Ruadh, who by his wife Roigh, the father of the celebrated Fergus Mór; and 6. Cionga, the ancestor of the heroic Conal Cearnach,from whom are descended O'Moore, MacGuinness, M'Gowan, and several other powerful families in Ulster and Conacht.
63. Ros Ruadh: son of Rory Mór; m. Roigh, dau. of an Ulster Prince – Brother to 63. Cionga: son of Rory Mór. ( Cionog (or Cionga), brother of Ros who is No. 63 on the "Line of Ir," was the ancestor of MacAonghuis [oneesh]; anglicised MacGuinness, Maginnis, Magennis, Magenis, MacInnes, Guinness, Angus, Ennis, Innis, etc.)
64. Capa (or Cathbharr): his son.
65. Fachna Fathach: his son; the 92nd Monarch of Ireland.
66. Cas: his son; and brother of Conor MacNessa, who deposed Fergus MacRoy from the sovereignty of Ulster.
67. Amergin: his son.
68. Conall Cearnach: his son; the famous warrior, so often mentioned in the Irish Annals as connected with the Red Branch Knights of Ulster.
69. Irial Glunmhar & Lioseach Lannmor: son of Conall Cearnach.: his son; King of Ulster; had a brother named Laoiseach Lannmor, who was also called Lysach, and who was the ancestor of O'Moore
70. Lugha-Laoghseach: his son.
71. Lugha-Longach: his son.
72. Baccan: his son; a quo Rath-Baccain.
73. Earc: his son.
74. Guaire: his son.
75. Eoghan (or Owen): his son.
76. Lugna: his son.
77. Cuirc: his son.
78. Cormac: his son.
79. Carthann: his son.
80. Seirbealagh: his son.
81. Bearrach: his son.
82. Nadsier: his son.
83. Aongus: his son.
84. Aongus (2): his son.
85. Beannaigh: his son.
86. Bearnach: his son.
87. Maolaighin: his son.
88. Meisgil: his son.
89. Eochagan: his son.
90. Cathal (or Charles): his son.
91. Cionaodh: his son.
92. Gaothin Mordha: his son; the first King of Lease (or Leix), now the "Queen's County."
93. Cinnedeach: his son.
94. Cearnach: his son.
95. Maolmordha ("mordha:" Irish, proud): his son; a quo O'Maoilmordha.
96. Cenneth: his son.
97. Cearnach (2): his son.
98. Cenneth (3): his son.
99. Faolan: his son.
100. Amergin: his son; who is considered the ancestor of Bergin.
101. Lioseach: his son.
102. Donall: his son.
103. Conor Cucoigcriche: his son.
104. Lioseach (2): his son.
105. Donall (or Daniel) O'Moore: his son; King of Leix or Lease; first assumed this surname.
106. Daniel Oge: his son.
107. Lioseach (3): his son; the last "King of Lease;" built the Monastery of Lease (called De-Lege-Dei), A.D. 1183.
108. Mall (or Neal): his son.
109. Lioseach (4): his son; had a brother named Daniel.
110. David: son of Lioseach.
111. Anthony: his son.
112. Melaghlin: his son; died in 1481.
113. Connall: his son; d. in l518.
114. Roger Caoch: his son; was slain by his brother Philip; had a brother named Cedagh, who died without issue; and a younger brother named John, who was the ancestor of Mulchay.
115. Charles O'Moore, of Ballinea (now Ballyna), Enfield: son of Roger Caoch; d. 1601; had an elder brother named Cedagh, who was Page to Queen Elizabeth, who granted him Ballinea.
116. Col. Roger, son of Charles; d. 1646; had a brother named Anthony.
117. Col. Charles: his son; Governor of Athlone; killed in the Battle of Aughrim, 12th July, 1691; his sister Anne was wife of Patrick Sarsfield of Lucan, and mother of Patrick, earl of Lucan.
118. Lewis: his son; d. 1738.
119. James O'Moore; his son;
whose daughter and sole heir, Letitia, married Richard O'Farrell, of Ballinree, county Longford.
120. Ambrose O'Farrell, of Ballyna: their son.
121. Richard Moore O'Farrell: his son; b. in 1797, d. 1880.
122. Ambrose More O'Ferrall, of Ballyna House, Enfield, co. Kildare; his son; living in 1887.
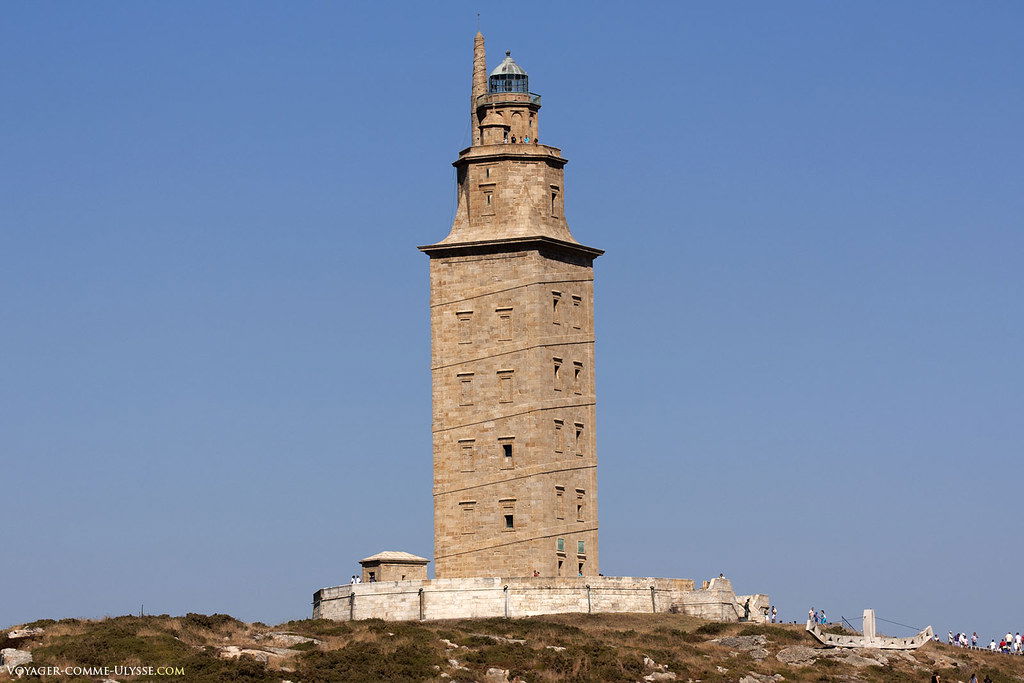
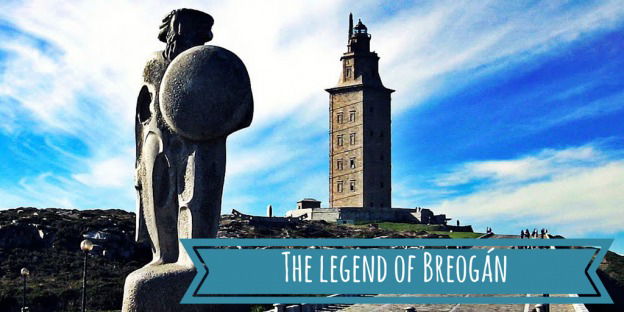
The Legendary Breoghan
Lamhfionn was a son of Agnon. He and his little fleet remained at sea for some time, resting and refreshing themselves on various islands. At that time Cachear their Druid, or priest, predicted that they would continue to wander until they reached the Western Island of Europe, now called Ireland. They would not reach Ireland themselves, but their descendants would after 300 years. Eventually Lamhfionn and his fleet reached Libya, at the point where Carthage was later built. Soon after, Lamhfionn died in Libya. Heber Glunfionn, son of Lamhfionn, was born and died in Libya. He was the father of Agnan Fionn. Heber Glunfionn and his posterity were kings and rulers there for over 150 years. Some sources say it was up to 300 years. Agnan Fionn was the father of Febric Glas. Febric Glas was the father of Nenuall. Nenuall was the father of Nuadhad. Nuadhad was the father of Alladh. Alladh was the father of Arcadh.
Arcadh was the father of Deag. Deag was the father of Brath, who was born in Libya (called Gothia or Getulia). Remembering Cachear’s prediction, Brath departed Libya with a large fleet to seek the Western Island of Europe, Ireland. After some time, Brath landed in Spain, and established a colony in Galicia in northern Spain. Breoghan (or Brigus) was a son of Deag. Breoghan's descendant was the legendary Connal Cearnach ; which eventually Conal or Connal became the founder of Clan Mordha/ O'Mordha (Moore/ O'Moore). He conquered Galicia, Andalusia, Murcia, Castile, and Portugal. He built Breoghan’s Tower in Galicia. He also sent a colony into Britain, and their descendants gave formidable opposition to the Romans as they invaded Britain.
Bile was a son of Breoghan, and he became king of all the countries his father had conquered. Bile had a brother named Ithe, of whom more will be said later. The Great Warrior of Milesius was a son of Breoghan. In his youth, Milesius traveled to Scythia. The King of Scythia gave him the hand of his daughter in marriage and appointed him General of his army. Milesius defeated the king’s enemies and became very popular with the people, so much so that the King became jealous and resolved to kill Milesius. Milesius discovered the King’s plot and killed the King instead. Then Milesius left Scythia with a fleet of sixty ships, and upon his arrival in Egypt, Pharoah Nectonibus made him General of all his forces against the King of Ethiopia.
Milesius was victorious. Milesius was a widower by this time, so in gratitude, Nectonibus gave Milesius the hand of his daughter Scotia in marriage. Milesius remained in Egypt for eight years, during which time he had his most able people instructed in the arts and sciences of Egypt, so that they might teach others when they returned to Spain.Eventually, Milesius returned to Spain. There, he found that the country had been overrun by "foreigners". By a series of fifty-four battles, Milesius drove the foreigners from Spain, and then settled down to rule in peace and quiet. However, a famine of twenty-six years duration fell upon Spain. The reasons for the famine were the lack of rainfall and the fact that the people had failed to use enough manure on their fields, but Milesius was superstitious and believed that his failure to seek the Western Island (Ireland) of Europe was the cause of the famine.
Knowing that the 300 years predicted by Cachear the Druid was about to expire, Milesius sent his uncle Ithe and Ithe’s son Lughaidh and 150 others to bring back an account of the Western Island. When he landed in the Western Island, or Ireland, Ithe left Lughaidh and 50 men to guard the ship while Ithe and the other 100 men explored. Ithe learned that the three rulers of Ireland were at their palace at Aileach Neid. Ithe travelled overland to Aileach Neid, sending word to Lughaidh to bring the ship around with the rest of the men. When Ithe arrived at Aileach Neid, he was honorably received and entertained, and then Ithe started back to his ship to return to Spain.
However, the three rulers suspected that Ithe would bring others from Spain to invade Ireland, so they attacked and killed Ithe before he reached the ship. This happened at Magh Ithe, or the Plain of Ithe. Lughaidh recovered his father’s body and returned it to Spain, where it was put on public display to excite the people to avenge Ithe’s death. Some sources say that Ithe was only wounded ashore, but died during the voyage back to Spain. Both in obedience to the God as signified by Cachear, and to avenge his uncle’s death, Milesius made preparations to invade Ireland. He died before the expedition got underway, leaving the invasion of Ireland to his eight sons by his two wives.
The Migration of the Milesian Tribe
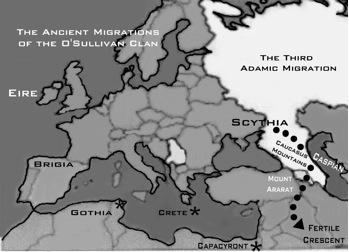
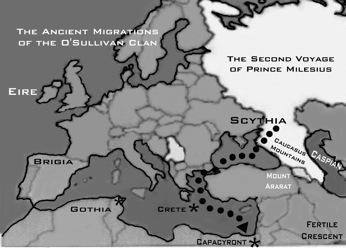
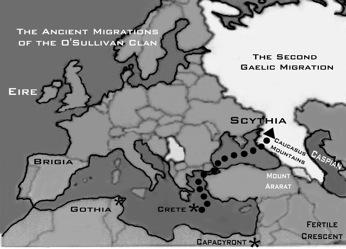
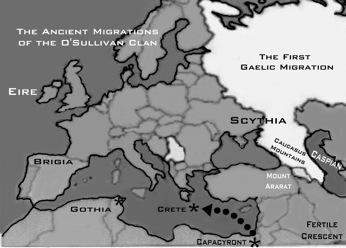
Around 1550 BC, the king of Scythia was Phoeniusa Farsaidh [1]*, an enlightened despot whose interest in ruling his people paled in comparison to his thirst for knowledge. His dream was to study and master all of the languages of the people in that part of the world. With this objective in mind, he surrendered his throne to his oldest son, Nenuall, and moved south to the City of Aeothena, in the Valley of Senaar. (Shinar, the plain in the Tigris and Euphrates basin.) He brought with him a younger son, Niul [2], who remained with his father in exile for twenty years. This move was the Third Adamic Migration
Soon after Asruth passed away, local politics changed and the Scythians were perceived by the Pharaoh as being subversive. A series of battles and bitter conflicts ensued during which a great number of the Scythians were killed. Outnumbered and out armed, Sruth was forced to abandon Capacyront with his small band of survivors. They escaped Egypt by boat and eventually landed on the island of Crete. Sruth died soon after their arrival. This exodus of the tribe of Gaodhal (Gael) resulted in the First Gaelic Migration.
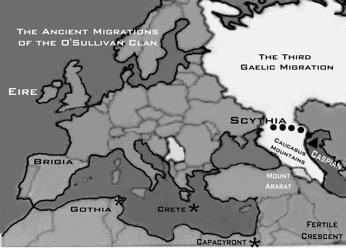
Heber Scut [6]*, oldest son of Sruth, stayed on Crete for about one year where he served as king of his people. He held a council and announced his intentions of returning to Scythia. Some of his people opted to stay on Crete and it is likely that a branch of Gaodhal’s bloodline still remains there since "the island breeds no venomous serpent ever since."Internecine battles continued between the two royal houses and in one engagement Heber was slain by Noemus, the former king’s son. Beouman [7]*, Ogaman [8]*, and Tait [9]*, were all, in turn, the oldest sons of the line of Heber and all served as kings of Scythia. After Tait’s death, however, Prince Agnon [10] was unable to retain the throne and he was forced to abandon Scythia and roam the Caspian Sea for several years as a dispossessed brigand. Agnon would never settle back on land again and he died at sea. His oldest son, Lamhfionn [11], became chief of this marauding band of pirates. This exile of the Gaels from Scythia was the Third Gaelic Migration.
One day, Caicher, the druid of the clan, approached his chief and shared with him a vision that he had seen. He told Lamhfionn of a distant western island that was green and fertile. It was the ‘promised land’ for their people and he predicted that they would have no peace until they arrived on its shores. After much deliberation and prayer, Lamhfionn announced that they were abandoning the pirate’s life on the Caspian Sea and they were headed west in search of Caicher’s prophesied island.
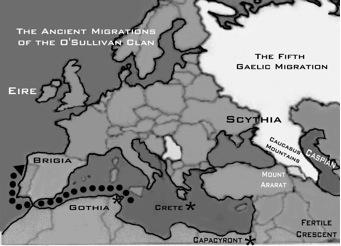
They traversed the Caucasus Mountains, the Black Sea, and the Mediterranean Sea. At last they arrived at Gothia (or Getulia) which is now known as Libya. They settled along the Gulf of Tunis where Carthage would later be built and began subjugating the natives. Lamhfionn’s oldest son, Heber Glunfionn [12]*, was born in Gothia. After his father’s death he assumed command of the Scythians and continued winning battles over the indigenous Gothians. He was the first of his line to be crowned king of Gothia. This invasion of northern Africa by the Gaels comprised the Fourth Gaelic Migration.
He was reminded of the divine mission to bring his people to the ‘promised land’ on the mythical distant western island. The small band of Scythian nomads had grown into a strong and populous tribe while ruling over Gothia. Though Gothia had proven to be a fortuitous stop-over, it was not the final destination for the clan. A large fleet was built and the entire tribe left Africa and sailed to the coast of Spain. Brath was successful in establishing a fortified colony in Galicia, in the northwestern corner of the Iberian Peninsula. This transplantation of the Gaels to Spain was the Fifth Gaelic Migration.
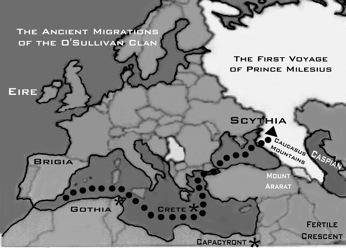
Bile’s oldest son, Milesius Galamh [23]*, grew up hearing Ithe’s tales and, being the adventurous type, yearned to visit the ancestral lands of Scythia. When he was old enough to travel he assembled a small fleet and with his father’s blessings sailed off to the east. He received a warm welcome from the king of Scythia and married one of his daughters with whom he sired several sons.
His military abilities soon impressed the king and he appointed Milesius to be General of his armies. After many victories Milesius was a favorite among the Scythian people and this raised the jealousy and suspicion of the king. The king tried to have Milesius assassinated but the plan back-fired and Milesius in turn killed his father-in-law. He was forced to leave the country and with a fleet of sixty ships he sailed to Egypt.At the time of his arrival, Egypt was under attack by the Ethiopian army. Milesius’ reputation for valor, strategy, and wisdom preceded him and the Pharaoh offered him the position of General of the Egyptian defense forces.
Milesius accepted and soundly routed the Ethiopians. Milesius thus won great favor in the Pharaoh’s court and married Princess Scota, one of the Pharaoh’s daughters. Between his first Scythian wife and Princess Scota, Milesius fathered eight sons.
One day, while hunting, Milesius encountered three lions all of which he slew alone. To commemorate this feat he added three lions to his personal cognizance already emblazoned with the thunderbolt and serpent of Gaodhal . For eight years Milesius remained in Egypt, being instructed in the sciences, arts, and trades of the time. At length a messenger from Spain arrived with instructions from the king to return home. Milesius bid farewell to the Pharaoh and set sail for Galicia.
The next morning Milesius was shocked to hear his uncle Ithe describe a vision that he had in which he saw the fertile shores of the western island in the distance from the heights of Breoghan’s tower. It was a sign from Go Lear, their god, to abandon Spain and to pursue their destiny. (To this day there is a belief in Galicia, Spain, that one can see Ireland from the top of an old Roman lighthouse if the weather is clear.)
Ithe was instructed to assemble a fleet and to leave the kingdom at once to find Caicher’s island. Ithe, with his son, Lughaidh and one hundred and fifty hearty men, then sailed north to the Kenmare River, Kerry, Ireland.
The exact date of the arrival of the Gaelic Celts in Ireland is unknown; however, all credible sources maintain that it occurred before the age of Alexander the Great (356-323 BC). The dates cited in the ancient history of the clan are estimates based on the best available evidence. The Gaelic Celts dominated Ireland from the time of their arrival until the dawning of the thirteenth century. The Milesians were master equestrians, superior metal workers, and fierce warriors, traits that were common to all of the Magi tribes.
They were also gifted military strategists. True to their Scythian roots, they were tall, muscular, fair skinned, and light haired. The Gaelic Celts were distantly related to the continental Celts that sacked Rome in 387 BC, raided Delphi in 279 BC, and established the kingdom of Galatia in Asia Minor. They called themselves "Gaels", the word "Celt" being coined by latter day scholars to describe the loose confederation of Magi tribes that emanated from Scythia to conquer the indigenous peoples of Europe and the Middle East.
The Gaels originally divided Ireland into four provinces, Munster, Leinster, Ulster, and Connaught. Meath was not considered a province until a much later time. Although an Ard Ri, or high king, was recognized, his powers were very limited. The freedom loving Gaels forcefully resisted the establishment of a strong central government and preferred to retain most of the civil authority within their relatively small and semi-autonomous tribes.
Milesius, with the general approbation of his people, sent his uncle Ith, with his son Lughaidh, and one hundred and fifty stout men to bring them an account of the western Isles; who accordingly, arriving at the island called Ireland. The leader of this small expedition force, order his men to guard the ships, and the rest to traveled about the island. The natives called Dananns welcome Ith to Ireland, but the Dananns became suspicious about Ith's motives for coming to Ireland. Thru misunderstanding of Ith's motive; the Danann's king murder Ith and two of his brothers. The rest of Ith's men escape back to the ships with Ith and his brothers bodies, and sailed back to Galicia.
The Milesian Tribe Gallery


History of Clan Morè
Septs of Clan More of India
More, Madhure, Devkate, Harphale, Dhyber, Marathe, Darekar, Devkar, and Adavale.
Lands of Clan More
The Mor/ Mores lands in India belong to the family at one point.
Historic Seat More of Maharashtra- Capital of Latur More of Patna
More of Javali Jargir More of Mahipatgad
More of Kashmir More of Shivthar
More of Jor More of Jambhali
More of Mahipatgad More of Kevanle
More of Vakan More of Devali Tarf Ategaon
More of Devali More of Khelana ( Vishalgad)
More of Sakharwadi More of Tal Phaltan
More of Hadapsar More of Dhayari
More of Pune More of Mahabaleshwar
More of Parvat More of Chakdev
More of Ghonaspur More of Taldev
More of Gardev More of Dhardev
More of Moleshwar More of Bankot
More of Kandat Khore
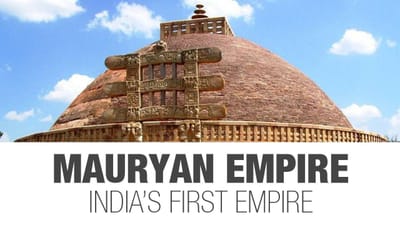
The Mauryan Empire
The Mor/ Mur came to India and established the Mauryan empire. They were supposedly close kins of the Armorites of Babylonia and Egypt. The Jats immigrants are also close kins of the ancient Gatians of Sumeria and the Goths. he Mores are claiming descendants of the Mouryan Dynasty in which it defeated the Greeks, which was led by Alexander the Great. I also believe that the Mauryan Dynasty came from the Milesians, and below is a time period of kings of the Mauryan Dynasty.
Mauryan Dynasty (BCE320-300)
Chandragupta Maurya (BCE320-300)
Bindusar (BCE300-187)
Ashok (BCE273-232)
Kunal (BCE232-225)(From Ujjain)
Dasarath (BCE232-225)(From Patliputra)
Samprati(BCE225-?)
Saliska fl. late 3rd BCE.
Devadharm fl. late 3rd BCE.
Satamdhanu fl. early 2nd BCE.
Brihadrath(BCE194-187)
The More's were mostly known in the lands of Maharashtra from their king Akhilesh More of Latur. Their capital was at Latur. The area of then Javali Jagir stretched from Rairi Raigad fort was built by Chandrarao More in 1030 to Fort Khelana (Vishalgad) and Koyana Valley to the current Mumbai-Goa highway.
The following is a list of lands in which the More clan controlled and was in their possession.
1. More of Shivthar owned by Yashwantrao More
2. More of Jor owned by Hanmantrao More
3. More of Jambhali owned by Govindrao More
4. More of Mahipatgad owned by Dauloatrao More
5. More of Kevanale and Vakan owned by Bagrao More
6. More of Devali Tarf Ategaon owned by Suryarao More
7. More of Devali owned by Bhikajirao More
8. More of Khelana(Vishalgad) owned by Shankarrao More
9. More of Sakharwadi Tal.Phaltan and Hadapsar owned by Madhavrao Yashwantrao and Sadashivrao More 10.More of Dhayari, and Pune owned by Paresh Krishnaraj More
They were honored as Kings. The More families' jurisdiction extended over the region of Savitri Rivers to Mahabaleshwar, Parvat, Chakdev, Ghonaspur,Taldev, Gardev, Dhardev, Moleshwar, Bankot etc. Daulatrao More branch headquarters were at Kandat Khore, where they found Swayambhu Niripji Devi. The Daulatrao More from Mahipatgad was successor of title Chandrarao. The More clan will face an enemy that will invade the homeland of the Mores called Javali. Shivaji will end up defeating the Mores in a campaign that will bring the More clan to be one of the ninety six clans of the Maratha empire.
The Javali Campaign
Now, Javali was a strategically important to the region in which the Mores control. It was the gateway to the Konkan region. Javalia was a densely forested area, mainly comprising of eighteen valleys, called Khores. It was a region traditionally ruled by the Mores ( There are stories that More's were the descendants of the Somvanshi, king More of Kashmir, while other version claims descent from the Mauryas of Magadh.). They owed allegiance to the Adilshahi. Under the Mores came the Khores of Jambhul, Jor, Shivthar, Kandat, Tam, Bamnoli and others.
The Mores had a clan head called Chandraro. The last Chandraro More was Daulatrao. When he died he was issue with no heirs. Afzhal Khan, Adilshahs commander, wanted to annex the More's territory to the Adilshahi. So Daulatraos widower turned to Shivaji for help, and he provided her with the military support to help assert authority and to keep her relatives at bay. Yeshwantrao was adopted from within the More clan of Shivthar. Shivaji promised them to help against external aggression. Initially this Chandrarao More being indebted to Shivaji, professed loyalty towards him, but later he change his mind. His attitude towards Shivaji's officials and envoy to turned from polite to rude.
He also disrespected towards and also refuse to accept Shivaji as king, which ended up in an attack on Shivaji's supporters by the More clan. Shivaji, taken back by Chandrarao's sudden arrogance, and decided to teach him a lesson, by annexing his territory. It was a tough terrain, but Shivaji had local support. His supporters was Jedhes, Bandals and the Silimkars. On 27th January 1656. Shivaji's man Sambhaji Kavji and Raghunath Ballal Atre. Chandrarao and the Ghorpades of Mudhol, who besides being Shivajis rivals and relatives, were also Bijapur's officiers. At the end of the campaign; Shivaji ordered the execution of Chandrarao More and annex Javali. Soon after Javali fell, so did the forts of Wasota and Rairi were also in the hands of Shivaji's hands. Shivaji then instructed Moropant Pingale to construct a powerful fort for him within the vicinity of Javali. That the fort named as Pratapgad. Shivaji next acquisition was the fort of Rohida in May 1656. When the Javali campaign was over and now the Mores became part of the Shivaji's forces in which they help to establish the Maratha empire. The More clan also had septs that belong to the clan, includes the following names: Madhure, Devkate, Harphale, Dhyber, Devkar, and Adavale.
The Maratha and Mughal Empires War
The wars of the Maratha empire began as an imperial conquest, and were a series of conquest in the India subcontinent, which led to the rise of the Maratha empire with the enormous help from the More clan. The most important wars of the Maratha empire, was a war against the Mughal empire. The Mughal empire was indeed a very enormous empire that expands to the lands of Afghanistan, Bangladesh, India and Pakistan. Before the wars between the two empire; there was a war between the Maratha and the Adlishahi. The Battle of Pratapgad between the two forces. The battle was fought in 10th of November 1659, the beginning of the Maratha empire, which result in a decisive victory and major territorial gain for the Maratha forces, even thou they were outnumbered.
This war lasted about 27 years and had two wars between the Mughal and Maratha empires. The Maratha empire was small compare to the Mughal empire which was enormous. At first, it wasn't a large scale battles that were fought before the year of 1680. The war became intensify when Aurangzeb's invasion into the Maratha's lands in Bijapur, which was establish by Shivaji. In Bijapur there were three battles that were fought, which includes: 1. The Battle of Bijapur Sultanate 2. The Battle of Kolhapur 3. The Battle of Pawanhind
It was a long fought war involving a quarter of a century and innumerable long and short battles. The upcoming battles will be tough and bloody. Most of these battles that were fought by the Maratha forces, in which they were outnumbered, and became very victorious. Both side won many battles, and these two empires were fighting to dominate the whole country of India.
The Battle of Chakan
The Mughal emperor Aurangzeb was enraged with Shaistakhan as he was living in luxury in the Deccan. In spite of attacking and destroying the Maratha forces. He along with 30,000 troops laid siege to the Chakan fort. Firangoji Narsala along with only 6,000 troops; Maratha soldiers bravery repulse the massive force of the Mughal's army, which was led by Shaistakhan for months. Finally Shaistakhan blasted the walls of the fort by using explosives. The Mughal rushed inside the fort and killing many Maratha soldiers. Firangoji was finally capture and brought before Shaistakhan which eventually he let Firangoji go and he returned home.
The battle was over and the Mughal was victorious in defeating the Maratha in Chakan, Maharashtra. The next fight was to be taken at the battle of Umberkhind on 2nd February in 1661. The location of this battle was Pen, Maharashtra and it end up a decisive victory for the Marathas, and also at this battle the Mughal had to paid a huge tribute to the Maratha. Once again the Maratha were outnumbered. The next battle was to be fought was at Surat, Gujarat on 5th January in 1664.
The Battle of Surat
The Mughal's forces was composition of 1,000 men at the command of Inayat Khan. The Maratha forces was composition of 4,000 cavalry under the command of Shivaji. Shivaji attacked Surat after a demand for tribute was rejected by the Mughal's commander. The Mughal Sardar, not the bravest, was very surprised by the suddenness of the attack and not willing to face the Maratha forces, he had hid himself in the fort of Surat. However, there was an attempted assassination of Shivaji by the emissary sent by the Mughal's Sardar. So Shivaji took the city and sacked it. Surat was under attack for nearly three days, in which the Maratha army looted all possible wealth from the Mughal and Portuguese trading center. The total numbers of prisoners executed during the raid was four; the hands of others were cut off, which were 24 men. Shivaji had to complete the sacking of Surat before the Mughal empire at Deli was alerted and couldn't afford to waste much time in attacking. The Maratha won a decisive victory. The next battle to be fought was at Purandar.
The Battle of Purandar
The battle of Purandar was fought in the year of 1665 in Purandar, India. The battle of Purandar was fought between Mughal and Maratha empires. Aurangzeb sent his general Dilir Khan of a large Mughal forces, crossed the Narmada river, while Shivaji was still engage in mopping up operations on the Konkan coast. Dilir turned his attention to Puranda and Jay Singh moved his main force to attack Sinhagarth fort while lesser forces under his command were moving against the More of Rajgad and Lochagad. According to Dilir Khan's plan, he was to lay siege to Purandhar, which was then gaurded by Murar Baji, the Maratha governor.
Laying a siege to Shivaji's well guarded position wasn't so easy; methods which Shivaji's men adopted in defense were similar to those they used in attack. The method was always the same, namely to have a short and quick engagements with the enemy rather then to face him in pitch battle. The secret to Shivaji's success was that he adopted the methods of guerilla warfare and his men followed his example even when attacking at Purandhar. With his modest garrison of only 2,000 Mavalis and Hetkaris, Murar Baji staved off the Mughal's attack. He blocked every point of approach by sending out parties of stragglers whose tactics were to nibble at the Mughal forces rather than to face them four squares.
Dilir Khan was adamant in carrying out his plan. Determined to destroy this Maratha fortress, he decided to use gunpowder to mine the main rock on which the lower fort of Purandhar was built. He succeeded in doing this, but his follow through was resisted by the Mavalis. The Maratha troops open fire on their attackers from the upper fort and a fierce and desperate battle ensued. The Mughals charged along side with the Pathans and Afghans, with Diler Khan, himself, mounted on an elephant, directing the operation. The battle for Purandhar fort ended in a hand to hand combat.
At one stage, Murar Baji came so close to Diler Khan that they were even exchanging verbal threats at close quarters. Murar, deprived of his shield in battle, was struggling to strike at Diler with his sword. However, Diler, realising the desperateness of the situation, shot at Murar with his bow and arrow. The arrow killed the Maratha governor and as he died, his scattered forces retreat to the upper fort and close the gates. Timely assistance, however, came to the besieged garrison from Shivaji, who sent out an extra force, which announced it's arrival with trumpets and war drums. This Mughals hadn't anticipated and, taken by surprise by the reinforcements, which Shivaji had sent, Diler lost the early advantage, which he had gained.
The Mughal commander remained undaunted. The battle continued, but the forces of nature came to the assistance of Shivaji, for the monsoon rains broke over the battlefield, which greatly dislocated Diler's plans and disarrayed his forces. It was soon realised by Diler that the battle was merely leading to the loss of life without any progress being made towards the capture of the fort. Negotiations were thus renewed with Shivaji and a personal meeting was arranged between the Maratha and the Rajputs. Thus peace was restored by the means of a peace mission between the Marathas and the representatives of the Mughals.
At the battle of Purandar; the Maratha forces was victorious in holding out against the Mughal forces. Maratha also took victory at the battle of Kondhana, which was a night battle, but soon after the victory, the Mughals went on and winning at the following battles: Kalyan, Bhupalgarh and Sangammer. The Maratha went on after losing to the Mughals in three striaght battles in a row, went on winning at the following battles: Nesari and the southern campaign. At the southern campaign in southern India with a massive force of 50,000 strong, which includes 30,000 cavalry and 20,000 infantry. He defeated and capture forts at Vellore and Jini. He also signed a treaty with the Kulub Shah of Golconda. These victories against the Mughal empire was at the battles of Palkhed, Mandsour, Vasai, 1st battle of Delhi and Bhopal.
At this point of the war, it was going bad for the Mughal empire. The Maratha did an expidition to Bengal. The battles of Burdwan, 1st and 2nd battles of Katwa was won by the Bengal forces of the Mughal empire. Maratha finally won at the siege of Trichinopoly and at the capture of Delhi in 1757; the capital of Mughal. When the war between the Maratha and the Mughal forces finally ended. The Maratha empire had devastating blow to the Mughal empire, in which is now a small empire, due to lost of territories.
The Wars of Durrani and the British Empire
After defeating the Mughal empire in a series of conflicts and battles; the Maratha turned their attention on the Durrani empire, which is located in the northwest of India. The Maratha won a decisive victory against the Durrani empire, and annex their lands and added to the growing of the Maratha empire. They defeated the Durrani at the battle of Attack and at Peshawar. Later on the Maratha empire experience their first civil war in the years of 1762-63 in which the rebels were soundly defeated at the battle of Rakshasbhuvan. The Maratha empire is about to meet it's greatest threat, and another rising empire known as the British empire.
The first Anglo- Maratha war began in 1775-1832. Maratha has successfully defeated the East India Company. After the first Anglo-Maratha war has ended; the East India Company has allied themselves with the Maratha empire to take on the Mysore forces. The Kingdom of Mysore was victorious at the battles of: Siege of Nargund, Adoni and Bahadur Benda. Maratha won battles at: Patan, capture of Shimoga with it's help from the East India Company and at the battle of Kharda.
The Downfall of the Maratha Empire
The downfall of the Maratha empire began with the second and third Anglo-Maratha wars. During these two wars the East India Company of the British empire was so victorious against the Maratha empire. The East India Company has won about 96% of it's battles against the Maratha. The East India Company won battles at Poona, Aligarh, 1st Delhi, Assaye, Laswari, Argaon, Farrukhabad and all the way up to the siege of Bharatpur. At the end of these two wars, it devastating the Maratha empire and the British empire has annex all of India.
Other sites to check out more about the More clan in India:
http://www.shivchhatrapati.com/biography/javli.php?id=0
http://www.iranchamber.com/history/articles/iranic_identity_of_mauryas3.php
http://parsooram-on-shivteerthaatan.blogspot.in/2012/01/chapter-one-making-of-pratapgad-fort.html?m=1.
Clan Morè's Castles in India
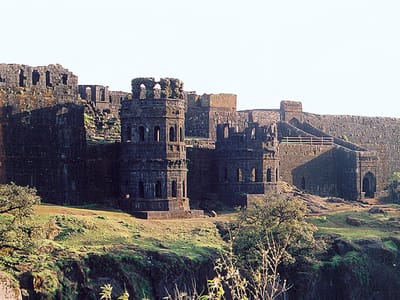
Castles belonging to the Mores in India:
1. Raigad Fort- was built by Chandrarao More in 1030 and was occupied by the clan.
2. Fort Mangalgad- was built by Chandrarao More and occupied by the clan until 1648.
3. Khelana Fort- Built and owned by the More clan.
1. Raigad Fort- was built by Chandrarao More in 1030 and was occupied by the clan.
2. Fort Mangalgad- was built by Chandrarao More and occupied by the clan until 1648.
3. Khelana Fort- Built and owned by the More clan.
History of Clan O'Mordha/ O'Moore
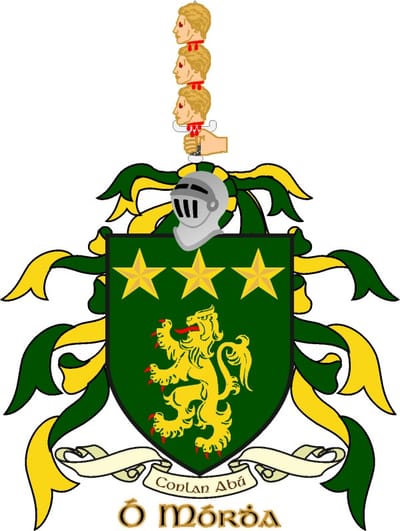
When the fleet reached Galicia; they brought the fallen to their families, and the sons of Mil sought revenge for his uncle death. They embarked with their warriors and also their families to Ireland with sixty five ships. A bard named Amairgin, who was the son of Mil, led the warriors to invade Ireland against the Dananns. The Dananns decided to avoid confrontations with the Milesians force by using their magic to hide Ireland in a fog. The Danann had also cast another spell of straying on the Milesian's fleet. However Amergin used his own magic to dispel their magic. Another son of Mil, named Ebaer Donn, wanted to exterminate the entire Danann race. The Danann then send a magical storm against the Milesian's fleet, where Eber was thrown overboard and drowned in the raging sea.
The Skirmish of Tailtiu
The Skirmish of Tailtiu may have been more of a skirmish between the Milesians and Dananns. There is not a whole lot of information about this battle between the two forces. One thing we do know, is that all three kings and queens of the Danann forces were killed in this battle, and were forced to retreat. After the skirmish or battle at Tailtiu; the Milesians has finally secure a landing in Ireland. Three days later when the Milesians began to move inland; they were again met by the Danann's forces at the battle of Sliabh Mis. This battle, by research is claimed to be the very first major battle to be fought by the two tribes. This battle will ended up in a bloody battle for both sides.
The Battle of Sliabh Mis
This is an account of the following battle. Three days after the skirmish at Tailiu; the Milesians, which is now refer to as the Gaels by the Dananns were attacked. The Dananns were led by Eriu, wife of Mac Greine son of the sun, and she having a good amount of soldiers that accompany her. They fought a hard battle, and many were killed on both sides. This was the first major battle between the sons of the Gaels and the forces of Dananns for the kingship of Ireland. It was in this battle, that, Fais, wife of Un, was killed in a valley at the foot of the mountain, and it was named after her " The valley of Fais." Scotia, wife of Milesius, was also killed in this battle, and she was buried in a valley on the north side of the mountain near the sea.
The sons of the Gaels had lost no more than three hundred of it's forces, while comparing to the Danann's forces; they have lost a thousands of it's men. Eriu was defeated and driven back to Tailltin, and as many of her soldiers, who can hold together. When she came to Tailltin; there she told the people on how she was defeated in battle against the Gaels, and lost her best men in pitch battle. The Gaels has stopped their advance after the battle was won; collected their dead from the battlefield and gave them a proper burial to honor their fallen. They gave a great burial to two of their Druids, Aer and Eithis; that were killed in the battle.
After the Gaels have rested for awhile, they went on to Inver Colpa in the county of Leinster, and Heremon and his men joined them. Then the Gaels send a messenger to the three kings of Ireland of the tribe of Danann. The three king's sons were Cermait, Honey and Mouth and bade them to come out and fight a final battle to determine the ownership of Ireland once and for all. This upcoming battle will decide the fate of Ireland on who will have complete control and kingship over Ireland. This will be the last and final bloody battle between these two tribes for kingship of Ireland.
The Battle of Tailltin
So, the Danann's forces came out to meet the Gaels, and fight a finally pitch battle for Ireland. The best fighters on both sides has gather on the field of Tailltin, and they began to attack one another. The sons of the Gaels remembered the death of Ith, and there was a great anger towards the Dananns, and they furiously attacked the Danann's lines to avenge Ith, and there was a fierce battle fought. For a while, neither side got the advantage of the other, but at last the Gaels have finally broken thru the lines of the Danann's army and routed their army from the fields with such a great slaughter, and drove them from the battlefield. Their kings were killed in the rout, and also the three queens of Ireland, which their names of the queens were Eriu, Fodhla and Banba.
When the Danann saw their leaders were dead; they began to fall back in great disorder, and the sons of Gaels followed after them. Following the Danann's force; the Gaels have lost two of their best leaders named Cuailgne, son of Breagan at Slieve Cuailgne, and Fuad, his brother, at Slieve Fuad. They were in no way daunted by the lost of their two leaders, but they continue to pursue the fleeing Danann's force, so hotly that they were never able to bring their army together again, but had to admit to themselves that they were defeated by the Gaels. The Dananns had no choice, but to hand over Ireland to the Gaels. The leaders, and the sons of Mileius had divided up the provinces of Ireland between them. The first son, Heber took the provinces of Munster, and he share Amergin with his other brother. The second son, Heremon got Leinster and Connacht for his share, and the third son, Eimhir, son of Ir, son of Miled and some of their chief men of the county of Ulster.
It was one of the sons of Eimhir, that were called the children of Rudraighe, and that he lived in Emain Macha for nine hundred years, and some of the best men of Ireland came from there, which includes the following: 1. Fergus, son of Rogh 2. Conall Cearnach of the Red Branch of Ulster Now, the O' Mordha/ O' Mores were descendants of Conall Cearnach. From the son of Ith, the first Gael to get his death in Ireland. There came in was Fathadh Canaan that got the sway over the whole world from the rising and to the setting sun, and that took hostages of the streams, the birds, and the language.
It is what the poets of Ireland used to be saying " That every brave man, good at fighting, and every man that could do great deeds and not be making much talking about them, was of the sons of the Gaels, and that every skilled man that had music and that did enchantments secertly, was of the Tuatha de Danann. But they put a bad name on the Firbolgs and the men of Domnand and the Gaileoin, for lies and for big talk and injustice. But for all that, they were good fighters among them, and Ferdiad, that made so good a stand against Cuchulain in the war of the Bull of Cuailgne, was one of them. The Gaileoin fought well in the same war; but the men of Ireland had no great liking for them, and their Druids drove them out of the country afterward.
The Birth of Clan O'Mordha
It all begins with the legendary hero and found of Clan O'Mordha of Ireland. His name is Conall Cernach in which his descendants of Clan Muir. From the time of the Milesians, to the Red Branch of Ulster, to the formation of Clan O'Mordha/ O'More, and all the way to modern day Ireland. The Clan O'Mordha fought in many of Ireland's war, feuds, and against invaders. The bravery, curageous and heroism of clan O'Mordha has play an important role in Ireland history and even stories of tragedy. This is their story of the bitter fighting for freedom between the Native tribes, Clan feuds, The English army, and over sea fighting in Irish battalions and regiments. The Blood and sacrifice that the O'Mores had shed to bring freedom, and defending the clan in Ireland's turbulence history.
The Legendary Founder
Conall is descendants from the Milesians tribe and also of royal blood of the Galician Kings and queens of Galicia, Spain. Conall Cernach is the founder of Clan O'Mordha/ O'Mores, and was part of the most elite knights of the Red Branch. His journey from Ulster, Ireland all the way into Jerusalem. Conall is also known as Conall the Victorious. He became a legendary figure during his services in the Red Branch of Ulster. He has served the Kings of Ulster with much bravery and courage against the king's enemies. The Red branch Knights had a passion for building great forts in Ulster to defend the county from invaders. The red branch of Ulster is consider to be a band of elite warriors to defend Ulster from it's enemies.
This is his story of courage, bravery and loyalty. His father was Amairgin mac Echit and his mother was Findchoem. His parents' marriage was barren, until Findchoem visited a druid and was advised to drink from a certain well. She took a drink from the well, swallowing a worm with it, and became pregnant. Findchoem's brother Cet mac Magach a Connachtman, protected his sister until she gave birth to a son, Conall. Druids came to initiate the child into their religion, and prophesied that he would kill more than half of the men of Connacht, and that he would always have a Connachtman's head on his belt. Cet took the child, put him under his heel and tried to break his neck, but only damaged it, leaving Conall with a crooked neck.
Battle of Howth
Conall Cernach fought at the Battle of Howth. He fought Mes Gedra, king of Leinster, in single combat following a battle provoked by the Ulster poet Athirne. Mes Gedra had lost a hand in an earlier fight, so Conall fought him with one hand tucked into his belt. He won, taking his opponent's head as a trophy. When he put Mes Gedra's head on his shoulder, it straightened his neck. Conall's charioteer couldn't carry the head, so he cut out the brain and preserved it by mixing it with lime. The calcified brain was later stolen by Cet and used to kill Conchobar mac Nessa.
Battle of Da Derga's Hostel
Conall was also a supporter the King named Conaire Mór (Conaire Mor) was the greatest high king during the period. He was one of the warriors defending Conaire Mor, during the Destruction of Da Derga's Hostel. Ingcel and his bandits arrived at the hostel, and they were determined to attack the hostel. He went and spied on those inside the hostel. When Ingcel returned, Conaire's foster-brothers realised that their king was there. The story went into great details, with the foster-brother identified each of the champion in Conaire's retinue, including , Conall of the Victorious son Cromar, and Mac Cecht, the son of Snade Teched. Ingcel ordered his men to attack the hostel. They were repulsed with heavy causalities from Conaire and his followers. Ingcel ordered to burn the hostel to the ground. The warriors inside, put out the fire with all water and wine that can be found in the hostel. After hours of fighting, only less than handful of warriors were left inside the hostel.
Conaire Mór, dying with thirst, ordered Mac Cécht to procure him with drink. Mac Cécht was reluctant to leave his king, but managed to break free from Ingcel's bandits. Outside, Mac Cécht went in search for water, but the Dananns hid all the water sources from the hero, with magic. Lakes and rivers seemed to dry up when Mac Cécht appeared. After hours of searching, Mac Cecht managed to fill the cup with water, and began his trek back to the hostel.
By the time Mac Cécht returned, the other champions were either dead or had fled. Mac Cécht saw two men severed his king's head. Mac Cécht attacked the two men beheading his enemies with his sword. Taking up Conaire's head, Mac Cécht poured water into mouth. Conaire Mór spoke, praising Mac Cécht for his duties to his king, of fetching water for the king. Conall was forced to withdraw from the fighting, when he was severely wounded, leaving his dying king.
Mac Da Thó's Pig
Cet is exulting in his victory over the full warrior contingent of Ulster present, the Ulster hero Conall enters the hostel, and leaps into the middle of the hall to roars of welcome from the Ulaid. Cet and Conall acknowledge each other in an exchange of archaic rhetorical verses, and Cet concedes that Conall is a better warrior than he. Cet adds that his brother Anlúan would best Conall in a contest: "'It is our misfortune that he is not in the house.' 'Oh but he is,' said Conall, and taking Anlúan's head from his wallet he threw it at Cet's breast so that a mouthful of blood spattered over the lips." Conall would have a fierce rivalry with Cet for the rest of his life.
He shamed Cet at a feast at the house of Mac Dá Thó, a hospitaller of Leinster, when the warriors of Connacht and Ulster competed for the champion's portion by boasting of their deeds. Cet reminded all comers how he had bested them in combat, including emasculating Celtchar with his spear. However, just as Cet was about to carve, Conall arrived, and his boasts topped even Cet's. Cet admitted defeat, but claimed that if his brother Anlúan were present, his feats would top even Conall's. Conall responded by tossing him Anlúan's freshly severed head.
The Bricriu's Feast
He also competed for the champion's portion at a feast held by the troublemaker Bricriu, albeit with less success. Bricriu went in turn to Conall, Loegaire Budadach and , and promised each of them the champion's portion. When the feast started each of the three warriors' charioteers stood up and claimed the champion's portion for his master. A fight broke out between Conall, Láegare and Cúchulainn, until King Conchobar, Fergus, and Sencha, intervened to separate them. Meanwhile, Bricriu went to each of the three heroes' wives - Conall's wife Lendabair, Lóegaire's wife Fedelm, and Cúchulainn's wife Emer - and promised them precedence at the feast, and when the women approached, Conall, Lóegaire and Cúchulainn were almost set to violence again.
Emer was the first to enter, as Cúchulainn lifted the side of the house up to let her in, tipping Bricriu into a ditch. The Ulstermen asked first Ailill and Medb, king and queen of Connacht, then Rio Cu , king of Munster, to adjudicate the dispute. In every test set, Cúchulainn came out on top, but neither Conall nor Lóegaire would accept the result.
Finally, a hideous, giant churl, carrying a huge axe, appeared at Emain Macha . He challenged each of the three heroes to cut off his head, and then allow him to return the next day to cut off the hero's head. Lóegaire accepted the challenge and cut off the churl's head, and the churl picked up his head and left. He returned the next day, but Lóegaire was nowhere to be seen. Conall was the next to take up the challenge, but he too did not fulfil his side of the bargain. Finally Cúchulainn cut off the churl's head, and submitted himself to the churl's axe the following day as promised. The churl spared him, revealed himself as Cú Roí, and declared that Cúchulainn should have the champion's portion undisputed at any feast held by the Ulstermen.
The death of Cúchulainn
Conall and Cúchulainn had sworn to each other that whoever was killed first, the other would avenge him before nightfall. When Lugaid mac Con Roi and Erc mac Cairpri killed Cúchulainn, Conall pursued them. Lugaid had also lost a hand, and Conall again fought one-handed, but this time he only won after his horse took a bite out of Lugaid's side. He took both their heads, and when he took Erc's head back to Tara his sister, Achall, died of grief.
Final Showdown with Cet
Conall pursued Cet after he had made a raid on Ulster, killing twenty-seven men and taking their heads. It had snowed, so he was able to follow his trail. He caught up with him, but was reluctant to face him until his charioteer chided him for cowardice. They met at a ford, and Conall killed Cet in a ferocious combat that left Conall near to death himself. He was found by Belchu of Breifne , a Connachtman, who took him home, tended to his wounds, and planned to fight him when he was fit. But Bélchú soon regretted his honourable behaviour and asked his three sons to kill Conall as he lay in his sickbed. Conall overheard and forced Bélchú to take his place in the bed, and when his sons arrived they killed him instead. Conall then killed the three of them and took all four heads home.
Fráech's Cattle Raid
He told of how his friend Cúchulainn had made him a copy of his own Gáe Bolg, the magical
spear of death, made by the warrior princess Scáthach from the bones of great Coinchenn the sea monster. He told of how he and Fráech has followed the pirates to Scotland where Fráech’s family had been sold to slavers from the south. Down through Britain and into Gaul they raced, eventually finding the family sold to a rich merchant that lived on the southern slopes of the Alps. Great were the cheers in the hall when he recounted how Fráech slew 100 guards and he 200, their battle hardened skills with sword, spear and shield were no match for the men the merchant had hired.
To allow Fráech and his family to escape, Conall had taken a stand in a narrow ravine leading north into the mountains. Conall stood alone and met all challenges with sword and spear. Eventually a Roman general was summoned and asked Conall for a parley. The Roman general amazed by the prowess of this tall red haired warrior from the north offered him terms. Where he to give the Roman army 5 years of his time and expertise no action would be taken against him, Fráech or his family who would be allowed free passage back to Ireland. Conall a man known for his foresight and wisdom accepted the offer and was duly enrolled in the General’s army as a foot soldier and took the name Longinus.
Roman Army Stationed in Jerusalem
As time passed Conall’s skill at arms meant he soon was promoted and in a remarkably short time was made a centurion and was sent by order of Emperor Tiberius into the cities of the east to put down revolt and sedition. Which is how Conall found himself arriving in Jerusalem, the city of the Jews, on a hot and sultry Friday. It was shortly before noon when they reached Jerusalem, the city of the Jews. It was a strange day, the sun hung a ball of raw fire in the heavens. Like all the cities he had seen the air was filled with the noise of shouting men, wailing of women and screaming children, as always it hurt the ears of chieftain of Dunservick and he was ill at ease when he reported to his cohort commander. “No time for rest” the commander told him, “Take your men up the hill to the east to a place these local heathens call Golgotha. We use it for executions, it is easy to find, just follow the crowds and your nose.
The Prefect Pilate is playing politics with the Jewish Sanhedrin, tomorrow is one of their 100’s of holy days and these criminals MUST be executed band off their crosses before sundown of there will be hell to pay. So off you go and break their legs, that will speed up the dying and then we can all relax. Oh .. one of the men is a special Jew … some business with calling himself King of the Jews, he has followers … they may cause problems, make sure they do not!” Conall nodded and left. This was not a duty he liked . He was a warrior of the Red Branch, duty bound to be honorable and fair in all things and the way the Romans dealt with problems was not to his taste.
When there was a dispute or a crime it was best solved by single combat, winner takes all that was the Red Branch Way. The torturous deaths these Romans had thought up had no honor and it sickened the Irish warrior’s heart when he rode down avenues lined with small forests of crosses hung with the corpses of offenders. Up past the bare brown synagogues and closely packed houses Conall and his troops marched following the hurrying crowds. Here and there groups of women talked in whispers, pausing at sight of the Romans and the tall red haired chieftain of Ulster.
Conall Cearnach wore his wide-spreading scarlet cloak, fastened with a large brooch of Irish gold in the shape of a deer across his breast, and his red hair fell down in many plaits to his broad shoulders, each plait being tied at the end by a red string and tiny ball of gold. His short trimmed beard was red as his hair, his cheeks were like an apple when the sun had kissed it, and his blue bright eyes, keen-glancing, drew the eyes of all to look at him. On the way up the hill Conall noted the splashes of bright red blood and the score marks made by the heavy crosses as they were pulled by those being executed. This was the final straw and into the soul of Conall a hot anger came a-rushing as he broke away from his troops and sped like a blast of wind towards the place where the people were thickest. One thought filled his mind, “I will not let this happen. If this special man needs a champion then his champion I will be! It was not to be, pushing his way through the crowd it was a bleeding and dying man that hung on the center cross below a sign that read “Jesus Of Nazareth, King of the Jews”.
Another two men hung on similar crosses, one on the left the other on the right. The chieftain of Dunservick’s eyes clouded in anger at the sight. As Conall drew close to the center cross the man’s dry and bloodied lips opened and in a hoarse whisper he said “I am thirsty. Conall took a sponge from his pack and dipped it in a jar of rough sour wine mixed with numbing herb wormwood, placed it on the butt end of his spear and held it to the man’s lips. The man weakly sucked it for a minute and looking down directly into the eyes of Conall he whispered “It is finished” and he died. It was as if in that last flash of life something had passed between the two men. Something strange yet wonderful had filled Conall’s heart.
Conall’s soldiers arrived and used a hammer to break the legs of the man crucified on the left. The man screamed once and died. The soldiers moved to Conall and looked at him for permission to carry out their orders. “Hold” said Conall, “He is gone” and to prove it he took his spear, the very one given him by Cúchulainn and thrust it deep into the man’s side, blood flowed weakly but did not pulse as it would with a beating heart, the man was indeed dead. The soldiers moved to the third man and dispatched him with the hammer as they had the first. The skies darkened with boiling clouds until the sun itself disappeared and it was as if night had fallen. The sky was rent with a furious chachophny of thunder, the ground shook as if a giant stamped his feet and all around Golgotha long dead corpses rose from their graves and walked amongst the living. Conall took the arm of a woman weeping near the foot of the cross.
It was the man’s mother, he told her sadly and slowly “It was wrong your son died this cruel and untimely death. I share your grief little mother and were my brothers of the Red Branch not so far away, there would be a reckoning both fierce and swift.” The woman’s eyes met Conall’s and he knew in his heart that revenge was not proper here and his anger had no place in the grief of this mother. He knelt beside her and said “I know little of your religion and I did not know your son or if his crimes deserved this punishment but it seems to me in my heart, he was the true son of God” He helped her to her feet and onto the arm of one of her friends silently weeping behind her.
Conall felt a sharp tug on his cloak, behind him stood a well dressed man, “Centurion” he asked “although I can see by your looks you are not Roman can I ask you a favor citizen to citizen?”. Conall nodded and the man continued “I am Joseph from Arimathea a Jew like this man Jesus, I have asked Pilate if I may take his body to my tomb not far from here and bury him before the day is done and he has agreed … but I cannot do this by myself and I fear that we may be delayed by his enemies” The red haired warrior considered this and without a word set to assisting Joseph in moving the body to a tomb in a cave some half a mile away. Once the body of the man had been laid in the tomb the women cleaned and dressed the body as was set in their customs. When they finished the body was left alone in the tomb.
A large stone had been cut for the purpose of sealing the tomb but was so large that no normal man could move it. Conall took the butt of his spear and jammed it under the stone and flexing his broad shoulders he levered the stone inch by inch until it sealed the tomb tight. As the stone fell into place the unbreakable shaft of the spear made by Cúchulainn shattered into two pieces. Joseph was a rich man and he offered to have the spear head re-shafted, but Conall refused saying “This spear has done all it’s work and I swear on my honor it will never be used in anger again. I will keep the head as it is now stained with this innocent blood as a remembrance of the evil done this day”.
Joseph in return passed him scrolls on which he had written the story of Jesus from his birth to the last supper he had with his 12 friends. With that Conall returned to the barracks resigned his commission and started his long journey home. As Conall finished his tale, silence fell in the great hall for they all could see in the eyes of their chieftain the pain he carried in his heart from being even a minor a part of this evil deed. This was a pain that he would carry for the rest of his days. All eyes were downcast as the chieftain reached into his bag and took the broken spear head. He wrapped it in the fine linen napkin from the table and strode from the hall into the storm and out through the great castle gates and up onto the cliff path. He returned the following morning empty handed.
No one followed him and he never spoke of where he hid the spear that pierced the side of Jesus. That secret he took to his grave. In pagan Ireland news of strange Gods from far off countries were soon forgotten by all but Conall himself. He tried his best to follow the teachings of the rabbi from far away Nazareth written on the scrolls. And so it was nearly 400 years later after Saint Patrick brought Christianity to Ireland and the new religion slowly replaced the old that the story of the hidden spear surfaced again when Saint Gobhain was lead by a mysterious holy flame to build his church on the edge of a cliff above a cave half way between Dunseverick castle and White Park Bay a church that still stands to this day.
Conall, the founder of clan O'Mordha and eventually Muir. He has became a great legendary hero who fought for the Knights of the Red Branch with much victories and ending his career in the Roman Army, which eventually made him become Christianity after seeing Jesus dying on the cross. Something inside of Conall has change forever.
“As we record our history we move into the future. We the Irish O'Mores have not a reason to hide our past for we fought the good battle.” by The Clan O'More Website
The ancient Irish family of the name descends from O'Mordha (meaning majestic). The ancestor from whence they sprung was Conal Cearnach one of the Red Branch knights of Irish history. Under various spellings of the name in Ireland, the More, O'More or O'Moore family can be traced to Ireland and Moore can be traced to English and French origins. 'Moore' is an English spelling for which the Irish O'Mores were forced to take. It can well be said that the name Moore was given to English families to confuse the Clan O'More in Ireland.
The Chieftians of Clan O'Mordha:
the Chieftians of Leix: (Note:mac means son of..) Year:
Chief: 1016 Gahan O’More, (?) lord of Leix, slain. 1017
Cearnach O’More, lord of Leix, slain. 1026
Aimergin mac Kenny mac Cearnach O’More, lord of Leix, slain. 1041
Faelan mac Aimergin O’More, lord of Leix, blinded; died in 1069. 1042
Cucogry O’More, lord of Leix, living. 1063
Lisagh mac Faelan O’More, lord of Leix, slain 1069
Macraith O’More, (?) lord of Leix, slain. 1091
Kenny O’More, lord of Leix, slain. 1097
Aimergin O’More, lord of Leix died. 1098
The son of Gahan O’More, lord of Leix, slain. 1149
Lisagh mac Aimergin mac Faelan O’More, lord of Leix, died. 1153
Neill O’More, lord of Leix, blinded. 1158
Macraith O’More, lord of Leix, living. 1183
Cucogry mac Lisagh O’More, lord of Leix, living. 1196
Donnell O’More, lord of Leix, slain.[It is a remarkable fact the “The Irish Annals” make no mention of an O’More, Chief of his name, during the thirteenth century] 1319
Shane mac Donough O’More, (?) lord of Leix, slain. 1342
Lisagh O’More, lord of Leix, slain. 1348
Connell O’More, lord of Leix, slain. 1354
Rory mac Connell O’More, lord of Leix, slain. 1368
Lisagh mac David O’More, (?) lord of Leix, died. 1370
Murtough O’More, (?) lord of Leix, slain. 1394
Donnell O’More, lord of Leix, living. 1398
Melaghlin O’More, lord of Leix, died. 1404
Gillpatrick O’More, lord of Leix, living. 1464
Kedagh O’More, lord of Leix, died. 1467
Donnell O’More, lord of Leix, died. 1477
The son of Owny O’More, (?) lord of Leix, slain. 1493
Connell mac David O’More, lord of Leix, slain. 1493
Neill mac Donnell O’More inaugurated lord of Leix. 1502
Melaghlin mac Owny mac Gillpatrick O’More, lord of Leix, died. 1523
Kedagh mac Lisagh O’More, lord of Leix, died. 1537
Connell mac Melaghlin mac Owny O’More, lord of Leix, died. 1538
Peirce mac Melaghlin mac Owny O’More, lord of Leix, (?) died. 1542
Kedagh roe mac Connell mac Melaghlin O’More, lord of Leix, died. 1545
Rory coach mac Connel mac Melaghlin O’More, lord of Leix, slain. 1548
Gillpatrick mac Connell mac Melaghlin O’More, lord of Leix, died. 1557
Connell og mac Connell mac Melaghlin O’More, lord of Leix, hanged. 1578
Rory og mac Rory coach mac Connell O’More, lord of Leix, slain. 1584 (circa)
.James mac Kedagh O’More, alias Meaghe, lord of Leix, died. 1600
Owny mac Rory og mac Rory coach O’More, lord of Leix, slain. 1600
Owny mac Shane O’More, appointed lord of Leix.
Clan O' Mordha/ O'Moore's Septs:
This is an official list of Septs belonging to Clan O' Moore in Ireland: Mordha, O' Mordha, McMoore , O'Moore, O'Moire, O'More Mac Gaethin (GAHAN, MacGEEHAN, MAGEEHAN), Mac Ceadach (KEADY, KEADIE, KEDDY, KEEDIE, KEEDY, MACKEADY), Ó Leathlobhar (LALOR, LAWLOR), Ó hArraghain (HARRIGAN, HARAGHAN, HARAHAN), Ó Liathain, Mac Laoidhigh (LEE, MacLEA, MacLEE), Ó Suaird (SWORDS SORD, SOURDES, SUARD), Ó Broithe (BROPHY, BROFIE), Ó Casain (CASHIN, KISSANE), Ó Deoradhain (DORAN, DORRIAN), Ó Dunlaing (DOWLING), and Ó Duibhgainn (Deegan)
The O' Mordha/ Moore/ O'More lands in Ireland belong to the family at one point.
Clan O'Mordha Historic Seat Conall Cearnach of Ulster- The Branch of the red knights
O'Mordha of Laois- Leinster Province
Moore of Drogheda
Moore of Mooresfort, Co. Tipperary
Moore of Mountcashel
Moore of Ballina Co. Mayo
Moore of Rosscarberry Co. Cork, Ireland
Moore of Ballymacrue, Co. Cavan
Moore of Carra, County Mayo
Moore of Antrim
Moore of Barmeath
Moore of Favor Royal
Clan O'More was a very powerful Irish clan, a clan the English hated. English families with the name Moore began to settle in the province of Munster in the 12th century. Their name is said to stem from the word 'moor', meaning "strong mountain". The O'Mores were the leading tribe of the "7 Septs of Leix". They fought hard to keep Ireland free from invaders and many died. In 1609 the English transplanted the remnant of the clan to Co. Kerry, around Tarbert in hopes they would die. Still many returned to their ole grounds in Co' Leix. Keatings History says that St.Fintan is our patron saint. As we record our history we move into the future. We the Irish O'Mores have not a reason to hide our past for we fought the good battle.
Maol Mordha Rises Against Brain
Murchadh dragged Maol Mórdha from hiding in a yew tree. Maol Mórdha’s life was spared and he was allowed to remain king of Leinster. To cow any potential challengers, Brian built fortresses, strengthened the fortifications of Cashel, took hostages, and sent Murchadh on punitive raids. Although Cashel was his capital, Brian preferred to rule from his boyhood home, Kincora. He was fortunate that his sons proved loyal and did not turn on each other—or on him. In the subjugated Norse towns, trade with Europe flourished in slaves, wine, walrus tusks, spices, furs, and silks. From Brian’s vassal kingdoms, a ceaseless tribute of cows, hogs, cloaks, iron, and wine flowed into Munster.
Decades of raids by Vikings, by Irish lords, and even by Irish abbots had caused much damage to the land. Brian used his growing wealth to improve roads, build bridges, restore old churches and monasteries, and build new ones alongside schools. For nearly a decade, minor feuds aside, Ireland enjoyed untypical peace and a cultural renaissance. Trouble brewed when Brian became estranged from Gormfhlaith, who left Kincora to return to Dublin. Consumed by hatred for Brian, she egged on her son, Sigtrygg, and King Maol Mórdha to rise against Brian. Brian responded with a severe new tribute that sent Leinster into near-starvation and summoned Maol Mórdha to Kincora for a show of obedience. Coaxed into an argument by Murchadh, Maol Mórdha stormed out of the castle before consulting with Brian.
A messenger sent after him by Brian was later found with his skull smashed in. Whether the threat was real or imagined, Maol Mórdha reformed his alliance with Sigtrygg. Maol-Seachlainn, however, stayed loyal to Brian. He even sent his army against Dublin, but suffered a crippling defeat. In 1013, Brian and Murchadh arrived to plunder Osraighe and southern Leinster before heading on to Dublin. Early in September, Sigtrygg watched as Brian and Murchadh’s army set up camp outside the city’s landward walls. This time, however, Sigtrygg wisely did not sally forth. The fortifications of the Viking strongholds were more formidable than those of the Irish forts and, when resolutely defended, were beyond Brian’s or any other Irish king’s power to overcome. After more than three months of blockade, Brian’s forces stirred with mutiny because supplies were running low and the foul winter weather was on the way.
Sigtrygg jeered as Brian’s humbled army broke camp, but he knew that Brian would return. In search of allies, Sigtrygg set off to the hall of Sigurd Hlodvirsson the Stout, the Norse earl of the Orkneys. In return for bringing a few hundred half-heathen, half-Christian men as reinforcements, Sigurd demanded Gormfhlaith’s hand in marriage and an Irish kingdom to rule. Gormfhlaith was pleased with her son, but counseled Sigtrygg to gather an even greater force. He found more help in the pirates of the pagan Dane, Brodar of the Isle of Man. The cunning Sigtrygg promised Brodar the same reward he had promised Sigurd. Brodar and Sigtrygg reckoned that, at the comparatively advanced age of 54, Sigurd could well die in battle. In the coming conflict, Brian depended on his loyal Munster warriors, as well as the Danish stewards of Waterford and Limerick.
Only a few reinforcements strode forth from Connacht, and none came from Ulster. Fortunately for Brian, Maol-Seachlainn promised to help, and a new ally was found in Brian’s son-in-law, King Malcolm II of Scotland, who sent a small force commanded by Domhnall, the great steward of Mar. It was also heartening to hear that southern Leinster had refused to aid Sigtrygg and Maol Mórdha. With his 5,000 warriors, Brian still held numerical superiority over Maol Mórdha and Sigtrygg, who barely commanded more than 3,000 Vikings and Irishmen between them. Nevertheless, Brian had to act quickly to wipe out Dublin’s and Leinster’s newfound independence before the neutral Irish kings could turn against him.
Brian’s youngest son, Donnach, took a few hundred men to keep an eye on southern Leinster. Brian set up his own camp north of Dublin on a hillock in the Wood of Tomar. From there he could see the city to the south, its harbor thick with Norse longboats, and between Brian’s camp and the city, the sprawling tents and campfires of his enemies. Maol Mórdha, Sigurd, Brodar, and Dubhgall, Sigtrygg’s brother, had set up their camps near the little fishing weir of Clontarf. Sigtrygg remained in Dublin with a reserve force. On Thursday, April 22, 1014, Brian sat down to take council with his lords. Tempers flared, and as a result Maol-Seachlainn withdrew his forces to Meath. The hot-headed Murchad might well have been to blame. Brian now no longer held the numerical advantage. He immediately sent word for Donnach to hurry back, but there was little chance his son would arrive in time.
Brian’s hair was now silver, and he was73 years old. Too old to personally lead his warriors in battle, Brian would have to depend on Murchadh, who was unquestionably brave but also reckless. That night, Brian’s mind was haunted by worries. According to legend, a banshee visited Brian and warned him that he would fall in battle, and that “this plain shall be red tomorrow with your proud blood.” On the Viking side, Brodar, who was widely believed to be a sorcerer, prophesied that should they fight on Good Friday, Brian would die, but his army would be victorious. Whatever the truth behind such tales, Maol Mórdha, Sigtrygg, Sigurd, and Brodar all knew that they had to strike before Donnach returned. Brian had lost none of his regal bearing as he reviewed his army at dawn of Good Friday.
He looked to his brave Dalcassians, who Murchadh would use to spearhead the attack. Ready to fight beside Murchadh was his 15-year-old son, the crown prince Tordhelbach, and Murchadh’s brothers, Conchobhar and Flann. Behind them fluttered the banner of Brian’s nephew, Conaing, king of Desmond. Also present that day were the Eoganacht lords Cian and Domhnall, Domhnall, the great steward of Mar, King Tadhg of Connacht, and an array of lesser kings and princes. On his wings, Brian stationed his 10 Danish stewards and their troops Brian’s army followed Murchadh’s blue banner to meet the oncoming Dublin-Leinster coalition at Clontarf. The latter advanced with Sigurd and Brodar’s Vikings in the lead, followed by the Danes from Dublin and, behind them, Maol Mórdha and his Leinster men. Murchadh recklessly initiated the attack by bolting ahead of the main army.
Alarmed, Brian called for him to fall back into line. Murchadh replied that he would not retreat one step backward. Inspired by Murchadh’s valor, the rest of Brian’s army surged forward. Meanwhile, Brian knelt down before his pavilion to pray for victory. Below him the two armies collided in a deafening crescendo of clashing arms and battle cries. From behind their large round shields, protected by leather and ring-mail byrnies, the Danes slashed and thrust their axes, spears, and swords. Their Irish foes lacked armor but not spirit, and fought back with unbridled fury. There were few lulls in the fighting. Engulfed in a semicircle, the Dublin and Leinster men slowly gave way to Brian’s battle-crazed Irish and Danish troops. Although their army fled around them, Sigurd and his guard stood like an unbroken bastion, the legend-shrouded Raven banner of the Orkneys fluttering at Sigurd’s side.
One Viking warrior after another took up the banner, only to be cut down again by Murchadh’s relentless assault. The last hands to grasp the fateful Raven banner were those of its lord. Sigurd wrapped the banner around himself before he was decapitated by Murchadh with two powerful blows to the neck. Scarcely had Murchadh caught his breath from slaying Sigurd than there appeared the fierce Norse champion, Amrud, who had carved a bloody path through the Dalcassians. Murchadh grappled Amrud to the ground and tore away his sword. Murchadh leaned the pommel of the sword against his own breast and drove it three times into Amrud, piercing the earth beneath him. Gurgling blood, Amrud plunged his own blade into Murchadh, killing him simultaneously. Panicked Norsemen and Leinstermen threw themselves into the ocean, hoping to reach their longboats. Heedless of their own safety and hungry for blood, their pursuers followed them into the waves.
The high tide carried both to their doom. His hands locked upon the hair of a Dane, Murchadh’s son Tordhelbach was washed upon the Weir of Clontarf. A stake shot through his body, and he drowned. The number of men killed on both sides was great. Conchobhar and Flann, King Tadhag of Connacht and Domhnall of the Eoganacht were among the 30 Irish chiefs and kings who died that day. Except for Sigtrygg and Brodar, all the Norse-Leinster leaders were slain among their annihilated army. Maol Mórdha and Conaing, king of Desmond, fell by each other’s hand.
From Dublin’s ramparts, the Danish women anxiously watched the battle. Brian’s proud daughter stood there too, and at sight of the Norsemen rout she mocked her husband Sigtrygg. “It appears that the foreigners have gained their their natural inheritance—the sea,” she scoffed. In anger, Sigtrygg hit her in the face, knocking out one of her teeth. Sigtrygg rode forth too late to rally his men and was lucky to flee back into Dublin alive.
The Norman Invasion
In 1152, we learn that Diarmuid Mac Morrough, Diarmuid na Ngall, brought Devorgille, wife of O’Rourke of Breifne, to his castle of Dunamase. (This information is still preserved in the traditions of the locality).Diarmuid had to fly the country on account of his many crimes, for all Ireland was leagued against him. He sought the help of Henry II of England to reinstate him to his kingdom. This led to the Norman Invasion. When Diramuid died, he left his kingdom of Leinster to Strong bow, who had married his daughter, Eva. They had one daughter Isabel who married William Marshall.
They had five sons and five daughters. Marshall was murdered by his fellow-Normans envious of his vast possessions. His sons died and his daughters married English Earls among whom the land was divided, with Eva as the youngest daughter, getting Dunamase. They lived on the Rock, which they erected into a manor, a feudal court, where their tenants came to render aid and service.Their daughter Maud, married Robert Mortimer, Lord of Wigmore. Thus, Dunamase passed from the hands of the O’Mores into those of an English Earl. Some of you may be interested to learn that from this marriage sprang the imperial house of Austria and the royal families of England, France, Prussia, Denmark, Holland, and Sardinia.
Mortimer fortified Dunamase, but as he preferred to live in England, he employed the Chief of the O’Mores to look after his possessions in Ireland. There are many references in the State papers of this period to Dunamase, but as they relate to Anglonorman succession only, they have not great interest in us. In the war between the Geraldines and the Red Earl of Ulster, great havoc was wrought throughout the country. In the reprisals which followed, Maurice Fitzgerald, son of the more famous Maurice, took John de Cogan and Theobald Butler from the sanctuary of Castle Dermot Church and imprisoned them in the dungeons of Dunamase. From this it would appear that Dunamase was then in the hands of the Geraldines in 1264.
The Bruce Invasion
Dunamase must have played no small part in the Bruce Invasion, for Sir Roger Mortimer, its then lord and master, acted as Deputy for the English King. In the large army, which he gathered to oppose the Bruce, there must have been many nobles of the O’More family. As a result of the Bruce invasion, many Irish families, among them the O’Mores and the O’Connors, threw off their allegiance to the English Crown and harassed the Pale. In 1325, Laoiseach O’More, who acted for the absent Mortimer as his captain of war in Laoighis, seized the castle of Dunamase and recovered for his family all the lands held by his ancestors, viz., all that extent of country lying between the Barrow and the Nore, and extending westwards towards the Slieve Bloom mountains, and portions of the present Counties of Kildare and Kilkenny.
Laoiseach was a powerful and wealthy prince, and he was a man held in much esteem by his own people. At 1342 he was killed by one of his own retainers. O’Mores were attacked from all sides by the indignant Normans, but despite a protracted and exhausting war, they maintained their independence for the next two centuries. After Laoiseach’s death, Mortiner recovered procession of Dunamase. He fortified it strongly and made it his chief residence. The more firmly to secure it, he build other castles in the vicinity to replace those destroyed by Laoiseach. From now on, Dunamase was for many years the seat of the English civil and military jurisdiction.
Though Dunamase had passed from their hands for the time being, the O’Mores were not inactive. They harassed the Pale on all occasions, so much so that in 1358, according to the annuals of Ulster, a large force marched from Dublin to invade and lay waste Laoighis. It was defeated by the then chief, and many English fell on the field of battle. In conjunction with Art MacMurrough Kavanagh, the O’Mores ravaged and laid waste the town and county of Carlow. In 1404, Gillapatrick O’More, Lord of Laoighis, defeated the English at Ath Dubh-now Blackford-a few miles from Stradbally, and took great spoil in horses, clothing and arms. In 1421, they defeated the Earl of Ormond at Old AbbyleixOn this occasion, the defeated enemy sought sanctuary in the Cistercian monastery.
To avenge this defeat, the Lord Lieutenant invaded Laoighis, and defeated the O’Mores at Red Bog of Athy, and laid waste their territory. The O’Mores had to sue for peace. About 1444, the O’Mores adopted the English system of primogeniture. The system of tanistry had its faults, the chief being that it led in those turbulent times to quarrels over the right of succession. Malachy O’More appears to have been the chief ruler of Laoighis in those days. His tomb may still be seen in the old Cistercian monastery of Abbyleix, which was build and endowed by his family. In 1480, Gerald More, Earl of Kildare, invaded Laoighis to punish the O’Mores for their depredations on the Pale. In 1513, the Great Earl was wounded by one of the O’Mores and died as a result of his would in Ley Castle. In the following year, Gerald Og, Earl of Kildare, defeated the O’Mores in their own territory. To avenge this defeat, the O’Mores slew the son of the Earl and many others some time after.
1358 - Hugh O Neill defeats the Fer Managh and Orial. O More defeats the English of Dublin in battle
1404- O' Mores fought at the Battle of Ath Dubh- Clan O' More Victory
1421- Battle of Old Abbyleix- Victory
O'more were defeated at the battle of the Red Bog of Athy which lead the O'Mores to sue for peace. Now I be talking about the Cosby and the O'More clan battles, which started with the O'More being massacre at Mullaghmast.
Part II Of Clan O' Moore's History

In 1577, Sir Francis Cosby, commanding the queen's troops in Leix and Offaly, formed a diabolical plot for the permanent conquest of that district. Peace at the moment prevailed between the government and the inhabitants; but Cosby seemed to think that in extirpation lay the only effectual security for the crown. Feigning, however, great friendship, albeit suspicious of some few "evil disposed" persons said not to be well affected, he invited to a grand feast all the chief families of the territory; attendance thereat being a sort of test of amity. To this summons responded the flower of the Irish nobility in Leix and Offaly, with their kinsmen and friends—the O'Mores, O'Kellys, Lalors, O'Nolans, etc. The "banquet"—alas!—was prepared by Cosby in the great Rath or Fort of MullachMaisten, or Mullaghmast, in Kildare county. Into the great rath rode many a pleasant cavalcade that day; but none ever came forth that entered in.
A gentleman named Lalor who had halted a little way off, had his suspicions in some way aroused. He noticed, it is said, that while many went into the rath, none were seen to reappear outside. Accordingly he desired his friends to remain behind while he advanced and reconnoitered. He entered cautiously. Inside, what a horrid spectacle met his sight! At the very entrance the dead bodies of some of his slaughtered kinsmen! In an instant he himself was set upon; but drawing his sword, he hewed his way out of the fort and back to his friends, and they barely escaped with their lives to Dysart!
He was the only Irishman out of more than four hundred who entered the fort that day that escaped with life! The invited guests were butchered to a man; one hundred and eighty of the O'Mores alone having thus perished. The peasantry long earnestly believed and asserted that on the encircled rath of slaughter rain nor dew never fell, and that the ghosts of the slain might be seen, and their groans distinctly heard "on the solemn midnight blast!
O'er the Rath of Mullaghmast, On the solemn midnight blast,
What bleeding specters pass'd With their gashed breasts bare!
"Hast thou heard the fitful wail
That overloads the sullen gale
When the waning moon shines pale O'er the cursed ground there?
"Hark! hollow moans arise
Through the black tempestuous skies,
And curses, strife, and cries,
From the lone rath swell;
"For bloody Sydney there
Nightly fills the lurid air
With the unholy pompous glare
Of the foul, deep hell.
"False Sydney! knighthood's stain!
The trusting brave—in vain
Thy guests—ride o'er the plain
To thy dark coward snare;
"Flow'r of Offaly and Leix,
They have come thy board to grace Fools!
to meet a faithless race, Save with true swords bare.
"While cup and song abound, The triple lines surround
The closed and guarded mound, In the night's dark noon.
"Alas! too brave O'Moore, Ere the revelry was o'er,
They have spill'd thy young heart's gore, Snatch'd from love too soon!
"At the feast, unarmèd all, Priest, bard, and chieftain fall
In the treacherous Saxon's hall, O'er the bright wine bowl;
"And now nightly round the board, With unsheath'd and reeking sword,
Strides the cruel felon lord Of the blood-stain'd soul.
"Since that hour the clouds that pass'd
O'er the Rath of Mullaghmast, One tear have never cast
On the gore-dyed sod;
"For the shower of crimson rain
That o'erflowed that fatal plain, Cries aloud, and not in vain,
To the most high God!"
Battle of Glenmalure
A sword of vengeance tracked Cosby from that day. In Leix or Offaly after this terrible blow there was no raising a regular force; yet of the family thus murderously cut down, there remained one man who thenceforth lived but to avenge his slaughtered kindred. This was Ruari Oge O'More, the guerrilla chief of Leix and Offaly, long the terror and the scourge of the Pale. While he lived none of Cosby's "undertakers" slept securely in the homes of the plundered race. Swooping down upon their castles and mansions, towns and settlements, Ruari became to them an angel of destruction. When they deemed him farthest away his sword of vengeance was at hand.
In the lurid glare of burning roof and blazing granary, they saw like a specter from the rath, the face of an O'More; and, above the roar of the flames, the shrieks of victims, or the crash of falling battlements, they heard in the hoarse voice of an implacable avenger—"Remember Mullaghmast!"And the sword of Ireland still was swift and strong to pursue the author of that bloody deed, and to strike him and his race through two generations. One by one they met their doom: "In the lost battle Borne down by the flying; Where mingles war's rattle With the groans of the dying."
On the bloody day of Glenmalure, when the red flag of England went down in the battle's hurricane, and Elizabeth's proud viceroy, Lord Grey de Wilton, and all the chivalry of the Pale were scattered and strewn like autumn leaves in the gale, Cosby of Mullaghmast fell in the rout, sent swiftly to eternal judgment with the brand of Cain upon his brow. A like doom, a fatality, tracked his children from generation to generation! They too perished by the sword or the battle-ax—the last of them, son and grandson, on one day, by the stroke of an avenging O'More —until it may be questioned if there now exists a human being in whose veins runs the blood of the greatly infamous knight commander, Sir Francis Cosby.
The battle of Glenmalure was fought August 25, 1580. That magnificent defile, as I have already remarked, in the words of one of our historians, had long been for the patriots of Leinster "a fortress dedicated by nature to the defense of freedom;" and never had fortress of freedom a nobler soul to command its defense than he who now held Glenmalure for God and Ireland—Feach M'Hugh O'Byrne, of Ballinacor, called by the English "The Firebrand of the Mountains." In his time no sword was drawn for liberty in any corner of the island, near or far, that his own good blade did not leap responsively from its scabbard to aid "the good old cause." Whether the tocsin was sounded in the north or in the south, it ever woke pealing echoes amid the hills of Glenmalure.
As in later years, Feach of Ballinacor was the most trusted and faithful of Hugh O'Neill's friends and allies, so was he now in arms stoutly battling for the Geraldine league. His son-in-law, Sir Francis Fitzgerald, and James Eustace, Viscount Baltinglass, had rallied what survived of the clansmen of Idrone, Offaly, and Leix, and had effected a junction with him, taking up strong positions in the passes of Slieveroe and Glenmalure.
Lord Grey of Wilton arrived as lord lieutenant from England on August 12th. Eager to signalize his advent to office by some brilliant achievement, he rejoiced greatly that so near at hand— within a day's march of Dublin Castle—an opportunity presented itself. Yes! He would measure swords with this wild chief of Glenmalure who had so often defied the power of England.
He would extinguish the "Firebrand of the Mountain," and plant the cross of St. George on the ruins of Ballinacor! So, assembling a right royal host, the haughty viceroy marched upon Glenmalure. The only accounts which we possess of the battle are those contained in letters written to England by Sir William Stanley and others of the lord lieutenant's officials and subordinates; so that we may be sure the truth is very scantily revealed.
Lord Grey having arrived at the entrance to the glen, seems to have had no greater anxiety than to "hem in" the Irish. So he constructed a strong earthwork or entrenched camp at the mouth of the valley the more effectually to stop "escape." It never once occurred to the vainglorious English viceroy that it was he himself and his royal army that were to play the part of fugitives in the approaching scene! All being in readiness, Lord Grey gave the order of the advance; he and a group of courtier friends taking their places on a high ground commanding a full view up the valley, so that they might lose nothing of the gratifying spectacle anticipated. An ominous silence prevailed as the English regiments pushed their way into the glen.
The courtiers waxed witty; they wondered whether the game had not "stolen away;" they sadly thought there would be "no sport;" or they hallowed right merrily to the troops to follow on and "unearth" the "old fox."
After a while the way became more and more tedious. "We were," says Sir William Stanley, "forced to slide sometimes three or four fathoms ere we could stay our feet;" the way being "full of stones, rocks, logs, and wood; in the bottom thereof a river full of loose stones which we were driven to cross divers times." At length it seemed good to Feach M'Hugh O'Byrne to declare that the time had come for action. Then, from the forest-clad mountain sides there burst forth a wild shout, whereat many of the jesting courtiers turned pale; and a storm of bullets assailed the entangled English legions.
As yet the foe was unseen, but his execution was disastrous. The English troops broke into disorder. Lord Grey, furious and distracted, ordered up the reserves; but now Feach passed the word along the Irish lines to charge the foe. Like the torrents of winter pouring down those hills, down swept the Irish force from every side upon the struggling mass below. Vain was all effort to wrestle against such a furious charge. From the very first it became a pursuit. How to escape was now each castle courtier's wild endeavor. Discipline was utterly cast aside in the panic rout! Lord Grey and a few attendants fled early, and by fleet horses saved themselves; but of all the brilliant host the viceroy had led out of Dublin a few days before, there returned but a few shattered companies to tell the tale of disaster, and to surround with new terrors the name of Feach M'Hugh, the "Firebrand of the Mountains."
Battle of Stradbally Bridge
On May 17-18, 1596, a battle took place in Stradbally. Owney MacRory O'More, chieftain of Leix, was proceeding thru the Stradbally area with his troops (which usually included men of the O'Duinn and O'Dempsey Clans) and demanded passage for his men over the Stradbally Bridge, which crosses over the river of the same name, in the middle of the village. His request, which was considered as a formal challenge to fight, was refused.
The infamous Alexander Cosby, who had been granted by Queen Elizabeth an extremely large area -over 1300 acres plus several town lands and the Monastery of Stradbally - - of the former O'Moores territories, and at the time, was the appointed Chief of the Kerne, proceeded to defend the bridge (and his own lands), taking with him his eldest son Francis, who was married to Helena Harpoole of Shrule, by whom he had a son, William, born but nine months before. Dorchas Sydney , Alexander's wife, who would never allow herself to be called a Cosby, and her daughter-in-law, placed themselves at a window in the abbey, overlooking the bridge - where they could observe the action. For some time they beheld their husbands bravely maintaining their ground.
At length, after some furious engagements, Alexander Cosby, as he was pressing forward was shot, and dropped down dead. Upon this his kern with melancholy outcries, began to give way. Francis Cosby, the son, apprehensive of being abandoned, endeavored to save his own life by leaping over the bridge, but at the very moment he cleared the battlements on the bridge, he was also shot, and fell dead into the river. An interesting anecdote to this story has to do with the two Cosby wives while observing the battle. As their two husbands were killed, one of them called out of the window to the other witnesses "Remember my husband (i.e. Francis) did not fall first, consequently, the estate descended to him and is now the property of my eldest son". Thus, young William of nine months became owner of all the Cosby properties.
This battle occurred after the infamous Massacre at Mullaghmast in 1577, and the later death of Rory Oge in 1578, after numerous successful battles against the British. In 1598, the Irish again broke out in rebellion, under the leadership of Hugh O'Neill, the Earl of Tyrone - and other chiefs. The battle at Stradbally bridge was a continuance of the revenge against the perpetrators of Mullaghmast and the dishonest treatments of the Crown's government; and was followed - under Owney MacRory along with many of the O'Duinns, O'Dempseys, and the brilliant Captain Tyrrel and Captain Nugent - with numerous victories over the forces of St Leger and the Lord Deputy, including that of the battle at the "Pass of the Plumes" in 1599 with the devastating victory over the English army under the Earl of Essex.
Battle of the Pass of the Plumes
On June, 1598 The Annals state that the Earl of Ormond with a great host of twenty-four companies of foot and two hundred horse set out for Laois and encamped in the evening on a high hill on the border. Next morning he sent out his nephew, James Butler, (from whom great hopes in war and in peace had been expected), with a troop to reconnoiter the passes. On the very first pass Butler was met by Brian Roe O 'Mordha, "that most • mischievous and malicious traitor", with 150 men who gave the Ormond troop a fierce and terrific salute and hemmed it in on- all sides. Butler was killed and his force utterly routed— a big blow to the Ormondians. Lord Ormond stated that the scene of this fight was in the great woods of Comagh—a name now obsolete.
On the OML, 1563, a place called "the Comac" is marked not far from Ballyfin, and it is thought that the high hill on which the Ormond camp was pitched may have been Conlawn or Conlon Hill in the ancient Fearann, O Dunlaing (or, corruptly, O Doolan) territory—in the Slieve Blooms adjoining Ui Failghe. On the very day after the battle, Owney and Captain Tyrrell arrived and pitched their camp on hill right opposite that occupied by Ormond. Before noon next day instead of continuing his projected march through Laois, Ormond and his force returned to Kilkenny.(Discretion perhaps was the better part of valor).
August, 1598 Noting the success of the northern chiefs at Clontibret (Monaghan) and at Beal an Atha Bui (Yellow Ford), the southern chiefs, whose lands had been distributed among a gang of undertakers, applied to O Neill for help. The latter complied by sending Owny O Mordha and Captain Richard Tyrrell as his delegates to organize the south, which they did. successfully from Slieve Bloom to Kerry (except in Upper Ossory as will be related later).
One of the ablest of the southern "rebels" Pierce de Lacy of Brugh na Deise (East Limerick) whose lands had been "granted" to one Thornton, scornfully flung back a "pardon" granted to himself and set out to meet "O Mordha Laoise", one of the delegates of whose fighting fame he had heard. Among many wise suggestions made by de Lacy, was one to nominate James Mac Thomas (Fitzgerald) as chief, under the old and respected Geraldine title, "Earl of Desmond". The suggestions were submitted to O Neill who, by this time exercising the prerogatives of an Irish King, sanctioned them— the English contemptuously nick-naming Mac Thomas "The Sugan Earl" (Note the Irish qualifying word they used for the title).
Tyrrell remained for a time in personal attendance on the new Earl, and Owny returned to Laois, as the rumors had already reached Ireland of the preparations in England for the largest and best equipped army, under Essex, that ever took the field in Ireland. O Neill made no mistake in his choice of organizers. The campaign that followed was so successful that only in four places in all Desmond was an undertaker or planter left by the end of October. In the course of events it fell to Owny's lot to be the first Irish chieftain to man the Beama Baoil in Essex's campaign.
September, 1598 The garrison in Maryborough seems to have been, as usual, in trouble all this time and was continually crying out for relief. About September 1598, the Earl of Ormond with a large force of 4,000 foot and horse, set out from Dublin to relieve the Fort. But at Blackford (Ath Dubh) at a little stream (formerly the boundary between Laois and The Pale) very near, and on the Stradbally side of, "The Bleeding Horse", he suffered a heavy defeat by Owny's relatively small force of 1,400. The "dangerous traitor" Tyrrell cannot have remained long with Fitzgerald of Desmond for he fought in this encounter too. The Earl lost 600 men and a great quantity of war material and provisions. He himself was wounded and barely escaped. Of Owny's force there were 60 killed and 80 wounded.
Yet it is said that Ormond ultimately reached the Fort of Maryborough and relieved it, but the state papers do not say when or where or how soon he procured arms money and provisions for that relief—considering that he, in no great fettle himself, had 3,400 worn and wounded men to look after who themselves required relief. With several other skirmishes the year 1598 was brought to a successful conclusion for the old territory.
January, 1599 Ormond had again to relieve the Fort of Maryborough; on this occasion Laoiseach Og O Mordha, one of Owny's chief leaders, was killed. January, 1599 The rebels planned to assemble at Knocke Arde O Gurry with a view to attack Kilkenny city. January, 1600Some thirty O' Mordha were somehow inveigled into the Fort of Maryborough and treacherously killed. The wily Owny avoided the trap, and in a short time after replied satisfactorily.
Essex's Journey from Dublin to Stradbally and Croshyduff
The years 1597 and 1598 were disastrous for the English in Ulster where Hugh O'Neill, Hugh O'Donnell and Hugh Maguire (warrior Chief of Fermanagh and son-in-law of O'Neill) were having things their own way, culminating on 14th August, 1598, in the great victory of Beal an Atha Bui, the echo of which resounded throughout the courts of Europe. Elizabeth, exasperated, censured all around, and appointed Robert Devereux, second Earl of Essex, an experienced and (so far) successful soldier, as Lord Lieutenant and Governor of Ireland.
On 13th April, 1599, he arrived in Dublin having with him a force of 16,000 foot and 1,300 horse, but "instead of carrying out his instructions and attacking O'Neill in force he accepted the advice of some members of the Council at Dublin who were personally interested in the undertakers' lands, and were concerned most. of all in recovering their own property or the property of their friends", (History of Ireland, Rev. E. A. Dalton, Vol. 3, page 150) and consequently he decided to travel southwards to subdue the Desmond Geraldines under their "contemptible Sugan Earl".
Having dispatched garrisons to towns north and south of Dublin he left that city on 9th May with a force of 3000 foot and 260 horse. His route lay through Naas, Kilcullen and Kilrush; he encamped on the 12th Tiillaghgory (Geraldine) near Athy where he was joined by Ormond from Carlow with a force of 700 foot and 200 horse. In Athy, after an assault on the castle which guarded the bridge, he remained two days (13th and 14th) to receive provisions from Naas and to repair the bridge. Leaving 100 men in Athy he dispatched 350 men to garrison Carlow and ordered 750 men to Offaly. (The Pass, of the Plumes has sometimes been wrongly ascribed to this Offaly route as near Monasterevan).
He would then have about 2,500 foot and 260 horse, (according to Bourchier's "Devereux" he had 3,000 foot and 300 horse) while most accounts agree that Owny O Mordha had only about 500 foot and 40 to 50 horse, roughly six to one. On his road to Stradbally on the 15th he reached the passage of Ath Dubh (Black Ford) a strategic point where many a fierce attack had taken place. This had been hurriedly entrenched by Owny with the mention of engaging the English there, but he wisely withdrew his comparatively small force while closely observing every movement of the invading army, which arrived that evening at Stradbally.
On the 16th Essex resumed his journey but must have left the main part of his army about the western slope of Croshy Duff, as he himself set out (probably along an old road that branches via Kyle, Cappoley, the Ridge and the Downes), with 200 horse and 500 foot to relieve the fort of Maryborough which had been closely invested by the O Moores, and in which Francis Rush, the governor, and his men had been living on horseflesh for twenty days. (Earlier in the day he must have passed quite near Dunamase without any attempt at attack probably because of its strength and of the urgency of his mission).
Having supplied the garrison in Maryborough with provisions and ammunition, he returned to the main body without delay and all encamped that evening at the foot of Crosby Duff Hill. Owny and his men, securely posted on the hills around, observed every movement, and from their thorough knowledge of the district could well foresee the enemy's plans and surmise his intended route to Kilkenny.
Owny placed his small force in secure positions where he had the choice of attack (or retreat for a considerable distance along a road sloping and winding through natural declivities which were studded with woods and thickets, a road boggy for some distance around one vital point and ill-suited for Essex's large and heavily equipped army, but highly favorable for a resolute and daring leader,with a small body of courageous and devoted clansmen, in the dangerous defiles that lay ahead. Next morning, 17th, having viewed the country from the top of Crosby Duff Hill, 600 feet, from where Owny's men, or at least some of them. could be observed a couple of miles away, Essex decided to move on.
The question then arose as to whether his army should proceed southwards by the nearest way to Rosconnel on the Kilkenny border, that is by the near-by Pass of Cashel, or march by the mountain of .Sleen agree to avoid the disadvantage of the Pass. The decision arrived at was that the rebels should be sought rather than shunned because it was necessary to teach the Irish and the world at large that Her Majesty's army could and would in all places make way for itself. This last paragraph is condensed from "Barnaglitty", Proceedings R S A., p. 21J5, Part III, Vol. XXXIV, 1904).
The name Sleen agree (Sliabh na nGroigh, the mountain of the horses) is now obsolete. The OML 1563, shows -a-mountain or a mountain pass, Sleen agree, and a river alongside flowing southeasterly. On the modern map the river would appear to be about the western part of Upper Slatt and Doonane townlands. Two little tributaries are shown one of which (? Red River) flows near Kilgorey old church which appears fairly near the left bank. Distances or relative positions of places cannot be accurately gauged on the old map. On the modern map the road from Timahoe runs in the same general direction (S.E.) through Upper Slatt and Doonane, probably following along or near the old pass. This would appear to be a rather indirect and hilly route for Essex's army moving towards the Pass of Bellyragget.
The English in their accounts of the attack make very little comment. According to the diary of Sir John Harrington who accompanied Essex, three or four of the English were hurt. Sir James Ware just brushes the rebels aside to let Essex pass through, but in his very next paragraph he has Essex applying to England for more troops. Other English historians do not mention the affair at all. Sullivan Beware and the Four Masters give a very different account, although meagre as to detail. For two hours, according to Essex’s own diary (quoted by Lord N. Fitzgerald in his paper on “Barnaglitty), the transport was crawling through the Pass (which was only a short portion of the whole route from Bothar na Muc to Moinin-na-Fola) and during the whole course the attack seems to have been kept up at close quarters along the line interlaced with almost impenetrable thickets.
The remains of an old dwelling house known as Ned Duff’s stood on the northern verge of the old road very near the crossroads at the road marked. In the digging of the foundations for Ned Duff’s house and out offices, about 1834, cartloads of human remains were exhumed. About forty years ago a similar case occurred in the immediate neighborhood. As a tree that fell a few years ago a skull was found in the roots. This area is very gravelly and seems to have been used for interring those who fell in the battle, a dry sand pit. Mr. Daniel O'Byrne in his History of Queen's County, Chapter XXIV, p. 111, states that the remains of the slain have been found in a high gravelly part between Ballykilocken Cross and Callyknocken castle. Local tradition supports Mr. O'Byrne on this point.
O Sullivan (who according to a note of O D estimated the English casualties at 500) states that the well-contested road, by reason of the helmet feathers taken from the English cavalry, was afterwards called Bearna na gCleiti—the Gap of the Feathers—which previously had been known as the Pass of Cashel. Some years ago I was informed by the late Patrick Burke of Ballyknocken, that during the first world war, a field of his which had not been broker for "ages" was tilled, and numbers of horse-shoes found which were iron-plated or soled all across to cover the frog.
A few of the shoes were sent to the RSAI who explained that in Essex's journey southward the fields and passes were spiked by the local people with caltrops or iron spikes made by the smiths. (Some specimens of caltrops are to be seen in the National Museum). This field, near point 6 on sketch, is about two-thirds of a mile in a north westerly direction from Moinin na Fola and not less than one third of a mile from the nearest point of the line of march (17). This would seem to indicate a wide divergence towards Maryborough Fort (relieved the day previous) and that some of Owny's men wen; prepared for this divergence by having arranged an ambush.
OH in HQC, p. 482, intimates that after the battle the English troops travelled southwards by Ballyroan, Rosconnell and the Pass of Ballyragget to Killkenny.Some very intelligent traditionists, however, maintain that they took an old road, the continuation of Garret’s Lane by Kilvahan graveyard anmd proceeded southwards by Bothar-a-'clay through a Cullenagh mountain-pass. Others think they followed Kyle Lane and a very old road SW. through Cappoley towards Lalor’s Mill, Colt Wood, and on southwards by BallinaKill.
Probably tile main army having got through the Pass at heavy cost, continued along the route (thereafter clear and unobstructed) as given by OH to Ballyroan, where they would be succoured by the Hetheringtons, and that scattered parties fled helter-skelter through the nearest pass or gap they met— one of which where the caltrops where found led widely away from any southern route.
Harrington mentions that after the battle “troops came together on a great playne". The great plain, I think must have been in the Pass House— Ballyroan direction, as both the Kyle and Bothar-a'-clay routes are hilly. There is nothing resembling a great plain in the vicinity except the-large field in which Kilvahan graveyard is situated but this would be off the main route which (most accounts agree) the troops had gained after the battle.
On the main point anyway the site of the battle, there is now, I think, no doubt. Now a good word for Essex. It is only fair to say of him (what cannot be said of his treacherous successors, Charles Blount, otherwise Lord Mount joy, and Blount's wily partner George Carey, otherwise Sir George Carew) that he was a courageous man who knew well what he had to face at the Pass and resolutely faced it; that he made a fair open fight and that although before the battle he despised the Irish bands as "rogues and naked beggars" (they used often fight in strong leathern coats and bare legs) he was straight and manly enough to admit candidly when writing to the English Council on the third day after the battle, that the "people against whom we fight hath able bodies, good use of the arms they carry, boldness enough to attempt, and quickness in apprehending any advantage they see offered to them." These words of this hitherto successful soldier may be regarded as an honest admission that instead of teaching the world an exemplary lesson in warfare at the Pass of Cashel Her Majesty's army learned a very salutary one.
Nine Year War
The nine years war also known as the Tyrone's Rebellion is fought between the Kingdom of England, Ireland against Spain, Scottish Gaelic mercenaries and the alliance of the Irish Clans. I believe that the Moores fought on both sides of this war. You have the English Moores and on the other side you have the Irish O'Moore clan. The O'Moores of Laois served under the command of Hugh O'Neill.
Battle of Clontibret
Battle of Clontibret was essentially a two-day running fight, as Bagenal's column was ambushed on its way to and from the castle at Monaghan town. The Irish fought sharply along the roads about Crossdall, around 4 miles (6.5 km) from Monaghan, firing on the English column with cavilers (light muskets) from the surrounding woodland. With the loss of 12 dead and 30 wounded the English reached the castle, which was re-supplied and reinforced with one company.
Bagenal had misgivings about his supply of powder and lead, much of which had been used on the way, and could afford little for the garrison before he started back. Two days later, on 27 May, Bagenal set out for Newry in a column, but by another route, past the townland of Clontibret. The route lay through Drumlin country, which abounded with hills, bogs and woods, making it ideal for an ambush. The column came under fire from the outset, and then fell into a major ambush at a pass near Clontibret.
Tyrone's army - about 4000 strong - consisted of contingents from the O'Neill, MacMahon and Maguire clans, as well as Scottish mercenaries. The Irish also deployed a greatly enlarged force of cavalry and clavier-men (musketeers). To Bagenal's puzzlement, the clavier-men were turned out in red coats and acquitted themselves with expertise. Fire from the flanks was heavy, and many English troops were killed or fell wounded while the Irish cavalry played around the fringes. Tyrone himself was almost killed in hand-to-hand combat with a Pales man named Seagrave, who led a cavalry charge on the Irish position.
Seagrave had his arm chopped off by Tyrone's standard bearer O'Cahan, and was killed by Tyrone with a dagger thrust to the groin. Bagenal's column was slowed to a crawl and, as night fell in the wilderness, the commander called his men to a halt and camped at the hilltop of Ballymacowen. It seemed that hundreds were missing, and there was fear that the Irish would renew the attack under cover of darkness. There was no further attack and, a little after first light, reinforcements from Newry arrived to relieve the column.
According to intelligence received in the days following, Tyrone's failure to follow up had been caused by a lack of powder - ironic, given the state of Bagenal's own supplies - but the overall sense in government was of disquiet, and a bad job was made of hushing up the casualty figures.
This gave fuel to the rumors of a severe defeat, and many people set greater store on the numbers put about by confederate supporters. Sir Ralph Lane, the muster-master-general, informed the queen's principal secretary, Lord Burghley, that "more men were hurt and killed in that late service than was convenient to declare". The casualty figures for both sides vary depending on sources. Bagenal admitted only 31 killed and 109 wounded on the second day of fighting, but his losses were almost certainly higher. The Irish annals claimed up to 700 English killed. Estimates of the confederate losses vary between 100 to 400 killed. Three years later, Bagenal led an army into another ambush by Tyrone, at the battle of the Yellow Ford. The English general was killed and his troops were routed with heavy losses.
The Battle of the Yellow Ford
Further afield, Owen MacRory O'Moore and Richard Tyrrell, O'Neill's best field commander, led 2,000 men into battle. The crown forces were organized in six regiments—two forward, two center, and two rear, and with cavalry at center. As soon as they left Armagh garrison, they were all harassed with musket fire and thrown spears from rebel forces concealed in the woods. As a result the different regiments became separated from one another as they paused to deal with the hit and run attacks.
This problem was accentuated when one of their ox-drawn artillery pieces became stuck in the bog with a damaged wheel and a rear regiment got left behind guarding it as it was slowly coaxed through the bog. The regiment at the front of the march encountered a mile-long trench, 4 feet wide and 5 feet deep. The regiment succeeded in crossing this trench but then came under heavy attack from large forces and decided to retreat back behind the trench again, and it suffered significant losses during that retreat. This regiment in disarray then merged into the ranks of the other forward regiment. Standardly at the time, it was desirable for a marching army to take on a more compact, less elongated form when large enemy forces were present.
At this point, Henry Bagenal was killed by a shot through the head. In post-mortems in Dublin, Bagenal was criticized for being near the vanguard of the march, instead of keeping himself in a more protected position near the center. Command of the army was taken over by Thomas Maria Wingfield. Further demoralizing the crown troops and causing chaos, their gunpowder store exploded, apparently ignited accidentally by the fuse of a matchlock musket. Daunted, Wingfield decided to retreat to Armagh. But the commander of the forward part (Evans) either didn't get the command or refused to obey it, or was unable to execute an orderly retreat and judged it necessary to maintain his forward position.
Anyway, seeing their enemy in confusion, the O'Neill cavalry rushed at the head of the forward part, followed by swordsmen on foot. Crown troops in this part of the field (at the "yellow ford" from which the battle gets its name) were cut to pieces, and any wounded survivors left on the field after the battle were slain as well. The rest of the crown forces had to struggle their way back to the Armagh garrison. They reached it largely intact, but were harried all the way by the Irish. Crown forces lost about 900 killed at the battle.
This included 18 "captains" or officers dead. Several hundred soldiers deserted to the rebels, and many hundreds more deserted back to their families, or went astray in the Armagh drumlins. Out of 4,000 soldiers who had set out from Armagh, just over 2,000 reached the town after the battle. Those who did reach Armagh were virtual prisoners inside. The cavalry broke out and dashed south escaping the Irish. After three days negotiations, it was agreed that the crown troops could leave Armagh as long as they left their arms and ammunition behind them. They were evacuated from Newry to via a sea route.
O'Neill's forces lost perhaps 200 to 300 killed in the battle, though sources for the number lost on O'Neill's side are very scanty. In light of the battle's result, the court at London undertook to greatly and rapidly increase its military forces in Ireland; and simultaneously many in Ireland who had been neutral on the sidelines undertook to support the rebellion. Thus the ultimate outcome of the battle was an escalation of the war. The victory was the Alliance of the Irish Clans against the English forces.
Battle of Moyry Pass
The English reached the pass on 20 September and set up camp just outside, to the south on Faughart Hill. Taking advantage of a misty day on the 25th, an officer named Thomas Williams (who had commanded the Blackwater Fort during the Battle of the Yellow ford made a sortie into the pass. After heavy fighting he identified the Irish defense works and returned to the English camp with 12 dead and 30 wounded. For six days heavy rain held up the fighting, until the weather cleared on 2 October. The weather was important because the matchlock muskets of the day would not work in wet conditions.
On 2 October, Sir Samuel Bagnall led his regiment of infantry into the Pass at the head of four other regiments. The English breached the first barricade, and Thomas Bourke's regiment led the way to the second and third lines of defense. The English took the second line only to find themselves in a trap, with gunfire concentrated from three sides. They tried to dislodge the Irish from their remaining positions for three more hours before retreating, with the Irish in close pursuit.
The English admitted 46 killed and 120 wounded, but it is thought that they understated their losses throughout the campaign. On 5 October, Mountjoy sent two regiments on a flanking march over the hill to the west, with one further regiment supported by horsemen advancing up the center of the Pass. No significant gains were made and the regiments turned back, reporting casualties of 50 dead and 200 wounded. By 9 October the privy councilor Geoffrey Fenton complained, "we are now but where we were in the beginning". Mountjoy retired to Dundalk - on either the 8th or 9th of October - but on the 14th word reached the English camp that O'Neill had abandoned the Pass and retreated to a crannog stronghold at Lough Lurcan. The most likely explanation for O'Neill's withdrawal from his position of strength is that he was short of ammunition and food and feared a flanking attack on his rear from Newry.
Moreover, most of his forces were composed of temporary, clan-based levies, who could not be kept together for long. Mountjoy occupied the Moyry Pass on the 17th of October and dismantled O'Neill's earthworks. He marched on to Carrickban, just outside Newry, and by Sunday the 2nd of November set up camp at Mountnorris (halfway between Newry and Armagh). There he built an earthwork fort and left a garrison of 400 men under the command of Captain Edward Blaney. He then marched back to Dundalk via Carlingford, but was attacked on 13 November by O'Neill, close to the Fathom Pass, and suffered 15–20 killed and 60–80 wounded.
The battle of Moyry Pass was a stalemate: Mountjoy could not take the Pass, O'Neill could not keep it. Mountjoy did establish a garrison at Mountnorris, but had to retire to Dundalk after taking substantial casualties. Mountjoy claimed his force lost only 200 men killed and 400 wounded in the fighting from 20 September to 13 November, though this may be a considerable underestimate. More, he said, died of disease. The Irish casualties were given by the English as an incredible 900–1200 killed and wounded, but this is questionable given that the Irish were in a strong defensive position of their own choosing, behind the protection of fieldworks and had lured the English into an ambush. These figures probably say more about what Mountjoy wanted the Queen to hear than about the actual casualty figures.
Rebellion of 1641 & The Irish Confederate War
The Rebellion of 1641 is the beginning of the Irish confederate war. In this war, a hero and a famous warrior of clan O'Moore appears. His name is Rory O'Moore. This war is also known as the Eleven Year war. Rory O' Moore and his clan fought for the Catholic Irish against the English and Scottish Royalists, and the Parliamentarians. Rory O'Moore is supposedly the founder of the Ancient Order of the Hibernians.
Battle of Julianstown ( November 29 1641)
Either by chance or otherwise the insurgents came upon an untrained and hastily raised force of Government soldiers, largely composed of planter refugees from the northern counties sent against them. The two sides met at the bridge at Julianstown. The British commander gave the order to counter march, which the half trained recruits misinterpreted as a march to the rear. The British army began slowly edging backwards.
However, the rebel force believed that the British had shouted contúirt bháis! (danger of death). The Irish, upon hearing this and seeing the panic and confusion amongst the British force let loose with a war cry and charged with unyielding ferocity. What followed was a simple rout. The soldiers attempted to hold them off by firing in volleys, but were unable to co-ordinate their actions and panicked when they saw the rebels bearing down on them. Many threw down their muskets and ran away, the remainder being either killed or captured.
One disputed source tells that the rebels spared the Irish in the soldier’s ranks, but killed the English and Scots. It is noted from the Cavan depositions that several of those men killed at Julianstown were in fact refugees who had joined the ranks of the army, having previously been robbed and turfed out of their homes by the insurgents. The Officer in charge of the Crown's forces at Julianstown was Sir Patrick Wemyss. His account of the battle can be read in his letter to the Earl Ormonde, recorded in the Calendar of State Papers relating to Ireland, 1641.
The consequences of the Julianstown skirmish were out of proportion to its military significance. The victory by the insurgents made them seem much more formidable than they actually were, and helped to spread the rebellion to the rest of Ireland. In the event they failed in the ensuing siege, and withdrew. It was also was a rude wake up call for Ormonde and his fellow commanders in Ireland, and showed the determination and support in Ireland for the insurgents led by most of the landed gentry.
Ormonde called for reinforcements from England and was to mount a considerable counter-offensive in parts of Leinster in the spring of 1642. This indirectly helped to prolong the English Civil War, as the English royalist forces absent in Ireland would have greatly improved the King's chances at the Battle of Edgehill later in 1642. At the end of this battle Rory O' Moore came out victorious. He came into battle with five thousand men and his causalities were low, but unfortunately the English came into battle with 3,500 and loss a total of 600.
Siege of Drogheda
The commanders of Drogheda was Colonel Tichborne and Moore of the English Force against Féilim Ó Néill of the Irish rebel. The siege lasted from December 1641- March 1642. The English force is comprise of about two thousand men while the rebels have about six thousand. The men of Drogheda and their leaders were outnumbered. The rebels tried three assaults on the town. On the first occasion they simply tried to rush the walls. In their second attempt, a small party of 500 men broke into the town at night through dilapidated sections of the walls, with the aim of opening the gates for a storming party of 700 men outside.
However, the initial incursion was repulsed in confused fighting and in the morning, the garrison opened the gates to rebels outside, only to take them prisoner once they entered the town. The rebels tried for a final time in March 1642, when a relief of the town was imminent, attacking the walls with scaling ladders, but were again repulsed. Shortly afterwards, English reinforcements arrived from Dublin, under Colonel Moore, who was later created the Earl of Drogheda. They broke the rebel siege and also drove them out of Dundalk and back into Ulster.
The Battle of Kilrush
This battle was fought in April 15 1642. The Irish Catholics were led by Richard Butler against James Butler, Earl of Ormonde. The Royalist were the victors. The Dublin Penny Journal of the 1800s said that: “The land in the neighborhood of Inch Castle lies remarkably flat, with the exception of two ridges that run nearly parallel northward from the castle, with a marsh lying between.
It was in these heights the armies of Ormond and Mountgarrett, in 1642, marched in sight of each other, the evening previous to the battle of Kilrush; that of Ormond on the high grounds of Ardscull, Fontstown, and Kilrush, whilst the rebel army under Mountgarrett, and attended by the Lords Dunboyne and Ikerrin, Roger O’More, Hugh O’Byrne, and other leaders of Leinster, proceeded in the same direction along the heights of Birtown, Ballyndrum, Glasshealy, and Narraghmore. Mountgarrett, having the advantage in numbers, and anxious for battle, out-marched Ormond’s forces, and posted himself on Bull Hill and Kilrush, completely intercepting Ormond’s further progress to Dublin; a general engagement became unavoidable.
The left wing of the Irish was broken by the first charge; the right, animated by their leaders, maintained the contest for some time, but eventually fell back on a neighboring eminence, since called Battlemount; here they broke, fled, and were pursued with great slaughter, across the grounds they had marched over the day before. This victory was considered of such consequence that Ormond was presented by the Irish Government with a jewel, value £50.” A contemporary account of the battle was given in the pamphlet: "Captaine Yarner's Relation of the Battle fought at Kilrush upon the 15th day of April, by my Lord of Ormond, who with 2500 Foot and 500 Horse, overthrew the Lord Mountgarret's Army, consisting of 8000 Foot and 400 Horse, all well armed, and the choice of eight Counties. Together with a Relation of the proceedings of our Army, from the second to the later end of April, 1642.
Battle of Portlester
The Battle of Portlester took place on 7 August 1643 near the town of Portlester, Leinster in Ireland as part of the Irish Confederate Wars. It was fought between the Ulster Army under Owen Roe O'Neill and a largely Protestant government force from Dublin under Lord Moore, with both sides proclaiming their basic loyalty to Charles 1 In a largely indecisive battle the two armies exchanged artillery fire, during which the Protestant commander Lord Moore was killed. His army withdrew handing the Irish Confederates a strategic victory. O'Neill then received intelligence that a largely Protestant force under Lord Moore was approaching from Athboy. Moore had recently been reinforced and was eager to test the strength of O'Neill's army. Moore wished to prevent the Ulster Army from capturing more of the government's strongholds and to stop further damage being done to the countryside.
O'Neill's forces took up defensive positions near a ford across the river and at a nearby mill. O'Neill led some of his troops forwards until they made contact with the enemy, then withdrew hastily in an effort to draw Moore's army onto unfavorable ground. As they advanced in pursuit the Protestant troops were raked with crossfire, particularly from the mill where O'Neill had stationed musketeers. Faced with heavy fire, Moore's men withdrew. They regrouped but two further assaults were driven back. Moore then ordered a large force to attempt the mill. Heavy hand-to-hand combat took place around the position, while Moore launched further attacks on the ford. O'Neill sent in a relief column to the mill whose defenders accepted fresh ammunition but rejected the need for reinforcements and pledged to hold the position at all costs.
While Moore was surveying the nearby fighting at the mill, he was struck by an artillery shot that killed him.
Following their commander's death the government forces withdrew about a mile, carrying his body with them. Some of O'Neill's troops wanted to follow them, but O'Neill rejected this as he feared that the withdrawal was a ruse and wanted to conserve his forces. The following morning the Protestant army retreated towards Athboy. Although there were other government troops nearby under George Monck, they were short of numbers and marched towards Trim.
O'Neill rewarded the mill's defenders with gold coins for their bravery. Although the victory brought to an end the series of defeats that the Ulster Army had suffered over the previous two years, the defensive battle at Portlester gave little advantage to the Confederates as they lacked the resources to attempt a further advance eastwards towards Dublin. Shortly afterwards a Cession of Arms was agreed between the Dublin government of Ornond and the Irish Confederates as a first step towards negotiating a peace treaty and alliance against their mutual enemies the roundhead forces in England. Strategic victory Irish confederate.
Battle of Dungan's Hill
This battle was fought by Henry Moore, 1st Earl of Drogheda of the Confederate forces. The Battle of Dungan's Hill took place in County Meath, in eastern Ireland in August 1647. It was fought between the armies of Confederate Ireland and the English Parliament during the Wars of the three Kingdoms. The Irish army was intercepted on a march towards Dublin and destroyed. Although it is alittle-known event, even in Ireland, the battle was very bloody (with over 3000 deaths) and had important political repercussions. The Parliamentarian victory there destroyed the Irish Confederate forces’ Leinster army and contributed to the collapse of the Confederate cause and the Cromwellian conquest of Ireland in 1649.
From a Parliamentarian point of view, victory in this battle was presented to them by the incompetence of the Irish commander. Preston was a veteran of the Thirty Years War where he had been a commander of the Spanish garrison at Leuven , but had no experience of open warfare or handling cavalry. Jones, by contrast, had been a cavalry officer in the English civil war. As a result, Preston tried to move his cavalry along a narrow covered lane (site of the present day main road), where they were trapped and subjected to enemy fire without being able to respond. Even worse, Preston had placed a large number of his troops in wheat fields over seven feet tall. As a result these troops were unable to see the Parliamentarians until it was too late.
With the Confederate army spread out and in confusion, Jones' troops fell in amongst them causing the demoralized Irish cavalry to flee the field, leaving the remainder of Preston’s infantry unsupported. The Confederate army’s infantry were primarily equipped with pikes and heavy muskets and trained to stand in tercios in the Spanish manner. This meant they were difficult to break, but also highly immobile, without cavalry to cover their cumbersome formation when it moved. What was worse, Preston had positioned them in a large walled field, so that when their cavalry had run away, the Parliamentarians could surround and trap them. Some of the Irish infantry, Scottish highlanders brought to Ireland by Alasdair MacColla , managed to charge and break through Jones’ men and escape into a nearby bog, where the English cavalry could not follow. Preston and about 2-3000 of his regular infantry managed to follow the Highlanders to safety, but the remainder were trapped.
What happened next is disputed. The Irish infantry managed to hold off several assaults on their position, before trying to follow their comrades into the safety of the bog. This made them lose their formation and the Parliamentarians got in amongst them and then surrounded them in the bogland. Parliamentarian accounts simply say that the Irish force was then destroyed. Irish accounts, however, claim that the Confederate troops surrendered and were then massacred. One account, by a Catholic friar named O Meallain, says that the corpses of the Irish foot soldiers were found with their hands tied.
A recent study (Padraig Lenihan, Confederate Catholics at War, Cork 2001), suggests that the Irishmen probably tried to surrender, but that, according to the conventions of 17th century warfare, this had to be accepted before it entitled them to safety. In this case, it was not accepted and the infantrymen were butchered. Around 3000 Confederate troops and a small number of Parliamentarians died at Dungan's Hill. One of the English regimental commanders, Colonel Anthony Hungerford, was shot in the mouth, a wound that invalided him out of the English Army.
Most of the dead were Irish infantrymen killed in the last stage of the battle. Those prisoners who were taken were mainly officers, whom the Parliamentarians could either ransom or exchange for prisoners of their own. Richard Talbot (later Earl of Tyrconnell and Lord Deputy of Ireland, but then a junior cavalry officer) was among the Confederate prisoners. In the immediate aftermath of the battle, Owen Roe's Ulster Army marched through the pass of Portlester Mill to mount an effective rearguard action, routing Jones' advanced brigade and enabling the survivors of the Leinster army to escape. Jones, fearing O'Neill's army, did not continue the pursuit and returned to Dublin. O'Neill and his Ulstermen returned four months later to bury the dead Confederates.
Part III Of Clan O'Moore's History
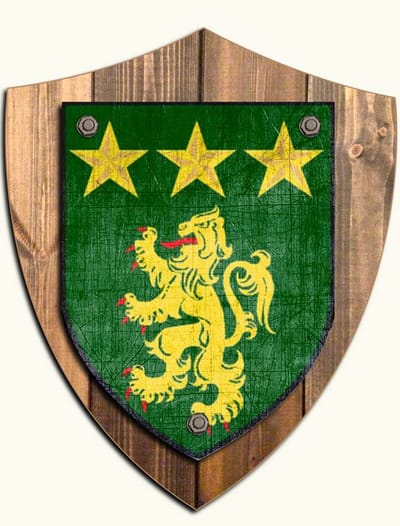
The Moores/ O'Moore fought in this war, and is possibilities that they both fought for the protestant Williamites and as well for the Catholic forces of James the 2. It started in March 12 1689 – October 3, 1691. This Jacobite rising at this time was located both in Ireland and Scotland. Like all other Jacobite rising this one was a defeat for the Jacobite forces. King James's troops were chiefly Celtic and Catholic. There were four regiments commanded by McCarthy More and Maguire O'More and others which they recruited among their own clansmen.
Siege of Derry
The siege of Derry was fought on April 18- July 28, 1689, there was a Lieutenant Patrick Moore, during this siege. Patrick Moore fought for the Army of William III. The Derry City Governor, Lieutenant Colonel Robert Lundy, turned away reinforcements led by Colonel Cunningham, which had arrived in the River Foyle, telling them that the city was to be surrendered. He wrote on 15 April that "without an immediate supply of money and provisions this place must fall very soon into the enemy's hands". Lundy called a meeting with several of his most loyal supporters to discuss surrender. News of the meeting spread, angering many of the citizens.
That night, Lundy (in disguise) and many others left the city and took ship to Scotland. The city's defense was overseen by Major Henry Baker, Colonel Adam Murray, and Major George Walker (also an Anglican priest). Their slogan was "No Surrender". As the Jacobite army neared, all the buildings outside the city walls were set alight by the defenders to prevent them being used as cover by the besiegers. The Jacobite army reached Derry on 18 April. King James and his retinue rode to within 300 yards of Bishop's Gate and demanded the surrender of the city. He was rebuffed with shouts of "No surrender!", and some of the city's defenders fired at him.
According to a later account, one of the king's aides-decamp was killed by a shot from the city's largest cannon which was called "Roaring Meg". James would ask thrice more, but was refused each time. This marked the beginning of the siege. Cannon and mortar fire were exchanged, and disease took hold within the city. James returned to Dublin and left his forces under the command of Richard Hamilton.
The Mountjoy rams through the boom. Royal Navy warships under Admiral Rooke arrived in Lough Foyle on 11 June, but initially declined to ram through the heavily defended defensive boom (floating barrier) across the River Foyle at Culmore. On 28 July, two armed merchant ships, Mountjoy and Phoenix, sailed toward the boom, protected by the frigate HMS Dartmouth under Captain John Leake. Mountjoy rammed and breached the boom at Culmore fort, and the ships moved in, unloading many tons of food to relieve the siege. The city had endured 105 days of siege during which some 8000 people of a population of 30,000 were said to have died. The Siege has been lifted by the royal Navy.
The Siege of Carrickfergus
During this siege from August 20-27 1689, there was a Charles MacCarthy More who was in command of a regiment. A second major wave of reinforcements was assembled at Chester under the veteran Huguenot commander Frederick Schomberg, 1st Duke of Schomberg. While it was originally suggested that they might head for Cork, it was decided that they should be landed in Ulster. By the time the expedition sailed from Hoylake on 12 August 1689, news of the relief of Derry had reached England. It meant that Schomberg could now act offensively. During a council of war, the expedition's officers decided to make for Belfast Lough rather than Carlingford Lough, allowing them to join up with the advancing Irish Protestant forces of Derry and Enniskillen.
By 13 August the expedition was in sight of the Mountains of Mourne. They were accompanied into Bangor Bay by George Rooke who had led a Royal Navy force to clear Belfast Lough of French shipping. The same afternoon Schomberg began disembarking his men. He kept them at the alert in case the Jacobite garrisons of nearby Belfast, Bangor and Carrickfergus should attack, but there was no opposition as the troops were brought ashore. The artillery and supply ships arrived separately a few days later. By the end of August, a total of six cavalry and nine infantry regiments had been landed safely at Carrickfergus.
The landing added to a series of setbacks for the Jacobite's including their failures at Derry and Enniskillen and the defeat of a Jacobite force at the Battle of Newtownbutler. Faced with strong Williamite forces in both the north-west and north-east, the Jacobite commander in the north Thomas Maxwell ordered a withdrawal towards Newry. At Carrickfergus he left a garrison which consisted of Charles MacCarthy More's infantry regiment and nine companies of the Protestant Jacobite Cormac O'Neill's regiment. The garrison were charged with delaying Schomberg's army for as long as possible. The Jacobites abandoned Belfast which was swiftly occupied by Henry Wharton's English Regiment. As Schomberg wanted to march on Dublin before the winter set in, he intended to move rapidly to reduce Carrickfergus. He marched through to Belfast, sending out patrols to prevent plundering in the area by the retreating Jacobites. On 20 August Schomberg marched to Carrickfergus with five regiments, followed by another seven on the following day.
They joined up with newly arrived Enniskillen troops under General Percy Kirke. On 14 August, expecting an imminent siege, the Jacobites had set fire to the town's suburbs to deny their cover to the besiegers. They had tried to prepare Carrickfergus to withstand an assault, but much of the town's defenses were decayed from lack of recent use. The first skirmishes began around the town on 20 August. Schomberg sent a message summoning the town to surrender. The defenders asked for time to send a message to King James, asking for his advice. Schomberg rejected this as a delaying tactic to waste time. Shortly after the parley had taken place, the town's artillery took aim at Schomberg's command tent but he was absent at the time. During that night the Williamites dug trenches in an attempt to move as close to the walls possible, prompting intense exchanges of fire. Schomberg's artillery targeted the town house of the absent Lord Donegall, which had been taken over by the defenders and cannons mounted there.
Using intelligence received from local inhabitants the artillery fire became more carefully directed. Although Schomberg had initially spared Carrickfergus Castle from fire, probably because he hoped to use it after the town fell, he now ordered his artillery to open up on it. After his chief Engineer Jacob Richards was wounded, Schomberg had to take over much of his duties due to the lack of qualified replacements. However further infantry and cavalry reinforcements now arrived by boat. During another parley, Schomberg rejected a demand that the garrison be allowed to surrender with the honors of war (to be able to march away with their weapons to the nearest Jacobite garrison) and insisted on unconditional surrender. Many of the garrison wanted to agree terms, but a group led by Colonel Owen MacCarthy and the Governor MacCarthy More were determined to hold out.
Williamite fire had created a breach near the North Gate, but at night the defenders desperately tried to fill it in and make other running repairs on the defenses. To add to the pressure on the defenders, Schomberg ordered Royal Naval vessels in the harbor to join in the bombardment. Although the garrison had good stocks of food, they were already running low on gunpowder. By the evening of 27 August, with Henry Wharton's regiment poised to make an assault against the breach, the Jacobites ran up a white flag and agreed to surrender. Schomberg had reversed his earlier position and was now willing to grant them the honors of war, allowing the garrison to march to Newry with their weapons and baggage.
Many of the town's buildings had been hit during the artillery duel. On the morning of 28 August the garrison, accompanied by their families and other camp followers, marched out of Carrickfergus. A cavalry escort under Sir William Russell was provided to accompany them some of the way towards Jacobite-controlled Newry. Soon after they set off, the Catholic troops began to be robbed of their clothes, possessions and weapons by local Protestant civilians as compensation for the plundering and general persecution they had suffered during the Jacobite occupation of the town. The escort was overwhelmed by the weight of numbers, and many of the Catholics ran for shelter amongst the ranks of the Williamite infantry regiments standing outside Carrickfergus.
Order was finally restored when Schomberg rode amongst them firing his pistol. In response to Schomberg's landing, King James called out the militia across Ireland, and began making preparations to defend Dublin.
After leaving Sir Henry Ingoldsby's regiment to garrison Carrickfergus, Schomberg and his main force departed the town on 28 August. However, Schomberg's progress southwards was slower than he intended, and having reached Dundalk by 7 September he had to halt his force there due to lack of supplies, which were still being shipped through the increasingly distant Carrickfergus. Faced with a large Jacobite field army under James II, Schomberg remained at Dundalk Campduring the autumn, where his army suffered terribly from illness, losing thousands of dead.
Many of the Williamite sick were shipped via Carrickfergus to the hospital in Belfast. After a stand-off between the two armies, involving several skirmishes, both went into winter quarters. In June 1690 William of Orange landed at Carrickfergus, shortly before beginning the campaign that would lead to his victory at the Battle of the Boyne the following month.
Battle of the Boyne
At the battle of the Boyne was a major victory for the Williamite forces that ultimately destroying most of the Jacobite Forces. In this battle there was a William Mure, an ensign in King William 3rd's Army. William Mure, nobly fighting at the ever memorable battle of the Boyne, at the side of the brave Duke Schomberg, crossed the Boyne, was rewarded by Government with lands for his activity. The Battle took place on July 1, 1690 with a force of thirty six thousand soldiers, while the Jacobite force has twenty three thousand and five hundred.
The causalities of the Williamite force was about 750, while the Jacobites suffer one 1,500. William had landed in Carrickfergus in Ulster on 14 June 1690 and marched south to take Dublin. He was heard to remark that 'the place was worth fighting for'. James chose to place his line of defense on the River Boyne, around 30 miles (48 km) from Dublin. The Williamites reached the Boyne on 29 June. The day before the battle, William himself had a narrow escape when he was wounded in the shoulder by Jacobite artillery while surveying the fords over which his troops would cross the Boyne.
The battle itself was fought on 1 July , for control of a ford on the Boyne near Drogheda, about 2.5 kilometres (1.6 mi) northwest of the hamlet of Oldbridge (and about 1.5 kilometres (0.9 mi) westnorthwest of the modern Boyne River Bridge). William sent about a quarter of his men to cross the river at Roughgrange, about 4 kilometres (2.5 mi) west of Donore and about 6 miles (9.7 km) southwest of Oldbridge. The Duke of Schomberg's son, Meinhardt, led this crossing, which Irish dragoons in piquet under Neil O'Neill unsuccessfully opposed.
James, an inexperienced general, thought that he might be outflanked and sent half his troops, along with most of his artillery, to counter this move. What neither side had realized was that there was a deep, swampy ravine at Roughgrange. Because of this ravine, the opposing forces there could not engage each other, but literally sat out the battle. The Williamite forces went on a long detour march which, later in the day, almost saw them cut off the Jacobite retreat at the village of Naul.
At the main ford near Old bridge, William's infantry, led by the elite Dutch Blue Guards, forced their way across the river, using their superior firepower to slowly drive back the enemy foot soldiers, but were pinned down when the Jacobite cavalry counter-attacked. Having secured the village of Old bridge, some Williamite infantry tried to hold off successive cavalry attacks with disciplined volley fire, but were scattered and driven into the river, with the exception of the Blue Guards. William's second-in-command, the Duke of Schomberg, and George Walker were killed in this phase of the battle. The Williamites were not able to resume their advance until their own horsemen managed to cross the river and, after being badly mauled, managed to hold off the Jacobite cavalry until they retired and regrouped at Donore, where they once again put up stiff resistance before retiring.
The Jacobites retired in good order. William had a chance to trap them as they retreated across the River Nanny at Duleek, but his troops were held up by a successful rear-guard action. The Dutch secretary of King William, Constantin Huygens Jr., has given a good description (in Dutch) of the battle and its aftermath, including subsequent cruelties committed by the victorious soldiers. The casualty figures of the battle were quite low for a battle of such a scale—of the 50,000 or so participants, about 2,000 died. Three-quarters of the dead were Jacobites. William's army had far more wounded.
At the time, most casualties of battles tended to be inflicted in the pursuit of an already beaten enemy; this did not happen at the Boyne, as the counter-attacks of the skilled Jacobite cavalry screened the retreat of the rest of their army, and in addition William was always disinclined to endanger the person of James, since he was the father of his wife, Mary. The Jacobites were badly demoralized by the order to retreat, which lost them the battle. Many of the Irish infantrymen deserted. The Williamites triumphantly marched into Dublin two days after the battle. The Jacobite army abandoned the city and marched to Limerick, behind the River Shannon, where they were Unsuccessfully besieged. Soon after the battle William issued the Declaration of Finglas, offering full pardons to ordinary Jacobite soldiers but not to their leaders. After his defeat, James did not stay in Dublin, but rode with a small escort to Duncannon and returned to exile in France, even though his army left the field relatively unscathed.
James's loss of nerve and speedy exit from the battlefield enraged his Irish supporters, who fought on until the Treaty of Limerick in 1691; he was derisively nicknamed Seamus a' chaca ("James the shit") in Irish. There is an oral tradition stating that no battle took place at all, that a symbolic victory was shown by the crossing of the River Boyne and that the total fatalities were a result of Williamite cavalry attacking the local able-bodied men.
It is well documented that Williams' horse on that day was black, despite all Orange Order murals depicting it as white with William holding his sword between the horse's ears to make it resemble a unicorn as a symbol of his "Savior" status. The battle was overshadowed by the defeat of an Anglo-Dutch fleet by the French two days later at the Battle of Beachy Head, a far more serious event in the short term; only on the continent was the Boyne treated as an important victory. Its importance lay in the fact that it was the first proper victory for the League of Augsburg, the first-ever alliance between the Vatican and Protestant countries.
The victory motivated more nations to join the alliance and in effect ended the fear of a French conquest of Europe. The Boyne also had strategic significance for both England and Ireland. It marked the end of James's hope of regaining his throne by military means and probably assured the triumph of the Glorious Revolution. In Scotland, news of this defeat temporarily silenced the Highlanders supporting the Jacobite rising, which Bonnie Dundee had led. In Ireland, the Boyne fully assured the Jacobites that they could successfully resist William.
But it was a general victory for William, and is still celebrated by the Protestant Orange order on the Twelfth of July. Ironically, due to the political situation mentioned above, the Pope also hailed the victory of William at the Boyne, ordered the bells of the Vatican to be rung in celebration. Some Irish Catholics who were taken prisoner after the battle were tortured until they agreed to convert to Protestantism. The Treaty of Limerick was very generous to Catholics. It allowed most land owners to keep their land so long as they swore allegiance to William of Orange. It also said that James could take a certain number of his soldiers and go back to France.
However, Protestants in England were annoyed with this kind treatment towards the Catholics, especially when they were gaining strength and money. Because of this, penal laws were introduced. These laws included banning Catholics from owning weapons, reducing their land, and prohibiting them from working in the legal profession.
Battle of Aughrim
There was a commander named Moore fought with his brigade at the following engagements at Ballymore Fort, Sligo, and Aughrim.He served in the Royal Regiment of Foot Guard of the Army of James II. This battle was fought in July 22, 1691. The Williamite was victorious in this battle. Williamite force have twenty thousand and their causalities were about three thousand killed, while the Jacobite forces have eighteen thousand and their causalities were about four thousand killed and three to four thousand capture. The battle started with Ginkel trying to assault the open flank of the Jacobite position with cavalry and infantry. This attack ground to a halt after determined Jacobite counterattacks and the Williamites halted and dug in behind stakes driven into the ground to protect against cavalry.
The French Huguenot forces committed here found themselves in low ground exposed to Jacobite fire and took a great number of casualties. Contemporaneous accounts speak of the grass being slippery with blood. To this day, this area on the south flank of the battle is known locally as the "Bloody Hollow". In the centre, the Williamite infantry under Hugh Mackay tried a frontal assault on the Jacobite infantry on Kilcommadan Hill. The Williamite troops, mainly English and Scots, had to take each line of trenches, only to find that the Irish had fallen back and were firing at them from the next line.
The Williamite infantry attempted three assaults, the first of which penetrated furthest. Eventually, the final Williamite assault was driven back with heavy losses by cavalry and pursued into the bog, where more of them were killed or drowned. In the rout, the pursuing Jacobites manage to spike a battery of Williamite guns. This left Ginkel with only one option, to try to force a way through the causeway on the Jacobite left. This should have been an impregnable position, with the attackers concentrated into a narrow lane and covered by the defenders of the castle there.
However, the Irish troops there were short on ammunition. Mackay directed this fourth assault, consisting mainly of cavalry, in two groups - one along the causeway and one parallel to the south. The Jacobites stalled this attack with heavy fire from the castle, but then found that their reserve ammunition, which was British-made, would not fit into the muzzles of their French-supplied muskets. The Williamites then charged again with a reasonably fresh regiment of Anglo-Dutch cavalry under Henri de Massure. Faced with only weak musket fire, they crossed the causeway and reached Aughrim village with few casualties. A force of Jacobite cavalry under Henry Luttrell had been held in reserve to cover this flank.
However, rather than counterattacking at this point, their commander ordered them to withdraw, following a route now known locally as "Luttrell's Pass". Henry Luttrell was alleged to have been in the pay of the Williamites and was assassinated in Dublin after the war. The castle quickly fell and its Jacobite garrison surrendered. "[The] fire from the castle on the right. . . was insignificant for it slew but a few in the passage. The reason of it was given because the men had French pieces, the bore of which was small and had English ball which was too large."
The Jacobite general Marquis de St Ruth, after the third infantry rush on the Williamite position
up to their cannons, appeared to believe that the battle could be won and was heard to shout, "they are running, we will chase them back to the gates of Dublin". However, as he tried to rally his cavalry on the left to counter-attack and drive the Williamite horse back, he was decapitated by a cannonball. At this point, the Jacobite position collapsed very quickly. Their horsemen, demoralised by the death of their commander, fled the battlefield, leaving the left flank open for the Williamites to funnel more troops into and envelope the Jacobite line. The Jacobites on the right, seeing the situation was hopeless, also began to melt away, although Sarsfield did try to organise a rearguard action.
This left the Jacobite infantry on Killcommadan Hill completely exposed and surrounded. They were slaughtered by the Williamite cavalry as they tried to get away, many of them having thrown away their weapons in order to run faster. One eyewitness, George Storey, said that bodies covered the hill and looked from a distance like a flock of sheep. Estimates of the two armies' losses vary. It is generally agreed that about 5–7,000 men were killed at the battle. Some recent studies put the Williamite dead as high as 3,000, but they are more generally given as between 1-2,000, with 4,000 Jacobites killed. However the Williamite death toll released by them at the time was only 600 and they claimed to have killed fully 7,000 Jacobites.
Many of the Jacobite dead were officers, who were very difficult to replace. On top of that, another 4,000 Jacobites either deserted or were taken prisoner. What was more, they had lost the better part of their equipment and supplies. For these reasons, Aughrim was the decisive battle of the Williamite war in Ireland. The city of Galway surrendered without a fight after the battle, on advantageous terms, and the Jacobites' main army surrendered shortly afterwards at Limerick after a short siege. The battle, according to one author, "seared into Irish consciousness", and became known in the Irish language tradition as Eachdhroim an áir - "Aughrim of the slaughter".
The contemporary Gaelic poet Séamas Dall Mac Cuarta wrote of the Irish dead, "It is at Aughrim of the slaughter where they are to be found, their damp bones lying uncoffined". Another poet wrote, "Our friends in vast numbers and languishing forms, left lifeless in the mountains and corroded by worms". Since it marked the end of the Irish Catholic Jacobite resistance, Aughrim was the focus of Loyalist (particularly Orange Order) celebrations in Ireland on 12 July up until the early 19th century. Thereafter, it was superseded by the Battle of the Boyne in commemorations on "the twelfth to the switch to the Gregorian calendar .
It has also been suggested that the Boyne was preferred because the Irish troops there were more easily presented as cowardly than at Aughrim, where they generally fought bravely. It is also mentioned in "The Sash", an Ulster folksong: It is old but it is beautiful, and its colours they are fine It was worn at Derry, Aughrim, Enniskillen and the Boyne. My father wore it as a youth in bygone days of yore, And on the Twelfth I love to wear the sash my father wore.
Irish Brigade in France
In the Irish Brigade of France there were many O'Mores of the Leix sept who were officers during the eighteenth century. They served France during the wars of War of Spainish Sucessions, Austrian Sucessions, and the 1745 Jacobite Rising. The battles fought in the 1745 Jacobite rising by the Irish Brigade was at Falkirk and Culloden.
Battle of Malplaquet
The allied army, mainly consisting of Dutch and Austrian troops, but also with considerable British and Prussian contingents, was led by Marlborough and Prince Eugene of Savoy, while the French and a contingent of Bavarians were commanded by Villars and Marshal Boufflers. Boufflers was officially Villars' superior but voluntarily serving under him. The allies had about 86,000 troops and 100 guns and the French had about 75,000 and 80 guns, and they were encamped within cannon range of each other near what is now the France/Belgium border.
At 9.00am on 11 September, the Austrians attacked with the support of Prussian and Danish troops under the command of Count Albrecht Konrad Finck von Finckenstein, pushing the French left wing back into the forest behind them. The Dutch under command of John William Friso, Prince of Orange, on the Allied left wing, attacked the French right flank half an hour later, and succeeded with heavy casualties in distracting Boufflers enough so that he could not come to Villars' aid.
Villars was able to regroup his forces, but Marlborough and Savoy attacked again, assisted by the advance of a detachment under General Withers advancing on the French left flank, forcing Villars to divert forces from his centre to confront them. At around 1.00 pm Villars was badly wounded by a musket ball which smashed his knee, and command passed to Boufflers. The decisive final attack was made on the now weakened French centre by British infantry under the command of the Earl of Orkney, which managed to occupy the French line of redans. This enabled the Allied cavalry to advance through this line and confront the French cavalry behind it.
A fierce cavalry battle now ensued, in which Boufflers personally led the elite troops of the Maison du Roi. He managed no less than six times to drive the Allied cavalry back upon the redans, but every time the French cavalry in its turn was driven back by British infantry fire. Finally, by 3.00 pm Boufflers, realising that the battle could not be won, ordered a retreat, which was made in good order. The Allies had suffered so many casualties in their attack that they could not pursue him. By this time they had lost over 21,000 men, almost twice as many as the French. Villars himself remarked on the enemy's Pyrrhic victory via the flip-side of King Pyrrhus' famous quote: "If it please God to give your majesty's enemies another such victory, they are ruined. By the norms of warfare of the era, the battle was an allied victory, because the French withdrew at the end of the day's fighting, and left Marlborough's army in possession of the battlefield, but with double the casualties. In contrast with the Duke's previous victories, however, the French army was able to withdraw in good order and relatively intact, and remained a potent threat to further allied operations.
Villars claimed that a few more such French defeats would destroy the allied armies; and the historian John A. Lynn in his book The Wars of Louis XIV 1667–1714 terms the battle a Pyrrhic victory but the attempt to save Mons failed, and the fortress fell on 20 October. Nonetheless, news of Malplaquet, the bloodiest battle of the eighteenth century, stunned Europe; a rumor abounded that even Marlborough had died. For the last of his four great battlefield victories, the Duke of Marlborough received no personal letter of thanks from Queen Anne. Richard Blackmore's Instructions to Vander Beck was virtually alone among English poems in attempting to celebrate the "victory" of Marlborough at Malplaquet, while it moved the English Tory party to begin agitating for a withdrawal from the alliance as soon as they formed a government the next year.
Battle of Fontenoy
Siege of Tournai by Louis XV of 30 April to 22 May 1745 by Louis Nicolas van Blarenberghe. Taking Tournai was the first step in Saxe's campaign. The fortress fell shortly after the Battle of Fontenoy. From Cambron the Allies marched to Moulbay and to within the sound of the siege guns at Tournai. Even now Cumberland was still unsure of the situation facing him, "I cannot come at any certain knowledge of the enemy's numbers, but I have concurring information that the body on this side the Schelde does not exceed 31 battalions and 32 squadrons. The reports vary of the progress of the siege, the weather is so bad that, tho' we are within a distance to hear the canon very distinctly, yet no true judgement can be formed from thence whether the enemy are retir'd over the Schelde or not."
On the evening of 9 May the Allies at last reached the final stage of their tiring march, encamping their left wing on Maubray, and their right on Baugnies, almost within musket-shot of the French outposts. Tournai lay six miles (~10 km) to the north-west. French reconnaissances had confirmed Saxe in his belief that the Allies would endeavour to relieve Tournai by attempting to force a passage from the south-east via the hamlet of Fontenoy and the small town of Antoing on the Scheldt. The French commander now cast about for a good spot where he might await the attack in security, finally settling on a potentially strong defensive position on the eastern side of the Scheldt, about 5 miles (~9 km) south-east of Tournai. To guard against any break-out by the Dutch from within the besieged city the Marquis of Dreux-Brézé was left with 21,550 men in the trenches, and orders to contain the garrison of about 8,000 men at all costs.
Louis XV took to the field in person, accompanied by his son Louis, and their enormous retinue. After observing the siege at Tournai, the King moved on to the Château de Calonne between Tournai and Antoing.That same day, 8 May, Saxe began to move his main troops into position to face the Pragmatic Army. During a hasty reconnoitre late on 9 May Cumberland, Königsegg, and Waldeck found the French fortifying the hamlet of Fontenoy; they also discovered the enemy's pickets at the villages of Vezon and Bourgeon. These outposts were dealt with on the following day: on the right the British under General Campbell moved to take Vezon, where Cumberland subsequently moved his headquarters; while the Dutch on the left possessed themselves of Bourgeon. The Allied forward units now held the Peronne–Bourgeon–Vezon line.
After another reconnoitre the Allied commanders resolved to defer the battle until the morning of the 11th, but all agreed that the French position – the barrier between themselves and Tournai – must be attacked.
The position which Saxe had chosen to make his defence was naturally strong: the right of his army rested on Antoing, the centre on Fontenoy, and the left was covered by the Wood of Barry. This defensive line rested on the edge of a crest of high ground. Here lay the strength and advantage of Saxe's choice: the descent in many places along the position formed a natural glacis, and throughout the whole length, from Antoing to the wood, the prolonged slope offered an even and deadly field for cannon and musketry fire. This position was further strengthened by the construction of redoubts. Two were built along the Fontenoy-Barry gap, defended by two regiments of the Brigade of Eu, and each supplied with four cannon – the first breastwork (nearest Fontenoy), known as the Redoubt of Eu, played a central part in the battle.
In the rear of these works and extending Northeast to the village of Ramcroix stood the French left wing, including the six battalions of the Irish Brigade. Between Fontenoy and the larger village of Antoing on the French right a further three redoubts were built along the ridge-line. These defences were manned and supported by the regiments of Crillon, Bettens, Diesbach, and Biron, and three dismounted dragoon regiments. Antoing itself was defended by seven battalions, including four veteran battalions of Piedmont, and six guns. Additionally, six 12-pounders were mounted on the far side of the Scheldt facing Antoing, targeting the left flank of any force attacking in that quarter. The hinge of the French line consisted of the small hamlet of Fontenoy.
This position was held by the Brigade Dauphin, comprising three battalions of the regiment Dauphin, and one of Beauvoisis, supported by six guns commanding the approaches. But it was the Fontenoy–Barry gap which was of particular danger to Saxe. Here the line comprised the Gardes Suisses, four battalions of the Gardes Françaises, as well as the brigade of Aubeterre composed of three battalions of the Swiss regiment of Courten and one battalion of the regiment Aubeterre. Immediately to the rear of Fontenoy there were three battalions of the regiment Le Roi.
Behind the first line were further infantry supports, and behind these stood the whole body of French cavalry, with their left resting on the Leuze–Tournai causeway, and their right some distance back from Fontenoy. In total Saxe had 60 battalions and 110 squadrons, of which about 6,000 were thrown into the bridgeheads at Calonne and Vaulx to secure possible lines of retreat and/or to guard against any sortie from Tournai in the rear of his position. This left the French commander with approximately 50,000 troops to fight the coming battle. One hundred guns were disposed along the whole line, between Antoing and the Wood of Barry. At 02:00 on 11 May, the Allied regiments took up their stations.
The British were posted on the right wing with the Hanoverians to their immediate left, while the Dutch took the left wing, supported by the small Austrian contingent made up mainly of mounted troops. A large battery of Allied guns, some 40 to 50 guns according to French accounts,[ began to bombard the French positions at long range. The allied bombardment was to little effect however, as most of the French were in the woods, or in redoubts, or behind the swell of ground leading to their position, or fortified in Fontenoy. Accounts from both sides speak to the three hour long duration and intensity of the other's fire.
Cumberland's reconnaissance on the evening of the 10th had failed to detect the Redoubt of Eu near the woods, but during the night information had been brought to him of its whereabouts. The strength of the French left was only now appreciated, and the position became a matter of the greatest importance. The task of neutralising the strong-point was given to Brigadier-General Ingolsby, for which he was given command of Duroure's (12th), Pulteney's (13th), the Highland Regiment (43rd), and Böschlanger's Hanoverian regiment. While this attack went in on the right, the Dutch and the Austrians with the Hanoverians in the centre would strike to Cumberland's left in all-out assaults on Fontenoy and Antoing. Once the flanks were under heavy attack, the massed body of the British infantry could storm the Fontenoy–Barry gap and dislodge the main French army..
Ingolsby had explicit orders from the Duke to capture the Redoubt of Eu, and either spike the guns or turn them on the enemy. At around 06:00 Ingolsby moved his brigade forward, but he halted in a 'hollow way' a short distance from the wood. Here he remained, telling Lord Bury (one of Cumberland's six aides-de-camp), "that he saw troops in the wood, that he did not know the number of them, and had consulted with his officers, who were of opinion it was impracticable." These 'troops in the wood' were the Grassins, a combination of light infantry and light cavalry who tenaciously defended the position against the Allied attack.
Ingolsby continued to falter and hesitate. He asked for cannon before he advanced and was immediately sent three six pounders but he still made no attack. At last Cumberland himself confronted the Brigadier, but by this time the British infantry were drawing up on the plain beyond Vezon in readiness for the main attack, while to their left the Dutch were preparing to advance on Fontenoy and the redoubts between that village and Antoing. With French cannon taking a heavy toll on these dense formations it was clear that the opportunity for Ingolsby's attack had slipped by, and the Duke simply ordered him to move his brigade forward in line with the main British formation under Ligonier.
Cumberland had decided to ignore the danger on his right flank. To compound his troubles General Campbell, commander of the British cavalry, had earlier been mortally wounded while screening the infantry advance onto the plain, and had been carried from the field without having revealed his orders to any other officer. With no one knowing what to do, the cavalry simply formed to the rear of the infantry where they remained until the battle was virtually decided. Ligonier finally sent word to Cumberland that he was ready to advance as soon as the Dutch carried out their attack on Fontenoy. The night of the 10th had seen the left wing of the allies more advanced towards the enemy than the right. Prince Waldeck was thus able to complete his dispositions for battle in the morning more rapidly than Ligonier. The Dutch line, from left to right, was formed of: 36 squadrons of cavalry, next 8 infantry battalions, then 4 squadrons and finally, facing Fontenoy, 12 battalions in two lines.
However, Waldeck also had not sufficiently reconnoitred his objectives, and was unaware of the strength of the enemy position in the village. The Dutch advanced, moving up three batteries of artillery to support their attack. The French infantry, secure behind their barriers, allowed the Dutch to draw very close before releasing a devastating volley upon them. Those Dutchmen who were not killed, fled. Meanwhile, a second column, with cavalry in its rear, advanced on Antoing. Encountering a terrible fire from the three redoubts and the battery on the far side of the Scheldt, the Dutch in this sector also wavered. Their cavalry turned about; but while the bulk of them halted within cannon-shot, a minority of them fled. Colonel Appius took flight with his regiment all the way back to Ath. It was now around 10:30, and the British and Hanoverian infantry stood ready to march forward.
However, both flank attacks – Inglosby on the right and the Dutch on the left – had failed. With Fontenoy and the Redoubt of Eu still in French hands Cumberland and Königsegg had to decide whether to move forward or retreat and wait for a more propitious opportunity. Cumberland chose to attack. Moreover, he personally chose to lead the column in what was to become one of the great infantry advances of the eighteenth century. The British and the Hanoverians were deployed in two lines. The first British line, from right to left, was composed of three brigades: first, on the right, the Guards brigade composed of the 1st, 3rd and 2nd Foot Guards; second, Ponsonby's brigade of the Royal Scots (1st Foot), Scots Fusiliers (21st Foot), Handaside's (31st Foot); third, Onslow's brigade of Onslow's's (8th Foot), Rothe's/Sempill's (25th Foot), Johnson's (33rd Foot) and Howard's (19th Foot). The second British line was three brigades, from right to left: first Howard's brigade with Howard's 'the Buffs' (3rd Foot) on the right, the Welsh Fusiliers (23rd) Foot and Skelton's (32nd Foot); second, Bland's brigade of Sowle's (11th Foot) and Bragg's (28th Foot); and third Skelton's brigade of Cholmondeley's (34th Foot) and Bligh's (20th Foot).
The Hanoverian regiments were on the left of the British lines. The Dutch now made a second attempt on Fontenoy, reinforced with Austrian cavalry and two battalions of British infantry, including the Highland Regiment. The Brigade of Dauphin were surprised by the irruption of these "Highland furies, who rushed upon us with more violence than ever sea did when driven by a tempest." However, concerted French fire drove the Allied forces off again. This dispirited the Dutch who retired out of range and did not participate in the main attack. Along the French right flank the Allies had been routed; but the battle was not yet over. On being congratulated by Monsieur de Bauffremont, Saxe simply replied, "all is not said; let us go to the English, they will be harder to digest." and, at about 10:15, he abandoned his wicker carriage and mounted his famous white palfrey.
As the second Dutch attack on Fontenoy went in, the main Allied formation moved towards the French position on the plateau. Cumberland took up his place alongside Ligonier at the head of 20 battalions, 15 British and 5 Hanoverian to their left, led by the British Guards brigade, each with their two battalion guns, about 13,000 to 15,000 men, drawn up in two disciplined lines, each six ranks deep. However, the narrowness of the defile through which the attack must pass forced the Hanoverians back to form a third line behind the British. As the British and Hanoverians advanced the French pushed forward the four small three-pound battalion guns of the Gardes Françaises brigade and the four of Aubeterre brigade, the fire from these was added to the bombardment from the Redoubt d'Eu. Cumberland responded by deploying seven of the Guard's Brigade's three-pound battalion guns to push them back. The Duc de Gramont, of Dettingen infamy, would be killed by a shot from these.
As the column advanced up a slight rise, the British brought up a battery of twelve six-pound
cannon to the front of the column at such close range that the Gardes Françaises left their supported defensive position against orders, as they had at Dettingen, and advanced, unsupported, in an attempt to take the guns. Both sides exchanged fire at close range. From the redoubt of d'Eu and Fontenoy the French cannon poured tremendous flanking fire. Whole Allied ranks were swept away, but still they pressed forward in perfect order as if on parade, the better to foster cohesion and the better to overawe their opponents. Saxe had never believed that the Allies would conceive or execute such a manoeuvre, and here was the one weak spot of his defence – a third redoubt between Fontenoy and the Redoubt of Eu would have rendered the Allied advance impossible.
On obtaining the summit of the ridge the Allied column found itself facing the French infantry line. The French guards rose and advanced towards the crest, whereupon the two forces confronted each other at a distance of 30 paces. The moment was immortalised by Lord Charles Hay of the 1st Regiment of Guards who later wrote that he stepped forward, took out a hip flask and drank with a flourish, shouting out to his opponent, "We are the English Guards, and we hope you will stand till we come up to you, and not swim the Scheldt as you did the Main at Dettingen!" He then led his men in three cheers. Voltaire's version of this famous episode has become proverbial. He wrote: "The English officers saluted the French by doffing their hats . . . the French, returned the greeting. My Lord Charles Hai, captain in the English Guards, cried, 'Gentlemen of the French Guards, fire!' The Comte d'Auteroche, then lieutenant of Grenadiers, shouted, ' Gentlemen, we never fire first; fire yourselves."
The French were the first to fire, the volley was somewhat ineffective but threw the Third Guards into some confusion and wounded George Churchill, the commander of the Guards brigade. Captain Lord Panmure led the unbroken companies of the Third Guards to the flank of the First Guards. Up to this point the British column had not fired a single musket shot, but now the Allied infantry poured a devastating discharge into the French. The volley of musketry with the battalion guns delivering numerous rounds of grape-shot, swept away the front rank of the ten battalions of the French first line, killing and wounding between 700–800 men, breaking the Gardes Françaises, while the Gardes Suisses and the four battalions of the brigade Aubeterre were driven back by the British advance. Historian David Chandler writes that upon the order 'First Firing, Take Care!,' in the British platoon firing system, the six platoons of the first firing with the whole of the front rank of each British battalion fired together – explaining the efficacy of the British first volley.
Additionally, Chandler describes the advance as also a British development of the platoon firing system in which troops mounting an attack continue to advance to give fire by stepping out ahead of the rest of the marching battalion, when they are done and reloading the other platoons advance ahead of them and give fire in turn. This explains the slow advance of the column noted in many first hand accounts. The French now faced an unexpected crisis. Although the Allied attack on Fontenoy had failed, the commander of the second line of the French center had dispatched much of this line to support the brigade in Fontenoy so there was now no support infantry line behind the part of the line formerly held by the Gardes Françaises and the British Guards advanced deep into this gap.
Saxe was still seriously ill on the day of the battle and had spent the early part of the engagement in his wicker carriage. By the time the of the British/Hanoverian advance, however, he had mounted his horse and, despite great pain, directed French actions personally. Saxe now ordered his cavalry to attack the advancing foe, but they too recoiled, broken by shattering fire. From his vantage point near Notre Dame de Bois Louis XV, attended by the Dauphin, Noailles, the Duke of Richelieu, and Louis XV's Minister of War, the Marquis d'Argenson, had witnessed his best infantry fall back in disorder. Convinced it was over, Noailles had implored the King to seek safety; but Saxe reassured him that the battle was not lost.
With his defiant oath that "We must all conquer or die together", the French commander rode off to restore order at the front. The King stayed. By now the Allied foot had penetrated the French lines for a distance of 300 yards, and into the French camp. However, the incessant fire from the flanks – from Fontenoy and the Redoubt of Eu – followed by the constant cavalry and infantry attacks, had caused the British and Hanoverian infantry to yield ground, forcing them slowly back towards the crest of the plateau. Endeavouring to restore order, Cumberland personally exhorted and inspired his men, halting their retreat, rallying them with the cry: “ "Don't you know me my countrymen? Will you leave me? I don't ask you to do anything without me: all I beg you is to share my danger. ” Newly encouraged, the Allies once again began to move forward.
Gradually, however, the French onslaught had brought about a change in the column's formation. The wings of the line had moved round on either flank in order to face the enemy to their left and right, thus forming a hollow, three sided square, against which Saxe now flung his second line of cavalry. The brigade of the Maison du Roi, the Carabiniers, the Gendarmerie, the finest cavalry of France, charged and charged again, but each time were driven back by the steady discipline and fire of the British infantry. The regiments of Vaisseaux, Hainault, Normandie, and part of the Irish Brigade, were all beaten back. Ligonier later recorded, "Having had orders to make a second attempt, our troops … a second time made the enemy give way; and they were once more pushed as far as their camp with great loss of men, which we too felt upon our side."
After the Allied attempts on the left had failed the French had become more and more focussed on the British infantry, and on the retreat of the Dutch all the guns of Fontenoy had been turned to face Cumberland's men. The British and Hanoverians themselves overlooked the opportunity to attack Fontenoy on its unbarricaded side with the French cannon either out of shot or running low on ammunition, a much easier task than that the Dutch had faced. The garrison from Tournai was contained by the French besiegers. Although the constant charges of the French cavalry had been thrown back, their perseverance at last achieved Saxe's aim: they had made time for his infantry brigades to reform. Long after the battle Saxe justified his tactics writing: “ "While Fontenoy remained untaken, the enemy's success in the centre was disadvantageous to them, for they had no pivot. The farther they penetrated the more were they exposed to the fire of our troops and batteries in their rear. It was essential to distract their attention by repeated cavalry charges, which were, it is true, unable to produce a decisive effect, but gave us time to organise the general attack on which all depended.”
The hollow 'square' had again progressed several hundred yards beyond the flanking batteries, but Cumberland had become increasingly isolated in the centre with his shrinking mass of British and Hanoverian infantry. The Allies grew indecisive. Löwendahl saw the true state of affairs, and galloped off to meet with Saxe. "Well, monsieur le maréchal, here is a great day for his Majesty! These fellows will never get themselves out of a fix like that!" After a council with Louis XV it was resolved to unite all available forces, and at around 14:00, Saxe made a final concerted effort to repulse the enemy. Four pieces of reserve artillery, loaded with grape-shot, were brought into action, and every available regiment mustered.
Saxe rallied six Irish battalions of the Wild Geese supported by the remnants of Vaisseaux and Normandie for a final assault and flung themselves into the attack with the wild Gaelic cry of "Cuimhnigidh ar Luimnech agus feall na Sassonach!" – "Remember Limerick and Saxon Perfidy". The Irish Brigade, as a brigade, would suffer the heaviest overall casualties on the French side, losing 656 men including one-quarter of their officers.
Sergeant Wheelock of Bulkeley captured a colour and the attack of the Irish compelled the
British Guards to retire. A simultaneous attack on the Allied left was made by all the regiments which had faced the Dutch between Fontenoy and Antoing. Meanwhile, the French Guards, now led by the Comte de Chabannes, eager for revenge, with fixed bayonets charged the front so closely that fire was exchanged muzzle to muzzle. As Saxe and Löwendahl led the infantry, D'Estrées, and Richelieu brought up the whole Household Cavalry. The fighting was extremely close and deadly, some British regiments lost half their strength such as the Royal Welch Fusiliers which lost 322 soldiers, over 200 killed, while the brigade of British Guards suffered over 700 casualties.
The French counter-attacks eventually halted and then repelled the British column, taking the field. The initial disorder of the Allied column was soon checked as each battalion rallied around its colours; the compact formation was restored, and the British and Hanoverians accomplished their retreat in good order. Attacked from three sides the Allies performed a fighting withdrawal – the rearguard of the column facing about at measured intervals to fire at their pursuers. Ligonier made provision for covering the retreat.
Skelton's (32nd) and Cholmondeley's (34th) formed the rearguard, the Buffs were ordered to hold the churchyard, while hedges and ravines were lined with the Black Watch.
On either flank the British cavalry closed in to form a screen for the infantry – the Royal Horse Guards to the fore especially distinguished themselves. The army reformed behind Vezon, before retreating on Ath. Upon reaching the safety of Ath, Cumberland burst into tears over his disappointment at the defeat and the huge number of lives the defeat cost. Saxe was blamed by the 'carpet generals' for halting the pursuit 100 yards from the battlefield and not turning the defeat of the Allies into a rout. But the enemy were not, even now, lacking in discipline or morale, and the Allied cavalry were at last admirably handled. He later explained that while the Allied cavalry was still relatively intact, his own had been decimated.
Afterwards he gave his reason for not pursuing the Allies further – "As we had enough of it, I thought only of restoring order of the troops engaged in the charge." As Louis XV rode over to congratulate his commander for avenging Poitiers, Saxe's personal guard helped their ailing Marshal onto his horse to meet and embrace his sovereign. Although the details have not been precisely established, casualty figures were high for both sides: the French amounting to at least 7,000 killed and wounded; the Allies are estimated as 10,000 to 12,000.
This casualty rate was the highest in western Europe since the Battle of Malplaquet in 1709, where, as a boy, Saxe personally witnessed the carnage. After surveying the field, Louis XV told his son the Dauphin, Louis-Ferdinand "See how much blood a triumph costs. The blood of our enemies is still the blood of men. The true glory is to save it." Kneeling before his King after the battle Saxe remarked, "Sire, now you see what war really means." Nevertheless, he was gratified to receive a letter from Louis XV in acknowledgement of his services. "If I owe this triumph to the valour of my troops … you also contributed to it no less by your steadfast daring, by your sage counsel and by your remarkable foresight." Saxe wrote to his brother, King Augustus III, at Dresden, ""The engagement lasted nine hours and although I was half-dying by the end of it, I resisted my fatigue as though I was in perfect health. It is very sweet to win battles … " Louis XV lavished gifts on Saxe, including the royal Château de Chambord, for Saxe had been present where needed, in spite of his debilitating illness, to deal with every crisis of the battle from rallying troops, to directing and leading reserves, encouraging the king and counseling with his officers.
With his victory at Fontenoy, Saxe would become a great hero of Frederick the Great of Prussia, his ally, and would visit Frederick at Sanssouci in 1746. For the Allies there were recriminations with the Dutch getting most of the blame in English accounts with no explanation as to why the Hanoverian advance on Fontenoy failed to occur. However, Cumberland's official report praised his co-commander, Königsegg, who, fighting between the first and second lines of infantry "was present on horseback during the whole action, and gave his orders with great calmness."
Cumberland was universally praised for his bravery, but also criticised for his generalship, in particular for neglecting to clear the Woods of Barry at the beginning of the battle or to establish an adequate intelligence system, the failure of which gave Saxe ample time to prepare his position. He failed to make his orders clear and Ingolsby's hesitation on the Allied right was in part due to receiving conflicting orders. Brigadier Ingolsby was court-martialled on the charge 'That he received orders from the Duke to attack a redoubt or battery in the last action near Fontenoy, which orders he did not execute'.
The charge of disobedience of orders was found proved. Ingolsby's contention that he had been harassed by inconsistent orders was amply borne out by the evidence, and he was acquitted on the charge of cowardice. The court concluded his failure arose 'from an error of judgement, and not from want of courage.' He was suspended from service and allowed to sell out. Cumberland failed to make effective use of his cavalry. He was so absorbed in the infantry attack that he left his horse regiments idle in the rear until the time for useful action had passed. In effect, the Duke relied not on manoeuvre but on force; it was a direct approach that fell victim to Saxe's clever exploitation of his defensive position.
Additionally, with Cumberland at the head of the Allied column he was in no position to capitalize on his own attack through efforts elsewhere: he could not prevent the French from concentrating against his column because he was behaving more like a battalion commander than a Captain General. Although British leadership was found lacking, British infantry's superior discipline showed that however much French infantry had improved under Saxe's tutelage, France could not match the best that Britain could put in the field. Fontenoy dispelled the notion of British military superiority held in Europe since Marlborough and demonstrated French battlefield superiority over the British and their allies.
The Mordhas other battles n Feuds
Other battles that were fought by the O' Moore clans were the Battle of Portmore castle and the Battle of Corrondogh. There is probably an attack on Castle Lea in which the O' Moore clan took the castle from Clan Demspey. Since there is hard to find infomation on the O'Moore clan feuds. In conclusion the O'Moore clan was a powerful clan that the English fear the most, and quickly hated the O'Moore and did everything in their power to destory the clan. They have fought many battles and wars during Ireland trubulent History and many have shed their blood for their faith and country. There may be more battles that have been fought but sadly is very undoucument.
Clan O' Brenans and Clan O'Mordha Feud
In or about the year, 1026 the O'Brenans and their neighbours, the O'Moores became hostile to each other and fought a sanguinary battle in which Aimhergin O'Moore, Lord of Leix and Cuidhuilegh O' Brenan Lord of Uy Duach with many others were slain and the battle was won by the O' Brenans. This battle is name Bloody road.
Clan Mcduff and Clan O'Mordha feud
In the year of 1096 Gilmurry Mcduff the chief was killed by Magrath O'More in the doorway of the Penitentiary or of Tech Mochua after both had first sworn on a reliquary called the Caimin.
Clan McDonald and Clan O'Mordha Feud
Mac Donchad also called Donald had a quarrel with O More about that period when the Anglo Norman Invaders had landed in Wexford Having engaged some of the newly arrived warriors Mac Donchad invaded Leix which he overran for four days. These ravages were only arrested by O More's submission.
Clan O'Mordha and Clan O'Connor
Around 1196, Mahon the son of Connor of Connaught was slain by Donnell O' Mordha and the men of Leix who attempted to prevent him from bearing off the spoil which he had taken from the English. This act was perpetrated by a mercenary of the Laighis but O'Mordha was killed by Cathal Carrach O'Connor in revenge for his brother Mahon's death. Donnell was then seigneur of the tribes of Leix. He is declared to have resisted in defense and to have killed as a manifestation of loyalty to the Anglo Normans that the Irish chief. Thus when Mahon was bearing off the spoils taken from the English people, the annals of Kilronan state that he was slain by an archer of Donnell O'More's clansmen and that Donnell O'Mordha fell on the same day by the hand of Cathal Carragh in revenge of his brother. The annals of Boyle refer this incident to the year, 1197, while Mahon's death is attributed to one of the O'Mordha's archers.
Clan O'Mordha and Clan Geraldines
O' Conor and O'Moore taking part in a feud between the neighboring Geraldines and the English of the Pale, took up the cause of the former invaded Kildare burned the town of Athy and slaughtered many of the inhabitants.
Clan McMurroghs and Clan O'Moore
The McMurroghs along the ridge of and all their kindred upon the Barrow and the Slaney under a chief against the Lord justice was to march in person later in the campaign of 1316. Lord Dunamase was equally sanguine but 800 men of the O'Mordha's slain in one disastrous encounter crippled the time, the military strength of that great house.
There were feuds between O' Moore and MacGillapatrick and O'Dempsey. O'Moore attack O'Dempsey at Lea castle in which O' Moore capture the castle. Invasion of Laois On Saturday which was the eve of St Remigius feast AD 1333 Galfridus de la Frene slain by the O Morthys or O Moores Slemargys or Slievemarigue. Out of the mountain, fastness of the Slieve Bloom the O'Conor and the O'Moores swooped like birds of prey upon the plains of Leix and Offaly. Friar Clyn gives an interesting account of one of these raiders, Leysert O' Moore. He writes in the year of 1342, Leysert O'Moore, a man influential, rich, and wealthy and respected in his tribe.
By force he ejected almost all the English from his lands and inheritance; for in one night he burned eight English castles and destroyed the noble castle of Dunamase, the property of Lord Roger de Mortimer and obtained for himself and Lordship over his country. Earl Gerald set out to besiege Leap castle, in O'Moore country, but it happened that as he was watering his horse in the little river Greese, at Kilkea, he was shot by one of the O'Moores; he was immediately carried to Athy where shortly afterwards he die. In the year of 1606; Cosby challenged the O'Moores to a pitched battle and the contending clans to meet once more in the Glyn of Agsrabily under the rock of Dunamase; when a bloody conflict ensued, terminating in the triumph of Cosby and the total defeat of his foes who were never afterwards able to defeat them.
The MacMore
“ Between two woods at some distance from the sea. I beheld Mac more and a body of the Irish more than I can number descend the mountain. He had a horse without housing or saddle which was so fine and good that it had cost him they said four hundred cows for there is little money in the country wherefore their usual traffic is only with cattle. In coming down it galloped so hard that in my opinion I never in all my life saw hare deer sheep or any other animal. I declare to you for a certainty run with such speed as it did In his right hand he bore a great long dart which he cast with much skill, But his people drew up in front of the wood. These two like an out post met near a little brook.
There Macmore stopped He was a fine large man wondrously active. To look at him he seemed very stern and savage and an able man He and the Earl spake of their doing recounting the evil and injury that Macmore had done towards the king at sundry times and how they all forswore their fidelity when wrong fully without judgment or law they most mischievously put to death the courteous Earl of March. Then they exchanged much discourse did not come at last to agreement they took short leave and hastily parted Each took his way apart from the other and the Earl towards King Richard.”
Lugad Laighis who in a series of encounters destoryed the previously successful invaders in consideration of which he was granted the district called Laighis or Laoighis subsequently latinised into Lagisia or Lisia and anglicised into Lexi or Leax Lugad's descendants after the introduction of surnames took that of O'Mordha otherwise O'Morra, O'More, or O'Moore from Mordha or the Majestic; the 25th in descent from Conall Cearnach or Victorious. The O'Moores and their clansmen were led by the blood- curdling of drums and warpipes played by their hereditary pipers, the McCrimmins, who were the pipers to the O'Moores.
Clan O'Mordha ( O'Moore) According to Keating, the O’Mores have St. Fintan as their protector.
Thomas Moore (28 May 1779 – 25 February 1852) was an Irish poet, singer, songwriter, and entertainer, now best remembered for the lyrics of "The Minstrel Boy" and "The Last Rose of Summer". He was responsible, with John Murray, for burning Lord Byron's memoirs after his death. In his lifetime he was often referred to as Anacreon Moore.
From a relatively early age Moore showed an interest in music... and other performing arts. He sometimes appeared in musical plays with his friends, such as The Poor Soldier by John O'Keeffe (music by William Shield), and at one point had ambitions to become an actor.[1] Moore attended several Dublin schools including Samuel Whyte's English Grammar School in Grafton Street where he learned the English accent with which he spoke for the rest of his life.[2] In 1795 he graduated from Trinity College, which had recently allowed entry to Catholic students, in an effort to fulfill his mother's dream of him becoming a lawyer. Moore was initially a good student, but he later put less effort into his studies. His time at Trinity came amidst the ongoing turmoil following the French Revolution, and a number of his fellow students such as Robert Emmet were supporters of the United Irishmen movement, although Moore himself never was a member.[3] This movement sought support from the French government to launch a revolution in Ireland. In 1798 a rebellion broke out followed by a French invasion, neither of which succeeded.
Castles of Clan O'Moore
Ireland:
1. Dunamase Castle- The O'Mordha clan took Dunamase Castle in 1330 and became clan O'Mordha's main seat in which they ruled from until the English remove them. From 1325 until 1609, the castle belonged to the O'Moore family of Laois.
2. Moore's Hall- ( Moore's Hall, Mayo), or Moorehall, the house and estate of George Henry Moore and family, is situated to the south of the village Carnacon in the barony of Carra, County Mayo in a karst limestone landscape. The Moores were an aristocratic Irish family who built Moore Hall between 1792 and 1795. The first Moore of Moore Hall was George Moore, a name borne by many members of the family down the generations. The Moores were originally an English Protestant family but some became Catholic when John Moore married a Roman Catholic, Jane Lynch Athy of Galway, and when their son, George, married Katherine de Kilikelly (a.k.a. Kelly), an Irish-Spanish Catholic, in 1765. The ruins of the Moore family's large stately home, Moore Hall.
3. Dunsverick Castle- Owned by Fergus Mor
4. Lea Castle- In 1346 the castle was burned by the O'Moores. In 1452 the Earl of Ormond took it from the O'Dempseys. In 1533 it was in the possession of the FitzGeralds. In 1598 it was re-taken by the O'Moores.
5. Fort Navan- Owned by the Knights of the Red Branch. ( Conall Cearnach founder of clan O'Mordha).
6. Moorestown Castle- Owned and built by the O' Moores of Moorestown.
7. Garvey Castle- This castle, situated near Favor Royal, was the residence of the Mure family.
8. Timhoe Tower and Monastery- was rebuilt and founded the Monastery by the O'Mores.
9. Mellifont Abbey- In 1603 the Treaty of Mellifont was agreed between the English Crown and Hugh O'Neill, Earl of Tyrone in the abbey grounds, Mellifont was then the property of Garret Moore, 1st Viscount Moore, who was a close friend of Tyrone, and helped persuade him to sign the Treaty. The Moore family remained at Mellifont until 1927.
10. Mellifont Castle- Moore/ O'Moore owned this castle.
11.Ballyadam Castle- This is the remains of the 15th century abode of the O'Moore family.
12. Ballyhannon Castle- The castle is currently privately owned by an Ó Mórdha family.
13. Aherlow Castle- was later the property of the Moores of Mooresfort. Count Charles Moore was the occupier in 1906 when the buildings were valued at £20. It is now a ruin.
14. Clopook Ancient hill fortress- Owned by the Knights of the Red Branch. ( Conall Cearnach founder of clan O'Mordha).
15. Moore Abbey- Moore Abbey was built by the English engineer Christopher Myers in the Gothic style for Charles Moore, 1st Marquess of Drogheda in 1767.[1] The 10th Earl of Drogheda abandoned the house after the First World War and it was leased to John McCormack, the tenor, from 1925 to 1937.
16. Kilyleagh Castle- In 1667 the 2nd Earl married Lady Alice Moore, daughter of the Earl of Drogheda,
17. Ballygally Castle- The castle served as a coastguard station for several years, and then as a private residence for the Reverend Classon Porter family, and the Moore family.
18. Cloghan Castle- The castle and its lands were granted in the reign of Charles II. to Garrett Moore, descended from Rory Oge O’Moore, the chief of ancient Leix. One of his descendants married Margaret, daughter of the sixth Earl of Clanricarde. At Meelick, in the Moore family burial place, there is a slab stating:
“Here lies Sir John More my grandfather who died in the month of May, 1631. Also here lies Dame Margaret More otherwise De Burgo, my wife, who died in the month of February 1671, daughter of Richard, Earl of Clanricarde, in whose memory I Garrett More, Colonel in the King’s Army and faithful to the last, have caused to be constructed the tomb in which others of my family are also interred.”
19. Carrickfergus Castle- Owned by Fergus Mor. The Duke of Schomberg, an old soldier in his 70s who had become a military legend for his successes in the continental wars of the time, bombarded the town and the castle with mortars for seven days before Colonel Charles McKarty Moore surrendered.
20. Charleville Castle- first manison house to be built on the site of Charleville castle was by Thomas Moore circa 1641. The estate passed through the hands of Charles Moore, Lord Tullamore, grandson of Thomas, and when he died in 1674 it went via his sister Jane to Charles William Bury.
21. Durrow Mansion- Passed into the O'Moores clan.
22. Benburb Castle- One of these was occupied in 1622 by "Mr Moore, an Englishman, with his wife and family.
23. Ballylinan Castle- Built and owned by the O'Moores.
24. Brize/ Bree Castle- The original castle was the home of the Moore family in the 17th century.
25. Stradbally Abbey- Founded in 1447 by Lord O'More.
26. Rowallan Mansion/ House- Rev. John Robert Moore named his property " Rowallan" after his family's ancestral home. He has built and occupied the Rowallan house.
27. Ballycowan Castle- The castle was built in 1589 as a fortified house ansd was occupied by Thomas Moore.
28. Kilcloggan Preceptory Abbey- In 1183 was owned by the clan O'More.
29. Cloonbigny Castle- The ruins of the seventeenth century Moore residence known as Cloonbigny Castle in the County Roscommon parish of Taughmacconnell, viewed from the north.
30. Croghan Castle- Sir John Moore Knt who in 1599 held his castle of Croghan for the Queen after which he was knighted and made considerable additions to his estate namely the town of Clonfert by purchase from Anthony Marche the town of Crutmulloghrosse with 186 acres the castle of Ratrummon with 155 acres and by virtue of the commission for the plantation and disposition of lands in the county of Leitrim and the territory of Lly O Carrol King James I.
31. Ballintotis Castle- The tower was granted to George Moore in 1579, but recovered soon after by the FitzGeralds.
32. Meelick Castle- John Moore the younger, the first cousin of Richard Burke, 4th Earl of Clanricarde, became Clanricarde’s tenant at Meelick at some point, but the Earl eventually became dissatisfied with him as a tenant, as he failed to pay rental arrears long due. ‘I have been at great charge with the untowardly ward’, Clanricarde complained of Moore in a letter dating from about 1618-1619. He was ‘the untowardliest young fellow that I have known full of wild and ill conditions and I fear it will be his ruin, and for myself I have rid my lands of him’. His arrears were still outstanding at that time and the Earl planned to have him answer for his debts in England, where the Earl himself was living at the time, if the rent was not soon paid. ‘I wonder such a man as he would take himself to be, would deal so ungratefully and so unworthily, but’, the Earl determined, ‘I will make him pay it to his greater cost and shame.’[xix] Not long thereafter, from Clanricardes letter, Moore appears to have been replaced as ward of Meelick castle. Moore owned this castle.
33. Rheban Castle- In 1327 when Rheban Castle was captured by Lysagh O’More and owned the castle.
34. Woodstock Castle- was captured by Lysagh O’More and owned the castle. Thomas Fitzgerald, seventh Earl of Kildare, who, on marrying Dorothea, daughter of Anthony O'Moore, of Leix, in 1424, received the manors of Woodstock and Rheban as her dower.
35. Castlemore Castle- There is another castle called Castlemore in these part said to be built by the O' Moores.
36. Dovehill Castle – Carrick on Suir: That above is Dove Hill (or Duff Hill), originally built on land under the control of the O’Mores. Dovehill Castle is a 14 century Tower or Keep located about three miles west of Carrick-on-Suir. It was apparently owned by Connell O’More in 1348.
Clan O' Mordha Gallery
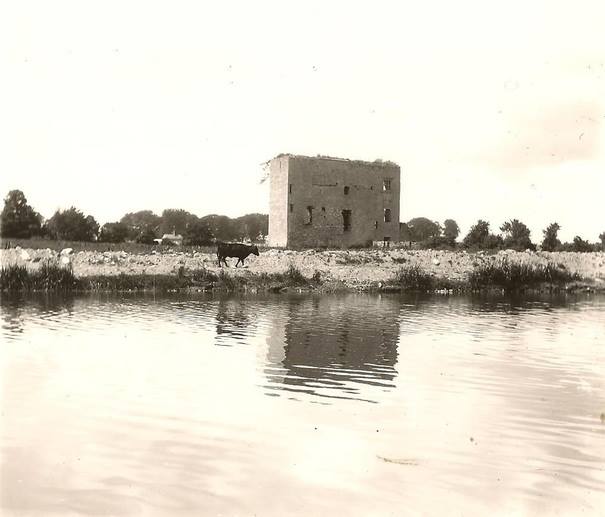
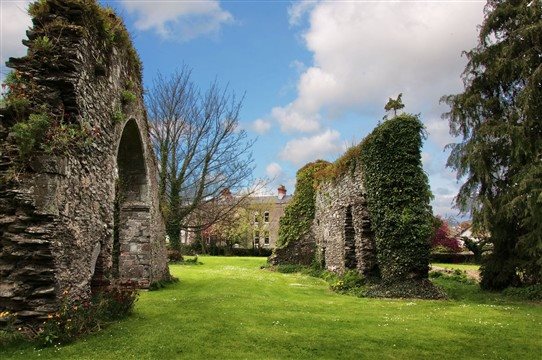
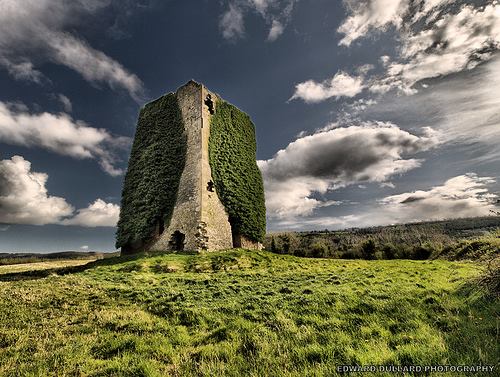


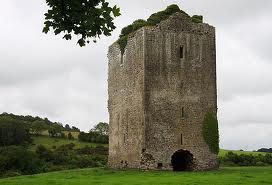
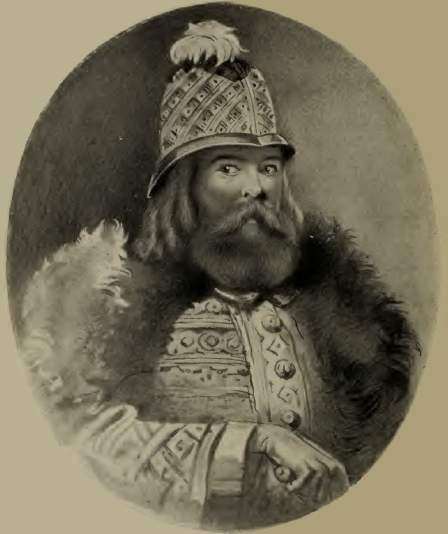


The History of the English Moores
The story of the de la Mores and Mares of England begins with William the conqueror of Normandy. Amongst William's army included Guillaume de la Mare, Hugue de la Mare, Thomas de More, Richard de la More and S. More to retake the throne of England, in which he felt cheated out by Harold Godwinson. The Saxon force meet the Norman army at the battle of Hasting, in which it was the only battle to be fought by the Saxons and Normandy forces. Sir Edward Mores who was knight by King Henry VII after the battle of Stoke field during the wars of the roses.
The Battle of Hasting
Many of the primary accounts contradict each other at times, it is impossible to provide a description of the battle that is beyond dispute. The only undisputed facts are that the fighting began at 9 am on Saturday 14 October 1066 and that the battle lasted until dusk. Sunset on the day of the battle was at 4:54 pm, with the battlefield mostly dark by 5:54 pm and in full darkness by 6:24 pm. Moonrise that night was not until 11:12 pm, so once the sun set, there was little light on the battlefield. William of Jumieges reports that Duke William kept his army armed and ready against a surprise night attack for the entire night before.
The battle took place 7 miles (11 km) north of Hastings at the present-day town of battle, between two hills – Caldbec Hill to the north and Telham Hill to the south. The area was heavily wooded, with a marsh nearby. The name traditionally given to the battle is unusual – there were several settlements much closer to the battlefield than Hastings. The Anglo- Saxon chronicle called it the battle "at the hoary apple tree". Within 40 years, the battle was also known as "Senlac", a Norman French adaptation of the Old English word "Sandlacu", which means "sandy water".
This may have been the name of the stream that crosses the battlefield. The battle was already being referred to as "bellum Hasestingas" or "Battle of Hastings" by 1087, in the doomsday book. Sunrise was at 6:48 am that morning, and reports of the day record that it was unusually bright. The weather conditions are not recorded. The route that the English army took to the battlefield is not known precisely. Several roads are possible: one, an old Roman road that ran from Rochester to Hastings has long been favored because of a large coin hoard found nearby in 1876. Another possibility is a Roman road between London and Lewes and then over local tracks to the battlefield. Some accounts of the battle indicate that the Normans advanced from Hastings to the battlefield, but the contemporary account of William of Jumieges places the Normans at the site of the battle the night before.
Most historians incline towards the former view, but M. K. Lawson argues that William of Jumieges's account is correct. Most recent historians conclude that Harold's forces deployed in a small, dense formation around the top of Caldbec Hill, with their flanks protected by woods and a stream and marshy ground in front of them. Lawson points out the possibility that the English line was a bit longer and extended enough to anchor on one of the streams nearby. The English formed a shield wall, with the front ranks holding their shields close together or even overlapping to provide protection from attack. More is known about the Norman deployment.
Duke William appears to have arranged his forces in three groups, or "battles", which roughly corresponded to their origins. The left units were the Bretons, along with those from Anjou, Poitou and Maine. This division was led by Alan the Red, a relative of the Breton count. The center was held by the Normans, under the direct command of the duke and with many of his relatives and kinsmen grouped around the ducal party.
The final division on the right consisted of the Frenchmen, along with some men from Picardy, Boulogne, and Flanders. The right was commanded by William Fitzosbern and Count Eustace II of Boulogne. The front lines were archers with a line of foot soldiers armed with spears behind. There were probably a few crossbowmen and slingers in with the archers.
The cavalry was held in reserve, and a small group of clergymen and servants situated at the base of Telham Hill was not expected to take part in the fighting. William's disposition of his forces implies that he planned to open the battle with archers in the front rank weakening the enemy with arrows, followed by infantry who would engage in close combat. The infantry would create openings in the English lines that could be exploited by a cavalry charge to break through the English forces and pursue the fleeing soldiers. The battle opened with the Norman archers shooting uphill at the English shield wall, to little effect. The uphill angle meant that the arrows either bounced off the shields of the English or overshot their targets and flew over the top of the hill.
The lack of English archers hampered the Norman archers, as there were few English arrows to be gathered up and reused. After the attack from the archers, William sent the spearmen forward to attack the English. They were met with a barrage of missiles, not arrows but spears, axes and stones. The infantry was unable to force openings in the shield wall, and the cavalry advanced in support. The cavalry also failed to make headway, and a general retreat began, blamed on the Breton division on William's left. A rumor started that the duke had been killed, which added to the confusion.
The English forces began to pursue the fleeing invaders, but William rode through his forces, showing his face and yelling that he was still alive. The duke then led a counterattack against the pursuing English forces; some of the English rallied on a hillock before being overwhelmed. It is not known whether the English pursuit was ordered by Harold or if it was spontaneous. Wace relates that Harold ordered his men to stay in their formations but no other account gives this detail. The Bayeux Tapestry depicts the death of Harold's brothers Gyrth and Leofwine occurring just before the fight around the hillock.
This may mean that the two brothers led the pursuit. The Carmen de Hasting Proelio relates a different story for the death of Gyrth, stating that the duke slew Harold's brother in combat, perhaps thinking that Gyrth was Harold. William of Poitiers states that the bodies of Gyrth and Leofwine were found near Harold's, implying that they died late in the battle. It is possible that if the two brothers died early in the fighting their bodies were taken to Harold, thus accounting for their being found near his body after the battle. The military historian Peter Marren speculates that if Gyrth and Leofwine died early in the battle, that may have influenced Harold to stand and fight to the end.
A lull probably occurred early in the afternoon, and a break for rest and food would probably have been needed. William may have also needed time to implement a new strategy, which may have been inspired by the English pursuit and subsequent rout by the Normans. If the Normans could send their cavalry against the shield wall and then draw the English into more pursuits, breaks in the English line might form. William of Poitiers says the tactic was used twice. Although arguments have been made that the chroniclers' accounts of this tactic were meant to excuse the flight of the Norman troops from battle, this is unlikely as the earlier flight was not glossed over. It was a tactic used by other Norman armies during the period. Some historians have argued that the story of the use of feigned flight as a deliberate tactic was invented after the battle; most historians agree that it was used by the Normans at Hastings.
Although the feigned flights did not break the lines, they probably thinned out the housecarls in the English shield wall. The housecarls were replaced with members of the fyrd, and the shield wall held. Archers appear to have been used again before and during an assault by the cavalry and infantry led by the duke. Although 12th-century sources state that the archers were ordered to shoot at a high angle to shoot over the front of the shield wall, there is no trace of such an action in the more contemporary accounts. It is not known how many assaults were launched against the English lines, but some sources record various actions by both Normans and Englishmen that took place during the afternoon's fighting. The Carmen claims that Duke William had two horses killed under him during the fighting, but William of Poitiers's account states that it was three.
Harold appears to have died late in the battle, although accounts in the various sources are contradictory. William of Poitiers only mentions his death, without giving any details on how it occurred. The Tapestry is not helpful, as it shows a figure holding an arrow sticking out of his eye next to a falling fighter being hit with a sword. Over both figures is a statement "Here King Harold has been killed". It is not clear which figure is meant to be Harold, or if both are meant. The earliest written mention of the traditional account of Harold dying from an arrow to the eye dates to the 1080s from a history of the Normans written by an Italian monk, Amatus of Montecassino.
William of Malmesbury stated that Harold died from an arrow to the eye that went into the brain, and that a knight wounded Harold at the same time. Wace repeats the arrow-to-the-eye account. The Carmen states that Duke William killed Harold, but this is unlikely, as such a feat would have been recorded elsewhere. The account of William of Jumieges is even more unlikely, as it has Harold dying in the morning, during the first fighting. The Chronicle of Battle Abbey states that no one knew who killed Harold, as it happened in the press of battle.
A modern biographer of Harold, Ian Walker, states that Harold probably died from an arrow in the eye, although he also says it is possible that Harold was struck down by a Norman knight while mortally wounded in the eye. Another biographer of Harold, Peter Rex, after discussing the various accounts, concludes that it is not possible to declare how Harold died. Harold's death left the English forces leaderless, and they began to collapse. Many of them fled, but the soldiers of the royal household gathered around Harold's body and fought to the end. The Normans began to pursue the fleeing troops, and except for a rearguard action at a site known as the "Malfosse", the battle was over. Exactly what happened at the Malfosse, or "Evil Ditch", and where it took place, is unclear. It occurred at a small fortification or set of trenches where some Englishmen rallied and seriously wounded Eustace of Boulogne before being destroyed by Duke William. Harold's defeat was probably due to several circumstances.
One was the need to defend against two almost simultaneous invasions. The fact that Harold had dismissed his forces in southern England on 8 September also contributed to the defeat. Many historians fault Harold for hurrying south and not gathering more forces before confronting William at Hastings, although it is not clear that the English forces were insufficient to deal with William's forces. Against these arguments for an exhausted English army, the length of the battle, which lasted an entire day, show that the English forces were not tired by their long march. Tied in with the speed of Harold's advance to Hastings is the possibility Harold may not have trusted.
Earls Edwin of Mercia and Morcar of Northumbria once their enemy; Tostig had been defeated, and declined to bring them and their forces south. Modern historians have pointed out that one reason for Harold's rush to battle was to contain William's depredations and keep him from breaking free of his beachhead. Most of the blame for the defeat probably lies in the events of the battle. William was the more experienced military leader, and in addition the lack of cavalry on the English side allowed Harold fewer tactical options. Some writers have criticized Harold for not exploiting the opportunity offered by the rumored death of William early in the battle.
The English appear to have erred in not staying strictly on the defense, for when they pursued the retreating Normans they exposed their flanks to attack. Whether this was due to the inexperience of the English commanders or the indiscipline of the English soldiers is unclear. In the end, Harold's death appears to have been decisive, as it signaled the break-up of the English forces in disarray. The historian David Nicolle said of the battle that William's army "demonstrated – not without difficulty – the superiority of Norman-French mixed cavalry and infantry tactics over the Germanic-Scandinavian infantry traditions of the Anglo-Saxons." The day after the battle, Harold's body was identified, either by his amour or marks on his body. His personal standard was presented to William, and later sent to the papacy. The bodies of the English dead, including some of Harold's brothers and his housecarls, were left on the battlefield, although some were removed by relatives later.
The Norman dead were buried in a large communal grave, which has not been found. Exact casualty figures are unknown. Of the Englishmen known to be at the battle, the number of dead implies that the death rate was about 50 per cent of those engaged, although this may be too high. Of the named Normans who fought at Hastings, one in seven is stated to have died, but these were all noblemen, and it is probable that the death rate among the common soldiers was higher. Although Orderic Vitalis's figures are highly exaggerated, his ratio of one in four casualties may be accurate. Marren speculates that perhaps 2,000 Normans and 4,000 Englishmen were killed at Hastings.
The Normans buried their dead in mass graves. Reports stated that some of the English dead were still being found on the hillside years later. Although scholars thought for a long time that remains would not be recoverable, due to the acidic soil, recent finds have changed this view. One skeleton that was found in a medieval cemetery, and originally was thought to be associated with the 13th century Battle of Lewes now is thought to be associated with Hastings instead. Among those were killed was Richard de la More.
The Moore/ de la More/ de la Mare lands in England belong to the family at one point.
Moore of Northmoor
Moore of Kirkdale
Moore of Appleby Parva
Moore of Westmoreland
Moore of Berkshire
Moore of Salisbury
Moore of Cheshire
Moore of Somerset
Moore of Dorset
Moore of Bedfordshire
Moore of Leicester
The First baron War
King John in June 1215 was forced to put his seal to "The Articles of the Barons" by a group of powerful barons who could no longer stand John's failed leadership and despotic rule. The king's Great seal was attached to it on 15 June 1215. In return, the barons renewed their oaths of fealty to King John on 19 July 1215. A formal document to record the agreement was created by the royal chancery on 15 July: this was the original Magna Carta. "The law of the land" is one of the great watchwords of Magna Carta, standing in opposition to the king's mere will. The Magna Carta of 1215 contained clauses which in theory noticeably reduced the power of the king, such as clause 61, the "security clause".
This clause allowed a group of 25 barons to override the king at any time by way of force, a medieval legal process called distrain that was normal in feudal relationships but had never been applied to a king. After a few months of half-hearted attempts to negotiate in the summer of 1215, open warfare broke out between the rebel barons and the king and his supporters. There was Peter de la Mare who sided with the French
against King John in 1216, and Milo de St. Maur also fought against king John.
The Welsh Mawr
In 855, Rhodri Mawr met a Danish fleet in Anglesey led by Gormr, a warrior who had worried Charles The Bald's Kingdom. Rhodri defeated and killed Gormr; The news was so greeted with relief when it became known in Charles's court in Liege. The threat posed by the Vikings who could quickly escape on their ships, were difficult to counter and it was necessary to adopt an unusual, battle-seeking strategy to hurt the raiders when the chance presented itself. Rhodri was successful in 855 and in 893.
The Anglo- Saxon chronicle records that a Welsh forces joined up with the Anglo-Saxon's force to defeat a Viking force encampment near Severn. In 877 Rhodri Mawr was force to flee to Ireland by an alliance between the Vikings and the men of Ceowulf of Mercia. He return the following year and defeated the Viking in battle on Anglesey. Later in 878, Rhodri and his son Gwriad were slain by the Mercians who were seeking to extend their influence in Gwynedd. Their ambitions meet with a heavy resistance. There was Gynddelw Brydydd Mawr was part of a raid which lead to the fall of Powys.
Wars with Welsh and the Scots
Sir John de la More went on an expedition against Llewellin, Prince of Wales. Many Mores, Mare, and Maur fought in Scotland and Wales during 1282-1350. First we will be looking at the Welsh war then the Scottish campaign. Amongst these English army during the Welsh campaign of 1282-83 there were Sir John de la More, Sir Richard de la More, Sir William St. Maur, Sir Roger de la More, and others. John de la More also fought in the war of Brecknock and Radnor. In 1282 he fought at the battle of Rudolan against the Welsh. William de St. Maur conquered Penhow, Woundy and Monmouth Tron from the Welsh in 1235. There is a Stephen de la More when he fought in the years of 1282,1306,1307 and 1310 at the battles of Flanders in 1397, Falkirk, and was in the Scottish expeditions.
After a successful invasion and take over of Wales by England; they found themselves fighting against the Scots. Once again John de la More went to war in 1309 against the Scots. He also fought at the battle of Falkirk. Sir Roger de la More fought at the battle of Boroughbridge, during the first war of independence for Scotland. Sir Roger de la More also in the year of 1211 is mentioned as a commander of the infantry in the king's army in Wales.
The Battle of Ewloe
Owain's army made camp at Basingwerk to block the route to Twthill at Rhuddlan . Henry split from his main army with a smaller force that would march through the nearby Ewloe woods (in modern-day Flintshire) to outflank Owain's army. Sensing this, Owain is said to have sent a large army led by his sonsDafydd ab Owain Gwynedd and Cynan ab Owain Gwynedd into the woods to guard Owain's main force from Henry's outflanking army. Owain split his army and decided to personally lead an extra 200 men into the Ewloe woods to reinforce his sons' armies. When Henry's outflanking force advanced into the wood, they were ambushed by Owain's forces and cut down. The remainder of Henry's force retreated, with Henry narrowly avoiding being killed himself (having been rescued by Roger, Earl of Hertford).
Henry managed to escape back to his main army alive. Not wishing to engage the Angevin army directly, Owain repositioned himself first at St. Asaph, then further west, clearing the road for Henry II to enter into Rhuddlan "ingloriously". Once in Rhuddlan, Henry II received word that his naval expedition had failed. Instead of meeting Henry II at Deganwy or Rhuddlan as the king had commanded, the English fleet had gone to plunder Môn and the Norman troops on board had been defeated by the local Welsh soldiers (Henry FitzRoy himself had also been killed). Despite Owain's success in the Ewloe woods and his men on Anglesey's success, Henry had still succeeded in securing Rhuddlan, and so Owain felt obliged to make peace with him. Owain surrendered the lands of Rhuddlan and Tegeingl to Chester. He also gave Cadwaladr his lands back in Ceredigion, which recemented the alliance between the two brothers. Owain also agreed to render homage and fealty to Henry.
The Battle of Boroughbridge
When Lancaster arrived at the town of Boroughbridge, Harclay was already in possession of the bridge crossing the river. The rebel forces counted probably no more than 700 knights and men-atarms, against the 4,000 or so soldiers in the royal army.Lancaster initially tried to negotiate, but Harclay could not be swayed. Since there was no realistic alternative place to cross the river, and with the royal forces in pursuit from the south, the rebels had no choice but to fight. The ensuing battle was short and one-sided. Harclay had deployed his men on foot to hold the bridge from the northern side. Additional forces were placed at a nearby ford, though contemporary sources do not specify the exact location of this ford.
The royal pikemen were deployed in a schiltron formation, a tactic learned from the Scots in the Scottish wars. The formation proved effective against the oncoming cavalry. The rebels divided into two columns; one led by Hereford and Roger de Clifford, attacking the bridge on foot, the other under Lancaster, trying to cross the ford by horse.According to a graphic description in the chronicle the Brut, Hereford was killed as he crossed the bridge by a pikeman hiding underneath, who thrust his spear up through the Earl's anus. Clifford was also severely injured, and that column of the army fell into disarray. Lancaster's party fared little better; under heavy archery fire his cavalry was cut off before it even reached the ford, and was forced to retreat. This event shows an early – if not entirely novel – effective use of the longbow against cavalry, a tactic which was to become central to future English military success. Lancaster negotiated a truce with Harclay, and withdrew to the town.
During the night a great number of the rebels deserted, and the next day the sheiff of York arrived from the south with additional forces. Lancaster, now greatly outnumbered and with no chance of retreat, had no choice but to surrender to Harclay. The de la Mores of Gloucestershire enter the services of Ayme de Valence in the late thirteen century. The Mores of Gloucester fought at the following engagements at Flanders (1297), Battle of Falkirk, siege of Caerlaverock, Methven, Loudoun Hill, Bannockburn, and old Byland against the Scottish army and the clansmen of clan Muir.
The Siege of Caerlaverock Castle
In July 1300 King Edward I of England marched north with an army including eighty-seven of the Barons of England and several knights of Brittany and Lorraine. John of Brittany, Earl of Richmond. (c. 1266-1334) was among Edward's most trusted warriors and is said to have been present. He was a son of the John II, duke of Brittany who had grown up in Edward's court and it was said that Edward treated him as a son.
The Maxwells, under their chief Sir Eustace Maxwell, made a vigorous defence which repelled the English several times. In the end the garrison were compelled to surrender, after which it was found that only sixty men had withstood the whole English army for a considerable period. In recent years,
Historic Scotland has organized re-enactments of the Siege. During the siege the English heralds composed a roll of arms, the Roll of Caerlaverock, in the form of verses of poetry, each describing the feats of valour of each noble or knight present with a poetic blazon of his armorials.
The Hundred Year War
The Hundred year war was fought by two main super powers back then was England and France. There were many de la Mores and de la Mare have fought along side with Edward the Black prince in France. The first phase was known as the Edwardian phrase was fought from (1337-1360) and the de la Mores and Mare fought at Crecy, Les Espagnols Sur Mer, and the Battle of Poictiers. Possible that the de la Mores and Mare fought in the different phrase of the hundred year wars and during the Lancasterian phrase at the battle of Agincourt. The following names that fought in the hundred years war which includes: Sir John de la More ( a veteran soldier), Reginald de la Mare, Henry de la More, Elias de la Mare/ More. There was also a William de la More who fought in many battles that are mention as well at the battle of Navarette.
Battle of Crecy
There was Reginald de la More, and Sir William de la More fought at Crecy Edward deployed his army facing south on a sloping hillside at Crecy- en- Ponthieu; the slope put the French mounted knights at an immediate disadvantage. The left flank was anchored against Wadicourt, while the right was protected by Crecy itself and the River Maye beyond. This made it impossible for the French army to outflank them. The army was also well-fed and rested, giving them an advantage over the French, who did not rest before the battle.
The English army was led by Edward III; it mainly comprised English and Welsh troops along with allied Breton and German mercenaries. The exact size and composition of the English force is not known. Andrew Ayton suggests a figure of around 2,500 men at arms, nobles and knights, heavily armoured and armed men, accompanied by their retinues. The army contained around 5,000 longbowmen, 3,000 hobelars (light cavalry and mounted archers) and 3,500 spearmen. Clifford Rodgers suggests 2,500 men-at-arms, 7,000 longbowmen, 3,250 hobelars and 2,300 spearmen. Jonathon Sumption believes the force was somewhat smaller, based on calculations of the carrying capacity of the transport fleet that was assembled to ferry the army to the continent. Based on this, he has put his estimate at around 7,000–10,000. The power of Edward's army at Crécy lay in the massed use of the longbow: a powerful tall bow made primarily of yew.
Upon Edward's accession in 1327, he had inherited a kingdom beset with two zones of conflict: Aquitaine and Scotland. England had not been a dominant military force in Europe: the French dominated in Aquitaine, and Scotland had all but achieved its independence since the battle of Bannockburn in 1314. Previously, medieval battles had largely been decided by the charge of heavily armoured mounted knights, countered effectively by the Scots infantry at battles such as Stirling bridge and Bannockburn.. Longbows had been effectively used before by English armies: Edward I successfully used longbowmen to break up static Scottish schiltron formations at the Battle of Falkirk in 1298; however it was not until Edward III's reign that they were accorded greater significance in English military doctrine. Edward realised the importance of inflicting severe damage upon an enemy force before melée combat began; at Halidon Hill in 1333, he used massed longbowmen and favourable terrain to inflict a significant defeat on the Scots forces—in some ways a harbinger of his similar tactics at Crécy.
A second important advantage of longbowmen was cost: they were far cheaper to equip and train than aristocratic knights. To ensure he had a force of experienced archers to call upon, Edward engrained archery into English culture; he encouraged its practice and the production of stocks of arrows and bows in peacetime as well as war. He later declared in 1363 that archery had to be practised by law, banning other sports to accommodate archery. A common claim for the longbow was its ability to penetrate plate armour due to its draw weight, a claim contested by contemporary accounts and modern tests. A controlled test conducted by Mike Loades at the Royal Military College of Science's ballistics test site for the programme Weapons That Made Britain - The Longbow found that arrows shot at a speed of around 52 metres per second against a plate of munition-quality steel (not speciallyhardened) were ineffective at a range of around 80 metres, enough to mildly bruise/wound the target at 30 metres, and lethal at a range of 20 metres. Archery was described as ineffective against plate armour by contemporaries at battles such as Bergerac in 1345, Neville's cross in 1346 and Poitiers in 1356.
Later studies also found that late period plate armour such as that employed by Italian city-state mercenary companies was effective at stopping contemporary arrows.Horses, however, were almost wholly unprotected against arrows, and arrows could penetrate the lighter armour on limbs. Clifford Rodgers, commenting on the later, similar Battle of Agincourt, argues that the psychological effect of a massive storm of arrows would have broken the fighting spirit of the target forces. Archers were issued with around 60-72 arrows before a battle began. Most archers would not shoot at the maximum rate, around six per minute for the heaviest bows, as the psychological and physical exertion of battle strained the men. As the battle wore on, the arm and shoulder muscles would tire from exertion, the fingers holding the bowstring would strain and the stress of combat would slacken the rate of fire. The French army was led by Philip VI and the blind John of Bohemia.
The exact size of the French army is less certain as the financial records from the Crécy campaign are lost, however there is a prevailing consensus that it was substantially larger than the English. The French army likely numbered around 30,000 men. Contemporary chronicler Jean Froissart places the French numbers at 100,000, while Wynkeley suggests 80,000. These numbers have been described as unrealistic and exaggerated by historians, going by the extant war treasury records for 1340, six years before the battle. Ayton suggests around 12,000 mounted men-at-arms as the core soldiery of the French army, several thousand Genoese crossbowmen and a "large, though indeterminate number of common infantry".
Most historians have accepted the figure of 6,000 Genoese crossbowmen. However, Schnerb questions this figure, based on the estimates of 2,000 available crossbowmen in all of France in 1340. That Genoa on its own could have put several thousand mercenary crossbowmen at the disposal of the French monarch is described by Schnerb as "doubtful". The contingent of common infantrymen is not known with any certainty, except that it outnumbered the English and was in the thousands.
The Battle of Crécy is often exemplified as a battle in which the longbow defeated the rival crossbow. The crossbow had become the dominant ranged infantry weapon on the continental European battlefield: the choice weapon for expert mercenary companies. The crossbow was favoured as it required less physical strength to load and shoot than a longbow, and could release more kinetic energy than its rival, making it deadlier at close range. They were, however, hampered by slower, more difficult loading, their cumbersome shape and their range, in which the longbow had the advantage.
Later developments in more powerful crossbows in the 15th century, such as the windlass-span crossbow, negated these advantages, while advances in bow technology brought to Europe from armies on crusade introduced composite technology; decreasing the size of the crossbow while increasing its power. A common claim about the crossbow is a reload time of one bolt every 1–2 minutes. A test conducted by Mike Loades for Weapons That Changed Britain - The Longbow found that a belt and claw span crossbow could discharge 4 bolts in 30 seconds, while a longbow could shoot 9. A second speed test conducted using a hand-span crossbow found that the weapon could shoot 6 bolts in the same time it took for a longbow to shoot 10.
The English army was deployed in three divisions, or "battles".
Edward's son, Edward, the Prince of Wales commanded the vanguard with John de Vere, the Earl of Oxford, Thomas de Brauchamp, the Earl of Warwick, and Sir John Chandos. This division lay forward from the rest of the army and would bear the brunt of the French assault. Edward himself commanded the division behind, while the rear division was led by William de Bohun, Earl of Northampton. Each division composed of spearmen in the rear, men-at-arms in the centre and the longbowmen arrayed in front of the army in a jagged line.The exact location of the English baggage train is not known. Edward ordered his men-atarms to fight on foot rather than stay mounted.
The English also dug a series of ditches, pits and caltrops to maim the French cavalry. The French army came north from Abbeyville, the advance guard of his army arriving at the Crécy ridgeline at around midday on 26 August. After reconnoitring the English position, it was advised to Philip that the army should encamp and give battle the following day. Philip met stiff resistance from his senior nobles and was thus forced to concede that the attack would be made that day. This put them at a significant disadvantage; the English army was well-fed after plundering the countryside and well-rested, having slept in their positions the night before the battle.
The French were further hampered by the absence of their Constable. It was the duty of the Constable of France to lead its armies in battle, however, the Constable Raoul II of Brienne, count of Eu had been taken prisoner when the English army sacked Caen, depriving them of his leadership. Philip formed up his army for battle; the Genoese under Antonio Doria and Carlo Grimaldi formed the vanguard, followed by a division of knights and men-at-arms led by Charles II, count of Alencon accompanied by the blind King John of Bohemia. The next division was led by Rudolph, Duke of Lorraine and Louis II, Count of Blois, while Philip himself commanded the rearguard. The French army moved forward late in the afternoon, around 4pm after it had formed up.
As it advanced, a sudden rainstorm broke over the field of battle. The English archers de-strung their bows to avoid the strings becoming damaged; the Genoese with their crossbows could take no such precautions, resulting in damage to their weapons. The crossbowmen began their advance, however they had left their pavises back in the baggage train, and thus had no means of protection as they loaded their weapons.The Genoese moved within range and discharged their weapons. Damaged by the rain, the slackened crossbows had little effect on the English line.
The English archers shot their bows in retaliation, inflicting heavy casualties on the Genoese, causing them to retreat. The knights and nobles following in Alencon's division, seeing the routed mercenaries, hacked them down as they retreated. Froissart writes of the event: The English, who were drawn up in three divisions and seated on the ground, on seeing their enemies advance, arose boldly and fell into their ranks... You must know that these kings, earls, barons, and lords of France did not advance in any regular order... There were about fifteen thousand Genoese crossbowmen; but they were quite fatigued, having marched on foot that day six leagues, completely armed, and with their wet crossbows.
They told the constable that they were not in a fit condition to do any great things that day in battle. The Count of Alençon, hearing this, was reported to say, "This is what one gets by employing such scoundrels, who fail when there is any need for them. — Chateaubriand, after Froissart's middle French, gives: "On se doit bien charger de telle ribaudaille qui faille au besoin" The clash of the retreating Genoese and the advancing French cavalry threw the army into disarray.
The longbowmen continued to discharge their bows into the chaos, while five Ribaldis , early
cannon, added to the confusion, though it is doubtful that they had inflicted any significant casualties. Froissart writes that such guns fired "two or three discharges on the Genoese", likely large arrows or primitive grapeshot. Giovanni Villani writes of the guns: The English guns cast iron balls by means of fire...They made a noise like thunder and caused much loss in men and horses... The Genoese were continually hit by the archers and the gunners... [by the end of the battle], the whole plain was covered by men struck down by arrows and cannon balls.
With the Genoese neutralised, the French cavalry charged the English ranks, however, the slope and obstacles laid by the English disrupted the charge. The continued hail of longbow arrows inflicted mounting losses upon the knights, blocking successive waves of advance by the following ranks. The massed ranks could not break the English position, which subjected them to a relentless barrage of arrows, making many of the horses casualties. The Black Prince's division was hard pressed by the French attack, however Edward refused to send help with the comment; "Let the boy win his spurs".
The French cavalry made repeated attempts to charge up the slope, however with each successive wave more losses were sustained. In the course of the battle, the blind king John was struck down attacking the Black Prince's position. The struggle continued well into the night when Philip abandoned the field of battle. Philip had his horse killed from underneath him twice during the battle and may have taken an arrow to the jaw. His sacred and royal banner, the Oriflamme, which when raised meant that no quarter was to be given to the enemy, was also captured and taken, one of the five occasions this occurred during the banner's century spanning history. The battle ended soon after the French king fled, the remaining men-at-arms running from the battle.
Battle of Poictiers
At the beginning of the battle, the English removed their baggage train leading the French to think they were about to retreat which provoked a hasty charge by the French knights against the archers. According to Froissart, the English attacked the enemy, especially the horses, with a shower of arrows. Geoffery the baker writes that the French armour was invulnerable to the English arrows, that the arrowheads either skidded off the armour or shattered on impact. Given the following actions of the archers, it seems likely Baker was correct. The armour on the horses was weaker on the sides and back, so the archers moved to the sides of the cavalry and shot the horses in the flanks. This was a popular method of stopping a cavalry charge, as a falling horse often destroyed the cohesion of the enemy's line. The results were devastating.
The Dauphin attacked Salisbury and pressed his advance in spite of heavy shot by the English archers and complications of running into the retreating vanguard of Clermont's force. Green suggests that the Dauphin had thousands of troops with him in this phase of the attack. He advanced to the English lines but ultimately fell back.The French were unable to penetrate the protective hedge the English were using. This phase of the attack lasted about two hours. This cavalry attack was followed by infantry attack. The Dauphin's infantry engaged in heavy fighting, but withdrew to regroup. The next wave of infantry under Orleans, seeing that the Dauphin's men were not attacking, turned back and panicked.
This stranded the forces led by the King himself. This was a formidable fighting force, and the English archers were running very low on arrows; the archers joined the infantry in the fight and some of both groups mounted horses to form an improvised cavalry. At about this time, King John sent two sons from the battlefield. His youngest son, Philip, stayed with him and fought at his side in the final phase of the battle. When the Dauphin and other sons withdrew, the duke of Orléans also withdrew. Combat was hard, but the Black Prince still had a mobile reserve hidden in the woods, commanded by Jean de Grailly, the Captal de Buch; which was able to circle around and attack the French in the flank and rear. The French were
fearful of encirclement and attempted to flee. King John was captured with his immediate entourage only after a memorable resistance. Henry de More was wounded at this battle and was knighted by Edward the black prince.
The Battle of Agincourt
In this battle there was Elias de la More/ Mare who was killed at this battle and a Richard de la Mare fought at this battle. Henry V invaded France following the failure of negotiations with the French. He claimed the title of King of France through his great-grandfather Edward III, although in practice the English kings were generally prepared to renounce this claim if the French would acknowledge the English claim on Aquitaine and other French lands. He initially called a great council in the spring of 1414 to discuss going to war with France, but the lords insisted that he should negotiate further and moderate his claims.
In the following negotiations Henry said that he would give up his claim to the French throne if the French would pay the 1.6 million crowns outstanding from the ransom of John II (who had been captured at the Battle of Poitiers in 1356), and concede English ownership of the lands of Normandy, Touraine, Anjou, Brittany and Flanders as well as Aquitaine. Henry would marry Princess Catherine, the young daughter of Charles VI, and receive a dowry of 2 million crowns.
The French responded with what they considered the generous terms of marriage with Princess Catherine, a dowry of 600,000 crowns, and an enlarged Aquitaine. By 1415, negotiations had ground to a halt, with the English claiming that the French had mocked their claims and ridiculed Henry himself. In December 1414, the English parliament was persuaded to grant Henry a "double subsidy", a tax at twice the traditional rate, to recover his inheritance from the French. On 19 April 1415, Henry again asked the Great Council to sanction war with France, and this time they agreed.
Henry's army landed in northern France on 13 August 1415, carried by a fleet described by Shakespeare as "a city on the inconstant billows dancing / For so appears this fleet majestical", often reported to comprise 1,500 ships, but probably far smaller, and besieged the port of Harfleur with an army of about 12,000, and up to 20,000 horses. The siege took longer than expected. The town surrendered on 22 September, and the English army did not leave until 8 October. The campaign season was coming to an end, and the English army had suffered many casualties through disease.
Rather than retire directly to England for the winter, with his costly expedition resulting in the capture of only one town, Henry decided to march most of his army (roughly 9,000) through Normandy to the port of Calais, the English stronghold in northern France, to demonstrate by his presence in the territory at the head of an army that his right to rule in the duchy was more than a mere abstract legal and historical claim.
He also intended the maneuver as a deliberate provocation to battle aimed at the dauphin, who had failed to respond to Henry's personal challenge to combat at Harfleur. The French had raised an army during the siege which assembled around Rouen. This was not strictly a feudal army, but an army paid through a system similar to the English. The French hoped to raise 9,000 troops, but the army was not ready in time to relieve Harfleur.
After Henry V marched to the north, the French moved to blockade them along the river Somme. They were successful for a time, forcing Henry to move south, away from Calais, to find a ford. The English finally crossed the Somme south of Peronne, at Bethencourt and Voyennes and resumed marching north. Without the river protection, the French were hesitant to force a battle. They shadowed Henry's army while calling a semonce des nobles, calling on local nobles to join the army. By 24 October, both armies faced each other for battle, but the French declined, hoping for the arrival of more troops.
The two armies spent the night of 24 October on open ground. The next day the French initiated negotiations as a delaying tactic, but Henry ordered his army to advance and to start a battle that, given the state of his army, he would have preferred to avoid, or to fight defensively: that was how Crecy and the other famous longbow victories had been won. The English had very little food, had marched 260 miles (420 km) in two and a half weeks, were suffering from sickness such as dysentery, and faced much larger numbers of well equipped French men at arms. The French army blocked Henry's way to the safety of Calais, however, and delaying battle would only further weaken his tired army and allow more French troops to arrive. The location of the battle is not precisely fixed in contemporary accounts. Most authors believe it was fought in the narrow strip of open land formed between the woods of Tramecourt and Azincourt . However, the lack of archaeological evidence at this traditional site has led to suggestions it may have been fought to the west of Azincourt.
Early on the 25th, Henry deployed his army (approximately 1,500 men at arms and 7,000 longbowmen) across a 750-yard (690 m) part of the defile. The army was organized into three "battles" or divisions: the vanguard, led by the Duke of York; the main battle led by Henry himself; and the rearguard, led by Lord Camoys. In addition, Sir Thomas Epringham, one of Henry's most experienced household knights, had a role in marshalling the archers. It is likely that the English adopted their usual battle line of longbowmen on either flank, with men-at-arms and knights in the center. They may also have deployed some archers in the center of the line. The English men-at-arms in plate and mail were placed shoulder to shoulder four deep. The English and Welsh archers on the flanks drove pointed wooden stakes, or palings, into the ground at an angle to force cavalry to veer off. This use of stakes may have been inspired by the Battle of Nicopolis of 1396, where forces of the Ottoman empire used the tactic against French cavalry.
The English made their confessions before the battle, as was customary. Henry, worried about the enemy launching surprise raids, and wanting his troops to remain focused, ordered all his men to spend the night before the battle in silence, on pain of having an ear cut off. He told his men that he would rather die in the coming battle than be captured and ransomed. Henry made a speech emphasizing the justness of his cause, and reminding his army of previous great defeats the kings of England had inflicted on the French. The Burgundian sources have him concluding the speech by telling his men that the French had boasted that they would cut off two fingers from the right hand of every archer, so that he could never draw a longbow again.
Whether this was true is open to question; as previously noted, death was the normal fate of any soldier who could not be ransomed. The French force was not only larger than that of the English, their noble men-at-arms would have considered themselves superior to the large number of archers in the English army, whom the French (based on their experience in recent memory of using and facing archers) considered relatively insignificant.
For example, the chronicler Edmond de Dyntner stated that there were "ten French nobles against one English", ignoring the archers completely. Several French accounts emphasize that the French leaders were so eager to defeat the English (and win the ransoms of the English men-at-arms) that they insisted on being in the first line; as one of the contemporary accounts put it: "All the lords wanted to be in the vanguard, against the opinion of the constable and the experienced knights." The French were arrayed in three lines or "battles".
The first line was led by Constable d'Albret, Marshal Boucicault and the Dukes of Orleans and Bourbon, with attached cavalry wings under the Count of Vendome and Sir Clignet de Brebant. The second line was commanded by the Dukes of Bar and Alencon and the Count of Nevers. The third line was under the Counts of Dammartin and Fauconberg. The Burgundian chronicler, Jean de Wavrin, writes that there were 8,000 men-at-arms, 4,000 archers and 1,500 crossbowmen in the vanguard, with two wings of 600 and 800 mounted men at-arms, and the main battle having "as many knights, esquires and archers as in the vanguard", with the rearguard containing "all of the rest of the men-at-arms".
The Herald of Berry uses somewhat different figures of 4,800 men-at-arms in the first line, 3,000 men in the second line, with two "wings" containing 600 mounted men-at-arms each, and a total of "10,000 men-at-arms", but does not mention a third line. Thousands of troops appear to have been in the rearguard, containing servants and commoners whom the French were either unable or unwilling to deploy. Wavrin gives the total French army size as 50,000: "They had plenty of archers and crossbowmen but nobody wanted to let them fire .
The reason for this was that the site was so narrow that there was only enough room for the men-at-arms." A different source says that the French did not even deploy 4,000 of the best crossbowmen "on the pretext they had no need of their help". The field of battle was arguably the most significant factor in deciding the outcome. The recently ploughed land hemmed in by dense woodland favored the English, both because of its narrowness, and because of the thick mud through which the French knights had to walk. An analysis by battlefield detectives has looked at the crowd dynamics of the battlefield. The Battlefield Detectives episode states that when the density reached four men per square meter, soldiers would not even be able to take full steps forward, slowing the speed of the advance by 70%.
Accounts of the battle describe the French engaging the English men-at-arms before being rushed from the sides by the longbow men as the melee developed. The English account in the Gesta Henrici says: "For when some of them, killed when battle was first joined, fall at the front, so great was the undisciplined violence and pressure of the mass of men behind them that the living fell on top of the dead, and others falling on top of the living were killed as well."
Although the French initially pushed the English back, they became so closely packed that they are described as having trouble using their weapons properly. The French monk of St. Denis says: "Their vanguard, composed of about 5,000 men, found itself at first so tightly packed that those who were in the third rank could scarcely use their swords," and the Burgundian sources have a similar passage. As the battle was fought on a recently ploughed field, and there had recently been heavy rain leaving it very muddy, it proved very tiring to walk through in full plate amour.
The French monk of St. Denis describes the French troops as "marching through the middle of the mud where they sank up to their knees. So they were already overcome with fatigue even before they advanced against the enemy". The deep, soft mud particularly favored the English force because, once knocked to the ground, the heavily armored French knights had a hard time getting back up to fight in the mêlée. Barker states that some knights, encumbered by their amour, actually drowned in their helmets. On the morning of 25 October, the French were still waiting for additional troops to arrive.
The Duke of Barbant (about 2,000 men), the Duke of Anjou (about 600 men), and the Duke of Brittany (6,000 men, according to Monstrelet), were all marching to join the army. For three hours after sunrise there was no fighting. Military textbooks of the time stated: "Everywhere and on all occasions that foot soldiers march against their enemy face to face, those who march lose and those who remain standing still and holding firm win." On top of this, the French were expecting thousands of men to join them if they waited. They were blocking Henry's retreat, and were perfectly happy to wait for as long as it took.
There had even been a suggestion that the English would run away rather than give battle when they saw that they would be fighting so many French princes. Henry's men, on the other hand, were already very weary from hunger, illness and marching. Even though Henry knew as well as the French did that his army would perform better on the defensive, he was eventually forced to take a calculated risk, and move his army farther forward to start the battle.
This entailed abandoning his chosen position and pulling out, advancing, and then reinstalling
the long sharpened wooden stakes pointed outwards toward the enemy, which helped protect the longbow men from cavalry charges. (The use of stakes was an innovation for the English: during the battle of Crecy, for example, the archers had been instead protected by pits and other obstacles.) The tightness of the terrain also seems to have restricted the planned deployment of the French forces.
The French had originally drawn up a battle plan that had archers and crossbowmen in front of their men-at arms, with a cavalry force at the rear specifically designed to "fall upon the archers, and use their force to break them," but in the event, the French archers and crossbowmen were deployed behind and to the sides of the men-at-arms (where they seem to have played almost no part, except possibly for an initial volley of arrows at the start of the battle). The cavalry force, which could have devastated the English line if it had attacked while they moved their stakes, charged only after the initial volley of arrows from the English.
It is unclear whether the delay occurred because the French were hoping the English would launch a frontal assault (and were surprised when the English instead started shooting from their new defensive position), or whether the French mounted knights instead did not react quickly enough to the English advance. French chroniclers agree that when the mounted charge did come, it did not contain as many men as it should have; Gilles le Bouvier states that some had wandered off to warm themselves and others were walking or feeding their horses. The French cavalry, despite being somewhat disorganized and not at full numbers, charged towards the longbow men, but it was a disaster, with the French knights unable to outflank the longbow men (because of the encroaching woodland) and unable to charge through the forest of sharpened stakes that protected the archers.
John Keegan argues that the longbows' main influence on the battle at this point was injuries to horses: armoured only on the head, many horses would have become dangerously out of control when struck in the back or flank from the high-elevation long range shots used as the charge started. The mounted charge and subsequent retreat churned up the already muddy terrain between the French and the English. Juliet Barker quotes a contemporary account by a monk of St. Denis who reports how the wounded and panicking horses galloped through the advancing infantry, scattering them and trampling them down in their headlong flight from the battlefield. The plate armour of the French men-at-arms allowed them to close the 300 yards or so to the English lines while being under what the French monk of Saint Denis described as "a terrifying hail of arrow shot".
A complete coat of plate was considered such good protection that shields were generally not used, although the Burgundian contemporary sources specifically distinguish between Frenchmen who used shields and those who did not, and Rogers has suggested that the front elements of the French force may have used axes and shields. Modern historians are somewhat divided on how effective the longbow fire would have been against plate armour of the time, with some modern texts suggesting that arrows could not penetrate, especially the better quality steel armour, but others suggesting arrows could penetrate, especially the poorer quality wrought iron armour.
Rogers suggests that the longbow could penetrate a wrought iron breastplate at short range and penetrate the thinner armour on the limbs even at 220 yards (200 m). He considers a knight in the best quality steel armour would have been more or less invulnerable to an arrow on the breastplate or top of the helmet, but would still have been vulnerable to shots hitting the limbs, particularly at close range.
In any case, to protect themselves as much as possible from the arrows, the French had to lower their visors and bend their helmeted heads to avoid being shot in the face—the eye and air-holes in their helmets were among the weakest points in the armour. This head lowered position restricted both their breathing and their vision. Then they had to walk a few hundred yards through thick mud, a press of comrades and wearing armour weighing 50– 60 pounds (23–27 kg), gathering sticky clay all the way. Increasingly they had to walk around or over fallen comrades. The surviving French men-at-arms reached the front of the English line and pushed it back, with the longbowmen on the flanks continuing to shoot at point-blank range.
When the archers ran out of arrows, they dropped their bows and using hatcchets, swords and the mallets they had used to drive their stakes in, attacked the now disordered, fatigued and wounded French men-at-arms massed in front of them. The French could not cope with the thousands of lightly armoured longbowmen assailants (who were much less hindered by the mud and weight of their armour) combined with the English men-at-arms.
The impact of thousands of arrows, combined with the slog in heavy armour through the mud, the heat and lack of oxygen in plate armour with the visor down, and the crush of their numbers meant the French men-at-arms could "scarcely lift their weapons" when they finally engaged the English line. The exhausted French men-at-arms are described as being knocked to the ground by the English and then unable to get back up. As the melee developed, the French second line also joined the attack, but they too were swallowed up, with the narrow terrain meaning the extra numbers could not be used effectively. Rogers suggests that the French at the back of their deep formation would have been attempting to push forward and quite literally add their weight to the advance, without realising that they were hindering the ability of those at the front to manoeuvre and fight, actually pushing them into the English formation of lancepoints.
After the initial wave, the French would have had to fight over and on the bodies of those who had fallen before them. In such a "press" of thousands of men, Rogers finds it plausible that a significant number could have suffocated in their armour, as is described by several sources, and is also known to have happened in other battles. The French men-at-arms were taken prisoner or killed in the thousands.
The fighting lasted about three hours, but eventually the leaders of the second line were killed or captured, as those of the first line had been. The English Gesta Henrici describes three great heaps of the slain around the three main English standards. According to contemporary English accounts, Henry was directly involved in the hand-to-hand fighting. Upon hearing that his youngest brother Humphrey, Duke of Gloucester had been wounded in the groin, Henry took his household guard and stood over his brother, in the front rank of the fighting, until Humphrey could be dragged to safety. The king received an axe blow to the head, which knocked off a piece of the crown that formed part of his helmet.
The only French success was an attack on the lightly protected English baggage train, with Ysembart d'Azincourt (leading a small number of men-at-arms and varlets plus about 600 peasants) seizing some of Henry's personal treasures, including a crown. Whether this was part of a deliberate French plan or an act of local brigandage is unclear from the sources.
Certainly, d'Azincourt was a local knight but he may have been chosen to lead the attack because of his local knowledge and the lack of availability of a more senior soldier. In some accounts the attack happened towards the end of the battle, and led the English to think they were being attacked from the rear. Barker, following the Gesta Henrici, believed to have been written by an English chaplain who was actually in the baggage train, concludes that the attack happened at the start of the battle. Regardless of when the baggage assault happened, at some point after the initial English victory, Henry became alarmed that the French were regrouping for another attack. The Gesta Henrici places this after the English had overcome the onslaught of the French men-at-arms and the weary English troops were eyeing the French rearguard ("in incomparable number and still fresh").
Le Fevre and Wavrin similarly say that it was signs of the French rearguard regrouping and "marching forward in battle order" which made the English think they were still in danger. It seems it was purely a decision of Henry, since the English knights found it contrary to chivalry, and contrary to their interests to kill valuable hostages for whom it was commonplace to ask ransom. Henry threatened to hang whoever did not obey his orders. In any event, Henry ordered the slaughter of what were perhaps several thousand
French prisoners, sparing only the most high ranked (presumably those most likely to fetch a large ransom under the chivalric system of warfare).
According to most chroniclers, Henry's fear was that the prisoners (who, in an unusual turn of events, actually outnumbered their captors) would realize their advantage in numbers, rearm themselves with the weapons strewn about the field and overwhelm the exhausted English forces. Contemporary chroniclers did not criticize him for it. In his study of the battle, John Keegan argued that the main aim was not to actually kill the French knights but rather to terrorize them into submission and quell any possibility they might resume the fight, which would probably have caused the uncommitted French reserve forces to join the fray, as well. Such an event would have posed a risk to the still-outnumbered English and could have easily turned a stunning victory into a mutually destructive defeat, as the English forces were now largely intermingled with the French and would have suffered grievously from the arrows of their own longbow men had they needed to resume shooting.
Keegan also speculated that due to the relatively low number of archers actually involved in killing the French knights (roughly 200 by his estimate), together with the refusal of the English knights to assist in a duty they saw as distastefully unchivalrous and combined with the sheer difficulty of killing such a large number of prisoners in such a short space of time, the actual number of French knights killed might not have even reached the hundreds before the reserves fled the field and Henry called an end to the slaughter. The lack of reliable sources makes it impossible to give a precise figure for the French and English casualties (dead, wounded, taken prisoner).
However, it is clear that though the English were outnumbered, their losses were far lower than those of the French. The French sources all give 4,000– 10,000 French dead, with up to 1,600 English dead. The lowest ratio in these French sources has the French losing six times more men than the English. The English sources vary between about 1,500 and 11,000 for the French dead, with English dead put at no more than 100. Barker identifies from the available records "at least" 112 Englishmen killed in the fighting, including Edward of Norwich, 2nd Duke of York, a grandson of Edward III. One widely used estimate puts the English casualties at 450, not an insignificant number in an army of about 8,500, but far fewer than the thousands the French lost, nearly all of whom were killed or captured.
Using the lowest French estimate of their own dead of 4,000 would imply a ratio of nearly 9 to 1 in favor of the English, or over 10 to 1 if the prisoners are included. The French suffered heavily. Three dukes, at least eight counts, a viscount, and an archbishop died, along with numerous other nobles. Of the great royal office holders, France lost her Constable, Admiral, Master of the Crossbowmen and prévôt of the marshals. The baillis of nine major northern towns were killed, often along with their sons, relatives and supporters. In the words of Juliet Barker, the battle "cut a great swath through the natural leaders of French society in Artois, Ponthieu, Normandy, and Picardy.” Estimates of the number of prisoners vary between 700 and 2,200, amongst them the Duke of Orleans (the famous poet Charles d'Orléans) and Jean Le Maingre, Marshal of France. Although the victory had been militarily decisive, its impact was complex.
It did not lead to further English conquests immediately as Henry's priority was to return to England, which he did on 16 November, to be received in triumph in London on the 23rd. Henry returned a conquering hero, in the eyes of his subjects and European powers outside France, blessed by God. It established the legitimacy of the Lancastrian monarchy and the future campaigns of Henry to pursue his "rights and privileges" in France. Other benefits to the English were longer term. Very quickly after the battle, the fragile truce between the Armagnac and Burgundian factions broke down.
The brunt of the battle had fallen on the Armagnacs and it was they who suffered the majority of senior casualties and carried the blame for the defeat. The Burgundians seized on the opportunity and within 10 days of the battle had mustered their armies and marched on Paris. This lack of unity in France allowed Henry eighteen months to prepare militarily and politically for a renewed campaign. When that campaign took place, it was made easier by the damage done to the political and military structures of Normandy by the battle.
The English Civil Wars
The English Civil wars will also include the war of the roses. Now it is not certain if there were any de la Mores who fought in this war but most likely they did. The war of the roses was fought between two main houses. The House of York and the House of Lancaster. I believe that the de la Mores fought for the house of Lancaster, since most of the de la Mores living in Gloucester, Lincoln , Lancastershire and others. It would also make sense that many de la Mores and Mare fought in the English civil wars. In one particular instance there was a John More at the Siege of Lathorn House.
The Mores and Mares most likely fought at the following engagements Siege of Gloucester, Battle of Boldon Hill, Battle of Gainsborough, Battle of Winceby, Siege of Lincoln, storming of Bolton, Battle of Ormskirk, Battle of Neseby, and Battle of Stow-on-the-Wold. In the Second and third English civil wars; the Mores and Mare fought at the Siege of Pembroke, Battle of Preston.
Colonel John Moore
John Moore was born into one of the oldest noble Moore families in England in 1599. By the early 1640s, John Moore (who was by now a Member of Parliament for Liverpool) was heavily involved with the early shipping trade, forging connections in Barbados. When English civil war broke out in England in 1642, Moore pledged his allegiance to the Roundhead Parliamentarians as did most of Liverpool's burgesses, who were largely of Puritan stock. The nobles and gentry formed the bulk of the Cavaliers (who had control of both Liverpool castle and tower), including the mayor, John Walker. The Castle and the township was handed over to Lord Derby for the Royalists.
In May 1643, however, John Moore and his Parliamentarian men set about routing the castle, which they succeeded, suffering only 7 dead to the Royalists' 80 dead and 300 prisoners. The Lancashire Royalist faction collapsed soon after. After the castle had been taken, John Moore assumed control of both it and the area that it encompassed, taking the title of Governor of Liverpool for himself. Cromwell rewarded him with the rank of Colonel in his Parliamentarian army and also making him Parliament's vice-admiral of Cheshire and Lancashire. Moore's victory was not to be long lived however, and Liverpool was routed from underneath him on June 13, 1644 when the Royalist Prince Rupert of the Rhine and his army of 10,000 forced an entry into the city around the area of Old Hall Street. The Parliamentarians put up a strong defense, and they took the lives of some 1,500 Royalists.
By the time that Prince Rupert reached the City itself, John Moore and the remaining Parliamentary troops had already left the city via the Pool. When Sir John Meldrum's Parliamentary forces recaptured the city six months later, John Moore found himself back in charge as governor. Moore was a supporter of pride's purge and, as well as helping to organize security arrangements at King Charles' trial. He was a signatory of the King's death warrant in 1649.In 1649, Moore fought in Ireland against James Butler, 1st Duke of Ormonde and became governor of Dublin. He died of a fever there in 1650.
The Siege of Lathorn House
When Fairfax arrived at Lathom House in February 1644, the Countess had made every effort to conceal the strength of the castle's fortifications. Fairfax demanded that the Countess surrender Lathom House to him. She asked for a week to consider his offer, and then insisted that it was only appropriate that he visit her at Lathom House for further negotiations. He was received as an honored guest, but the entire household categorically rejected his terms for surrendering. He gave her two more days to consider her situation. The emissary sent two days later was scornfully dismissed. The siege began with 2,000 Parliamentary soldiers (500 cavalry and 1,500 infantry) against a garrison of 300.
The fortifications of Lathom House consisted of: Outer walls and embankments six feet thick An eight-yard moat Nine towers, each with six cannons, three pointing in either direction, and the Eagle Tower providing an excellent overview of the battlefield In addition, the castle was at the lowest point in the middle of an open expanse that allowed superb views of the enemy's activities. Charlotte had assembled a militia of seasoned marksmen who were able to inflict significant losses by sniping. John Seacome, an 18th-century historian of the House of Stanley quoted from another account A true and genuine account of the famous and ever memorable siege of Lathom-House in the County of Lancaster: upon a flat, upon a moorish, springy, and spumous ground ; was at the time of the siege encompassed by a strong wall of two yards thick.
Upon the wall were nine towers flanking each other, and in every tower were six pieces of ordnance, that played three the one way and three the other. Within the wall was a moat, eight yards wide and two yards deep; upon the brink of the moat, between the wall and the graff, was a strong row of palisadoes surrounding the whole, and, to add to these securities, there was a high tower, called the Eagle Tower, in the midst of the house, surrounding (surmounting?) all the rest ; and the gatehouse was also a strong and high building, with a strong. tower on each side of it; and in the entrance to the first court, upon the top of these towers, were placed the best and choicest marksmen, who had been accustomed to attend the Earl in his field sports, with their fowling-pieces, which they levelled at the enemy, marking particularly the officers wherever they appeared in their trenches.
Nature seemed to have formed the house for a stronghold. The situation of the house might be compared to the palm of a man's hand-flat in the middle and covered with rising ground around it, so that during the siege the enemy was never able to raise a battery against it, or to make a single practicable breach in the wall. The works of the besiegers formed a line of circumvallation drawn round about the house at the distance of 60 or 100 or 200 yards from the wall, as best suited the ground, consisting of an open trench, a yard of ditch, and a yard of turf, with eight sconces raised in such places as might annoy the besieged in the sally, directs lateribus, and in some places staked and palisadoed.
The fortifications sustained continuous cannon and mortar fire with minimal damage. The Royalists launched several successful sorties to disrupt Parliamentary efforts to set up batteries. As a result, Parliamentary forces were unable to establish any major artillery positions against the castle, and the army refused to replenish those guns that were lost or spiked during the sorties. Morale among the Roundheads also suffered greatly as the besieged shot soldiers and engineers on the battlefield.
Nevertheless, Fairfax persisted in demanding that Charlotte surrender to his forces, going so far as to obtain a letter from Lord Stanley asking for safe passage for her. She refused to surrender under any terms, rebuking messengers in increasingly disdainful tones. After one particularly audacious sortie in late April that destroyed several Roundhead positions, Fairfax declared a day of fasting and prayer in his camp. One of the chaplains invoked the following verse from Jeremiah 50:14: Put yourselves in array against Babylon on every side: all ye that bend the bow, shoot at her, spare no arrows: for she hath sinned against the Lord. Captain Hector Schofield, a messenger from Colonel Alexander Rigby of the Roundheads, arrived to offer Charlotte an honorable surrender.
She threatened to hang him from the tower gates, then asked him to convey the following while she tore the message: Carry this answer back to Rigby, and tell that insolent rebel, he shall have neither persons, goods, nor house. When our strength and provisions are spent, we shall find a fire more merciful than Rigby; and then, if the providence of God prevent it not, my goods and house shall burn in his sight; and myself, children, and soldiers, rather than fall into his hands will seal our religion and loyalty in the same flames.
A similar ultimatum issued by Rigby on 23 May prompted Charlotte to respond: "The mercies of the wicked are cruel .... unless they treated with her lord, they should never take her or any of her friends alive".
The siege was lifted on the night of 27 May as the Royalist general Prince Rupert approached Lathom with thousands of cavalry and infantry. Charlotte and her household departed for the Isle of Man, leaving the care of Lathom House to Colonel Edward Rawstorne. Second Siege After the Parliamentary victory at the Battle of Marston Moor, which was fought 2 July 1644, the north of England was largely under Parliamentary control apart from areas close to Royalist garrisons such as Lathom House. The next year (1645), in July, 4,000 Parliamentary troops returned to begin the second siege. Their commander Colonel Peter Egerton made Ormskirk his headquarters while his men encamped on Aughton Moss (or Aughton Moor), near Aughton Mill. Trenchfield House, on the site of this encampment, still retains the name.
The garrison did not capitulate quickly, but when it became clear that no relief could be expected, and supplies were running short, famine forced Colonel Rawstorne's hand and he surrender at discretion to Colonel Egerton on 2 December 1645. The fall of Lathom House was regarded as an event of the first importance by the Parliamentary party. Besides the material gain of twelve pieces of cannon and a large store of arms and ammunition, the Republicans had achieved a great moral triumph in the fall of the famous royalist house, and an order was issued by the House of Commons "for the ministers about London to give public thanks to God, on the next Lord's Day, for its surrender".
Lieutenant Colonel James More (or Mure)
Lieutenant Colonel James More (or Mure) served in the Earl of Denbigh's Regiment of Foot of the Parliamentarian forces in the first English civil war. The regiment was first raised in July 1643 in London; in which they recuited from areas in London and Warwickshire. In the following year of 1644; Lieutenant Colonel James More fought at the following engagements: Siege of Rushall Hall ( May), Siege of Dudley Castle ( June), Battle of Tipton Green ( June), The Storming and skirmish at Oswestry. By July, the regiment left the garrison at Wem many officers and men drift away to other commands, and by March 1645 remains of regiment disband at Shrewsbury.
The Crusades
Mores of the Knight Templar
During the crusade period; a few De La More and Mare, Moir and few others have joined the Christians to battle against the Muslims. The crusades were fought mostly in the middle east, but the Muslim Moors and the European Christians fought on mainland Europe. The following names of the knight Templars who served in the crusades are Richard de la More, Roger de la More, Guillaumede de la More, William de la More, Aimery de Sainte Maure, Barthelemy de Moret, Kenneth Moir, Ronald de la More and Sir John de More. Most of these knights were from England, Scotland, and France. There was also a Robert de la Mare who fought during the third crusades leaving in 1188 or 1190 fought under the banner of Caeur de Leon in Palestine. A Purchardus de Mure from Switzerland who was involved in the crusades.
The Battle of Ascalon
The Fatimids were led by Vizier al-Afdal Shahanshah, who commanded perhaps as many as 50,000 troops (other estimates range from 20–30,000 to the exaggerated 200,000 of the Gesta Francorum). His army consisted of Seljuk, Turks, Arabs, Perisians, Armenians, Kurds, and Ethiopians. He was intending to besiege the crusaders in Jerusalem, although he had brought no siege machinery with him; he did however have a fleet, also assembling in the port of Ascalon. The precise number of crusaders is unknown, but the number given by Raymond of Auguiler is 1,200 knights and 9,000 infantry. The highest estimate is 20,000 men but this is surely impossible at this stage of the crusade. Al-Afdal camped in the plain of al-Majdal in a valley outside Ascalon, preparing to continue on to Jerusalem and besiege the crusaders there, apparently unaware that the crusaders had already left to meet him.
On August 11 the crusaders found oxen, sheep, camels, and goats gathered there to feed the Fatimid camp, grazing outside the city. According to captives taken by Tancred in a skirmish near Ramla, the animals were there to encourage the crusaders to disperse and pillage the land, making it easier for the Fatimids to attack. However, al-Afdal did not yet know the crusaders were in the area and was apparently not expecting them. In any case, these animals marched with them the next morning exaggerating the appearance of their army.
On the morning of the 12th, crusader scouts reported the location of the Fatimid camp and the army marched towards it. During the march the crusaders had been organized into nine divisions: Godfrey led the left wing, Raymond the right, and Tancred, Eustace, Robert of Normandy and Gaston IV of Bearn made up the center; they were further divided into two smaller divisions, and a division of foot-soldiers marched ahead of each. This arrangement was also used as the line of battle outside Ascalon, with the center of the army between the Jerusalem and Jaffa Gates, the right aligned with the Mediterranean coast, and the left facing the Jaffa Gate.
According to most accounts (both Crusader and Muslim), the Fatimids were caught unprepared and the battle was short, but Albert of Aix states that the battle went on for some time with a fairly well prepared Egyptian army. The two main lines of battle fought each other with arrows until they were close enough to fight hand-to-hand with spears and other hand weapons. The Ethiopians attacked the center of the crusader line, and the Fatimid vanguard was able to outflank the crusaders and surround their rearguard, until Godfrey arrived to rescue them. Despite his numerical superiority, al-Afdal's army was hardly as strong or dangerous as the Seljuk armies that the crusaders had encountered previously.
The battle seems to have been over before the Fatimid heavy cavalry was prepared to join it. Al-Afdal and his panicked troops fled back to the safety of the heavily fortified city; Raymond chased some of them into the sea, others climbed trees and were killed with arrows, while others were crushed in the retreat back into the gates of Ascalon. Al-Afdal left behind his camp and its treasures, which were captured by Robert and Tancred. Crusader losses are unknown, but the Egyptians lost about 10–12,000 men.
King Richard the Lionheart
When King Richard the Lionheart left for the crusades to fight in the middle east; couple of English De la Mores went and fought along side with Richard the Lionheart. Richard was a central Christian commander during the third crusade, leading the campaign after the departure of Philip II of France and scoring considerable victories against his Muslim counterpart, Saladin, although he did not retake Jerusalem from Saladin.
In September 1190 Richard and Philip arrived in Sicily. After the death of King William II of Sicily his cousin Tancred had seized power and had been crowned early in 1190 as King Tancered I of Sicily, although the legal heir was William's aunt Constance, wife of the new Emperor Henry VI. Tancred had imprisoned William's widow, Queen Joan, who was Richard's sister, and did not give her the money she had inherited in William's will. When Richard arrived he demanded that his sister be released and given her inheritance; she was freed on 28 September, but without the inheritance. The presence of foreign troops also caused unrest: in October, the people of Messina revolted, demanding that the foreigners leave. Richard attacked Messina, capturing it on 4 October 1190. After looting and burning the city Richard established his base there, but this created tension between Richard and Philip Augustus. He remained there until Tancred finally agreed to sign a treaty on 4 March 1191.
The treaty was signed by Richard, Philip and Tancred. Its main terms were: Joan was to receive 20,000 ounces (570 kg) of gold as compensation for her inheritance, which Tancred kept. Richard officially proclaimed his nephew, Arthur of Brittany, son of Geoffrey, as his heir, and Tancred promised to marry one of his daughters to Arthur when he came of age, giving a further 20,000 ounces (570 kg) of gold that would be returned by Richard if Arthur did not marry Tancred's daughter. The two kings stayed on in Sicily for a while, but this resulted in increasing tensions between them and their men, with Philip Augustus plotting with Tancred against Richard. The two kings finally met to clear the air and reached an agreement, including the end of Richard's betrothal to Philip's sister Alys (who had supposedly been the mistress of Richard's father Henry II).
Siege of Acre
The Muslims lay in a semicircle east of the city facing inwards towards Acre. The Crusader army lay in between, with lightly armed crossbowmen in the first line and the heavy cavalry in second. At the later Battle of Arsuf the Christians fought coherently; here the battle began with a disjointed combat between the Templars and Saladin's right wing. The Crusaders were so successful that the enemy had to send reinforcements from other parts of the field. Thus the steady advance of the Christian center against Saladin's own corps, in which the crossbows prepared the way for the charge of the men-at-arms, met with no great resistance. Saladin’s center and right flanks were put to flight. But the victors scattered to plunder. Saladin rallied his men, and, when the Christians began to retire with their booty, let loose his light cavalry upon them.
No connected resistance was offered, and the Turks slaughtered the fugitives until checked by the fresh troops of the Christian right flank. Into this fight, Guy's reserves, charged with holding back the Saracens in Acre, were also drawn, and, thus freed, 5,000 men sallied out from the town to the northward; uniting with the Saracen right wing, they fell upon the Templars, who suffered severely in their retreat. Gerard de Ridefort, Grand Master of the Templars, was killed. Andrew of Brienne was also killed and Conrad had to be rescued by Guy. In the end, the Crusaders repulsed the relieving army. Christian casualties ranged from 4,000 or 5,000 to 10,000 men. Saladin could not push them back without another pitched battle, and his victory remained incomplete.
Battle of Arsuf
On October 4, 1189, Saladin moved to the east of the city to confront Guy’s camp. The Crusader army of 7,000 infantry and 400 cavalry comprised feudal lords, many smaller contingents of European Crusaders, and members of the military orders. The Muslim army consisted of troops from Egypt, Turkestan, Syria, and Mesopotamia. At dawn on 7 September 1191, as Richard's forces began moving out of camp enemy scouts were visible in all directions, hinting that Saladin's whole army lay hidden in the woodland. King Richard took especial pains over the disposition of his army. The probable posts of greatest danger, at the front and especially the rear of the column, were given to the military orders. They had the most experience of fighting in the East, were arguably the most disciplined, and were the only formations which included Turcopole cavalry who fought like the Turkish horse archers of the Ayyubid army. The van of the Crusader army consisted of the Knight Templars under Robert de Sable.
They were followed by three units composed of Richard's own subjects, the Angevins and Bretons, then the Poitevins including Guy of Lusignan, titular King of Jerusalem, and lastly the English and Normans who had charge of the great standard mounted on its wagon. The next seven corps were made up of the French, the barons of Outremer and small contingents of crusaders from other lands. Forming the rearguard were the Knights Hospitaller led by Fra' Gamier de Nablus. The twelve corps were organized into five larger formations, though their precise distribution is unknown. Additionally, a small troop, under the leadership of Henry II of Champagne, was detached to scout towards the hills, and a squadron of picked knights under King Richard and Hugh of Burgundy, the leader of the French contingent, was detailed to ride up and down the column checking on Saladin's movements and ensuring that their own ranks were kept in order.
The first Saracen attack did not come until all the crusaders had left their camp and were moving towards Arsuf. The Ayyubid army then burst out of the woodland. The front of the army was composed of dense swarms of skirmishers, both horse and foot, Bedouin, Sudanese archers and the lighter types of Turkish horse archers. Behind these were the ordered squadrons of armored heavy cavalry: Saladin's mamluks , Kurdish troops, and the contingents of the emirs and princes of Egypt, Syria and Mesopotamia. The army was divided into three parts, left and right wings and center. Saladin directed his army from beneath his banners, surrounded by his bodyguard and accompanied by his kettle-drummers. The Itinerarium Regis Ricardi implies that the Ayyubid army outnumbered the Crusaders three to-one.
However, unrealistically inflated numbers, of 300,000 and 100,000 respectively, are described. In an attempt to destroy the cohesion of the Crusader army and unsettle their resolve, the Ayyubid onslaught was accompanied by the clashing of cymbals and gongs, trumpets blowing and men screaming war-cries. "In truth, our people, so few in number, were hemmed in by the multitudes of the Saracens, that they had no means of escape, if they tried; neither did they seem to have valor sufficient to withstand so many foes, nay, they were shut in, like a flock of sheep in the jaws of wolves, with nothing but the sky above, and the enemy all around them."
The repeated Ayyubid harrying attacks followed the same pattern: the Bedouin and Nubians on foot launched arrows and javelins into the enemy lines, before parting to allow the mounted archers to advance, attack and wheel off, a well-practiced technique. Crusader crossbowmen responded, when this was possible, although the chief task among the Crusaders was simply to preserve their ranks in the face of sustained provocation. When the incessant attacks of skirmishers failed to have the desired effect, the weight of the attack was switched to the rear of the Crusader column, with the Hospitallers coming under the greatest pressure. Here the right wing of the Ayyubid army made a desperate attack on the squadron of Hospitaller knights and the infantry corps covering them. The Hospitallers could be attacked from both their rear and flank. Many of the Hospitaller infantry had to walk backwards in order to keep their faces, and shields, to the enemy.
Saladin, eager to urge his soldiers into closer combat, personally entered the fray, accompanied by two pages leading spare horses. Sayf al- Din (Saphadin), Saladin's brother, was also engaged in actively encouraging the troops; both brothers were thus exposing themselves to considerable danger from crossbow fire. All Saladin's best efforts could not dislocate the Crusader column, or halt its advance in the direction of Arsuf. Richard was determined to hold his army together, forcing the enemy to exhaust themselves in repeated charges, with the intention of holding his knights for a concentrated counterattack at just the right moment. There were risks in this, because the army was not only marching under severe enemy provocation, but the troops were suffering from heat and thirst. Just as serious, the Saracens were killing so many horses that some of Richard's own knights began to wonder if a counterstrike would be possible. Many of the unhorsed knights joined the infantry.
Just as the vanguard entered Arsuf in the middle of the afternoon, the Hospitaller crossbowmen to the rear were having to load and fire walking backwards. Inevitably they lost cohesion, and the enemy was quick to take advantage of this opportunity, moving into any gap wielding their swords and maces. For the Crusaders, the Battle of Arsuf had now entered a critical stage. Garnier de Nablus repeatedly pleaded with Richard to be allowed to attack. He was refused, the Master was ordered to maintain position and await the signal for a general assault, six clear trumpet blasts. Richard knew that the charge of his knights needed to be reserved until the Ayyubid army was fully committed, closely engaged, and the Saracens' horses had begun to tire.
Goaded beyond endurance, the Master and another knight, Baldwin de Carron, thrust their way through their own infantry and charged into the Saracen ranks with a cry of “St. George!”; they were then followed by the rest of the Hospitaller knights. Moved by this example, the French knights of the corps immediately preceding the Hospitallers also charged. The precipitate action of the Hospitallers could have caused Richard's whole strategy to unravel.
However, he recognized that the counterattack, once started, had to be supported by all his army and ordered the signal for a general charge to be sounded. Unsupported, the Hospitallers and the other rear units involved in the initial breakout would have been overwhelmed by the superior numbers of the enemy. The Frankish infantry opened gaps in their ranks for the knights to pass through and the attack naturally developed in echelon from the rear to the van. To the soldiers of Saladin's army, as Baha alDin noted, the sudden change from passivity to ferocious activity on the part of the Crusaders was disconcerting, and appeared to be the result of a preconceived plan. Having already been engaged in close combat with the rear of the Crusader column, the right wing of the Ayyubid army was in compact formation and too close to their enemy to avoid the full impact of the charge. Indeed, some of the cavalry of this wing had dismounted in order to fire their bows more effectively.
As a result, they suffered great numbers of casualties, the knights taking a bloody revenge for all they had had to endure earlier in the battle. Baha al-Din noted that "the rout was complete." He had been in the center division of Saladin's army, when it turned in flight he looked to join the left wing, but found that it also was in rapid flight. Noting the disintegration of the right wing he finally sought Saladin's personal banners, but found only seventeen members of the bodyguard and a lone drummer still with them. Being aware that an over-rash pursuit was the greatest danger when fighting armies trained in the fluid tactics of the Turks, Richard halted the charge after about 1 mile (1.6 km) had been covered. The right flank Crusader units, which had formed the van of the column, including the English and Normans had not yet been heavily engaged in close combat and they formed a reserve on which the rest regrouped.
Freed from the pressure of being actively pursued, many of the Ayyubid troops turned to cut down those of the knights who had unwisely drawn ahead of the rest. James d'Avesnes, the commander of one of the French units, was the most prominent of those killed in this episode. Amongst the Ayyubid leaders who rallied quickly and returned to the fight was Taqi al- Din, Saladin's nephew. He led 700 men of the Sultan's own bodyguard against Richard's left flank. Once their squadrons were back in order, Richard led his knights in a second charge and the forces of Saladin broke once again. Leading by example, Richard was in the heart of the fighting, as the Itinerarium describes: "There the king, the fierce, the extraordinary king, cut down the Turks in every direction, and none could escape the force of his arm, for wherever he turned, brandishing his sword, he carved a wide path for himself: and as he advanced and gave repeated strokes with his sword, cutting them down like a reaper with his sickle, the rest, warned by the sight of the dying, gave him more ample space, for the corpses of the dead Turks which lay on the face of the earth extended over half a mile."
Alert to the danger presented to his scattered ranks, Richard, prudent as ever, halted and regrouped his forces once more after a further pursuit. The Ayyubid cavalry turned once again, showing they still had stomach to renew the fight. However, a third and final charge caused them to scatter into the woodland where they dispersed into the hills in all directions, showing no inclination to continue the conflict. Richard led his cavalry back to Arsuf where the infantry had pitched camp. During the night the Saracen dead were looted.
Battle of Juffa
By July 5, 1192, Richard began his withdrawal from the Holy land. Having realized that Jerusalem would not be defensible if it were to be captured, he began the retreat of Crusader forces from hostile territory. Almost immediately after Richard's withdrawal, Saladin, still smarting from his recent defeat at Arsuf, saw a chance for revenge and, on the 27 July, laid siege to the town of Jaffa which had served as a base of operations for Richard during his previous march inland towards Jerusalem. The defending garrison, although taken by surprise, fought well before the odds against them proved too great.
Saladin's soldiers successfully stormed the walls after three days of bloody clashes; only Jaffa's citadel held out and the remaining Crusaders managed to send word of their plight. Richard subsequently gathered a small army, including a large contingent of Italian sailors, and hurried south. Upon seeing Muslim banners flying from the walls, he falsely believed the town to be a lost cause, until a defender swam out to his flagship and informed him of the citadel's dire situation. Still in his sailor's deck shoes, Richard leaped into the sea and waded through the waves to reach the beach.
The King again showed his personal bravery and martial prowess, leading fifty-four knights, a few hundred infantrymen, and about 2,000 Genoese and Pisan crossbowmen into battle. The Muslim army began to panic at the sudden offensive launched by Richard's newly arrived force; they feared it was but a spearhead of a much larger army coming to relieve Jaffa. The English king fought in person at the forefront of his attack, and Saladin's men were routed. Many of the Christian prisoners who had surrendered earlier also seized their arms and resumed combat, for their captors were in such disarray that they were unable to stop them. Saladin's fleeing army spilled out of Jaffa and escaped in a disorderly manner; Saladin was unable to regroup his forces until they had retreated more than five miles inland.
When Saladin received reports that more of the Franks were coming down from Caesarea, he decided to launch a counterattack on Jaffa to recapture it before these additional reinforcements could arrive. On the early morning of August 4, Muslim troops massed around the walled town, concealing themselves in the fields and intending to attack at dawn the next day. Just before sunrise, however, a Genoese soldier out for a stroll discerned the hidden enemy; the neighing of horses and glinting of armor only served to confirm his suspicions. The sentries promptly raised the alarm, and Richard quickly assembled his knights, infantry and crossbowmen for battle.
He ordered his infantry, including unmounted knights, to form a defensive hedge of spears by kneeling and driving their shields and the shafts of their spears or lances into the ground, with the spearheads pointing towards their opponents. The crossbowmen stood behind the protective wall of spearmen, working in pairs, one shooting whilst the other loaded. In front of the infantry sharp tent pegs were hammered into the ground to help deter horsemen. Richard kept his handful of mounted knights as a reserve in the rear.
The lightly armored Turkish, Egyptian and Bedouin cavalry repeatedly charged. However, when it was evident that the Crusaders were not going to break ranks, they veered away from the spears without coming to blows.
Each Ayyubid attack lost heavily to the barrage of missiles from the many crossbows. The amour of the Christians proved better able to withstand the arrows of the Saracens than the amour of the Saracens could withstand crossbow bolts. Also, being entirely cavalry, the many horses of Saladin's force were particularly vulnerable to missile fire. After a few hours' onslaught, both sides began to tire. Having suffered considerably from the barrage of crossbow bolts without having been able to dent the Crusaders' defenses, Saladin's cavalrymen were in a demoralized state and their mounts were exhausted. They were put to flight by a charge of the knights, only 10 to 15 of whom were mounted, and spearmen led by the king himself. While the battle raged, a group of Ayyubid soldiers were able to outflank the Crusader army and enter Jaffa.
The Genoese marines who had been entrusted to remain behind and guard the gates offered little resistance before retreating to their ships. Before the Muslims could exploit their success, however, Richard himself galloped into the town and rallied all of its fighting men. By evening, it had become clear to Saladin that his men had been soundly defeated and he gave the order to withdraw. Saladin's forces had suffered 700 dead, and lost 1500 horses; the Crusaders lost 2 dead, though many were wounded. However, as for many Medieval battles, the recorded figures for losses may not be entirely reliable. Leaving their dead on the field, the Ayyubid force began a long, weary, march back to Jerusalem. Once back in the city Saladin strengthened its defenses in case Richard were to advance against it again.
Sir Kenneth Moir: The Crusade to Spain
Sir Kenneth Moir was a champion knight and Knights Templar who, in 1330, rode with James Douglas, Lord of Douglas and the Crusaders to Spain with the heart of Robert the Bruce to defeat the Moors who had laid siege to the fortress at Battle of Teba in Andalusia. Sir Kenneth and Sir James Douglas rode out on Crusade with Sir Simon Locard of Lee, Sir William Keith of Galston, Sir William de St. Clair and his younger brother John of Rosslyn, Sir Symon Glendonwyn, Sir Alan Cathcart and the brothers Sir Robert Logan of Restalrig and Sir Walter Logan. Locard would as a result of this Crusade became known as Lockhart. There was also a young William Borthwick.
Having been granted a promise of safe conduct from Edward III of England, the party sailed from North Berwick and made for Luys in Flanders in the spring of 1330 remaining there for 12 days and attracting more followers from all over Europe. The Knights Templar had been outlawed and ordered killed by this time. There are no written records of who joined the party of Scottish knights. There is circumstantial evidence that at least one knight from Germany joined in Flanders. Their intention was to then sail to Cape Finisterre in the north west of Spain to visit Santiago de Compostela which had been ordained as a holy town by Pope Alexander III following the discovery of the remains of the Apostle James. A pilgrimage to Santiago captured the imagination of Christian Europe on an unprecedented scale as it was the third holiest site in Christendom and, at the height of its popularity in the 11th and 12th century, attracted over half a million pilgrims each year.
However, before they could set off for Santiago word reached them that the King of Castile and León, Alphonso XI, in his efforts to drive the Nasrid dynasty (Moors) out of Granada had laid siege to the Castillo de las Estrellas (Castle of the Stars) at Teba which was occupied by the Saracen army of Muhammed IV, Sultan of Granada. The knights travelled 2,000 km (1,200 mi) to Seville and offered their support to Alfonso for his Crusade to rid the Iberian Peninsula of non-Christians. They marched the short distance to Teba.
On 25 August 1330, south east of Seville in a saddle high above the river the knights came to Teba in al-Andalus. There, three thousand of Muhammed IV's cavalry made a feigned attack on the Christians.
The great body of his army took a circuitous route to fall, unexpectedly, upon the rear of Alfonso's camp. With the Christian troops otherwise engaged, the Templar Knights faced overwhelming odds. Templar Knights did not retreat and Sir James gave the order to charge[citation needed]. Sir James Douglas, Sir William St. Clair, Sir John de St. Clair, Sir Robert Logan and Sir Walter Logan died in battle. To be a Templar Knight requires giving up family name in devotion to Christ. These Scottish knights followed the practice of Sir Kenneth. Instead, of going into battle with the family coat of arms, the knights, like Sir Kenneth were marked by crosses and stars. After the battle families would buy back the captured knights.
Unfortunately for the fallen knights, the Moors would have preferred to gain wealth by returning captured knights. Lochard did take a Moorish knight captive and was given a jewel that would become known as the Lockhardt penny for the knights release back to his family.
Scottish knights Errant
In 1329, as Robert the Bruce, King of Scots, lay dying he made one last request of his friend and lieutenant, Sir James Douglas. The King charged that, after his death, Sir James should take his embalmed heart and bear it with him on crusade, thus fulfilling the pledge that Bruce had been unable to honor in his lifetime. The projected campaign in Spain offered Sir James the ideal opportunity. In the spring of 1330, armed with a safe conduct from Edward III of England and a letter of recommendation to King Alfonso XI of Castile, Douglas set off from Berwick and sailed first to Sluys in Flanders. Here, according to the contemporary Walloon chronicler Jean Le Bel, Douglas' company consisted of one knight banneret, six ordinary knights and twenty esquires. It is not clear whether the knight banneret was Sir James himself.
Other knights named by the Scottish poet John Barbour included Sir William de Keith, Sir William de St. Clair of Rosslyn and the brothers Sir Robert Logan of Restalrig and Sir Walter Logan. Others alleged at one time or another to have accompanied Douglas are John de St. Clair, younger brother of Sir William, Sir Simon Lockhart of Lee, Sir Kenneth Moir, William Borthwick, Sir Alan Cathcart and Sir Robert de Glen but evidence is lacking. There appears to be no historical basis for claims that any of these men were connected with the Order of the Knights Templar, dissolved by Pope Clement V in 1312, eighteen years previously.
Le Bel relates that the Scots party remained at Sluys for twelve days, with Douglas holding court on board ship as if the late king were present. It may be he was awaiting news of the planned crusade and on learning that, despite the withdrawal of his allies, King Alfonso still intended to go to war, he finally set sail for Spain. After a stormy passage, the party arrived at the mouth of the Guadalquivir, probably sometime in late June, and disembarked upstream at Seville.
March to Teba
Douglas presented his credentials to Alfonso XI. According to John Barbour, the King offered Douglas riches, fine horses and armor. Sir James declined these gifts, declaring that he and his men were prepared to offer their arms in the service of the king as humble pilgrims, seeking absolution for their sins. Alfonso accepted and assigned experienced soldiers, accustomed to the style of fighting on the Frontera, as advisors to Douglas and his fellow knights. While the Scots rested after their long voyage and waited for the expedition to depart, many foreign knights who had come to seek service with Alfonso of Castile paid their respects to Douglas, including a number of Englishmen who were particularly keen to meet the man who until recently had been their nemesis.
Alfonso formed up his army for the advance south. Barbour claims that Douglas was given command of the lead division, the 'vaward' or vanguard. It may be more likely that he was put in charge of all the foreign knights in the Castilian army. The Christian host, its size unknown, marched to Ecija then to Osuna on the frontier. Once across the border, Alfonso continued south to the meadows of Almargen, five miles west of Teba, from where he advanced to set up camp and invest the fortress. King Alfonso waited for his siege engines to come up from Ecija, the Granadan forces in Malaga prepared to react. These were under the command of Uthman bin Abi-l-Ulá, a Berber noble fighting in the service of the sultans of Granada, who set off with six thousand cavalry and an unknown number of infantry to the relief of Teba.
Marching up the Guadalhorce valley, Uthman's force crossed over into the valley of the river Turón where they pitched camp between Ardales castle and the supporting fortress of Turón, ten miles south of Teba. Meanwhile the siege engines arrived at Teba and operations began to open a breach in the walls of the castle. The Christian army was hampered by a lack of water and they were forced daily to drive their herds out of camp and eastwards down to the Guadalteba, an abundant river flowing two miles south of the castle. Uthman quickly identified this weakness and sent raiding parties to disrupt the watering details. Alfonso in turn set up a defensive screen of patrols to hold them off and there were regular skirmishes on the river and in the hills to the south. It is possible that Sir James Douglas was killed in one of these encounters.
The 'Gran Cronica de Alfonso XI' refers to "the death of a foreign count through his own error", although some commentators prefer to think Douglas died in a more decisive encounter some days later. Alfonso had other problems. The five hundred Portuguese knights declared their term of service was about to expire and withdrew, and one night the garrison of Teba sallied out to attack the siege lines and retired leaving a siege tower in flames. Uthman too faced difficulties. He had concluded he could not defeat the Christians in open battle and so devised a stratagem to force Alfonso to abandon the siege.
The Battle of Teba
Under cover of darkness, three thousand Moorish cavalry prepared to make a diversionary attack across the river while Uthman took another three thousand upstream to make a flank attack on Alfonso's camp. At dawn, Uthman's river contingent occupied the watering grounds of the Guadalteba. Alfonso, however, having been warned by his scouts of the enemy's movements, kept the main force of his army in camp while he sent troops to check the assault developing on the river. Some argue that Douglas and his contingent must have been part of this reinforcement.
With battle joined, Uthman believed that his ruse was working and, emerging from the valley where he and his men had been concealed, rode up to attack the Christian camp from the west. When he reached the col overlooking the Almargen valley he saw the camp bristling with Alfonso's men armed and ready while at the same time saw his men on the river downstream beginning to fall back. He instantly abandoned the attack and rode back to support his right wing but arrived only in time to join in the general retreat.
The Moors on the river had been unable to withstand the weight of the Christian counter-attack. When Alfonso, having seen Uthman's move east, sent a further 2,000 men to intervene, the Granadan withdrawal turned into a rout. John Barbour, in his description of Douglas' last battle, describes a similar rout, with Douglas and his contingent pursuing the fleeing enemy closely. There is, however, no mention of the siege of Teba in Barbour's account, which describes the Christian army advancing from Seville to repel an invasion from Morocco.
According to Barbour, Sir James outruns the rest of his men and finds himself far out in front with only ten or so followers. Too late, he turns back to rejoin the main body. The agile Moorish cavalry see their opportunity, rally and counter-attack. In the running fight that follows, Douglas sees Sir William St.Clair surrounded by a body of Moors, trying to fight his way free. With the few knights still with him, Douglas rides to the rescue but all are killed, including Sir William St.Clair and the brothers Sir Robert and Sir Walter Logan.
The Castilian sources do not mention any Moorish counter-attacks during the pursuit, despite the Moors' notorious capacity for turning on unwary pursuers. The Castilian forces pursued the Moorish army back to their camp in the Turon valley. The chance of a more comprehensive victory was lost when the Christians stopped to loot the enemy tents and baggage. Despite further skirmishes, Uthman made no further attempt to raise the siege and shortly afterwards the garrison of Teba surrendered. The aged Berber general died some weeks later. Barbour tells how Douglas' body, together with the casket containing the embalmed heart of Bruce, were recovered after the battle. His bones, the flesh boiled off them, and the casket were taken back to Scotland by Douglas' surviving companions. Douglas was buried at St Bride's Kirk, at Douglas, South Lanarkshire. The battle was not decisive. While Teba remained secure in Castilian hands, the Guadalteba and Turon valleys continued debatable land for the next hundred and fifty years.
However, in response to Alfonso XI's victories of 1327-1330, the Marinid sultan of Morocco Abu Hasan sent forces in support of Muhammad IV to re-establish control of the Straits. Gibraltar was re-captured from the Christians in 1333 but Abu Hasan's attempt to re-take Tarifa in 1340 led to his disastrous defeat by allied Christian forces at Rio Salado. This was the last intervention by North African powers in the defense of Muslim Granada. There were probably more of our clansmen who were knight Templars and fought in most of the crusade wars. There is a claimed that Reginald de la More of Scotland were Templars. It isn't known how many clansmen of clan Muir had join the crusades.
English Moore's Castles
The Following Castles owned by the Moore(s), de la More(s)/ Mare(s) and More(s) are located in England, Isle of Man, Isle of Jersey and Wales.
England:
1. Kilpeck Church- )- The first of the family to occupy this castle was William FitzNorman de la Mare (More).
2. Kilpeck Castle- )- The first of the family to occupy this castle was William FitzNorman de la Mare (More).
3. Tickhall Castle- Tickhill Castle was just one of several castles (including Nottingham) seized by his brother, John and was held by Roger de la Mare. Following a siege by Hugh de Pudsey, Bishop of Durham in 1194, de la Mare surrendered, and the Castle was successfully reclaimed for Richard. John inherited the throne on the death of his brother in 1199, fifteen years later he gave Tickhill to the Count of Eu in exchange for his support; Robert de Vipont was appointed Custodian and the Castle temporarily passed out of Crown tenure.
4. Kentuall Hall- Kentwell Hall in 1818 by landscape engraver Thomas Higham, during Richard Moore's occupancy...From 1782 to 1823, the owner was Richard Moore and there is evidence of work carried out by him to the interior. There are Georgian features such as dentil cornices, fireplaces and doorways introduced during this period; and the mantle piece in the Moat Bedroom, in the west wing, is decorated with the coat of arms of the Moore family.
5. Rockingham Castle- The family ( De La Mare) held the office of Constable of Peterborough Abbey and had to provide, when called upon, three fully armed horsemen who would serve in the feudal army within the realm for forty days in a year they also had to garrison the Castle of Rockingham.
6. Northmoor church- De la More chapel of Northmoor was built and owned.
7. Nottingham Castle- defended by de la Mare.
8. Nunny Castle- Was built by Sir John de la Mare (More) and was occupied by the family. The De La Mare surname from French Normandy was progressively anglicized in England as "de la Mare" (Walter de la Mare), "De La More", "More.
9. Appleby Hall- The Manor of Appleby Parva was purchased by the Moore Family at the very end of the 16th century and would remain in their possession until the start of the 20th century.
10. Maxey Castle- De la Mares family owned this castle for more than 200 years.
11. Liverpool Castle- In 1644 Prince Rupert and his men took the castle, which was later taken back by Sir John Moore.
12. Rochester Castle- Thomas de la More, keeper of Rochester Castle.
13. Dorstone Castle- Around 1422 the castle belong to Richard de la Mare ( More) of the de la More family.
14. Yannon Towers Castle- This castle was built and control by Robert Moir.
15. Loseley Park House- The story of Loseley Park begins with the purchase of the Manor of Loseley during the reign of Henry VII. As Sheriff of Surrey and Sussex the purchaser, Sir Christopher More, was a man of considerable influence and power, yet it was his son, Sir William More, also a direct ancestor of the current owner, who first began building work in earnest. ( England. William de More appeared in Staffordshire... rolls in the 1086 Domesday Book. Sir Thomas de la More is recorded in the 14th century in Oxfordshire. The name achieved a national importance during the reign of Henry VIII. Thomas More, the son of a London barrister, gained renown as the author of Utopia.
He became Henry VIII's Chancellor but incurred the King's disfavor and lost his head in 1535. Sir Christopher More from Derbyshire fared better in London, making money from the dissolution of the monasteries. His son William was a trusted advisor of Queen Elizabeth and built his family mansion, Losely House, in Surrey (which still stands today). In the centuries that followed the fortunes of the More-Molyneux family waxed and waned. As in every ancient family, there were unfortunate marriages and political successes, times of influences and times when it seemed the family and the house might finally be parted. Yet the link remains unbroken. The 500 year story of the More-Molyneux family and their home at Loseley Park House.
Isle of Jersey:
1. Gorey Castle- LT. Henry de la More who fought against the French army while they More help defend the castle.
Wales:
1. Caerphilly Castle- castle held in 1270 by Sir Richard de la More and in 1306.
2. Penhow Castle-Penhow castle of South east Wales owned by the Maurs.
3. Alexanderstone Castle- In the early 12th century was founded, built and control by the Mora family in Llanddew, Brecknockshire, Wales.
4. Pencoed Castle- The moat and round SW tower may be relics of a castle held in 1270 by Sir Richard de la More.
5. Walwyn Castle- " Administrative/Biographical history: Major Thomas Moore (d. 1860) of Bathwick House, Bath, Somerset, was a member of the Moore family of Walwyn's Castle, Pembrokeshire. ( http://anws.llgc.org.uk/cgi-bin/anw/fulldesc_nofr?inst_id=32&coll_id=12321&expand=)
Isle of Man:
1. Rushen Castle- Built and defending by the Mores.
2. Rushen Abbey- a Colonel Sir Thomas Moore, who married a Miss Radcliffe of Derwentwater, received the grant of the Abbey of Rushen on its confiscation in 1540. The first record, however, of the family having held this property was in 1607, when John Moore was owner of 'the Abbey and parcels of ground and the Mill.
Clan Muir' History
Out of the mist of time; a powerful clan rises to play an important role in Scotland's History. The first Mores were among the tribe of Scotti of Northern Ireland who left Ireland to establish the kingdom of Dal Riata in the western part of Scotland. " One of the great O'Mordha's from Ireland eventually establishing Dalridia, the Gaelic kingdom that extended on both sides of the North Channel and composed the northern part of the present County Antrim, Northern Ireland, and part of the Inner Hebrides and Argyll, in Scotland. Dunadd and Dunolly were the chief strongholds. As Viking attacks on Ireland increased, Fergus Mor moved the seat of the royal dynasty of Dalriada from Ireland to Scotland. Eventually, Dalraida covered much of present-day Scotland. Clan (children of) Muir (and many variations of the name) descends from Fergus Mór mac Eirc, the founder of modern Scotland."
The Muirs/ Mure are descendants from King Fergus Mor of Dal Riata. Among the best known Irish royal families are the MacDermots, O'Connors, O'Flahertys, O'Kellys and O'Malleys of Connacht; the Maguires, O'Dochertys, O'Donnells, O'Neills and O'Reillys of Ulster; the MacMurroughs, O'Brynes, O'Melaghlins, O'Mores and O'Tooles of Lenister; the MacCarthys, MacGillycuddys, O'Briens, O'Donovans and O'Sullivans of Munster. Several still have recognised clan heads or chiefs of the name alive today. The Gaels gave Scotland its name from ‘Scoti’, a racially derogatory term used by the Romans to describe the Gaelic-speaking ‘pirates’ who raided Britannia in the 3rd and 4th centuries. They called themselves ‘Goidi l’, modernised today as Gaels, and later called Scotland ‘Alba’.
On the island of Great Britain, the Picts battled the encroaching Roman army with success until their resounding defeat at Mons Graupius in 84 A.D. After this, the Roman invaders weakened due to pressures on the Empire in other areas of the world. This allowed the Picts to regain strength. Reinforcements began moving across the Irish Sea from Ireland about 360 A.D. One of the great O'Mordha's from Ireland eventually establishing Dalridia, the Gaelic kingdom that extended on both sides of the North Channel and composed the northern part of the present County Antrim, Northern Ireland, and part of the Inner Hebrides and Argyll, in Scotland. Dunadd and Dunolly were the chief strongholds.
As Viking attacks on Ireland increased, Fergus Mor moved the seat of the royal dynasty of Dalriada from Ireland to Scotland. Eventually, Dalraida covered much of present-day Scotland. Clan Muir are descends from Fergus Mór mac Eirc, the founder of modern Scotland. Remember, Fergus Mor mac Eirc is also descendant from the House of Ir.
The Dal Riata kingdom was part of County Antrim in Northern Ireland to the West coast of Pictland. The Dal Riatans " Scotti- called by the Romans" help the Pictish tribe to over thrown and push back the Roman army. Roman historians recount the raids of the Scots and Picts on Briton's northern frontier as early as 297 AD. In 360 BC, Ammianus Marcellinus wrote that "savage tribes of Scotti and Picti, having broken the truce, were ravaging the parts of Roman Britain in the neighbourhood of the walls." In 365 CE, he noted that the "the Picti, Saxones, Scotti and Atecotti harassed the Britons continually." In 367 AD, a large force of Pict and Scots raiders overran Hadrian's Wall and ravaged the lands beyond.
Campaigns by Theodorus (384 AD) and Stilchio (396 AD) helped settle the frontier temporarily. However, troops were later withdrawn from the region to fight on Rome's other hard-pressed borders. In 450 AD, Gildas recorded that the Britain's call for help (The Groans of the Britons) against the "foul hordes of Scots and Picts" had gone unheeded by Rome.The reason why the Mores/ Mures/ Muirs came from Fergus Mor, because the Mores settled in the western highlands in Pictland ( Scotland), then eventually some went to the lowlands in Strathcylde.
Once the Roman army left Britain; the Dal Riata began their invasion of the western highlands which was led by King Fergus Mor. The Gaels has successfully taken the whole western highlands and establish their capital at Dunadd fort. From this point they have fought a bloody war against the Picts, and other native tribes in Britain. The balance of the kingdom was divided into three districts among Fergus' relatives. Brother Angus and his tribe held the islands of Jura and Islay. Brother Loarne was given the region that still bears his name. The third (comprising modern Cowall and Kintyre) was passed down to Fergus's great-grandson Comgall. These four kinship groups -- Cenel Gabrain (the direct line of Fergus Mor), Cenel Loairn (the sons of Loarne), the Cenel nOengusa (the sons of Angus) and the Cenel Comgall (the heirs of Comgall) were to contend throughout the history of Dalriada for the throne.
The first five years of Dalriadic rule were turbulent, but the third king Comgall was reputed to have ruled for 30 years without strife (507-538 AD). In 558 AD, King Brude Mac Maelchon of the Picts resoundly defeated the Dalraidic King Gabran in battle and in that same year Gabran died (whether or not he died in the battle is unclear). No further battles are recorded for 15 years. Conall, son of Comgall, succeeded Gabran as king of Dal Riata. Conall welcomed the exiled Columba (Colum Cille) from Ireland, and sent him on a peace embassy to the Pictish king. It was apparently successful, for in 563 AD, in apparent agreement with the Pictish king, Conall granted Columba the island of Iona on which to build his famous monastery. Columba then commenced his work of converting the Picts to Christianity.
In 568 AD, King Conall and his kinsman, Colman Becc of Ireland, led a campaign into the Inner Hebrides to consolidate his rule over Soil and Islay. The death of Conall in 574 AD lead to a succession crisis, with the kingship due to revert from Conall's line by tradition to the sons of Gabran. Columba intervened and proclaimed Aedan as king over his elder brother Eoganan. This prompted a rebellion by Dondchad, the son of Conall and supporter of Eoganan's claim to the throne. Aedan prevailed over Dondchad in a battle fought at Kintyre, thus cementing his claim to the throne. The balance of this period is not well recorded, although it is believed that the rise of Christianity and the power of Columba and his successors exercised in non-secular matters encouraged relative peace and prosperity between Dalriada and her neighbors, the Picts to the east and north, and the Britons to the south. Then came the Saxons of Berneicia and Deira, which were later joined to form Northumbria.
King Aedan lead a Dalriadic/Strathcyde Breton army against Ethelfrid of Berneicia, but was defeated decisively at Daegsastan (circa 597 AD). This defeat, coupled with the news of the death of Columba, prompted Aedan to relinquish his throne and retire to Kintyre, where he died at age 80. In 613 AD, a Dalriadic contingent fought with a unified British army (with contingents from Gwynedd, Powys, Pengwern and Dumnonian) against the Saxon invader Ethelfrid at Chester. The battle failed to slow the Saxon king, who continued his campaign and slew 1200 British monks of Bangor who where attempting to avert the battle with prayer. Ethelfrid then seized Deira from his brother Edwin, and combined them into the new Kingdom of Northumbria, which Edwin recovered in 617 AD.
Then King Penda of Mercia and Caedwalla (Cadwallon) of Wales joined forces against Northumbria, killing Edwin and destroying his army at the battle of Heathfield Chase in 633/634 AD. Caedwalla was given the Northumbrian throne by Penda, but lost it again to Oswald, son of Ethelfrid, who fought a series of battles with Penda to defend it. Oswald's army included a contingent of Scots (including monks from Iona) provided by King Domnall Brecc of Dalriada. With the defeat and death of Penda, Oswald and his heir Owsy reigned supreme. They seized Edinburgh, the last major stronghold of the British Votadini kingdom of Goddodin. Unable to resist, Dalriada and the Pictish kingdoms were forced to swear fealty to the Northumbrian bretwaldas.
As evidenced by the Convention of Druim Cett (575 AD), the Dalriadic Kings in Scotland had apparently continued to rule over and collect taxes from the Riatans who remained in Ireland. However, Domnhall, king of the Ui Neill defeated Congal, king of the Dal nAraide and Ulster (the nephew and agent of King Domnall Brecc of Dalriada) at the battle of Magh Rath in 637 AD, effectively ending Dalriadic control over their Irish possessions.In 642 AD, King Owen of Strathclyde defeated an invading Dalriadic army at the Battle of Strathcarron, killing the Scottish King Domnall Brecc.
Oswy's heir Egfrid ascended to the Northumbrian throne in 670 AD and mounted campaigns in the north to consolidate his hold over the Scots and Picts. Dalriada and the Picts fought unsuccessfully for independence, the Picts suffering a massive defeat in which their dead were reputed to lie so thick in two rivers that the Northumbrians could walk dry-shod from bank to bank. Thereafter Egfrid annexed Galloway, drove the Britons entirely out of Cumbria, seized Carlisle and the famous Columban monastery at Lindisfarne, and subjected the Mercians to his rule. Egfrid's subsequent foray into Ireland was repulsed, after which he mounted a major invasion of the north in 685 AD.
The Picts feigned a retreat, drawing the Northumbrians deeper into the highlands to Lin Garan (or Nechtan's Mere) a marshy lake in Forfarshire where an ambush had been laid. Egfrid was killed in the subsequent battle and his army all but annihilated, thus ending the Northumbrian control over Pictland and Dalriada and allowing the Picts to occupy as far south as Lothian. Contingents of Strathclyde Britons and Dalraidic Scots may have fought with the Picts at the battle of Nechtansmere.
Subsequently, Kings Eugene VI of Dalriada and Alfred of Northumbia cemented a friendship based on their mutual interests as scholars. Alfred was raised in the Monastery at Iona, whereas Eugene had been trained by Adamnan, abbot of Icolm-Kill. Peace prevailed for ten years, although relations between Dalriada and the Picts became increasingly strained and conflict only averted due to the mediation of Adamnan. The peace was spoiled, however, when the Southern Pictish King Nechtan converted to the Roman rite and expelled the Columban priests, who fled to Dalriada.
With religious lines drawn between Rome and Ireland, the conflict broadened and diversified. A period of religous civil war ensued between the Northern and Southern Picts, and war between the Southern Picts and Dalriada, who had allied themselves with the Northern Picts. Then a civil war erupted in Dalraida in c. 725 AD, when Echdach usurped the throne of Dungal. Finally, the reunified Picts under King Oengus attacked and overran Dalriada between 731-736 AD, forcing the Dalriadic king into brief exile in Ireland. Oengus continued his aggressive expansion southward until defeated by the Strathcylde Britons at the battle of Catohic (Mocetauc) near Glasgow in 750 AD.
In 768 AD, King Aed Fin lead a Dalriadian army into the southern Pictish province of Fortriu and fought a battle the outcome of which is not known. Thereafter, the Dalriadic kingship list becomes somewhat conjectural. The following is offered as a plausible but not certain history. In 781 AD, Constantine mac Fergus became King of the Northern Picts. Over the next ten years, he extended his rule south and west. In 798 AD, the Vikings made their first appearance on the scene and posed a constant threat to both the Picts and Dalriadic Scots for the next 200 years. In 809 or 810 AD, Conall mac Aed relinguished the throne of Dalraidia according to Irish annalists (perhaps because of the Viking threat), and the Dalriadic nobles recognized Constantine as their king, thus unifying the Picts and Scots for the first time.
Constantine and his heir and brother Oengus referred to their joint kingdom as Fortren. From this point forward until the accession of Kenneth Mac Alpin, the exact line of "Scottish" kings or claimants to the former Dalriadic throne is unclear. In 832 or 834 AD , Oengus died giving rise to another succession controversion. One of several candidates, the Scot Alpin claimed the Pict throne by virtue of his mother's royal Pictish blood. The Picts elected another, prompting Alpin to take the field. A battle was fought at Restennet, near Forfar, resulting in the death of the Pictish king and a victory for Alpin despite heavy casualties.
But rather than recognize Alpin's claim, the Picts elected a new king and raised a new army. In a second confrontation fought near Dundee, the Picts mounted their camp attendants on baggage horses and held them in concealment until a key juncture when they appeared on a hill overlooking the battleground. The appearance of this "second army" caused the Scots to panic and rout. Alpin's nobles were captured and executed on the spot, and an attempt to ransom Alpin was refused. He was beheaded and his head placed on a pike, which was carried home to adorn the battlements of the Pictish stronghold at Abernethy. An alternative history of this battle (reputedly fought in 839 AD) is also told. In this account, Norse Vikings came upon the Scot and Pict armies locked in combat and stopped to watch the outcome.
After the Picts had prevailed and beheaded Alpin, the Norse attacked the victorious Picts, killing King Eogahann and scattering his army. In any event, the victory ended immediate hostilities with the Scots, but prompted civil war among the Picts (perhaps due to the death of Eogahann and renewed conflict over a successor). This period of respite allowed Kenneth the Hardy, son of Alpin and successor to the Dalriadic throne, to recruit his strength. After three years, Kenneth Mac Alpin was eager to take the offensive, but was hampered by nobles reluctant to renew hostilities. In the fourth year, Kenneth invited his nobles to a banquet. After the revelry, and as his nobles drifted off to sleep, a young kinsmen of Kenneth appeared dressed "in a luminous robe, made out of the phosphorescent skins of fish," and with a long speaking tube.
This apparition exhorted the befuddled nobles to avenge the death of Alpin, and they apparently took heed of what appeared to be a divine message. The Dalriadic army subsequently took the field, crossing into southern Pictish lands and defeating a Pictish force near Stirlingshire. A series of battles followed, until finally the Pictish king and his army were trapped near Scone by the River Tay and destroyed. A less generous version of Kenneth's accession involves the story of another banquet to which were invited various Pictish nobles who opposed his claim to the throne. Purportedly a pit was dug underneath the floor of the banquet hall. After much wine had been consumed, the floor supports were removed and the Pictish nobles fell into the pit and were slaughtered by Kenneth's men-at-arms.
In any event, in A.D. 843, purportedly Kenneth Mac Alpin ascended the throne as ruler of Alba, the unified kingdom of the Dalriadic Scots and Picts. Pictish resistance apparently continued for several years, however, for it is recorded that King Aethelred II of Northumbria had sent military assistance to the Picts in their unsuccessful fight against invading Scots as late as 846 AD. Eventually both kingdoms of Pictland and Dal Riata, became one under one King and formed a new kingdom called " The Kingdom of Alba".
Out of the mist of time; a powerful clan rises to play an important role in Scotland's History. The first Mores were among the tribe of Scotti of Northern Ireland who left Ireland to establish the kingdom of Dal Riata in the western part of Scotland. The Mores, an ancient, and untitled family, would flourished and prosperous beyond the Niemen have been princes at the least. No wonder that finally, a Mure backed by royal alliances and grants of forfeited lands should become one of the richest and powerful subjects. The blood of the ancient family of Rowallan has, consequently, mingled with that of the greater portion of the royal families across Europe. At one stage the Mures were reputed to be the wealthiest clan in Scotland.
The Formation of Alba
The kingdom of Alba was formed by the Dal Riata and the Pictish intermarried with one another after years of bloody conflict. The Mores of Dal Riata has fought along side with the Pictish against the Roman army in Britain. The Mores were of royalty and fought along side every king and queen that came into power. The following list below are battles in which the Mores have fought.
Donald II and Constantine II
King Donald II was the first man to have been called rí Alban (i.e. King of Alba), when he died at Dunnottar in 900. This meant king of Caledonia or Scotland. All his predecessors bore the style of either King of the Picts. Such an apparent innovation in the Gaelic chronicles is occasionally taken to spell the birth of Scotland, but there is nothing special about his reign that might confirm this. Donald had the nickname dásachtach. This simply meant a madman, or in early Irish law, a man not in control of his functions and hence without legal culpability. The reason was possibly the restlessness of his reign, continually spent fighting battles against Vikings. It is possible he gained his unpopularity by violating the rights of the church or through high taxes, but it is not known for certain. However, his extremely negative nickname makes him an unlikely founder of Scotland.
Donald's successor Constantine II (Causantín mac Aeda) is more often regarded as a key figure in the formation of Alba. Constantine reigned for nearly half a century, fighting many battles. When he lost at Brunanburh, he was clearly discredited and retired as a Culdee monk at St. Andrews. Despite this, the prophecy of Berchan is full of praise for the king, and in this respect is in line with the views of other sources. Constantine is credited in later tradition as the man who, with bishop Ceallach of St Andrews, brought the Catholic church in Scotland into conformity with that of the larger Gaelic world, although it is not known exactly what this means. There had been Gaelic bishops in St Andrews for two centuries, and Gaelic churchmen were amongst the oldest features of Caledonian Christianity. The reform may have been organizational, or some sort of purge of certain unknown and perhaps disliked legacies of Pictish ecclesiastical tradition. However, other than these factors, it is difficult to appreciate fully the importance of Constantine's reign.
Malcolm I to Malcolm II
The period between the accession of Malcolm I(Maol Caluim Mac Domhnuill) and Malcolm II (Maol Caluim Mac Cionaodha) are marked by good relations with the Wessex, rules of England, intense internal dynastic disunity and, despite this, relatively successful expansionary policies. Sometime after an English invasion of cumbra land by King Edmund of England in 945, the English king handed the province over to king Malcolm I on condition of a permanent alliance. Sometime in the reign of king Indulf (Idulb mac Causantín) (954–62), the Scots captured the fortress called oppidum Eden, i.e. almost certainly Edinburgh. It was the first Scottish foothold in Lothian. The Scots had probably had some authority in Strathclyde since the later part of the 9th century, but the kingdom kept its own rulers, and it is not clear that the Scots were always strong enough to enforce their authority.
In fact, one of Indulf's successors, Cuilen(Cuilén mac Ilduilbh), died at the hands of the men of Strathclyde, perhaps while trying to enforce his authority. King Kenneth II(Cionaodh Mac Maol Chaluim) (971–95) began his reign by invading Britannia (possibly Strathclyde), perhaps as an early assertion of his authority, and perhaps also as a traditional Gaelic crechríghe (lit. "royal prey"), the rite by which a king secured the success of his reign with an inauguration raid in the territory of a historical enemy.
The reign of Malcolm I (942/3–954) also marks the first known tensions between the Scottish kingdom and Moray, the old heartland of the Scoto-Pictish kingdom of Fortriu. The Chronicle of the Kings of Alba reported that King Malcolm "went into Moray and slew Ceallach." The same source tells us that king Malcolm was killed by the Moravians. This is the first definite sign of tension between the Cenél nGabráin and Cenél Loairn, two kin-groups claiming descent from different ancestors of Erc. During the reign of Macbeth (Mac Beathadh Mac Findláich), and his successor Lulach (Lulach Mac Gille Comhgháin), the Moray-based Cenél Loairn ruled all Scotland.
The reign of Malcolm II saw the final incorporation of these territories. The critical year perhaps was 1018, when king Malcolm II defeated the Northumbrians at the Battle of Carham. In the same year, King Owain Foel died, leaving his kingdom to his overlord Malcolm. A meeting with King Canute of Denmark and England, probably about 1031, seems to have further secured these conquests, although the exact nature of Scottish rule over the Lothian and Scottish borders area was not fully realised until the conquest and annexation of that province during the Wars of Independence.
Duncan I to Alexander I
The Stone of Scone in the Coronation Chair at Westminster Abbey, 1855. It was the ceremonial coronation stone of Scotland's Gaelic kings, similar to the Irish Lia Fáil.The period between the accession of King Duncan I (Donnchadh Mac Críonáin) (1034) and the death of Alexander I (1124) was the last before the coming of the Normans to Scotland. In some respects, the reign of King Malcolm III (Maol Caluim Mac Donnchaidh) prefigured the changes which took place in the reigns of the French-speaking kings David I and William I, although native reaction to the manner of Duncan II's (Donnchad mac Máel Coluim) accession perhaps put these changes back somewhat.
King Duncan I's reign was a military failure. He was defeated by the native English at Durham in 1040, and was subsequently toppled. Duncan had only been related to previous rulers through his mother Bethoc, daughter of Malcolm II, who had married Crínán, the lay abbot of Dunkeld (and probably Mormaer of Atholl too). At a location called Bothganowan (or Bothgowan, Bothgofnane, Bothgofuane, meaning "Blacksmith's Hut" in old Gaelic, today Pitgaveny near Elgin), the Mormaer of Moray, Macbeth defeated and killed Duncan, and took the kingship for himself. After Macbeth's successor Lulach, another Moravian, all kings of Scotland were Duncan's descendants. For this reason, Duncan's reign is often remembered positively, while Macbeth is villanised. Eventually, William Shakespeare gave fame to this medieval equivalent of propaganda by further immortalising both men in his play Macbeth. Macbeth's reign however was successful enough that he had the security to go on pilgrimage to Rome.
It was Malcolm III, who acquired the nickname (as did his successors) "Canmore" (Ceann Mór, "Great Chief"), and not his father Duncan, who did more to create the successful dynasty which ruled Scotland for the following two centuries. Part of the success was the huge number of children he had. Through two marriages, firstly to the Norwegian Ingibiorg Finnsdottir, and secondly to the English princess Margaret of Wessex, Malcolm had perhaps a dozen children. Malcolm and, if we believe later hagiography, his wife, introduced the first Benedictine monks to Scotland.
However, despite having a royal Anglo-Saxon wife, Malcolm spent more of his reign conducting slave raids against the English, adding to the woes of that people in the aftermath of the Norman Conquest of England and the Harrying of the North, as Marianus Scotus tells us: "the Scots and French devastated the English; and [the English] were dispersed and died of hunger; and were compelled to eat human flesh: and to this end, to kill men, and to salt and dry them."
Malcolm died in one of these raids, in 1093. In the aftermath of his death, the Norman rulers of England began their interference in the Scottish kingdom. This interference was prompted by Malcolm's raids and attempts to forge claims for his successors to the English kingship. He had married the sister of the native English claimant to the English throne, Edgar Ætheling, and had given most of his children by this marriage Anglo-Saxon royal names. Moreover, he had given support to many native English nobles, including Edgar himself, and had been supporting native English insurrections against their Norman rulers.
In 1080, King William the Conqueror sent his son on an invasion of Scotland. The invasion got as far as Falkirk, on the boundary between Scotland-proper and Lothian, and Malcolm submitted to the authority of the king, giving his oldest son Duncan as a hostage. This submission perhaps gives the reason why Malcolm did not give his last two sons, Alexander and David, Anglo-Saxon royal names. Malcolm's natural successor was his brother, Donalbane (Domhnall Bán Mac Donnchaidh), as Malcolm's sons were young.
However, the Norman state to the south sent Malcolm's son Duncan to take the kingship. In the ensuing conflict, the Anglo-Saxon Chronicle tells us that: "Donnchadh went to Scotland with what aid he could get of the English and French, and deprived his kinsman Domhnall of the Kingdom, and was received as King. But afterwards some of the Scots gathered themselves together, and slew almost all of his followers; and he himself escaped with few. Thereafter they were reconciled on the condition that he should never again introduce English or French into the land"
Duncan was killed the same year, 1094, and Donalbane resumed sole kingship. However, the Norman state sent another of Malcolm's sons, Edgar to take the kingship. Anglo-Norman policy worked, because thereafter all kings of Scotland succeeded, not without opposition of course, under a system very closely corresponding with the primogeniture that operated in the French-speaking world. The reigns of both Edgar and his brother and successor Alexander are comparatively obscure. The former's most notable act was to send a camel (or perhaps an elephant) to his fellow Gael Muirchertach Ua Briain, High King of Ireland. When Edgar died, Alexander took the kingship, while his youngest brother David became Prince of "Cumbria" and ruler of Lothian.
Norman Kings: David I to Alexander III
Book of Deer, folio 29v contains a portrait of the Evangelist Luke; a list of privileges and legends were written legends in Gaelic and Latin in the margins, in lowland Buchan in the reign of David I. The period between the accession of David I and the death of Alexander III was marked by dependency upon and relatively good relations with, the Kings of the English. It was also a period of historical expansion for the Scottish kingdom, and witnessed the successful imposition of royal authority across most of the modern country. The period was one of a great deal of historical change, and much of the modern historiographical literature is devoted to this change (especially G.W.S. Barrow), part of a more general phenomenon which has been called the "Europeanisation of Europe". More recent works though, while acknowledging that a great deal of change did take place, emphasise that this period was in fact also one of great continuity (e.g. Cynthia Neville, Richard Oram, Dauvit Broun, and others).
Indeed, the period is subject to many misconceptions. For instance, English did not spread all over the Lowlands (see language section), and neither did English names; and, moreover even by 1300, most native lordships remained in native Gaelic hands, with only a minority passing to men of French or Anglo-French origin; furthermore, the Normanisation and imposition of royal authority in Scotland was not a peaceful process, but in fact cumulatively more violent than the Norman Conquest of England; additionally, the Scottish kings were not independent monarchs, but vassals to the King of the English, although not "legally" for Scotland north of the Forth.
The important changes which did occur include the extensive establishment of burghs (see section), in many respects Scotland's first urban institutions; the feudalisation, or more accurately, the Francization of aristocratic martial, social and inheritance customs; the de-Scotticisation of ecclesiastical institutions; the imposition of royal authority over most of modern Scotland; and the drastic drift at the top level from traditional Gaelic culture, so that after David I, the Kingship of the Scots resembled more closely the kingship of the French and English, than it did the lordship of any large-scale Gaelic kingdom in Ireland.
After David I, and especially in the reign of William I, Scotland's King's became ambivalent about, if not hostile towards, the culture of most of their subjects. As Walter of Coventry tells us: "The modern kings of Scotia count themselves as Frenchmen, in race, manners, language and culture; they keep only Frenchmen in their household and following, and have reduced the Scots [Gaels north of the Forth] to utter servitude."
The ambivalence of the kings was matched to a certain extent by their subjects. In the aftermath of William's capture at Alnwick in 1174, the Scots turned on their king's English-speaking and French-speaking subjects.
William of Newburgh related the events: "When [King William] was given over into the hands of the enemy, God's vengeance permitted not also that his most evil army should go away unhurt. For when they learned of the King's capture the barbarians at first were stunned, and desisted from spoil; and presently, as if driven by furies, the sword which they had taken up against their enemy and which was now drunken with innocent blood they turned against their own army. Now there was in the same army a great number of English; for the towns and burghs of the Scottish realm are known to be inhabited by English.
On the occasion therefore of this opportunity the Scots declared their hatred against them, innate, though masked through fear of the king; and as many as they fell upon they slew, the rest who could escape fleeing back to the royal castles."Walter Bower, writing a few centuries later albeit, wrote about the same event:
"At that time after the capture of their king, the Scots together with the Galwegians , in the mutual slaughter that took place, killed their English and French compatriots without mercy or pity, making frequent attacks on them. At that time also there took place a most wretched and widespread persecution of the English both in Scotland and Galloway. So intense was it that no consideration was shown to the sex of any, but all were cruelly killed ..."
Opposition to the Scottish kings in this period was indeed hard. The first instance is perhaps the revolt of Óengus of Moray, the Mormaer of Moray, the crushing of which led to the colonisation of Moray by foreign burgesses, and Franco-Flemish and Anglo-French aristocrats. Rebellions continued throughout the 12th century and into the 13th. Important resistors to the expansionary Scottish kings were Somhairle Mac Gille Brighdhe, Fergus of Galloway, Gille Brigte of Galloway and Harald Maddadsson, along with two kin-groups known today as the MacHeths and the Meic Uilleim.[citation needed] The latter claimed descent from king Donnchadh II, through his son William, and rebelled for no less a reason than the Scottish throne itself. The threat was so grave that, after the defeat of the MacWilliams in 1230, the Scottish crown ordered the public execution of the baby girl who happened to be the last MacWilliam.
This was how the Lanercost Chronicle relates the fate of this last MacWilliam: "the same Mac-William's daughter, who had not long left her mother's womb, innocent as she was, was put to death, in the burgh of Forfar, in view of the market place, after a proclamation by the public crier. Her head was struck against the column of the market cross, and her brains dashed out." Many of these resistors collaborated, and drew support not just in the peripheral Gaelic regions of Galloway, Moray, Ross and Argyll, but also from eastern "Scotland-proper", Ireland and Mann. By the end of the 12th century, the Scottish kings had acquired the authority and ability to draw in native Gaelic lords outside their previous zone of control to do their work, the most famous examples being Lochlann, Lord of Galloway and Fearchar Mac an t-Sagairt.
Such accommodation assisted expansion to the Scandinavian-ruled lands of the west. Uilleam, the native Mormaer of Ross, was a pivotal figure in the expansion of the Scottish kingdom into the Hebrides, as was Ailéan mac Ruaidhrí, the key pro-Scottish Hebridean chief, who married his daughter to Uilleam, the Mormaer of Mar. The Scottish king was able to draw on the support of Alan, Lord of Galloway, the master of the Irish Sea region, and was able to make use of the Galwegian ruler's enormous fleet of ships. The Mormaers of Lennox forged links with the Argyll chieftains, bringing a kin-group such as the Campbells into the Scottish fold. Cumulatively, by the reign of Alexander III, the Scots were in a strong position to annexe the remainder of the western seaboard, which they did in 1266, with the Treaty of Perth.
Orkney too was coming into the Scottish fold. In the 12th century, Mormaer Matad's son Harald was established on the Orkney Earldom. Thereafter, the Orkney earl (also Mormaer of Caithness) was just as much a Scottish vassal as a Norwegian one. Descendants of the Gaelic Mormaers of Angus ruled Orkney for much of the 13th century. In the early 14th century, another Scottish Gaelic noble, Maol Íosa V of Strathearn became Earl of Orkney, although formal Scottish sovereignty over the Northern Isles did not come for more than another century.
The conquest of the west, the creation of the Mormaerdom of Carrick in 1186 and the absorption of the Lordship of Galloway after the Galwegian revolt of 1135 meant that the number and proportion of Gaelic speakers under the rule of the Scottish king actually increased, and perhaps even doubled, in the so-called Norman period. It was the Gaels and Gaelicised warriors of the new west, and the power they offered, that enabled King Robert I (himself a Gaelicised Scoto- Norman of Carrick) to emerge victorious during the Wars of Independence, which followed soon after the death of Alexander III.
Battles fought by Dal Riatans:
The war against Roman Occupation of Britain
The Invasion of Pictland
Unknown Battle
Inner Hebrides Campaign
Battle of Kintyre
Battle of Daegsastan
Dal Riata Civil War
The battle of Chester
The battle of Heathfield Chase
The battle of Magh Rath
The battle of Strathcarron
The battle of Brunanburh
The battle of Nechtansmere
The battle of River Tay
The battle of Fortriu
Unknown battle near Dundee ( 832 or 834 AD)
The battle of Catohic (Mocetauc)
Unknown battle near Stirling
Action at Earnside
Battle of Bouds
Battle of Dollar
Battle of Barry
The Kingdom of Alba Battles:
Battle of Carham
Battle of Clitheroe
The Capture of the fortress Oppidum
The Battle of the Standard
Battles of Alnvoick
1093 and 1174 Battle of Stracathro 1130
Galwegian revolt
The Battle of Renfrew 1164
Battle of Corbridge
The strathclyde Britons of Ancient Scotland were the first to used the name Mure. At the Battle of the standard, for instance, it is the opinion of the ablest critics that the brave tribesmen who fought for king David I, under the name of the " Levernanii, were the men of Levernside ( the sons of the noisy stream), drawn from Neilston parish. Such is the opinion of Chalmers and Hailes, and when Walter the Steward summoned the stout men of Strathclyde to his standard to aid in the repelling the invasion of Somerled " Lords of the Isles", when he sailed up the Clyde and landed at Renfrew in 1164 A.D., they would doubtless again be in the field of fighting for hearth and home; and at the battle of Largs, in 1263 A.D., when it became necessary to hurl back the invading host under Haco, the men of Renfrewshire and Neilston parsh were there, and the Mures of the Caldwell family was the leader again.
Battle of Largs
The Battle of Largs was fought on October 2, 1263 between the Kingdom of Scotland and the Kingdom of Norway. Sir Gilchrist Mure who was dispossessed of the house and living at Rowallan by the strong hand of Sir Walter Cuming, and was compelled to keep close in his castle of Polkelly until the King Alexander III raised sufficient forces to subdue Cuming and his adherents. Sir Gilchrist regain Rowallan castle after the battle of Largs. From a saga written at the time we know that the Scottish King Alexander II had been attempting to buy the Inner and Outer Hebrides, Kintyre and the Isle of Man from the control of the Norwegian King Håkon IV, but he consistently refused. Alexander's successor Alexander III continued this
policy without success.
In the summer of 1262, Scottish forces launched raids against the Isle of Skye with a view to conquering all the islands. King Håkon responded by equipping a large conscripted fleet which left Bergen for Scotland in July 1263. After establishing control of the Hebrides, King Håkon anchored his fleet of over 120 ships, with a force of around 15,000 men, by the Isle of Arran in the Firth of Clyde where he opened peace talks with the Scottish King. These dragged on until broken off by King Håkon who sent the Kings Magnus and Dougal with 40 ships up Loch Long and into Loch Lomond to loot and plunder. On October 1 the main body of the fleet moved between the island of Cumbrae and Largs, where they were surprised by stormy weather. Five longships and a trading cog were driven ashore at Largs where they were attacked by a small number of Scots.
The next day, King Håkon went ashore with some of his men to stave off further attacks until the stranded ships could be brought free. During the day, a Scottish army approached which the saga says included 500 knights in armor on horseback and a large body of foot soldiers. If the saga is accurate, the Scottish army numbered about 8,000 men compared with around 800 Norwegian troops onshore. King Håkon was transported to safety on board his ship while his forces on the beach started scrambling to get into their boats to get back to their ships, several boats sank as a result of overcrowding. However, the Norwegians managed to restore order in their ranks and make a stand on the beach. King Håkon was unable to send large reinforcements on land because of the storm, but one ship from the main fleet managed to reach the shore. When the ship arrived, the Scots withdrew to the hill behind Largs. There followed a lengthy long-distance battle, with bows and stone-throwing, but the Scottish force ultimately retreated, whereupon the Norwegians immediately boarded their boats and withdrew to the main fleet.
The saga implies that the Scottish cavalry had not been in action, and it is also doubtful whether the full body of the foot soldiers was brought to bear. Similarly, the main body of the Norwegian force was on board their ships, prevented by the storm from joining battle. The Norwegians went back on land the day after to retrieve their dead and burn the stranded longships, which they were able to do unmolested. Within a few days, the Norwegian fleet left the Firth of Clyde with King Håkon sailing North to Orkney for the winter but most of his fleet sailed back to Norway. Largs had not been a crushing military defeat for King Håkon but it meant that he had not been able to win a decisive victory before the winter.
King Håkon fell ill while staying in the Bishop's Palace in Kirkwall and died on December 15, 1263. The following year, King Alexander successfully invaded the Hebrides. In 1265 negotiations between Scottish envoys and Håkon's successor, King Magnus VI, led to agreement that sovereignty over the Hebrides and Man was to pass to the Scottish King, in return for a lump sum of 4,000 marks and subsequently 100 marks annually in perpetuity. This was confirmed in the Treaty of Perth signed in 1266. Norway retained control over Orkney. But according to The Works of Sir William Mure of Rowallan states " Battle of Lairges The battle of Largs by the Norwegian account was fought on October 2 and 3 1263 Of the Norwegians 16,000 are said to have been slain Haco himself died of grief The victory cost the Scots 5000 men."
The Mores, an ancient, and untitled family, would flourished and prosperous beyond the Niemen have been princes at the least. No wonder that finally, a Mure backed by royal alliances and grants of forfeited lands should become one of the richest and powerful subjects.
The blood of the ancient family of Rowallan has, consequently, mingled with that of the greater portion of the royal families across Europe. At one stage the Mures were reputed to be the wealthiest clan in Scotland. The border region of England and Scotland produced some of the most illustrious family names that the world has ever known, names such as Armstrong, Nixon, Graham, Bell, Carson, Hume, Irving, Rutherford, and of course Mures.
The Scottish wars of Independence
The Scottish wars of independence was a war between the Kingdom of Scotland and Kingdom of England. There was the first Scottish war of independence ( 1296-1328), and then few years later there was a second war of independence ( 1332-1357). According to the historic Scotland website states "The Mure family's fate during the Wars of Independence is largely undocumented." Other sources for the Mure family/ clan involvement in the Scottish wars of independence has shown in the following sources: "It appears from the History says (Paterson) that the family had suffered considerably during the war of independence maintained first by Wallace and afterward by Bruce and Sir Adam is eulogized for his prudence in having improved and enlarged their dilapidated inheritance. " which was found in (the Moir genealogy and collateral lines: with historical notes), and other scoure claims " Although the Mure’s appear on the list rendering homage to Edward I in 1296, Sir Archibald Muir fought at the siege of Berwick for John Balliol in the same year. Sir Archibald was killed during the battle that ended with Edward 1 (Longshanks of England) defeating Balliol and his loyal supporters. It is almost certain Mure’s fought alongside Robert the Bruce in the War of Independence."
(http://www.ayrshirescotland.com/clans/mure.html)
This indicates the following; that the Mure family and it's variant spellings has first fought with the Balliol family, then William Wallace and finally Robert the Bruce in a series of bloody conflict against Edward's army. This tells me that the Clan Muir has played a major role in the Scottish wars of Independence. After the wars of independence, it seems that King Robert the Bruce has given the Mure family money to restore our dilapidated inheritance.
Siege of Berwick
Sir Archibald Muir did fought at the siege of Berwick for John Balliol. This siege happen on March 30 1296 which ended up being an English victory. After the raid on Carlisle, the English, under Edward I, began the initial conquest of Scotland in the first phase of the war. On the Wednesday in Easter week, being the twenty-eighth day of March, the Edward passed the river Tweed with his troops and stay that night in Scotland at the priory of Coldstream. From there he marched on the town of Berwick. Berwick-upon- Tweed, a Royal Burgh sat just north of the border, was Scotland's most important trading port.
The garrison was commanded by William the Hardy, Lord of Douglas, while the besieging party was led by Robert de Clifford, 1st Baron de Clifford.
Contemporary accounts of the number slain range from 4,000 to 17,000. Then they took the castle, whereupon Douglas surrendered and his life and those of his garrison were spared. The Battle of Dunbar crushed further Scottish resistance. Sir Archibald Muir was killed during the rout of Balliol. The Mure family/ clan has fought in the following battles battle of Dunbar in April 27, 1296,Battle of Lanark, and the Major battle at Stirling Bridge which was a decisive victory for the Scots against the English. They also fought at the battle of Kinclaven, Battle of Happrew, Battle of Roslin, and Falkirk.
Battle of Loudoun Hill
The Muirs/ Mure fought at this particular battle for a reason. That reason is simple, the Clan Muir lands were in East Ayrshire, and was very close to Loudoun Hill from Rowallan castle. Bruce won his first small success at Glen Trool, where he ambushed an English forces led by John Mowbray, sweeping down from the steep hillsides and driving them off with heavy losses. He then passed through the moors by Dalmellington to Muirkirk, appearing in the north of Ayrshire in early May, where his army was strengthened by fresh recruits. Here he soon encountered Aymer de Valence, commanding the main English force in the area.
In preparing to meet him he took up a position on 10 May on a plain south of Loudoun Hill, some 500 yards wide and bounded on either side by deep morasses. Bruce scouted the ground and made the necessary preparations. John Barbour describes his actions in his rhyming chronicle: "The king upon the other side, Whose prudence was his valor's guide, Rode out to see and chose his ground. The highway took its course, he found, Upon a meadow, smooth and dry. But close on either side thereby. A bog extended, deep and broad, That from the highway, where men rode, Was full a bowshot either side."
Valence's only approach was over the highway through the bog, where the parallel ditches Bruce's men dug outwards from the marsh restricted his room for deployment still further, effectively neutralizing his advantage in numbers. Valence was forced at attack along a narrowly constricted front upwards towards the waiting enemy spears. It was a battle reminiscent in some ways of Stirling Bridge, with the same 'filtering' effect at work. "the king's men met them at the dyke So stoutly that the most warlike And strongest of them fell to the ground. Then could be heard a dreadful sound As spears on armor rudely shattered, And cries and groans the wounded uttered. For those that first engaged in fight Battled and fought with all their might. Their shouts and cries rose loud and clear; A grievous noise it was to hear."
As Bruce's spearmen pressed downhill on the disorganized English knights they fought with such vigor that the rear ranks began to flee in panic. A hundred or more were killed in the battle. Amyer de Valence managed to escape the carnage and fled to the safety of Bothwell Castle. Three days after the Battle of Loudoun Hill Bruce defeated another English force under the Earl of Gloucester. But the greatest boost to his cause came two months later. At Burgh-on-Sands, just short of the Scottish border, Edward I died. In a cave inhabited by a spider. Supposedly, Bruce watched the small spider try to spin a line across a seemingly impossibly wide gap. As Bruce watched, the spider tried and tried and tried. "Foolish spider" thought Bruce, but continued to watch. Suddenly, the spider succeeded in leaping across the gap with its thread. Bruce considered this, and took it as an encouragement that he, too, should continue to persevere regardless of seemingly hopeless circumstances, and he later came out of hiding. It is doubtful if the story is true, however.
Battle of Bannockburn
I believe that this is one of two last battles of the first Scottish war on Independence, in which the clan Mure has fought. The Prelude to the Battle. An early 14th century English depiction of a Biblical battle giving an impression of how soldiers were equipped at Bannockburn. The image of a king wielding a battle axe in the top half has led some historians to link this image to Bannockburn. Edward II and his advisors were aware of the places that the Scots were likely to challenge them and sent out orders for their troops to prepare for an enemy established in boggy ground near to the River Forth, near Stirling .The English appear to have advanced in four divisions whereas the Scots were in three divisions, known as 'schiltrons' which were strong defensive circles of men bristling with pikes.
Thomas Randolph, 1st Earl of Moray, commanded the Scottish vanguard, which was stationed about a mile to the south of Stirling, near the church of St. Ninian, while the king commanded the rearguard at the entrance to the New Park. His brother Edward led the third division. According to Barbour, there was a fourth division nominally under the youthful Walter the Steward, but actually under the command of Sir James Douglas.The Scottish archers used yew-stave longbows and though these were not weaker or inferior to English longbows, there were fewer Scottish archers than English archers, possibly numbering only 500. These archers played little part in the battle.
There is firsthand evidence in a poem by the captured Carmelite friar Robert Baston, written just after the battle, that one or both sides employed slingers and crossbowmen. Most medieval battles were short-lived, lasting only a few hours, therefore the Battle of Bannockburn is unusual in that it lasted for two days. On 23 June 1314 two of the English cavalry formations advanced, the first commanded by the Earl of Gloucester and the Earl of Hereford. They encountered a body of Scots, among them Robert the Bruce himself. A celebrated single combat then took place between Bruce and Henery de Bohun who was the nephew of the Earl of Hereford.
Bohun charged at Bruce and when the two passed side by side, Bruce split Bohun's head with his axe. The Scots then rushed upon the English under Gloucester and Hereford who struggled back over the Bannockburn. The second English cavalry force was commanded by Robert Clifford and Henry de Beaumont and included Sir Thomas de Grey of Haeton, father of the chronicler Thomas Grey whose account of events follows; "Robert Lord de Clifford and Henry de Beaumont, with three hundred menat-arms, made a circuit upon the other side of the wood towards the castle, keeping the open ground. Thomas Randolph, 1st Earl of Moray, Robert de Brus's nephew, who was leader of the Scottish advanced guard, hearing that his uncle had repulsed the advanced guard of the English on the other side of the wood, thought that he must have his share, and issuing from the wood with his division marched across the open ground towards the two afore-named lords.
Sir Henry de Beaumont called to his men: "Let us wait a little; let them come on; give them room""Sir," said Sir Thomas Gray, "I doubt that whatever you give them now, they will have all too soon""Very well" exclaimed the said Henry, if you are afraid, be off" "Sir," answered the said Thomas, "it is not from fear that I shall fly this day." So saying he spurred in between Beaumont and Sir William Deyncourt, and charged into the thick of the enemy. William was killed, Thomas was taken prisoner, his horse being killed on the pikes, and he himself carried off with the Scots on foot when they marched off, having utterly routed the squadron of the said two lords. Some of the English fled to the castle, others to the king's army, which having already left the road through the wood had debouched upon a plain near the water of Forth beyond Bannockburn, an evil, deep, wet marsh, where the said English army unharnessed and remained all night, having sadly lost confidence and being too much disaffected by the events of the day."
Second day of battle; Under, the nightfall, the English forces crossed the stream that is known as the Bannock Burn, establishing their position on the plain beyond it. A Scottish knight, Alexander Seton, who was fighting in the service of Edward II of England, deserted the English camp and told Bruce of the low English morale, encouraging Bruce to attack them. In the morning the Scots then advanced from New Park. Not long after daybreak, the Scots spearmen began to move towards the English. Edward was surprised to see Robert's army emerge from the cover of the woods. As Bruce's army drew nearer, they paused and knelt in prayer. Edward is supposed to have said in surprise "They pray for mercy!" "For mercy, yes," one of his attendants replied, "But from God, not you. These men will conquer or die." The English responded to the Scots advance with a charge of their own, led by the Earl of Gloucester.
Gloucester had argued with the Earl of Hereford over who should lead the vanguard into battle, and argued with the king that the battle should be postponed. This led the king to accuse him of cowardice, which perhaps goaded Gloucester into the charge. Few accompanied Gloucester in his charge and when he reached the Scottish lines he was quickly surrounded and killed. Gradually the English were pushed back and ground down by the Scots' schiltrons. The English longbowmen attempted to support the advance of the knights but were ordered to cease fire as they were causing casualties among their own. An attempt to employ the English and Welsh longbowmen to shoot at the advancing Scots from their flank failed when they were dispersed by the Scottish 500-horse light cavalry under the Marischal Sir Robert Keith. The English cavalry was hemmed in making it difficult for them to manoeuvre. As a result, the English were unable to hold their formations and broke ranks.
It soon became clear to Aymer de Valence, 2nd Earl of Pembroke and Giles d' Argentan (reputedly the third best knight in Europe) that the English had lost and Edward II needed to be led to safety at all costs, so, seizing his horse's reins, dragged him away, and were closely followed by five hundred knights of the royal bodyguard. Once they were clear of the battle d'Argentan turned to the king, said "Sire, your protection was committed to me, but since you are safely on your way, I will bid you farewell for never yet have I fled from a battle, nor will I now." and turned his horse to charge back into the ranks of Scottish where he was overborn and slain.
English retreat Edward fled with his personal bodyguard, ending the remaining order in the army; panic spread and defeat turned into a rout. He arrived eventually at Dunbar castle, from which he took ship to Berwick. From the carnage of Bannockburn, the rest of the army tried to escape to the safety of the English border, ninety miles to the south. Many were killed by the pursuing Scottish army or by the inhabitants of the countryside that they passed through. Historian Peter Reese says that, "only one sizeable group of men--all footsoldiers--made good their escape to England." These were a force of Welsh spearmen who were kept together by their commander, Sir Maurice de Berkeley, and the majority of them reached Carlisle.
Weighing up the available evidence, Reese concludes that "it seems doubtful if even a third of the footsoldiers returned to England." Out of 16,000 infantrymen, this would give a total of about 11,000 killed. The English chronicler Thomas Walsingham gave the number of English men-at-arms who were killed as 700, while 500 more men-at-arms were spared for ransom. The Scottish losses appear to have been comparatively light, with only two knights among those killed.
Capture of Berwick
The Mures were at the Capture of Berwick, the last battle they fought. The Capture of Berwick took place in April 1318. Following the decisive Scots victory at the Battle of Bannockburn in 1314, the Scots had recovered all their strongholds, with the exception of Berwick. In September 1317, King Robert Bruce attempted a siege of Berwick, which lasted until November before he withdraw. The following April, an English sergent was bribed to allow a party of Scots to climb the town wall. The raiding party, led by Sir Douglas, and possibly the Earl of Dunbar, took the town after a fight. The castle was warned when they lost control of their men, who began to plunder and failed to capture the castle. King Robert soon arrived with an army, and after an eleven-week siege, the castle garrison capitulated due to a lack of supplies.
The English burgesses were expelled, and King Robert re-established Berwick as a Scottish trading port, installing his son-in-law Walter Stewart as Keeper. The retaking of Berwick was a significant victory for the Scots. After the first Scottish war of Independence ended on the year of 1328. The Treaty of Edinburgh– Northampton was signed between Scotland and England marking the end of the war, but sadly, however the Sencond Scottish War of Independence started up shortly after. Scotland has maintain it's independence.
Other battles in which clan Muir took part in, includes: The battles of Methven, Turnberry, The battle of the bell o' the brae, Dalrigh, Glen Trol, Siloch, Inverurie (1308), Buchan, Pass of Brander, Skaithmuir, Myton, the battle of Old Byland, and Stanhope park.
Second War of Independence
The date from which the second war started and ended was from 1332-1357. I believe that Sir William Mure and other Mures fought in the second war of independence. The clan Muir has played a vital role in the wars of independence to secure and maintain Scotland's independence from the English. The following battles they fought in, include the following battles: Battle of Dupplin Moor, Battle of Annan, Battle of Boroughmuir, Battle of Culblean, Battle of Neville's Cross, battle of Nisbit Moor, and Battle of Halidon Hill.
Battle of Neville's Cross
At the battle of Neville's cross there were probably a few clansmen of clan Muir that were there. We do know that there was a John de la More killed in this battle and a William More was taken prisoner. The Scots only discovered the presence of the English army on the morning of 17 October. Troops under command of William Douglas stumbled upon them in the morning mist during a raid south of Durham. The two rearward divisions of the English army drove the Scots off with heavy Scottish casualties.Upon hearing Douglas's report, David II led the Scottish army to high ground at Neville's Cross (site of an old Anglo-Saxon stone cross), where he prepared his army for battle. Both the Scots and English arranged themselves in three battalions.
Though the Scots were in what is considered a rather poor position (with various obstacles between them and the English position), they remembered well their defeats in the Battle of Dupplin Moor and the battle of Halidon Hill and thus took a defensive stance, waiting for the English to attack. The English also took a defensive stance, knowing they had the superior position and likely knowing that time was on their side. The resulting stalemate lasted until the afternoon, when the English sent longbowmen forward to harass the Scottish lines. The archers succeeded in forcing the Scots to attack, but their initial hesitation in going on the offensive appears in hindsight to have been the correct decision. The Scots' poor position resulted in their formations falling apart as they advanced, allowing the English to deal easily with the Scottish attack.
When it became clear that the battle was going in favour of the English, Robert Stewart, the future King of the Scots, and the Earl of March fled the battle, abandoning David II's battalion to face the enemy alone. Late in the afternoon, the king's own battalion attempted to retreat, but was unsuccessful and David II was captured after he fled the field, while the rest of the Scottish army was pursued for more than twenty miles.
Loehgoin is part of the Rowallan estates extends throughout a considerable part of the Fenwick. The Mures of Rowallan and Polkelly; the same parish, not the place of Renfrewshire as some have supposed. Mure was one of the most ancient and excellent of the Ayrshire families and we believe it was in the time of David More who was the first of the family of which we have any records.
From the earliest times that the Mures appear to have been excellent people, mild, and generous, yet brave, and this may have something to do with foreign refugees being allowed to settled upon the lands of Loehgoin.
Moreham a surname taken from lands in Haddingtonshire now a parish. The de Morehams flourished under Alexander I and II and in the Ragman Roll appears the name of Thomas de Morebam pumtt that is the younger as having sworn fealty to Edward I Sir Reginald Mure lord great chamberlain under David II belonged to this family.
He had sunk the last syllable of his name. Removing into Stirlingshire he resided on the north bank of the Canon at a place now called Scaithmoor where he built a fine house. He married one of the heiresses of the Grahams of Eskdale with whom he acquired the lands of Abercorn in Linlithgowshire notice the possession of Sir John the Graham the fidus Achates of Wallace. Here his family resided for some generations and were known in writs as to be Mores of Abercorn.
The sole heiress married Sir William Lindsay of the Byres.
Since the days of Horace name and birth without property have not been rated in the books so high as vile sea weed a fiscal dilemma from which the Mures are happily exempt and have long been. Touching their ample territorial possessions one of the earliest documents dated 1496 is an instrument of sazine of Sir Adam Mure's Nobilis viri Adae Mur de Cauldwel peaceably and legally conveying a small hamlet called Kempisland alias Breed sorrow so named because of the gratee sorrow it bred in debatting and contesting for the hereditable right thereof .This canting term kemping an old Scotch word for striving and fighting was a symbol and commentary of a disputatious age when border chiefs great coveters of Naboth's vineyard converted many an adjoining field into a cumpus belli of which the strongest man reaped the harvest with his claymore.
Siege of Stirling Castle. Cunynghame of Laiglane, Edward Mure of Middletoune, David Cunynghame of Bertaneholm, William Cunynghame of Craganis, William Cunynghame of Cunynghame, heid Mungo Mure of Rowallane, William Cuninghame in Glengarnock, and Robert Boyd in Kilmarnock for their treasonable art and part of besieging the Castle of Sterling in company with Johne Duke of Albany.
In the apprehension that something dreadful and destructive was approaching the panic of the Scot gentlemen this Council was extreme. The Archbishop of Glasgow was hastily dispatched to Court to urge the imminent danger and to solicit a warrant which was obtained and put in execution for the immediate imprisonment of about twenty gentlemen chiefly leading Presbyterians in the West without which it was impossible to answer for the peace and safety of the country.
Amongst the number so imprisoned were Major General Montgomery brother of the Earl of Eglinton, Sir Hugh Campbell of Cessnock, Sir William Cunningham of Cunninghamhead, Sir George Maxwell of Pollock, Sir William Muir of Rowallan, Sir James Stewart of Coltness, Major General Holborn of Menstrie, Colonel Robert Halket, brother of Halket of Pitfirrane, and Sir George Munro. Their imprisonment was the highest compliment that could be paid to them. It imported that they were men of acknowledged influence over their countrymen that their principles were odious to tyrants and if proper occasion arose that they might be expected to consecrate their abilities hearts and swords to the redemption their country from the bondage under which it was now groaning.
In the time of Robert Mure who succeeded to Polkelly in 1447 paying to the Crown 17 of relief a sheir the laird of Polkelly was a person of even greater importance than his kinsman and neighbor of Rowallan. Robert Mure of Polkelly was Chief Magistrate of Edinburgh in 1470. His name comes seventeenth in the list of Aldermen and Provosts in Maitland's History In the Registrum de Newbotle there is a Latin charter where the name of Robertus Mure de Polkelye prepositus de Edinburgh occurs. He appears to have held a commission as sheriff.
On 22nd October 1482 an instrument of sasine proceeding on a precept from Chancery addressed to Robert Mure Lord of Polkelly was granted to James Lord Boyd of the lands and barony of Kilmarnock.
In like manner also the house of Pokellie w the several branches of the house of Parke of which Midltone & Altonebume of wch Spitleside Brownehill and the Mures of Tarboltone the house of Skeldone of wch the
Mures of Woodland Knockmarlioch and Killikie the houses of Skemore & Annestone w yr branches the Mures of Duglasedale Carses & Calder the house of Bogside of wch the Mures of Arrathill Mures of Irwing & Polmadie of wch the most of the Mures of Glasgow the houses of Baldochat in Golloway of Sanquhare of Drwmskieoch of Achinneill of Ario land w the Mures of the Chappell of wcl1 the Mures of Edr for the most part.
The house of Ormishugh the houses of Cassen Carie & Fferrie of Blacklaw & Skirnalland of Well Ffinnickhill & Clarkland of Little Cesnock and Little Finnick houses of the latest descent some qrof falling to airs female some perishing throw oppression of the greater some throw proper misgoverment or siding w parties w qm they wer broken few of all being standing families at the present at the surname of Mure all of them I say diversified yr armes and from the paternall coat except in the stars and mullets by additionall nottes of distinction as the maisters of Herauldrie to the most considerable did appoynt or as best pleased the fansie of to make choyce of for themselves.
the entry of Caldwell House, designed by Adam and built c. 1763 the rebel army into Edinburgh", and an attack by the rebels on the king’s army which, at one point, led to "a panick into the foot, which was greatly increased by the cries and confusion of many thousands of spectators…" – a rather intriguing vision! The writer of this particular account describes "this memorable battle, at which I was present, and in which about 7000 of the best troops in the world fled like so many children before half that number of undisplined militia".
In 1291, There were a number of claimants to the Scottish throne and King Edward I of England "volunteered" to hear their case and decide who had the most valid claim. Those involved met Edward at Norham on Tweed in 1291. Edward insisted on all the nobles signing an oath of loyalty to him. Some declined but many signed what was the first (and smaller) of the "Ragman Rolls".
When Balliol began to resist the demands of Edward in 1296, the English King over-ran Berwick-upon-Tweed and defeated the Scots at the Battle of Dunbar. He then marched across Scotland as far as the Moray Firth, capturing castles and removing such precious items as the Stone of Destiny, the Scottish crown and huge archives of Scotland's national records. On 28 August, 1296, Edward held a "parliament" at Berwick. All the prominent Scottish landowners, churchmen and burgesses were summoned to swear allegiance to Edward and sign the parchments and affix their seals, many of which had ribbons attached. Prominent people as Robert Bruce, 6th Lord of Annandale, his son, the 2nd Earl of Carrick and William Wallace's uncle, Sir Reginald de Crauford (all of whom signed in 1291, but not 1296).
In total, 2,000 signatures were inscribed, making it a most valuable document for future researchers. It is suggested that the term "Ragman Rolls" derived from the ribbons attached to the seals on the parchments but the name may also have been derived from an earlier record compiled for the purposes of Papal taxation by a man called Ragimunde, whose name was corrupted to Ragman.
More (Mor) de Cragg, Reynaud (del counte de Lanark).
More de Leuenaghes, Douenal le fiz Michel (del counte de Dunbretan).
More, de Thaugarfton, Symon de la (del counte de Lanark).
More, Adam de la (del counte de Are).
More, Gilcrift (del counte de Are).
More, Renaud de la (Renaud) (del counte de Are).
Morhalle, Johan de (tenant le Euefqe de Seint Andreu, del counte de Perth).
Morham, Thomas de (pufne, del counte de Striuelyn).
In 1291 A.D.- Thomas de la More was an executor of the will of Devorgilla, mother of king John Balliol. In the year of 1296, Adam de la More and William de la More were jurors on the lands of Lady Elena La Zuche in Cummingham. Sir Archibald Muir; his son and successor, Sir William Muir was knighted by David II around
1357, and he sent one of his sons as hostage to England for the ransom of the king.
1317- 1400- Name of Muir/ Moore spreads widely in the areas where the Norse language was still spoken, predominantly in the Orkney and Shetland Islands. Robertus More became a Burgess of Aberdeen in 1317.
Adam Mure was a juror on an inquest in Kirkwall.
In 1458; Johannes Muir held a tenement in Glasgow. In the year of 1469-1470, a John Muir was a vicar general of the predicant order in Scotland.
Mungo Muir supported his relative, the Regent Arran, during the minority rule of Mary, Queen of Scots, and fought for him at the battle of Glasgow Muir in 1543. He carried out significant improvements to the Rowallan castle before being killed at the battle of Pinkie in 1547.
The clan embraced the new reformed religion and became opponents of Mary, Queen of Scots. Sir William Mure of Rowallan, Covenanter, Sons and Daughters. In 1662 Youngest son of Sir William Muir created the baronet of Nova Scotia.
The story of the name langmuir belongs to the rich and colorful history of the clans of the lawless borderlands of Scotland and England.
By consulting some of the most ancient manuscripts such as the Exchequer Rolls of Scotland,the Ragman Rolls, the Domesday Book, parish records and cartularies, and tax records,researchers found the first record of the name langmuir in East Dunbartonshire at Langmuir,near Kirkintilloch, a town and former royal burgh about 8 miles (13km) northeast ofGlasgow.
Alternatively the name could have been derived from Longmore, near Ayr. [1] One ofthe first records of the name was Elice de la Longmore and Robert de Langemore of Ayrshirewho rendered homage to King Edward I in his invasion of Scotland in 1296.
Langmore, Langmuir, Langmoor,Langmuire, Longmuir, Longmore, Longmuire and Longmoorto are one of the varient spellings of langmuir and is a sept of Clan Muir.
From this historic region come the ancestors of the langmuir family; the earliest records of
whom were found in Kirkcudbrightshire where they were recorded as a family of great antiquity seated with manor and estates in that shire. John de Langmure was a juror in Irvinein 1417, John of Langmuir was listed there in 1424 and John of Langomwire was listed there in1524. John Langmour, a presbyter witness a deed regarding the Collegiate Church of Dalkeith in 1477. They also acquired branches at Kirkintilloch and Kilmaurs. In the 16th century they acquired the lands of Kirkland, as well as estates in Midlothian and Edinburgh.
From examining such documents as the Inquisitio, 1120 A.D., the Exchequer Rolls of Scotland, The Ragman Rolls, the Chronicles of the Picts and Scots; as well as and various other cartularies of parishes in Scotland, we have determined that the Moir name was first found in Aberdeenshire (Gaelic: Siorrachd Obar Dheathain), a historic county, and present day Council Area of Aberdeen, located in the Grampian region of northeastern Scotland, where they held a family seat from early times. The family name Moir first appearedon the early census rolls taken by the early Kings of Scotland to determine the rate of taxation of their subjects.
The family name Moir emerged as that of a Scottish Clan or family in this territory. More specifically they developed from their original territories of Aberdeen where they were recorded as a family of great antiquity seated with manor and estates in that shire. Robert Moir was a distinguished businessman of that city in 1300.
The early Clan seat was at Uthircoly in Aberdeen but they later branched to Abergeldie, Otterburn, Hilton, Scotstoun,Stoneywood, Invernettie in Aberdeen, and Leckie in Stirlingshire. The Moir Baronetcy, of Longford in the County of Nottingham, was created in the Baronetage of Nova Scotia on 18 June 1636 for Edward Moir. The title became dormant on his death in 1644. This baronetcy included: Sir Edward Moir, 1st Baronet (c.1610-1644); Sir Ernest William Moir, 1st Baronet(1862-1933); Sir Arrol Moir, 2nd Baronet (1894-1957); Sir Ernest Ian Royds Moir, 3rd Baronet (1925-1998); Sir Christopher Ernest Moir, 4th Baronet (b. 1955).
Sir John Muir abiding in the raid of Linlithgow.
In the time of Robert Mure who succeeded to Polkelly in 1447 paying to the crown, 17 of relief a sheir. The laird of Polkelly was a person of, even greater importance than his kinsman and neighbor of Rowallan. Robert Mure of Polkelly was chief magistrate of Edinburgh in 1470.
He appears to have held a commission as sheriff on October 22, 1482, an instrument of sasine proceeding on a precept from chancery addressed to Robert Mure, Lord of Polkelly was granted to James, Lord Boyd of the lands and barony of Kilmarnock.
Glencairn and Mure of Caldwell were in the same year, engaged in the abortive rising under Arran who aspired to the regency to depose. Albany and worked upon by the intriguing of Lord Daere as well as by the family enmity we find the master of Glencairn or Kilmaurs in 1517 hotly engaged in the work of anarchy.
Mure family Until 1681 Searching the National Archives of Scotland using alternative spellings I discovered that on 9th September 1570, "Quintin Mure in Kileckie" witnessed an agreement between Gilbert Kennedy 4th Earl, and "Allan Abbot of Crossragwell" in which "the Earl obliges himself to pay yearly to the Abbot the sum of £100".
The story of "the Roasting of the Abbot of Crossraguel" tells that on 1st September 1570, Allan Stewart, the Commendator of Crossraguel Abbey near... Maybole, was kidnapped, taken to Dunure Castle and roasted over a fire until he agreed to sign over the abbey lands to Gilbert. Afterwards Gilbert granted him a yearly pension of £100. Quintin Mure was a witness to several important documents around this time – why?
Was he related to the Mures in Auchendrane (the murderers of Sir Thomas Kennedy) or Cloncaird, both important houses in the area? Later lists of farm tenancies show several generations of Mures in Kileckie, until 1681, when John Mure is listed, but what happened to him?
The High court of Justiciary might pronounce sentences of outlawry upon the Kennedys and the Boyds, Cunninghams and Montgomeries, Crawfurds and the Kerrs, Campbells and the Mures and put them to the horn at the Mercat cross.
A powerful faction, wrought upon by the internal jealousies of the kingdom, not less than by the English's influence and by English gold, espoused the cause of the hereditary enemy; among them the Earl of Glencairn and the Mures of Caldwell.
The estates of Sir Alexander were sequestrated and by 1642, had passed into the possession of James Mure, burgess and Merchant of Edinburgh, who in an inquisition of the 28th July of that year, as owner of the lands and barony of the lands of West Nisbet, Mungaswall, Reishill, Fluiris, Glouroverhin, Windinkhall, Nisbet, Nisbet-hill, Craiklie and Wettie- Wallis, all in the parish of Edrom.
John Mure of Auchendraine in Ayrshire, was a gentleman of good means and connection; who acted at one time in a judicial capacity as ballie of Carrick, and gave general satisfaction by his judgement.
Sir Reginald Mure of Abercorn, who was a chamberlain of Scotland in 1329.
The entry of Caldwell house, designed by Adam and built in 1763; The rebel army into Edinburgh, and an attack by the rebels on the King's army which at one point, led to a panic into the foot, which was greatly increased by the cries and confusion of many thousands of spectators.
Over the principal entrance of Rowallan Castle is the family coat of arms and above a side entrance is a Hebrew inscription of Palsm xvi 5 " The lord is the portion of mine inheritance and of my cup." Also Sir William built Fenwick Kirk in 1649 his initials and arms are over the gallery doorway.
The earliest record of an Ayrshire Ryeburn was a Robert Ryeburn who in 1496 witnessed an " Instrument of sasine" given by a noble knight, Sir Adam Mure of Caldwell near Lugton.
The Marquis of Bute reviewed these old writs in a lecture to the Scottish history society. Dated in 1563, one of these old documents is a note of assignation by David Mure in Kilkerran, in which Mure stated he was wrongfully ejected by Adam, his servants and accomplices in July 1532, and he in 1563, claims, all the rents and profits of these lands for the past 31 years or thereby. Muir built and owned Penkill Castle before being ejected.
Langsaw, Hessilhead, Skelmorelie, Lord Boyd, Lord Semple, and Lord Mure of Caldwell on one side, and Caprington and Maxwell of Newark on the other side. Both sides failing to disband their forces which they kept in arms throughout the winter.
The unrest continued during that summer with both Glencairn and the Montgomeries assembling more men in November before matters quietened down in the winter of 1592- 1593.
David de More, of the house of Polkelly, Renfrewshire, appears as a witness to a charter of Alexander II. Willielmi de Mora and Laurentii de Mora also occur in two charters granted by Robert the Bruce.
The latter distinguished himself at the battle of Largs in 1263, and for his bravery was knighted. "At which time," says the 'Historie,' "Sir Gilchrist was reponed to his whole inheritance, and gifted with the lands belonging to Sir Walter Cuming before mentioned, a man not of the meanest of that powerful tribe, which for might and number have scarcelie to this day been equaled in this land."
He married Isobel, daughter and heiress of the said Sir Walter Cumin, and in the death of his father-in-law, he found himself secured not only in the title and full possession of his old inheritance, but also in the border lands wherein he succeeded to Sir Walter Cuming, within the sheriffdom of Roxburgh. Sir Gilchrist "disponed to his kinsman Ranald More, who had come purposely from Ireland for his assistance: in the time of his troubles, and also at the battle of Largs, the lands of Polkellie, which appear to have been the original inheritance of the family.
Sir Gilchrist Muir died "about the year 1280, near the 80 year of his age," and was buried "with his forefathers in his own burial place in the Mures Isle at Kilmarnock." He had a son, Archibald, and two daughters, Elizabeth, the wife of Sir Godfrey Ross, and Anicia, married to Richard Boyle of Kelburne, ancestor of the earls of Glasgow.
William More, the son and successor of Archibald, married a daughter of the house of Craigie, then Lindsay, and with two daughters, had a son, Adam, who succeeded him. Of William honorable mention is made in an indenture of truce with England in the nonage of King David, wherein he is designated Sir William.
He died about the time when King David was taken prisoner at the battle of Durham, fought 17th October 1346. There is supposed to have been an older son than Adam, named Reynold. The editor of the 'History,' on the authority of Crawford's Officers of State, (vol. i. p. 290), says in a note: Reynold, son and heir of Sir William More, was one of the hostages left in England at David's redemption.
Sir Adam More, who, "in his father's auld age," had the management of all his affairs, both private and public, considerably enlarged and improved the estate. He married, in his younger years, Janet Mure, heiress of Polkellie, granddaughter of Ranald More, and thus restored that estate to the family. By this marriage he had two sons, Sir Adam, his successor, and Andrew, and a daughter, Elizabeth, married in 1348, to Robert, the high steward, afterwards King Robert II.
Elizabeth Muir of Rowallan was a lady of great beauty and rare virtues, and attracted the high steward's regard in his younger years when living in concealment about Dundonald castle during Edward Baliol's usurpation.
Sir Adam, the eldest son, had on his own resignation, a new charger from Robert III., of the barony of Rowallan and whole lands Holden of the crown, as also of the barony of Polkellie, &c., with very ample privileges, the designation given him by the king being 'consanguineus.'
He married Joan, daughter of Danielston of that ilk, and by her had three sons. "Carried away," says the 'History,' "as appears with emptied surmises and hopes founded on court favors, he made unawares a new rent in his estate and provided his second son, Alexander, to the barronie of Pokellie, together with the lands of Limflare and Lowdonehill, wherein his lady was infeft in liferent, and wer given out by him, now the second time, to the great damage and prejudice of his house and posteritie.
However, at that time the court seemed to smile upon him, his proper estate considerable, his friendship strong, and of the greatest of these times. He gave a quartered coat of the arms of Mure and cumin. The hoarseness and asperitie of the Irish pronunciation of his title and lands is forgot, and Rigallane is now Rowallane, Pothkellath is now Pokellie, &c., and More is now Mure by the court dialect.
He died in 1399. His two younger sons, Alexander and Rankine, were steady adherents of the Douglases. From the earl of Douglas, who married Margaret, daughter of Robert III., he had the lands of Hareschaw and Drumbowy, Lanarkshire, by a precept of infeftment dated in 1417. The family of Polkellie, sprung from him, continued for nearly 150 years, when Margaret, daughter and heiress of William Mure, the last of that house, marrying Robert Cunningham of Cunninghamhead, her whole inheritance came into possession of that family.
Rankine, the youngest son, was "commonly called of Abercorn," says the 'History,' "not that he had these lands in heritage, for that doth never appear by history nor evident that ever come to my hands, notwithstanding of the common tradition thairanent, being established their as bailiff and a chief officer under his lord, the earl of Douglass, having charge of his men their in all his noble achievements." He "rose to no mean respect, place, and power, and is said to have attained to large possessions in Stirlingshire within Abercorn, the Carses Calder and other places adjacent where he also settled divers of his surname and friends." He was an active and stirring adversary of Sir Alexander Livingstone of Calender, guardian of the young king, James II., one of the principal enemies of the earl of Douglas.
Rankine's grandson long held out the castle of Abercorn for the Douglases, and was slain when it was stormed, and the power of that great family overthrown. Archibald, eldest son of Sir Adam, succeeded. He married Euphame Kennedy, daughter of the knight of Dunure, ancestor of the marquis of Ailsa, and had a son, named Robert.
He is said by the author of the 'History' to have "died in battle against England, 1426." The date is evidently wrong, for, as the editor remarks in a note, "Nothing in history of this nature corresponds to the date 1426. The action alluded to should possibly be referred to the battle of Sark, 1448; and if so, we must place Archibald, who fell, after a Robert, probably his brother, and both sons of an Archibald."
In a charter of "George Fullertoun, lord of Corsbie," in 1430, Robert More of Rowallan is designated sheriff depute, it is understood of Ayrshire. He is supposed to have been succeeded by a son or brother named Archibald, father of another Robert "who frequented the court in the minoritie of King James the Third.
He was ane man black hared and of ane budge large stature, therefore, commonly called 'the Rud of Rowallane.'" The epithet 'Rud' is explained in a note to mean of great stature and strength, "a man with 'a back as braid as a barn door,' and who, in addition to his bodily ability, has also the inclination for a fray." The 'History' does not give a good account of this fierce personage, 'the Rud of Rowallan,' nor of his wife either.
"The king, in his bearer head proponed to round with him, and as he offered swa to doe dang out his eye with the spang of ane cockle shell. He was a man reguarded not the well of his house, but in following court, and being unfit for it, wasted, sold, and wadset all his proper lands of Rowallane, whilk may be ane example to all his posteritie.
He married Margerie Newfound, daughter to the laird of Michaelhill in the Merse; ane drunken woman, and ane waistor man, what made then this house to stand but the grace of God?" The 'Rud of Rowallan' died in 1504. He had four sons and a daughter. John, his eldest son, married "Elizabeth Stewart, daughter to the first Lord Evandale," says the 'Historie,' "whose mother was daughter to the earle of Crawfurd, called Earle Beardie."
The first Lord Evandale, who was the son of Lord James Stewart, son of Murdoch, duke of Albany, of the royal house of Stewart, died without issue in 1488. His nephew, Andrew Stewart, who afterwards succeeded to the estate of Evandale, was created a peer by the same title. He left several sons and daughters, and Elizabeth Stewart, who married John Mure of Rowallan, must have been one of the latter, although not mentioned so in the published histories.
If, as is understood, she was the daughter of the second, not the first, Lord Evandale, she was the sister of Andrew Stewart, third Lord Evandale, and also of Henry Stewart, created Lord Methven, the third husband of Margaret, queen-mother of Scotland, daughter of Henry VII. Of England, and grandmother of Mary, queen of Scots.
He had four sons and three daughters. The sons were, John, his successor; Archibald, called 'Mickle Archibald;' Patrick Boyd, and James. From Pitcairn's Criminal Trials, we learn that "Nov. 3, 1508. - Patrick Boyde, brother to the laird of Rowallan," and 27 others, were "convicted of art and part of convocation of the lieges against the act of parliament, coming to the Kirk of Stewarton, in company with John Mure of Rowallan, for the office of parish clerk of the same kirk, against Robert Cunynghame of Cunynghamehed and his servants, in the year 1508;" and that "James Muir, brother to the laird of Rowalloun was, in 1508, convicted of art and part of the forethought felony and oppression done to John Mowat, junior, laird of Busbie, and Andrew Stevinstone, in the town of Stewarton, in company with the laird of Rowalloun."
John is said to have "deceast before Robert his father in 1501;" if so, he must have possessed the estate on his father's resignation. The editor adds in a note, that he was dead in 1495. A long feud had existed betwixt the lairds of Crawfurdland and Rowallan, the latter being superior of the lands of Ardoch as Crawfurdland was first called, during which the evidents of both houses were destroyed. In a Justice-eyre, held at Ayr about 1476 by John, Lord Carlyle, chief justice of Scotland on the south side of the Forth, Robert Muir of Rowallan and John Muir his son, and others their accomplices, were indicted for breaking the king's peace against Archibald Craufurd of Craufurdland.
John Mure of Rowallan, the eldest son, and grandson of Robert "the Rud," married Margaret, third daughter of Archibald Boyd of Bonshaw, brother of Thomas, master of Boyd, created earl of Arran about 1467. This lady was the means of putting an end to the feud of the Rowallan family with the Crawfurds. In her youth she had been mistress to James IV., by whom, with a son, Alexander, bishop of St. Andrews, she had a daughter, Catherine Stewart, married to the third earl of Morton. She afterwards "procured to herself the ward of the laird of Rowallan, John Muir, and married him." They had sasine of the lands of Warnockland, the gift of James IV., in January 1498. This John Mure of Rowallan was slain at Flodden in September 1513. He had four sons and four daughters.
Mungo, his eldest son, succeeded him. His half-sister, Catherine, countess of Morton, had three daughters, the eldest of whom, Lady Margaret Douglas, married the regent earl of Arran, duke of Chatelherault, ancestor of the dukes of Hamilton; the second, Lady Beatrix, married Lord Maxwell; and the youngest, Lady Elizabeth, became the wife of the regent Morton. These noblemen, therefore, stood in near relationship to Mungo Mure of Rowallan, which they were all very ready, the regent Morton in particular, to acknowledge. Mungo Mure of Rowallan was with Robert Boyd of the Kilmarnock family when he arrived, with a party of horse, to the assistance of the regent Arran in the skirmish at Glasgow, in 1543, with the earl of Glencairn.
In the appendix to the 'History' there is an account of "the behavior of the house of Kilmarnock towards the house of Rowallane, and of their house towards them," in which he is thus referred to: "It is understand that Mungow Muir of Rowallane, quhois mother was Boyd, joynit with Robert Boyd guidmane of Kilmarnock, in seeking revengement of the slaughter of James Boyd, the king's sisteris sone, quho sould have bene Lord Boyd, bot befoir he was fullie restorrit was slaine be the earl of Eglintoune.
Nixt, my lord of Glencairne proponing ane richt to the barronie of Kilmarnock proclaimit ane court to be holdin at the Knockanlaw, quhair the said Robert Boyd guidmane of Kilmarnock and Mungow Muir of Rowallane, with the assistance of thair friends, keipit the said day and place of court, offirit battle to the said earl of Glencairn, and stayit him from his pretendit court hoilding. Thridlie, the foirsaid Robert Boyd guidmane of Kilmarnock, and the said Mungow Muir of Rowallane, entirit in the field of Glasgow, the said Mungow being lairglie better accompanied then the foirsaid Robert, they behavit themselfe so valiantlie in that fact that the Duik Hamiltone quho reckonit both his lyfe and honour to be preservit be thair handis, maid the said Robert Boyd, guidman of Kilmarnock, Lord Boyd, lyk also as he revardit the said Mungow Muir with dyvers fair giftis.
The said Robert Boyd hichlie esteemit of the sais Mungow Muir of Rowallane and gave him the first place of honour al his dayis, acknawleging the alternation of his estait to the worthines of the said Mungowis handis. "This Mungo is particularly mentioned as having greatly improved the old castle of Rowallan. He was slain in battle at Pinkiefield "at the black Satterday, in the yeare of our lord 1547." He married Isabel, daughter of Sir Hugh Campbell of Loundoun, sheriff of Ayr, and had five sons and six daughters. His eldest son, John Mure of Rowallan, took great delight in planting, and built a portion of Rowallan castle. He "lived gratiouslie," says the 'Historie,' and "died in 1581, in the 66th year of his age."
The year is supposed to be a mistake for 1591, as it is given in the family Genealogical tree, drawn up in 1597. A 'letter of Soleance,' subscribed at Irvine and Kilwinning, 16th and 17th March 1571, is inserted in the Appendix to the 'Historie' so often quoted, from Alexander Cowper, mason in Kilwinning, "with consent and assent" of certain persons named, his "cheife and capitall branchis, bayth on the father side and mother side," granting his remission, free forgiveness and pardon to John Mure of Rowallan, William Mure, his son and heir, John Mure and Mungo Mure, his sons, and two others, and "thair complices, kin, freindis, allys, assistaris and parttakeris, the crewall wonding, hurting and bluding of me, the said Alexander, to the great effusions of my blude, done and committit be the saidis persones thair seruandis and complicis," in the month of February, 1570.
The account above quoted of the mutual friendly offices between these families appears to have been drawn up in reference to this charge. It recites many good deeds done by the Mures to the Boyds, in particular, amongst others, that after Robert, master of Boyd, had slain Sir Neil Montgomerie of Lainshaw, he was received and concealed by John Muir of Rowallan, who, with his friends and servants, was the means of saving his life, when pursued by the Montgomeries; and also that after the battle of Langside he kindly received the said Robert, being then Lord Boyd, although he had fallen into disfavour with the regent Moray, and much more to the same purport.
John Muir of Rowallan subscribed the bond in support of the Reformation in 1562, and the same year he was a member of the Scottish estates. In 1568, when Queen Mary escaped from Lochleven castle, she wrote the laird of Rowallan a letter dated 6th May that year, requiring him to meet her at Hamilton, as soon as he could muster his retainers, all well armed for her service. It does not appear, however, that he complied with the summons. In 1584 John Mure of Rowallan, "and his spouse and six persons with them in company," received a license from James VI., to eat flesh in Lent, and upon Wednesdays, Fridays, and Saturdays "for ane zeir next hereafter," and in February 1588 he had the present of a gray courser from his kinsman, the earl of Morton, on the latter going abroad. In the letter which accompanied the gift he says: "I think ze sall find him als meit in haikney for zour self or zour wife to ryd upoun as ony uther, for I chosit him to have been presentit to the king quhen the Scots horse suld have been send to the duke of Gwies."
He married a daughter of Cunninghame of Cunninghamehead, and had three sons and three daughters. His third son, Mungo Mure, received a remission, of date 1st March 1607, for being concerned in the slaughter of Hew, fourth earl of Eglintoun. He died in London in November 1632. Before his departure, we are told, he greatly lamented "the crying sinne of innocent blood."
William, the eldest son, succeeded his father. He was "of a meik and gentle spirit, and delyted much in the study of phisick, which he practiced especiallie among the poore people with very good success. He was ane religious man, and died gratiouslie in the yeare of his age 69, the year of our lorde 1616." With three daughters he had three sons, Sir William, who succeeded him; John Mure of Blacklaw, who was slain at a combat at Beith, and Hugh of Skirnalland.
Sir William, the eldest son, the next laird of Rowallan, is described as "ane strong man of bodie, and delyted much in hunting and halking." He died in 1639, aged 63. He was thrice married, and had issue by each of his wives. His eldest son, by his first wife, Elizabeth Montgomery, daughter of the laird of Hazlehead, was William Mure of Rowallan, the eminent poet, a memoir of whom is given below. He was succeeded by his eldest son, Sir William Mure of Rowallan, in the end of 1657.
This Sir William Mure was firmly attached to the Reformed doctrines, and was the intimate friend of the celebrated Mr. Guthrie, first minister of Fenwick. It is said that conventicles were held in the house of Rowallan during his time. Whether on this account or not, it is certain that he suffered much during the troubles of the Church of Scotland. He was imprisoned in 1665, in the castle of Stirling, with the lairds of Cunninghamehead and Nether-Pollock.
When other gentlemen were liberated upon the bond of peace in 1668, these three were retained in confinement, but in the year following, on the removal of Bishop Burnet from Glasgow, they presented a petition for release to the duke of Lauderdale, the commissioner, which was granted. IN 1683 Sir William Mure again fell under the suspicion of the court, and was apprehended, with his eldest son, in London. They were sent to Edinburgh and committed prisoners to the Tolbooth.
In the same year his second son, John, was taken prisoner, and carried to Edinburgh. In a short time the health of the young laird of Rowallan required indulgence, and he was allowed to be removed from the prison to a private house. In April 1684, they were both discharged, upon giving a bond of E2,000, to appear when called upon. Sir William died in or about 1686. He married about 1640, Elizabeth, daughter of James Hamilton of Aikenhead, provost of Glasgow, and had two sons and a daughter.
The elder son, William Mure of Rowallan, the last lineal representative of the family, was entered a student at the university of Glasgow in 1660. His share in the afflictions of his father has been already noticed.
This did not shake his attachment to the church for which he suffered. His name frequently occurs in the records of the parish of Kilmarnock. He is mentioned there, for the last time, in 1695, in a commission to defend a process of translation before the synod. He was a member of the Scots parliament, and died in 1700.
He married, about 1670, Dame Mary Scott, apparently heiress of Collarny in Fife, by whom he had three daughters, Anna, Margaret, and Jean. The latter, his only surviving daughter and sole heiress, married, first, William Fairlie of Bruntsfield, near Edinburgh, afterwards designed of Fairlie, to whom she had issue. Tradition still points out the spot where Fairlie was married to the heiress of Rowallan. The ceremony was performed by a curate, in the fields, about a quarter of a mile from the house of Rowallan, at a tree, still called the marriage tree, which stands on the top of a steep bank, above that part of the stream called "Janet's kirn."
The heiress of Rowallan married, secondly, David, first earl of Glasgow, and had to him three daughters, Lady Betty, who died in infancy; Lady Jean, who, by special destination, succeeded to Rowallan, and Lady Anne, who died unmarried. Jean Mure, countess of Glasgow, died September 3, 1724, and was succeeded by her elder surviving daughter of the second marriage, Lady Jean Boyle Mure of Rowallan, who married the Hon. Sir James Campbell of Lawers, K.B., third and youngest son of the second earl of Loudoun. Their son, James Mure Campbell, succeeded to the estate of Rowallan, and was the fifth earl of Loudoun (see LOUDOUN, fifth earl).
Sir Reginald, who was granduncle of the queen, Elizabeth Mure, first wife of Robert I., acquired his extensive estates of Abercorn, &c., in the Lothians and Stirlingshire, by marriage with one of the coheiresses of Sir John Graham of Eskdale and Abercorn. He adhered steadily to the cause of David II. in the Baliol wars with England, and was one of the commissioners appointed in 1340 to treat with the lords Percy, Moubray, and Neville of a truce between the two kingdoms. With one daughter, he had two sons, William, who succeeded to Abercorn, and died without male issue, and Gilchrist More, already mentioned, who carried on the line of the family.
Sir Adam Mure, the fourth in succession from Gilchrist, was knighted by James IV., and is supposed to have been slain at the battle of Flodden. His son, John Mure of Caldwell, on 20th February 1515, took by assault, at the head of his followers, "the castle and palace" of the archbishop of Glasgow, situated near the city, battering the walls in breach 'with artillery,' and carrying off a rich booty. He married Lady Janet Stewart, daughter of Matthew earl of Lennox, and grand-aunt of Lord Darnley, husband of Mary, queen of Scots, and died in 1533.
His eldest son, John Mure of Caldwell, had, with other children, two sons, John, his heir, and William of Glanderstoun, ancestor of the Mures of Glanderstoun. The granddaughter of the latter was the mother of the Rev. William Carstairs, a divine of great political influence in the reign of William III.
His son, Sir Robert Mure of Caldwell, was one of the jury appointed in 1580 to try the Lord Ruthven, high-treasurer of Scotland, for the murder of David Rizzio. He was on terms of great intimacy and confidence with James VI., by whom he was knighted, and to whom he was related through the Lennoxes. Six letters addressed to him by that monarch, preserved at Caldwell, have been inserted in the 'Selections from the Caldwell Papers,' printed for the Maitland Club in 3 vols. 4to, in 1854.
About 1610 the lands of Thornton near Kilmarnock, long in possession of the family, were alienated to a cadet, founder of the house of Mure of Thornton, the male line of which becoming extinct in 1701, in the person of Sir Archibald Mure, lord provost of Edinburgh, the estate passed by his heir female to John Cuningham of Caddell, and is now held by his descendant, in feu of the Caldwell family.
William Mure of Caldwell, the fourth in succession to Sir Robert, was a staunch Covenanter. He and a few other west-country gentlemen of similar sentiments, met in arms at Chitterfleet, in the parish of Beith, on 28th November 1666, and having collected a body of horsemen, amounting to about fifty in all, and consisting chiefly of the tenantry of Caldwell and the neighbouring estates, they set out, under Caldwell's command, to join Colonel Wallace of Achans, who was marching from Galloway in the direction of the Pentlands, by Lesmahago and Lanark.
On the way, finding themselves intercepted by the king's troops, under General Dalzell, they retraced their steps, and dispersed. Caldwell was attainted, fled to Holland, and died in exile. His estates were bestowed on General Dalzell; and Caldwell's lady, a daughter of Sir William Cunninghame of Cunninghamehead, was imprisoned, with two of his daughter, in Blackness castle, where she underwent much cruel persecution.
Barbara Mure, the second daughter, lived to obtain, by special act of parliament, 19th July 1690, a full restoration of the family estates. She married John Fairlie of that ilk, but dying without issue, was succeeded, in 1710, by her kinsman, William Mure, fourth laird of Glanderstoun, descended from William, second son of the John Mure who inherited Caldwell in 1539. This William Mure bore his share in the persecution of the times, having been imprisoned and fined, on a charge of nonconformity, in 1683. A Journal of a tour by him through England and the Netherlands in 1696, is printed among the 'Caldwell Papers.'
Dying without issue, he was succeeded by his nephew, William Mure, eldest son of Mure of Rhoddens in Ireland. His son, William Mure of Caldwell, M.P. for Renfrewshire from 1742 to 1761, was appointed one of the barons of the exchequer in Scotland in the latter year. In 1753 he bought Wester or Little Caldwell from the duke of Hamilton. The portion of the estate the Mures had previously possessed was called Easter Caldwell. Baron Mure was an intimate associate of David Hume the historian, and the author of one of two tracts on speculative points of political economy, printed for private circulation.
His correspondence and miscellaneous papers occupy the greater part of two of the three volumes of the 'Caldwell Papers.' He was rector of the university of Glasgow in 1764-5, and died in 1776.His eldest son, Colonel William Mure of Caldwell, was the friend of Sir John Moore, but early left the army. He was rector of the university of Glasgow in 1793-4. He married Anne, eldest daughter of Sir J. Hunter Blair, bart. of Dunskev, with issue, and died February 9, 1831.
Col. Mure's eldest son, William Mure of Caldwell, D.C.L., born July 9, 1799, was educated at Westminster, and studied at Edinburgh and in Germany, where he imbibed that taste for critical inquiry which made his name extensively known among the scholars of modern Europe. He married in 1825, Laura, 2d daughter of William Markham, Esq. of Becca Hall, Yorkshire, with issue; vice-lieutenant of Renfrewshire and colonel of its militia; was M.P. for that county from 1846 to 1855; lord-rector of Glasgow university in 1847-48; author of 'Brief Remarks on the Chronology of the Egyptian Dynasties; showing the Fallacy of the System laid down by Messrs.
Champollion, in Two Letters on the Museum of Turin,' London, 1829, 8vo; 'A Dissertation on the Calendar of the Zodiac of Ancient Egypt,' Edinburgh, 1832, 8vo; 'A Tour in Greece,' 1842; 'A Critical History of the Language and Literature of Ancient Greece,' 5 vols., 8vo. 1850-57; and the compiler of the 'Caldwell Papers.' He died at London, April 1, 1860, in his 61st year.
His eldest son, William Mure of Caldwell, lieutenant-colonel Scots fusilier guards, married 3d daughter of 1st Lord Leconfield. David Mure, born in 1810, 3d son of Col. William Mure, who died in 1831, passed advocate at the Scottish bar in the latter year. In 1853 he was appointed sheriff of Perthshire, and in 1858 solicitor-general for Scotland; lord-advocate in April 1859, and elected M.P. for Buteshire soon after.
The Muir/ Mure of Skaithmuir or back then it was called Skaithmure was owned by clan Muir from 1329- 1617; the last of this great line was the eldest son Alexander Mure. The lands of Skaithmure from the reign of David II till about the middle of the sixteenth century belonged to the family of More or Mure of Skaithmure. The old castle of which it is supposed a square tower3 about five hundred yards west of Carron Hall mansion is all that now remains was said have been built by Sir Reginald More Lord Great under David II .
On the tower are two sundials and the lintel of a window is the date 1637 and the initials Alexander fourth Lord Elphinstone and Dame Jean Livingstone his wife 1 whose son Michael was the founder of Quarrell branch of the Elphinstones as already stated Fleming has given interesting sketches of the tower and in his book Ancient Castles and Mansions of Stirling Nobility About 1488. Alexander Mure of Skaithmure was tenant his son James of Westerton of Bothkenner A charter by Robert Bisset of Quarrell is dated at Skaithmure 21st May 1543 sic probably 1534 and William Mure of Skamur a witness.
The confirmation of this charter is dated September 1542. Probably about this date the Bissets into possession of the lands On 31st October 1582. Mure was retoured heir of Alexander Mure of Skaithmure his father in the lands of Skaithmure and as late as 1617. Alexander Mure eldest son of the late Alexander of Skaithmure was alive From this time Skaithmure to be used as a territorial title.
MUIR - This family has been located in Sanday since 1502, when William of Mure and his brother are recorded by Henry, Lord St.Clair. William, who is designed as of Clat, there, held also the bull (mansion house) of Brugh, Lemsgarth, and Brusgarth. Sir Nicholas Muir, Canon of Orkney, is named in 1426."
According to Burke’s Landed Gentry, George Mure’s family is directly descended from Sir Reginald More, or Mure, of Abercorn and Cowdams.
Feudal strife was common place in Scotland in bygone centuries, and the Mure family was as involved as any. In 1500, according to the family records. The Caldwell Papers, Robert Mure, a son of Adam Mure of Caldwell, was granted a Remission under the Privy Seal for the "slaughter of umquhile Patrick Boure, and for the forthocht fellony done upon the Laird of Ralston". Sir Adam’s second son, John, described as "a bold and turbulent baron", fought against the government of the Duke of Albany and was involved in the sacking of the "Castle and Palace" of Glasgow in 1515.
A consequent action for damages for the destruction and plunder of these properties forced him to mortgage his estate of Camseskane. A generation later, this laird’s son, also called John, took part in 1543 in "the bloody battle called the Field of the Muir of Glasgow". Six years later he was indicted for having "with his five brothers and twenty-six others, armed in warlike manner, invaded Robert Master of Sempill and his servants for their slaughter, near the place and tour of Cauldwell, and put them to flight". The Mures, of course, were also at times the victims.
Moving forward to the seventeenth century we find William Mure of Caldwell who, as mentioned in Burke’s Landed Gentry, was "attainted for joining the Covenanters, fled to Holland, and died in exile". His support for the Presbyterian cause and role in the rebellion against the English monarchy led to seizure of his estates which were granted to "the celebrated" General Dalziel – an "Englishmen" who subsequently destroyed Caldwell Castle (just one tower still stands today). Mure’s unfortunate wife, meanwhile, was imprisoned with two of her daughters in Blackness Castle where she "underwent much cruel persecution".
One of her daughters, Anne, was to die as a result. As Anne lay mortally ill in the house of relatives, not far from Blackness, her mother appealed to be allowed to visit her: "Yet such was the unnatural cruelty of the times that so reasonable a request could not be granted." Some ten years later Barbara, the other imprisoned daughter, was, by special Act of Parliament, granted a full restitution of the patrimonial estates".
The Mure family were to be witnesses of, or participants in, several other historic upheavals. "In the eighteenth century," relates George Mure, "a later William Mure was Member of Parliament for Renfrewshire from 1742 to 1761, and one of the Barons of the Scottish Exchequer.
Letters about the rebellion collected in The Caldwell Papers speak of "unnatural rebellion", "the entry of Caldwell House, designed by Adam and built c. 1763 the rebel army into Edinburgh", and an attack by the rebels on the king’s army which, at one point, led to "a panic into the foot, which was greatly increased by the cries and confusion of many thousands of spectators…" – a rather intriguing vision! The writer of this particular account describes "this memorable battle, at which I was present, and in which about 7000 of the best troops in the world fled like so many children before half that number of undisciplined militia".
The rebels, nonetheless, were eventually forced into retreat by the Duke of Cumberland’s forces. Meanwhile a certain Archibald Stuart, wine-merchant, Lord Provost and MP for the city of Edinburgh, and a mutual friend of John Coutts, an influential banker, and of William Mure, was accused of Caldwell House gutted by a fire in the 1990s"favouring the Pretender and conniving at the occupation of the town by the rebel force".
To his friends’ relief, no doubt, Stuart was honorably acquitted at his trial. Farther afield, thirty-six years later, William Mure’s son, William, was to serve in America as a captain in his Britannic Majesty’s 82nd Regiment of Foot, which was forced into capitulation at Yorktown in October 1781. As America won its independence, Capt. Mure was made a prisoner of war. A very secret service –
The marriage of David William Alexander Mure to Diana Melicent Wathen at Mercer’s Hall, London, February 1938. In more recent history, William Mure, grandson of the first Lord Leconfield and head of his sept, the Mures of Caldwell, died in 1912 leaving a son, David William Alexander Mure who was born that same year at Eglinton Castle, Ayrshire.
David Mure was the last of his family to be born in Scotland. George explains that "At the outbreak of WWII,
David Mure, my father, enlisted in the Royal Norfolk Regiment and was soon commissioned into the 60th Rifles. Initially he served in the Western Desert but was then enlisted by the so-called ‘A’ Force. The overt role of this Middle East-based operation was to train soldiers in escape methods. In practice, it was involved in top-secret work, using the radio sets of double agents to feed back misleading information to the German Abwehr. Work on breaking the codes used by the famed Enigma machine was crucial to the operation. "The method was ingenious.
Each agent had a team of imaginary contacts and sub-agents. As my father described it in his book Practice to Deceive: ‘The agent’s wireless transmissions or letters to his Abwehr controllers would duly contain the latest news from his notional team. Enormous trouble was taken to endow each notional contact or sub-agent with a character of his own, with quirks and idiosyncrasies which were lovingly maintained throughout each transmission rather as in a long-running radio or television serial. The transmissions or letters were, of course, composed by us, and similar care was taken to preserve the principal agent’s character and maintain the impression of his busy life spent spying for the Germans.’
"The deception was reinforced by what my father described as ‘fabricated invasion flotillas, tanks, aircraft, etc. and a system of displaying false divisional signs converting non-operational to operational formations’. He also attributed the success of these operations to the always tacit and sometimes, he believed, active connivance of the chief of the Abwehr, Admiral Canaris, and his colleagues of the Schwarze Kapelle, the anti-Nazi conspirators within the German General Staff. "Of enormous importance to the Allied war effort, the ‘A’ Force’s skills at deception successfully diverted the Germans from planned Allied invasions of the Sicilian and Normandy coasts by encouraging them to focus on a forthcoming, but entirely fictitious, invasion of the Balkans by the Allies."
The Mures in Tasmania William George Mure and brother Jock Lloyd Mure (sons of William James Mure), with Mure shield. David Mure’s son George, the current head of the family, has also led a somewhat unusual, and decidedly colourful, life. Born in London in 1939, during the war years he lived on his great uncle’s estate in Norfolk where learned to row and fish. George then moved to Kenya at the age of eight when his mother remarried.
The Mures are now one of the largest owners of fishing quotas in the State of Tasmania. Mures in Tasmania has become an institution and a place of pilgrimage for lovers of seafood dishes – so, as George rather modestly puts it: "The Scottish influence is alive and well in Tasmania…" While relishing such fine dishes as oyster soup, sashimi mille feuille, Tasmanian salmon in boronia oils, or warm seafood salad, tuned-in diners hearing the creak of rigging, lapping of water and keening of seagulls on the dockside will surely gain some inkling into the Mures’ long love affair with the sea.
In the history of rowallan, we have the unbroken line of our ancestors from the 1100th century to the 1600th century. They're the next Adam, Gil, Archibald, William, Adam, Adam, Archibald, Robert, John, John, Mungo, John and John. The last known John Muir came together with his brother James Muir to be an officer of the Swedish King. Scottish and French troops against Russia at the end of the 1500 s. He married the Finnish order of orders with the daughter of fin. John Muir died in 1613 Evers.
His son John Muir, as a soldier named Hans, was also Colonel Lieutenant. He fell in the battle of the 1640 at Greif Castle in saxony. The next two generations were also officers in the Swedish Army. The family knighted in Sweden in the 1680 s. In the 700st century, the male members of the family moved abroad (by someone's view, as the knighted von of Poland) and daughters married to Finnish families.
The Muir family had close links with Scottish Kings. Sir Gilchrist married King Alexander III's blessing with the only daughter of the king and Sir Walter Coymn. The members of the Muir family were the barons. Adam Muir's daughter Elizabeth Married 1346 of the Scottish King, Robert II. Their descendants are later in the king of Scotland and England. My Ancestor, Marion Boyd, was the mistress of King James IV Stewart in the 1490 s and had two children. In 1498, Marion married to John Muir, John Muir. They got eight more kids, the oldest Mungo Muir was our ancestor.
Moars in Orkney and Shetland
Native Families of the Orkney and Shetland Islands:
Mowir lands of Mobisland ( anciently Mobisyord) and Linahow. Mowir seems edvident origin of the Sandwick surname Moar (formerly Moir.)
These were, in alpahbetical order, Berstane, Clouston, Cragy (Craigie), Cromarty, Corrigal, Flett, Heddle, HALCRO, Ireland, Kirkness, LINKLATER, Ness (later Petereson, Petrie, Tulloch) Paplay, Rendall, Scarth (Formerly Harraldson/Bolt) Scalter and Yenstay.
The second Group is made up of the lesser native families of putative Norse Viking origin whose profile became slightly more prominent after the 1470/71 cession of the islands to the Scottish Crown and the subsequent tyrranical period under the Stewart Earls of Orkney which was in dark and direct contrast to the benevolent rule of the Sinclair 'Jarls' . This larger Group was made up of the following families:
Adie, Aikers, Aim, Aith, Annal, BAIKIE, Banks, Bigland, Breck, Brock, Brough, Burgar, Corsie, Corston, Coubister, Cumlaquoy, Cursetter/Cursitter, Deerness, Delday, Dinnison, Drever, Eunson (Johnsson) FEA, Firth, Flaw(s), Folster, Foubister, Gormistane, GARRIOCK, Garsand/Garson, Gilbertson, GROAT/Grote, Groundwater, Harcus, Harrald/Harrold, Harroldson, Harray, Hestwall, Hoseason, Hourston, Housgarth, Hunto (now Hunter), Hurie/Hurrey, Inksgair, Inkster/Ingsgar, Instabille, Keldie, Kirkbrek, KNARSTON, Langskaill, Larquoy, Laughton, LEASK, Linay, Male, Marsetter, Marwick, Matches, Meason of Whytquoy, Meil, Midhouse, Moar, Norn, Norquoy, Nestegard, Newsgar, Oddie, Omand/Omond (Amundsen), Orkney, Peace REDLAND, Ritch, Rousay (now Rosie, Rosey, Rossey) Rusland, Sabiston, Stanger, Stockan, Stove, TAIT, Towrie/Tyrie, Turfeus/Torfus, (Thorfinnson/Torphisson), Twatt, Vedder, Velzian, Voy, Walls, Wick, Windwick, Yorson and Yule
According to the page ORCADIAN FAMILIES list Muir/Moar of Orkney in the year of 1426. This family has been located in Sanday since 1502, when William of Mure and his brother are recorded by Henry, Lord St.Clair. William, who is designed as of Clat, there, held also the bull (mansion house) of Brugh, Lemsgarth, and Brusgarth. Sir Nicholas Muir, Canon of Orkney, is named in 1426.
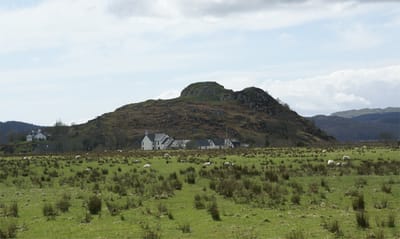
Clan Muir's History Part II
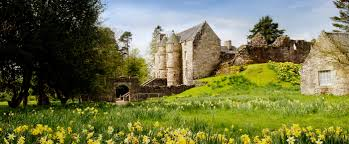
Chief- Supreme leader and lawgiver
The Tanist- nominated by the chief, tanistry was a system of succession by a previously elected member of the clan/family.
Commander/ Military leader
Chieftains- heads of various branches or septs of the clan, always appointed if the chief were old or infirm.
Gentlemen- those who could claim a blood connection with the chief.
Clansmen and septs- the greatest in numbers. In peace time, the clansmen did the manual work, while during war time, they fought for their chief. Although this hierarchy was scrupulously observed, there was no feeling of resentment on the part of the clansmen, whose powers of reflection we're limited by their circumstances. They were proud to be connected to their chief and to each other and the evidence shows they were willing to die for their clan.
Septs:
A sept is an English word for a division of a family, especially of a Scottish or Irish family.[1] The word may derive from the Latin saeptum, meaning "enclosure" or "fold", or via an alteration of "sect". The term is used in both Ireland and Scotland, where it may be translated as sliocht, meaning "progeny" or "seed", which may indicate the descendants of a person (for example, Sliocht Brian Mac Diarmada, "the descendant of Brian MacDermott").
In the context of Scottish clans, septs are families that followed another family's chief. These smaller septs would then comprise, and be part of, the chief's larger clan. A sept might follow another chief if two families were linked through marriage; or, if a family lived on the land of a powerful laird, they would follow him whether they were related or not. Bonds of manrent were sometimes used to bind lesser chiefs and his followers to more powerful chiefs.
Today, sept lists are used by clan societies to recruit new members. Such lists date back to the 19th century, when clan societies and tartan manufacturers attempted to capitalise on the enthusiasm and interest for all things Scottish. Lists were drawn up that linked as many surnames as possible to a particular clan. In this way, individuals without a "clan name" could connect to a Scottish clan and thus feel "entitled" to its tartan. Remember those that married into the clan can join as well those who have been adopted into a family with any of the septs or any variant spelling of Muir. Full list of Clan Muir Septs: * The following list is consider a sept of Clan Muir, and therefore allow to join the clan*These names include from Ireland, Scotland, Wales, England, France, Germany, Austria and India, and the list also contains most of the variant of the spellings of the surnames.
Mur, Mor, Muir, Mure, Moor, Moore, Mure, More, Moores, Mores, Moir, Langmoore/Longmuir, De la Mare, Mare, De la More, de Mora, Mora, Moar, de Moore, Moors, Mair, Meuros, Moyer, Moyre, Moorman, Muirman, Delamore, Dunsmore, Dunmor, Dundemor, Dundemore, Dunmoor, Dunsmoor, Dunmuir, Dunsmuir, Densmore, Densmuir, Denmuir, Dinsmoor Dinsmore, Dunmore, Muire, Mueros, Murieson, Murrison, Murrieson, Muirson, Mureson,Mour, Moer, Moire, Moure, Muire, Myre, O'More, McMore, Moire, Moare, MacMoore, McMoir, McMoore , O'Moore, O'Moire, McMoare, MacMoir, MacMoare, Mooer, Mooers, Mordha, O'Mordha, Moret, Morez, Moré, Morais, Morey, Moraie, Moraies, Mauret, Maurez, Maurais, Maurey, Mauraie, Mauraies, Morret, Maurret, Morrez, Morré, Morrais, Maurrais, Morrey, Maurrey, Morraie, Maurraie, Morraies, Maurraies, Mouré, Mouret, Mourez, Mourière, de Moret and du Moret, Morher, Mohre, Mohr, Dunsmore, Moire, Moorhouse, Moorcraft Morey, Myre/Myres, Morfield, Mohr, Mar, Morton, Morley, Blackmore De Mare, Mare, Mour/Moure, Moare/Moer, Moorfield, Moorefield, Morawa, Mory, Murzynowa, Mourier, Maurier, Murabito, Morias,Morill, Głowa, Morefield, Morfield, Morwick, Moran,Muirhead, Moorhead, Gilmore, Gilmour,Gillamor, Gillemoire, Gillemor, Gillemore, Gillemur, Gillemure, Gilmer, Gilmoir, Gilmor, Gilmore, Gilmour, Gilmoure, Gilmur, Gilmure, Gylmor, Moreland, Mortimer, Moorer, Blackmore, Moorhayes, de Moreham, Morehame, Myhr, Mawr and including other variant of spellings, Byres, Caldwell, Halliday, Mac Gaethin (GAHAN, MacGEEHAN, MAGEEHAN), Mac Ceadach (KEADY, KEADIE, KEDDY, KEEDIE, KEEDY, MACKEADY), Ó Leathlobhar (LALOR, LAWLOR), Ó hArraghain (HARRIGAN, HARAGHAN, HARAHAN), Ó Liathain, Mac Laoidhigh (LEE, MacLEA, MacLEE), Ó Suaird (SWORDS SORD, SOURDES, SUARD), Ó Broithe (BROPHY, BROFIE), Ó Casain (CASHIN, KISSANE), Ó Deoradhain (DORAN, DORRIAN), Ó Dunlaing (DOWLING), Ó Duibhgainn (Deegan), Bourbon, Bueil, BecCrespin, Mascureau, Pierre, Pourthence, Madhure, Devkate, Harphale, Dhyber, Marathe, Darekar, Devkar, and Adavale.
A branch of a clan- means that a large clan with several lands under the control of several chieftains belong to one clan in which they look after their own supporters, but always report to the main chief of the clan. After defining what a branch of a clan means; we can fully support that Clan Muir is indeed a very large clan comparing to those like Macdonalds and the Campbells. The following list below has been heavily research thru historic books and documents.
Mure of Polkelly ( Ancient historic Seat)
Mure of Kilmarnock
Mure of Rowallan
Mure of Abercorn
Moir of Aberdeenshire
Mure of Cowdams and Camseskane
Moir of Caithness/ Sutherland
Mure of Skaithmure
Mores of the Isle of Lewis
Mure of Caldwell
Moar of Orkney
Mure of Cloncaird
Moir of Overhill
Mure of Cassencarrie
Mure of Thornton
Mure of Glanderstoun
Mure of Braca
Mure of Kittochside
Mure of New Grange
Mure of Ferryhill
Moir of Strathavon
Mure of Torhouse, Cairnfield, Glenturk, and Craiglaw
Moir of Strathspey, Strathdee, Mulben, Moray, and Banff
Mure of Ardrossan, Ardnel and Dalry
Mure of Auchendrane
Mure of Otterburne
Mure of Bondingtown
Moir of Scotstown
Mure of Hertfchaw
Moir of Abergeldie
Mure of Templestoun
Moir of Hilton
Mure of Sheills
Moir of Leckie
Mure of Traquair
Moir of Stoneywood
Mure of Talticultrie
Moir of Invernettie
Mure of Akintoir
Moir of Barnes
Mure of Aboun
Moir of Kermuck
Mure of Meikle
Moir of Tonley
Mure of Morfy
Moir of Lonmay
Mure of Douny
Mure of Caverays
Mure of Balgram
Mure of Fermartyn
Mure of Auntslare
Mure of Obeyne
Mure of Foveran
Mure of Kintumer
Mure of Cromar
Mure of Dumlay, Spittleside, Brownhill, and Whitehill
Mure of Sauchens,Deanston, Gartincaber, and Doune
Mure of Clunche, Braidhaugh, Hillfoot, and Lochyfaulds
Mure of Thornhill, Moss-side, Boquhapple and Meadowhead
Mure of Clony and The Thrange of Formartyn
Mure of Netherton, Limflare, Craiagarnhall, and Lowdown Hill
Mure of Herber
Mure of Craighead, Carses Calder, Warnockland, and Blcklaw
Mure of Darlache
Mure of Aucheneil, Treescraig, Craighead Park and Middleston
More of Drumcork
Mure of Bruntwood or Bruntfield
Mure of Penkill
Muir of Beltone, Berwickshire ( Scottish Borders)
Chieftains of Polkelly ( Ancient Seat)
Reginald's Unknown father More ( 1st Lord of Polkelly) 1129-1179
Reginald More ( 2nd Lord of Polkelly) 1149-1199
Sir David More ( 3rd Lord of Polkelly) 1174- 1249
Ronald Muir ( 4th Lord of Polkelly) 1238- ?
Gilchrist Muir ( 5th Lord of Polkelly) 1269-?
Janet Muir ( 6th Lady of Polkelly) 1295- 1330
Andrew Muir ( 7th Lord of Polkelly) 1325- 1370
Alexander Muir ( 8th Lord of Polkelly) 1348- 1426
Adam Muir ( 9th Lord of Polkelly) ?
Archibald Muir ( 10th Lord of Polkelly) 1368-1446
Robert Muir ( 11th Lord of Polkelly) ?
Robert Muir ( 12th Lord of Polkelly) ?- 1511
Margaret Muir ( 13th Lady of Polkelly) ?
Hugh Muir ( 14th Lord of Polkelly) ?
Hugh Muir ( 15th Lord of Polkelly) ?
Elizabeth Muir ( 16th Lord of Polkelly) ?- 1589
William Muir ( 17th Lord of Polkelly) ?- 1629
Chieftians of Rowallan ( Historic Seat)
David More ( 1st Lord of Rowallan) 1174- 1249
Gilchrist Muir ( 2nd Lord of Rowallan) 1200- 1280
Archibald Muir ( 3rd Lord of Rowallan) 1231-1298
William Muir ( 4th Lord of Rowallan) 1265-1348
Adam Muir ( 5th Lord of Rowallan) 1280- ?
Adam Muir ( 6th Lord of Rowallan) 1323-1399
Archibald Muir ( 7th Lord of Rowallan) 1348-1426
Robert Muir ( 8th Lord of Rowallan) 1379- ?
Archibald Muir ( 9th Lord of Rowallan) 1413-1448
Robert " Rud" Muir ( 10th Lord of Rowallan) 1439-1504
John Muir ( 11th Lord of Rowallan) 1467- ?
John Muir II ( 12th Lord of Rowallan) 1471- ?
Mungo Muir ( 13th Lord of Rowallan) 1500- 1547
John Muir ( 14th Lord of Rowallan) 1523- 1591
William Muir ( 15th Lord of Rowallan) 1547-1616
William Muir ( 16th Lord of Rowallan) 1594-1686
Sir William Muir ( 17th Lord of Rowallan) 1623-1700
Jean Muir ( 18th Lady of Rowallan) ?- 1724
The Mures of Rowallan
This, however, is a mistake, as David de More, of the house of Polkelly, Renfrewshire, appears as a witness to a charter of Alexander II. Willielmi de Mora and Laurentii de Mora also occur in two charters granted by Robert the Bruce. The first on record of the family is stated to have been the above-named David de More. His successor is supposed to have been Sir Gilchrist More, the first of the name mentioned in the family 'Historie.' In the beginning of the reign of Alexander III., Sir Walter Cumyn took forcible possession of the house and living of Rowallan, "the owner thereof, Gilchrist More, being redacted for his safety to keep close in his castle of Pokellie."
The latter distinguished himself at the battle of Largs in 1263, and for his bravery was knighted. "At which time," says the 'Historie,' "Sir Gilchrist was reponed to his whole inheritance, and gifted with the lands belonging to Sir Walter Cuming before mentioned, a man not of the meanest of that powerful tribe, which for might and number have scarcelie to this day been equaled in this land." He married Isobel, daughter and heiress of the said Sir Walter Cumyn, and in the death of his father-in-law, he found himself secured not only in the title and full possession of his old inheritance, but also in the border lands wherein he succeeded to Sir Walter Cuming, within the sheriffdom of Roxburgh. Sir Gilchrist "disponed to his kinsman Ranald More, who had come purposlie from Ireland for his assistance: in the time of his troubles, and also at the battle of Largs, the lands of Polkellie, which appear to have been the original inheritance of the family.
He died "about the year 1280, near the 80 year of his age," and was buried "with his forfathers in his own buriell place in the Mures Isle at Kilmarnock."
He had a son, Archibald, and two daughters, Elizabeth, the wife of Sir Godfrey Ross, and Anicia, married to Richard Boyle of Kelburne, ancestor of the earls of Glasgow. In the Ragman Roll, among those barons who swore fealty to Edward I. in 1296, we find the names of Gilchrist More of Craig and Reginald More de Craig, that is, the Craig of Rowallan. The former is stated to have been the ancestor of the Mures of Polkellie, who, Nisbet thinks, were "the stem of the Mures, and an ancienter family than the Rowallan." The latter was in 1329 chamberlain of Scotland.William More, the son and successor of Archibald, married a daughter of the house of Craigie, then Lindsay, and with two daughters, had a son, Adam, who succeeded him. Of William honourable mention is made in an indenture of truce with England in the nonage of King David, wherein he is designated Sir William.
He died about the time when King David was taken prisoner at the battle of Durham, fought 17th October 1346. There is supposed to have been an older son than Adam, named Reynold. The editor of the 'Historie,' on the authority of Crawford's Officers of State, (vol. i. p. 290), says in a note: Reynold, son and heir of Sir William More, was one of the hostages left in England at David's redemption. This is certainly the same Sir William mentioned above, but whether of Rowallan seems still doubtful; If so, he must have lived long after 1348. There is a William More, Miles, mentioned in M'Farlane's MS., as living in 1363. Supposing this Sir William More to have been of Rowallan, Reynold probably never returned from England, and thus the estate may have fallen to Sir Adam, a younger son. During the long protracted payment of the king's ransom, many of the hostages died in confinement.
Sir Adam More, who, "in his father's auld age," had the management of all his affairs, both private and public, considerably enlarged and improved the estate. He married, in his younger years, Janet Mure, heiress of Polkellie, granddaughter of Ranald More, and thus restored that estate to the family. By this marriage he had two sons, Sir Adam, his successor, and Andrew, and a daughter, Elizabeth, married in 1348, to Robert, the high steward, afterwards King Robert II. She was a lady of great beauty and rare virtues, and attracted the high steward's regard in his younger years when living in concealment about Dundonald castle during Edward Baliol's usurpation.
There was long considerable doubt as to this marriage, and Buchanan and earlier historians were of opinion that none had ever taken place. The fact of her marriage, however, is now set beyond all question, and the author of the 'Historie' says, "Mr. John Learmonth, chaplain to Alexander, archbishop of St. Andrews, hath left upon record, in a deduction of the descent of the house of Rowallan, collected by him at command of the said archbishop, that Robert, great steward of Scotland, having taken away the said Elizabeth, drew to Sir Adam her father ane instrument that he should take her to his lawful wife, which myself have seen, saith the collector, as also ane testimonie, written in Latin by Roger M'Adam, priest of our Ladie Marie's chapel, ('Our Lady's Kirk of Kyle,' in the parish of Monktown,) that the said Roger married Robert and Elizabeth foresaids."
The editor of the 'Historie' remarks in a note: "Mr. Lewis Innes, principal of the Scots college at Paris, first completely proved the fallacy of Buchanan's account of King Robert's marriages, by publishing in 1694, a charter granted by him in 1364, which charter showed that Elizabeth More was the first wife of Robert, and made reference to a dispensation granted by the pope for the marriage. That dispensation was long sought for in vain, but was at length discovered in 1789, at which time a dispensation for the marriage with Euphemia Ross was also found. These discoveries have decided the question. The dispensation for the marriage with Elizabeth More is dated in December, in the sixth year of the pontificate of Clement VI. He was elected pope in 1342; this dispensation must therefore have been granted in December 1347. The dispensation for the marriage with Euphemia Ross is dated in the third year of the pontificate of Innocent VI. He was elected pope in 1352; this dispensation must therefore have been given in 1355."
Sir Adam, the eldest son, had on his own resignation, a new charger from Robert III., of the barony of Rowallan and whole lands holden of the crown, as also of the barony of Polkellie, &c., with very ample privileg4es, the designation given him by the king being 'consanguineus.' He married Joan, daughter of Danielston of that ilk, and by her had three sons. "Caried away," says the 'Historie,' "as appears with emptie surmises and hopes founded on court favors, he made unawares a new rent in his estate and provided his second son, Alexander, to the barronie of Pokellie, together with the lands of Limflare and Lowdonehill, wherein his lady was infeft in liferent, and wer given out by him, now the second time, to the great damage and prejudice of his house and posteritie.
However, at that time the court seemed to smile upon him, his proper estate considerable, his friendship strong, and of the greatest of these times. He gave a quartered coat of the arms of Mure and cumin. The hoarseness and asperitie of the Irish pronunciation of his title and lands is forgot, and Rigallane is now Rowallane, Pothkellath is now Pokellie, &c., and More is now Mure by the court dialect. He died in 1399. His two younger sons, Alexander and Rankine, were steady adherents of the Douglases. From the earl of Douglas, who married Margaret, daughter of Robert III., he had the lands of Hareschaw and Drumbowy, Lanarkshire, by a precept of infeftment dated in 1417. The family of Polkellie, sprung from him, continued for nearly 150 years, when Margaret, daughter and heiress of William Mure, the last of that house, marrying Robert Cunningham of Cunninghamhead, her whole inheritance came into possession of that family.
Rankine, the youngest son, was "commonlie called of Abercorn," says the 'Historie,' "not that he had these lands in heritage, for that doth never appear by historie nor evident that ever come to my hands, notwithstanding of the common tradition thairanent, being established thair as bailiffe and a chief officer under his lord, the earle of Duglass, having charge of his men thair in all his noble atchiefements." He "rose to no mean respect, place, and power, and is said to have attained to large possessions in Stirlingshire within Abercorn, the Carses Calder and other places adjacent where he also settled divers of his surname and friends." He was an active and stirring adversary of Sir Alexander Livingstone of Calender, guardian of the young king, James II., one of the principal enemies of the earl of Douglas.
Rankine's grandson long held out the castle of Abercorn for the Douglases, and was slain when it was stormed, and the power of that great family overthrown. Archibald, eldest son of Sir Adam, succeeded. He married Euphame Kennedy, daughter of the knight of Dunure, ancestor of the marquis of Ailsa, and had a son, named Robert. He is said by the author of the 'Historie' to have "died in battell against Ingland, 1426." The date is evidently wrong, for, as the editor remarks in a note, "Nothing in history of this nature corresponds to the date 1426. The action alluded to should possibly be referred to the battle of Sark, 1448; and if so, we must place Archibald, who fell, after a Robert, probably his brother, and both sons of an Archibald."
In a charter of "George Fullertoun, lord of Corsbie," in 1430, Robert More of Rowallan is designated sheriff depute, it is understood of Ayrshire. He is supposed to have been succeeded by a son or brother named Archibald, father of another Robert "who frequented the court in the minoritie of King James the Third.
He was ane man black hared and of ane budge large stature, therefore, commonlie called 'the Rud of Rowallane.'" The epithet 'Rud' is explained in a note to mean of great stature and strength, "a man with 'a back as braid as a barn door,' and who, in addition to his bodily ability, has also the inclination for a fray."
The 'Historie' does not give a good account of this fierce personage, 'the Rud of Rowallan,' nor of his wife either. "The king, in his bearne head proponed to round with him, and as he offered swa to doe dang out his eye with the spang of ane cockle shell. He was a man reguarded not the well of his house, but in following court, and being unfit for it, waisted, sold, and wadset all his proper lands of Rowallane, whilk may be ane example to all his posteritie.
He married Margerie Newfound, daughter to the laird of Michaelhill in the Merse; ane drunken woman, and ane waistor man, what made then this house to stand but the grace of God?" The 'Rud of Rowallan' died in 1504. He had four sons and a daughter.
John, his eldest son, married "Elizabeth Stewart, daughter to the first Lord Evandale," says the 'Historie,' "whose mother was daughter to the earle of Crawfurd, called Earle Beardie." The first Lord Evandale, who was the son of Lord James Stewart, son of Murdoch, duke of Albany, of the royal house of Stewart, died without issue in 1488. His nephew, Andrew Stewart, who afterwards succeeded to the estate of Evandale, was created a peer by the same title. He left several sons and daughters, and Elizabeth Stewart, who married John Mure of Rowallan, must have been one of the latter, although not mentioned so in the published histories. If, as is understood, she was the daughter of the second, not the first, Lord Evandale, she was the sister of Andrew Stewart, third Lord Evandale, and also of Henry Stewart, created Lord Methven, the third husband of Margaret, queen-mother of Scotland, daughter of Henry VII. Of England, and grandmother of Mary, queen of Scots.
He had four sons and three daughters.
The sons were, John, his successor; Archibald, called 'Mickle Archibald;' Patrick Boyd, and James. From Pitcairn's Criminal Trials, we learn that "Nov. 3, 1508. - Patrick Boyde, brother to the laird of Rowallan," and 27 others, were "convicted of art and part of convocation of the lieges against the act of parliament, coming to the Kirk of Stewarton, in company with John Mure of Rowallan, for the office of parish clerk of the same kirk, against Robert Cunynghame of Cunynghamehed and his servants, in the year 1508;" and that "James Muir, brother to the laird of Rowalloun was, in 1508, convicted of art and part of the forethought felony and oppression done to John Mowat, junior, laird of Busbie, and Andrew Stevinstone, in the town of Stewarton, in company with the laird of Rowalloun." John is said to have "deceast before Robert his father in 1501;" if so, he must have possessed the estate on his father's resignation.
The editor adds in a note, that he was dead in 1495.
A long feud had existed betwixt the lairds of Crawfurdland and Rowallan, the latter being superior of the lands of Ardoch as Crawfurdland was first called, during which the evidents of both houses were destroyed. In a Justice-eyre, held at Ayr about 1476 by John, Lord Carlyle, chief justice of Scotland on the south side of the Forth, Robert Muir of Rowallan and John Muir his son, and others their accomplices, were indicted for breaking the king's peace against Archibald Craufurd of Craufurdland. John Mure of Rowallan, the eldest son, and grandson of Robert "the Rud," married Margaret, third daughter of Archibald Boyd of Bonshaw, brother of Thomas, master of Boyd, created earl of Arran about 1467. This lady was the means of putting an end to the feud of the Rowallan family with the Crawfurds. In her youth she had been mistress to James IV., by whom, with a son, Alexander, bishop of St. Andrews, she had a daughter, Catherine Stewart, married to the third earl of Morton.
She afterwards "procured to herself the ward of the laird of Rowallan, John Muir, and married him." They had sasine of the lands of Warnockland, the gift of James IV., in January 1498. This John Mure of Rowallan was slain at Flodden in September 1513. He had four sons and four daughters. Mungo, his eldest son, succeeded him. His half-sister, Catherine, countess of Morton, had three daughters, the eldest of whom, Lady Margaret Douglas, married the regent earl of Arran, duke of Chatelherault, ancestor of the dukes of Hamilton; the second, Lady Beatrix, married Lord Maxwell; and the youngest, Lady Elizabeth, became the wife of the regent Morton. These noblemen, therefore, stood in near relationship to Mungo Mure of Rowallan, which they were all very ready, the regent Morton in particular, to acknowledge.
Mungo Mure of Rowallan was with Robert Boyd of the Kilmarnock family when he arrived, with a party of horse, to the assistance of the regent Arran in the skirmish at Glasgow, in 1543, with the earl of Glencairn. In the appendix to the 'Historie' there is an account of "the behaviour of the house of Kilmarnock towardis the house of Rowallane, and of their house towards them," in which he is thus referred to: "It is understandit that Mungow Muir of Rowallane, quhois mother was Boyd, joynit with Robert Boyd guidmane of Kilmarnock, in seeking revengement of the slaughter of James Boyd, the king's sisteris sone, quho sould have bene Lord Boyd, bot befoir he was fullie restorrit was slaine be the earl of Eglintoune. Nixt, my lord of Glencairne proponing ane richt to the barronie of Kilmarnock proclaimit ane court to be holdin at the Knockanlaw, quhair the said Robert Boyd guidmane of Kilmarnock and Mungow Muir of Rowallane, with the assistance of thair friends, keipit the said day and place of court, offirit battle to the said earl of Glencairn, and stayit him from his pretendit court hoilding.
Thridlie, the foirsaid Robert Boyd guidmane of Kilmarnock, and the said Mungow Muir of Rowallane, entirit in the field of Glasgow, the said Mungow being lairglie better accompanied then the foirsaid Robert, they behavit themselfe so valiantlie in that fact that the Duik Hamiltone quho reckonit both his lyfe and honour to be preservit be thair handis, maid the said Robert Boyd, guidman of Kilmarnock, Lord Boyd, lyk also as he revardit the said Mungow Muir with dyvers fair giftis. The said Robert Boyd hichlie esteemit of the sais Mungow Muir of Rowallane and gave him the first place of honour al his dayis, acknawleging the alternation of his estait to the worthines of the said Mungowis handis. "This Mungo is particularly mentioned as having greatly improved the old castle of Rowallan. He was slain in battle at Pinkiefield "at the black Satterday, in the yeare of our lord 1547." He married Isabel, daughter of Sir Hugh Campbell of Loundoun, sheriff of Ayr, and had five sons and six daughters. His eldest son, John Mure of Rowallan, took great delight in planting, and built a portion of Rowallan castle.
He "lived gratiouslie," says the 'Historie,' and "died in 1581, in the 66th year of his age." The year is supposed to be a mistake for 1591, as it is given in the family Genealogical tree, drawn up in 1597. A 'letter of Soleance,' subscribed at Irvine and Kilwinning, 16th and 17th March 1571, is inserted in the Appendix to the 'Historie' so often quoted, from Alexander Cowper, mason in Kilwinning, "with consent and assent" of certain persons named, his "cheife and capitall branchis, bayth on the father side and mother side," granting his remission, free forgiveness and pardon to John Mure of Rowallan, William Mure, his son and heir, John Mure and Mungo Mure, his sons, and two others, and "thair complices, kin, freindis, allys, assistaris and parttakeris, the crewall wonding, hurting and bluding of me, the said Alexander, to the great effusions of my blude, done and committit be the saidis persones thair seruandis and complicis," in the month of February, 1570.
The account above quoted of the mutual friendly offices between these families appears to have been drawn up in reference to this charge. It recites many good deeds done by the Mures to the Boyds, in particular, amongst others, that after Robert, master of Boyd, had slain Sir Neil Montgomerie of Lainshaw, he was received and concealed by John Muir of Rowallan, who, with his friends and servants, was the means of saving his life, when pursued by the Montgomeries; and also that after the battle of Langside he kindly received the said Robert, being then Lord Boyd, although he had fallen into disfavour with the regent Moray, and much more to the same purport. John Muir of Rowallan subscribed the bond in support of the Reformation in 1562, and the same year he was a member of the Scottish estates. In 1568, when Queen Mary escaped from Lochleven castle, she wrote the laird of Rowallan a letter dated 6th May that year, requiring him to meet her at Hamilton, as soon as he could muster his retainers, all well armed for her service.
It does not appear, however, that he complied with the summons. In 1584 John Mure of Rowallan, "and his spouse and six persons with them in company," received a license from James VI., to eat flesh in Lent, and upon Wednesdays, Fridays, and Saturdays "for ane zeir next hereafter," and in February 1588 he had the present of a gray courser from his kinsman, the earl of Morton, on the latter going abroad. In the letter which accompanied the gift he says: "I think ze sall find him als meit in haikney for zour self or zour wife to ryd upoun as ony uther, for I chosit him to have been presentit to the king quhen the Scots horse suld have been send to the duke of Gwies."
He married a daughter of Cunninghame of Cunninghamehead, and had three sons and three daughters. His third son, Mungo Mure, received a remission, of date 1st March 1607, for being concerned in the slaughter of Hew, fourth earl of Eglintoun. He died in London in November 1632. Before his departure, we are told, he greatly lamented "the crying sinne of innocent blood." William, the eldest son, succeeded his father. He was "of a meik and gentle spirit, and delyted much in the study of phisick, which he practiced especiallie among the poore people with very good success. He was ane religious man, and died gratiouslie in the yeare of his age 69, the year of our lorde 1616." With three daughters he had three sons, Sir William, who succeeded him; John Mure of Blacklaw, who was slain at a combat at Beith, and Hugh of Skirnalland.
Sir William, the eldest son, the next laird of Rowallan, is described as "ane strong man of bodie, and delyted much in hunting and halking." He died in 1639, aged 63. He was thrice married, and had issue by each of his wives. His eldest son, by his first wife, Elizabeth Montgomery, daughter of the laird of Hazlehead, was William Mure of Rowallan, the eminent poet, a memoir of whom is given below. He was succeeded by his eldest son, Sir William Mure of Rowallan, in the end of 1657. This Sir William Mure was firmly attached to the Reformed doctrines, and was the intimate friend of the celebrated Mr. Guthrie, first minister of Fenwick. It is said that conventicles were held in the house of Rowallan during his time. Whether on this account or not, it is certain that he suffered much during the troubles of the Church of Scotland. He was imprisoned in 1665, in the castle of Stirling, with the lairds of Cunninghamehead and Nether-Pollock. When other gentlemen were liberated upon the bond of peace in 1668, these three were retained in confinement, but in the year following, on the removal of Bishop Burnet from Glasgow, they presented a petition for release to the duke of Lauderdale, the commissioner, which was granted. IN 1683 Sir William Mure again fell under the suspicion of the court, and was apprehended, with his eldest son, in London. They were sent to Edinburgh and committed prisoners to the Tolbooth.
In the same year his second son, John, was taken prisoner, and carried to Edinburgh. In a short time the health of the young laird of Rowallan required indulgence, and he was allowed to be removed from the prison to a private house. In April 1684, they were both discharged, upon giving a bond of E2,000, to appear when called upon. Sir William died in or about 1686. He married about 1640, Elizabeth, daughter of James Hamilton of Aikenhead, provost of Glasgow, and had two sons and a daughter. The elder son, William Mure of Rowallan, the last lineal representative of the family, was entered a student at the university of Glasgow in 1660. His share in the afflictions of his father has been already noticed. This did not shake his attachment to the church for which he suffered. His name frequently occurs in the records of the parish of Kilmarnock. He is mentioned there, for the last time, in 1695, in a commission to defend a process of translation before the synod. He was a member of the Scots parliament, and died in 1700. He married, about 1670, Dame Mary Scott, apparently heiress of Collarny in Fife, by whom he had three daughters, Anna, Margaret, and Jean.
The latter, his only surviving daughter and sole heiress, married, first, William Fairlie of Bruntsfield, near Edinburgh, afterwards designed of Fairlie, to whom she had issue. Tradition still points out the spot where Fairlie was married to the heiress of Rowallan. The ceremony was performed by a curate, in the fields, about a quarter of a mile from the house of Rowallan, at a tree, still called the marriage tree, which stands on the top of a steep bank, above that part of the stream called "Janet's kirn." The heiress of Rowallan married, secondly, David, first earl of Glasgow, and had to him three daughters, Lady Betty, who died in infancy; Lady Jean, who, by special destination, succeeded to Rowallan, and Lady Anne, who died unmarried. Jean Mure, countess of Glasgow, died September 3, 1724, and was succeeded by her elder surviving daughter of the second marriage, Lady Jean Boyle Mure of Rowallan, who married the Hon. Sir James Campbell of Lawers, K.B., third and youngest son of the second earl of Loudoun. Their son, James Mure Campbell, succeeded to the estate of Rowallan, and was the fifth earl of Loudoun (see LOUDOUN, fifth earl).
Chieftians of Caldwell
Sir Godfrey Mure ( 1st Lord of Caldwell) 1325-1409
Sir John Mure ( 2nd Lord of Caldwell) 1385-1430
Sir John Mure II ( 3rd Lord of Caldwell) 1410-1492
Sir Adam Mure ( 4th Lord of Caldwell) 1445-1513
Sir John Mure ( 5th Lord of Caldwell) 1478-1539
John Mure ( 6th Lord of Caldwell) 1504-1554
William Mure ( 7th Lord of Caldwell) 1594-1640
Sir John Mure ( 8th Lord of Caldwell) ?
Sir Robert Mure ( 9th Lord of Caldwell) ?
Robert Mure ( 10th Lord of Caldwell) ?
Robert Mure II ( 11th Lord of Caldwell) ?- 1640
Robert Mure III ( 12th Lord of Caldwell) ?- 1644
James Mure ( 13th Lord of Caldwell) ?- 1654
William Mure ( 14th Lord of Caldwell) ?
Barbara Mure ( 15th Lady of Caldwell) ?
William Mure ( 16th Lord of Caldwell) ?
William Mure II ( 17th Lord of Caldwell) ?- 1722
William Mure III ( 18th Lord of Caldwell) 1718-1776
Colonel William Mure ( 19th Lord of Caldwell) ?- 1831
William Mure V ( 20th Lord of Caldwell) 1799-1860
William Mure VI ( 21st Lord of Caldwell) 1830-1880
William Mure VII ( 22nd Lord of Caldwell) ?- 1912
David Mure (23rd Lord of Caldwell) ?
George Mure ( 24th Lord of Caldwell) 1939- ?
The Mures of Caldwell
Sir Reginald, who was granduncle of the queen, Elizabeth Mure, first wife of Robert I., acquired his extensive estates of Abercorn, &c., in the Lothians and Stirlingshire, by marriage with one of the coheiresses of Sir John Graham of Eskdale and Abercorn. He adhered steadily to the cause of David II. in the Baliol wars with England, and was one of the commissioners appointed in 1340 to treat with the lords Percy, Moubray, and Neville of a truce between the two kingdoms. With one daughter, he had two sons, William, who succeeded to Abercorn, and died without male issue, and Gilchrist More, already mentioned, who carried on the line of the family.
Sir Adam Mure, the fourth in succession from Gilchrist, was knighted by James IV., and is supposed to have been slain at the battle of Flodden. His son, John Mure of Caldwell, on 20th February 1515, took by assault, at the head of his followers, "the castle and palace" of the archbishop of Glasgow, situated near the city, battering the walls in breach 'with artillery,' and carrying off a rich booty. He married Lady Janet Stewart, daughter of Matthew earl of Lennox, and grand-aunt of Lord Darnley, husband of Mary, queen of Scots, and died in 1533. His eldest son, John Mure of Caldwell, had, with other children, two sons, John, his heir, and William of Glanderstoun, ancestor of the Mures of Glanderstoun. The granddaughter of the latter was the mother of the Rev. William Carstairs, a divine of great political influence in the reign of William III.
Sir John, the elder son, was knighted by James V. He was slain, 10th September 1570, by the Cunninghames of Cunninghamehead and Raeburne of that ilk, the same who were afterwards principals in the murder of his cousin, Hugh, earl of Eglintoun, in 1585. His son, Sir Robert Mure of Caldwell, was one of the jury appointed in 1580 to try the Lord Ruthven, high-treasurer of Scotland, for the murder of David Rizzio. He was on terms of great intimacy and confidence with James VI., by whom he was knighted, and to whom he was related through the Lennoxes. Six letters addressed to him by that monarch, preserved at Caldwell, have been inserted in the 'Selections from the Caldwell Papers,' printed for the Maitland Club in 3 vols. 4to, in 1854.
About 1610 the lands of Thornton near Kilmarnock, long in possession of the family, were alienated to a cadet, founder of the house of Mure of Thornton, the male line of which becoming extinct in 1701, in the person of Sir Archibald Mure, lord provost of Edinburgh, the estate passed by his heir female to John Cuningham of Caddell, and is now held by his descendant, in feu of the Caldwell family. William Mure of Caldwell, the fourth in succession to Sir Robert, was a staunch Covenanter. He and a few other west-country gentlemen of similar sentiments, met in arms at Chitterfleet, in the parish of Beith, on 28th November 1666, and having collected a body of horsemen, amounting to about fifty in all, and consisting chiefly of the tenantry of Caldwell and the neighbouring estates, they set out, under Caldwell's command, to join Colonel Wallace of Achans, who was marching from Galloway in the direction of the Pentlands, by Lesmahago and Lanark. On the way, finding themselves intercepted by the king's troops, under General Dalzell, they retraced their steps, and dispersed. Caldwell was attainted, fled to Holland, and died in exile.
His estates were bestowed on General Dalzell; and Caldwell's lady, a daughter of Sir William Cunninghame of Cunninghamehead, was imprisoned, with two of his daughter, in Blackness castle, where she underwent much cruel persecution. Barbara Mure, the second daughter, lived to obtain, by special act of parliament, 19th July 1690, a full restoration of the family estates. She married John Fairlie of that ilk, but dying without issue, was succeeded, in 1710, by her kinsman, William Mure, fourth laird of Glanderstoun, descended from William, second son of the John Mure who inherited Caldwell in 1539. This William Mure bore his share in the persecution of the times, having been imprisoned and fined, on a charge of nonconformity, in 1683. A Journal of a tour by him through England and the Netherlands in 1696, is printed among the 'Caldwell Papers.'
Dying without issue, he was succeeded by his nephew, William Mure, eldest son of Mure of Rhoddens in Ireland. His son, William Mure of Caldwell, M.P. for Renfrewshire from 1742 to 1761, was appointed one of the barons of the exchequer in Scotland in the latter year. In 1753 he bought Wester or Little Caldwell from the duke of Hamilton. The portion of the estate the Mures had previously possessed was called Easter Caldwell. Baron Mure was an intimate associate of David Hume the historian, and the author of one of two tracts on speculative points of political economy, printed for private circulation. His correspondence and miscellaneous papers occupy the greater part of two of the three volumes of the 'Caldwell Papers.' He was rector of the university of Glasgow in 1764-5, and died in 1776. His eldest son, Colonel William Mure of Caldwell, was the friend of Sir John Moore, but early left the army. He was rector of the university of Glasgow in 1793-4.
He married Anne, eldest daughter of Sir J. Hunter Blair, bart. of Dunskev, with issue, and died February 9, 1831. Col. Mure's eldest son, William Mure of Caldwell, D.C.L., born July 9, 1799, was educated at Westminster, and studied at Edinburgh and in Germany, where he imbibed that taste for critical inquiry which made his name extensively known among the scholars of modern Europe. He married in 1825, Laura, 2d daughter of William Markham, Esq. of Becca Hall, Yorkshire, with issue; vice-lieutenant of Renfrewshire and colonel of its militia; was M.P. for that county from 1846 to 1855; lord-rector of Glasgow university in 1847-48; author of 'Brief Remarks on the Chronology of the Egyptian Dynasties; showing the Fallacy of the System laid down by Messrs. Champollion, in Two Letters on the Museum of Turin,' London, 1829, 8vo; 'A Dissertation on the Calendar of the Zodiac of Ancient Egypt,' Edinburgh, 1832, 8vo; 'A Tour in Greece,' 1842; 'A Critical History of the Language and Literature of Ancient Greece,' 5 vols., 8vo. 1850-57; and the compiler of the 'Caldwell Papers.' He died at London, April 1, 1860, in his 61st year.
His eldest son, William Mure of Caldwell, lieutenant-colonel Scots fusilier guards, married 3d daughter of 1st Lord Leconfield. David Mure, born in 1810, 3d son of Col. William Mure, who died in 1831, passed advocate at the Scottish bar in the latter year. In 1853 he was appointed sheriff of Perthshire, and in 1858 solicitor-general for Scotland; lord-advocate in April 1859, and elected M.P. for Buteshire soon after.
Chieftains of Auchindrane
Andrew Mure ( 1st Lord of Auchindrane) 1300-1365
Unknown Mure ( 2nd Lord of Auchindrane) 1320-1385
Unknown Mure ( 3rd Lord of Auchindrane) 1345-1415
Unknown Mure ( 4th Lord of Auchindrane) 1370-1450
John Mure ( 5th Lord of Auchindrane) 1395-1470
Unknown Mure ( 6th Lord of Auchindrane) 1415-1480
Archibald Mure ( 7th Lord of Auchindrane) 1435-1515
John Mure ( 8th Lord of Auchindrane) 1460-1520
John Mure II ( 9th Lord of Auchindrane) 1485-1540
Sir John Mure ( 10th Lord of Auchindrane) 1505-1565
James Mure ( 11th Lord of Auchindrane) ?
John Mure ( 12th Lord of Auchindrane) 1531-1611
James Mure ( 13th Lord of Auchindrane) 1556- 1621
Unknown Mure ( 14th Lord of Auchindrane) 1581-1631
John Mure ( 15th Lord of Auchindrane) 1611-?
William Mure ( 16th Lord of Auchindrane) 1635- 1700
Hugh Mure ( 17th Lord of Auchindrane) 1665-1715
John Mure ( 18th Lord of Auchindrane) 1690- 1740
William Mure ( 19th Lord of Auchindrane) 1710-1770
John Mure ( 20th Lord of Auchindrane) 1735- 1790
Hugh Mure ( 21st Lord of Auchindrane) 1741-1795
Eleanor Mure ( 22nd Lady of Auchindrane) 1750- 1810
The Mures of Auchindrane
MURE, SIR WILLIAM, of Rowallan, a poet of the 17th century, was born in 1594. He was the eldest son of Sir William Mure of Rowallan, by his wife, Elizabeth, daughter of Montgomery of Hazlehead, and sister of Alexander Montgomery, author of 'The Cherrie and the Slae.' He obtained an excellent classical education, and in his early years began to cultivate a taste for poetry. The 'Historie' of his family above quoted says of him: "This Sir William was pious and learned, and had an excellent vein in poesie; he delyted much in building and planting." Before his twentieth year he attempted a poetical version of the story of Dido and Eneas, from Virgil. In the 'Muse's Welcome,' a collection of poems and addresses made to King James on his visiting Scotland in 1617, there is an address by Mure of Rowallan. In 1628, he published a translation, in English sapphics, of Boyd of Trochrig's beautiful Latin poem, 'Hecatombe Christiana,' together with a small original piece called 'Doomesday.' His principal work is his 'True Crucifixe for true Catholikes,' published at Edinburgh in 1629.
For some years afterwards he seems to have been employed on a version of the Psalms, which was much wanted in Scotland at that time. The old English version was not popular; and the one executed by King James and Sir William Alexander of Menstrie, subsequently earl of Stirling, was so disliked that the bishops would not press it upon the church. King James' version was not sanctioned by the Assembly, and some expressions in it gave offence to the people, such as the sun being called "The lord of light," and the moon, "The pale lady of the night." Though this version was rejected, still many wished that the old one should be improved, or a better one substituted in its place. Several gentlemen attempted particular psalms; but a version of the whole was undertaken by Sir W. Mure of Rowallan, which he seems to have finished in 1639.
Principal Baillie, who attended the Westminster Assembly, as a commissioner from the Church of Scotland, in a letter, dated at London, January 1st, 1644, says, "I wish I had Rowallan's Psalter here, for I like it better than any I have yet seen." It does not, however, appear that Sir William's version was transmitted to the Assembly. That of Mr. Rous, which was recommended by the English parliament, was finally adopted, and has ever since been used in Scotland; but the committee appointed in 1650 to revise Mr. Rous's version, were instructed to avail themselves of the help of Sir William Mure's. (Historic and Descent of the House of Rowallane, pp. 92-94.) During the civil war, Sir William Mure took arms on the popular side. In the first army raised against the king, he commanded a company in the Ayrshire regiment, and was a member of the convention of 1643, by which the Solemn League and covenant was ratified with England. He was a member of the 'Committee of warre' for the sheriffdom of Ayr in 1644, and in the beginning of that year he accompanied the Scots army which marched to the aid of the parliamentary cause, and was wounded at the battle of Longmarston Moor, July 2. He was also present at the storming of Newcastle, in the following month. He died in the end of 1657.
Specimens of his poems, many of which are still in manuscript, will be found in Lyle's 'Ancient Ballads and Songs,' published at London in 1827. Sir William Mure was twice married, first, in 1615, when only twenty-one, to Anna, daughter of Dundas of Newliston, by whom he had five sons and six daughters; and, secondly, to Dame Jane Hamilton, Lady Duntreath, by whom he had two sons and two daughters. His second son, Captain Alexander Mure, was slain in the war against the rebels in Ireland; another of them, Patrick, the youngest son of the first marriage, was created a baronet of Nova Scotia in 1622. That title is now extinct.
Chieftains of Glanderstoun:
1st Laird of Glanderstoun: William Mure ( 1534- 1606)
2nd Laird of Glanderstoun: William Mure ( 1555- 1640)
3rd Laird of Glanderstoun: William Mure ( 1575- 1658)
4th Laird of Glanderstoun: William Mure ( 1595- 1678)
Chieftains of Cassencarie:
1st of Cassencarie: Alexander Mure
2nd of Cassencarie: Alexander Mure II
3rd of Cassencarie: George Mure
4th of Cassencarie: Alexander Mure
Mure of Skaithmuir “ The forgotten Branch”
The Muir/ Mure of Skaithmuir or back then it was called Skaithmure was owned by clan Muir from 1329- 1617; the last of this great line was the eldest son Alexander Mure. The lands of Skaithmure from the reign of David II till about the middle of the sixteenth century belonged to the family of More or Mure of Skaithmure. The old castle of which it is supposed a square tower3 about five hundred yards west of Carron Hall mansion is all that now remains was said have been built by Sir Reginald More Lord Great under David II .
On the tower are two sundials and the lintel of a window is the date 1637 and the initials Alexander fourth Lord Elphinstone and Dame Jean Livingstone his wife 1 whose son Michael was the founder of Quarrell branch of the Elphinstones as already stated Fleming has given interesting sketches of the tower and in his book Ancient Castles and Mansions of Stirling Nobility About 1488. Alexander Mure of Skaithmure was tenant his son James of Westerton of Bothkenner A charter by Robert Bisset of Quarrell is dated at Skaithmure 21st May 1543 sic probably 1534 and William Mure of Skamur a witness. The confirmation of this charter is dated September 1542. Probably about this date the Bissets into possession of the lands On 31st October 1582. Mure was retoured heir of Alexander Mure of Skaithmure his father in the lands of Skaithmure and as late as 1617. Alexander Mure eldest son of the late Alexander of Skaithmure was alive From this time Skaithmure to be used as a territorial title.
Skaithmure tower/ castle
Complaint by Sir David Livingstoun of Donypace knight baronet as He has been in peaceable possession of the teinds of the lands Skaithmure for several years past and the tenants thereof having requisition to him under form of instrument to collect and lead his as his other urgent affairs hindered him from doing so at the time allowed the tenants themselves to lead them on the condition they willingly agreed that each of them should preserve his own thereof safely till the complainer gave direction about the same tenants accordingly led the teinds to their barnyard of that William Mowat George Groser and Thomas Duncan the servants and teind masters had delivered the same to them Alexander Mure of Skaithmure being informed of this by bangsterie and oppression to seize the said teinds on September last he assembled some forty or fifty persons whom were William Seller burgess of Linlithgow James Charles Seller in Stanehous Sir John Hamiltoun of Grange George Hamilton his sons Mr Alexander Hamiltoun brother to Sir John and Alexander Hamiltoun his son who on horse and foot with lances jacks steelbonnets and other weapons came in under silence of night to the said barnyards of Skaithmure kuist the compleaners whole teinds tred the same with thair hors feit the most part thairof and the small remanent they caried thame.
This was the account the complainers teindmasters received from the tenants when on 26th September last they carry away the said teinds and found nothing Charge having to the persons above complained upon and all compearing with except the said Alexander Mure who for this cause is be put to the horn and escheat the Lords after hearing parties the judge ordinary the trial of the civil rights of parties to the question and reserve to themselves the punishment of the wrong the discussing of the civil right.
BRUCES OF AIRTH.
“ Amongst the Airth papers there is a licence by the Regent Morton in the king's name, permitting" Alexander Brus of Airth," "Alexander Mure of Skaith- muir," and " Thomas Brus of Larbertscheilles," and their tenants, "to remain and byd at hame fra our raid and army ordanit to convene and meet our said cousing and regent at Dumfries upon the tent day of October 1577, for persute and invasion of the thevis, outlawes, and perturbaris of the peace and quietness of our realme. — Dated at Haliruidhous, 19th October 1577." These three are cousins, the sons of Robert of Airth, of Mr Thomas of Leth- bertscheilles, progenitor of the Comtes de Bruce in France, and of their sister, who married " Mure of Skaithmuir." Elizabeth Mure of Skaithmure.
Chieftains of Leckie: 1668 - 1792
DAVID MOIR OF CRAIGARNHALL AND 1ST OF LECKIE
DAVID MOIR, 2ND OF LECKIE
JAMES MOIR, 3RD OF LECKIE
GEORGE MOIR, 4TH OF LECKIE
JAMES MOIR 5TH OF LECKIE
Anglo-Scottish Wars
Unfortunately, after the Scottish wars of independence; Scotland continue to fight for it's survival during the reigns of the Stewarts aginst thier most hated rivials, the English. The Muir/ Mure of Skaithmure from the reign of David II, till about the middle of the sixteen century belonging to clan of Muir. Once again the Clan Muir will played a vital role in the wars fought by the Kings and Queen of Scotland. England and Scotland fought several times during the 14th, 15th and 16th centuries. Wars like the Border war, The Flodden campaign, 1514-1523, clan feuds, and all the way to the convenanter wars ( Scotland and England civil wars).
Clan Muir have fought at the battles of Duns, Otterburn, Homildon Hill, and at the battle of Piperdean. The reason is that I believe that at one time the Mure of Rowallan and Polkelly were supporters and allies of clan Douglas, and usually fought side by side during wars and clan feuds. It also seems like another Acrhibald Mure of Rowallan die in battle against the English in 1426.
The Siege of Abercorn Castle
This siege may have been in the year 1445. During this siege it is claimed that Rankine Mure of Rowallan's grandson held Abercorn castle for the Douglases and was slain when it was stormed by the King's forces. That Mure line was then overthrown. Rankine Mure is said to be a supporter of the Earl of Douglas and stood with Douglas against the Livingstone of Calendar, guardian of James II (14371460). Rankie Mure and his clansmen fought at the battles of Arkininholm, Battle of Ancrum Moor and the Battle of Linlithgow Bridge. king James collected his forces and laid siege to Abercorn Castle while Douglas was absent raising his followers.
With 70,000 men, Douglas then advanced to raise the siege of his stronghold but the Earl of Hamilton with his men went over to the king's side and this was but the signal for the defection of nearly the whole of Douglas's army whereupon the king went in pursuit but failed to capture inre his haughty subject who found refuge with Donald Lord of the Isles. The king then returned to Abercorn Castle took it by storm with the loss of many of his folks and sundrie rich, evil, and wound it. The castle was dismantled and never restored.
Battle of Sark
This battle took place on October 23, 1448 in Gretna, Dumfries and Galloway Scotland. This was a decisive victory for the Scots. There was an Achibald Mure of Rowallan who was slain in battle. The stage for the battle was set when, in October, the Earl of Northumberland led a troop of 6,000 men into Scotland, where they made camp near the Lochmaben Stone. Their location proved poorly chosen, as they settled in a tidal waterway between the River Sark and Kirtle Water. Among the Scots, Hugh Douglas, Earl of Ormonde, mustered a force of 4,000 from Annandale and Nithsdale, marching against Northumberland on 23 October 1448. Northumberland took the lead in organizing his troops into three wings, with Magnus Reidman, a celebrated veteran of the 100 years war in France, John Pennington,with a large group of Welshmen, with the bulk of the forces at the core commanded by Northumberland himself, which arrangement Ormonde mirrored.
Ormonde had Sir William Wallace of Cragie, who opposed Magnus, and against Sir John Pennington was placed the knight of Carlaverock, called Lord Maxwell, and Johnston of Laird of Johnston, with many inland gentlemen. Ormonde and his retinue opposed Northumberland at the centre. Forces on both sides contained a large contingent of plate armored men at arms, some possibly mounted. At the beginning of the engagement, the English opened fire, pelting the Scottish ranks with the arrows of the English longbow. After enduring some volleys, the Scots, in avoidance of a repeat of Homildon Hill, made a daring advance.
It is said that Wallace cried out with a loud voice, so as he was heard by his followers, "why should we stand still thus to be wounded afar off? follow me, says he, and let us join in hand-strokes, where true valour is to be seen!" The Scots charged, and at arms length the English, being sorely pressed by axe, spear and halberd were routed, with Magnus being slain in the melee. When their ranks broke, they were caught by the rising tide, in which a large number drowned. There a great number of prisoners taken, amongst whom were Sir John Pennington, and Sir Robert Harrington, and the Lord Percy son to the Earl of Northumberland, taken while he helped his father to his horse, who thereby escaped capture.
The causalities were different sources report the number of Scots who lost their lives in the engagement variously: from as few as 26 (Auchinleck chronicle) to as many as 600 The History of Scotland; from 1436 to 1565(Pitscottie, Buchanan, Hume). The number of English deaths in the same sources varies from 2,000 (1,500 killed in battle; 500 drowned - Auchinleck chronicle) to 3,000 killed and drowned(The History of Scotland; from 1436 to 1565(Pitscottie, Buchanan, Hume). In the light of the nature of the battle 26 casualties for the Scots seems far too low, given the barrage of arrows and the death of Wallace of Cragie and Reidman, both Scottish and English commanding officers respectively. This wouldn't happen unless there was a fairly heavy engagement. A larger number of scholarly sources also seem to prefer numbers given by Pitscottie.
The Battle of Flodden
Battle of Flodden was fought on September 9, 1513. John Mure of Rowallan, Sir Adam Mure of Caldwell fought and die at this battle, and pursume that their was also other clansmen. It was a major diastrious for the Scots. he battle actually took place near the village of Branxton, in the county of Northumberland, rather than at Flodden--hence the alternative name is Battle of Branxton. The Scots had previously been stationed at Flodden Edge, to the south of Branxton. The Earl of Surrey, writing at Wooler Haugh on Wednesday 7 September, compared this position to a fortress in his challenge sent to James IV by Thomas Hawley, the Rouge Croix Pursuivant. He complained that James had sent his Islay Herald agreeing that they would join in battle on Friday between 12.00 and 3.00 pm, and asked that James would face him on the plain at Milfield as appointed.
Next, Surrey moved to block off the Scots' route north and so James was forced to move his army and artillery two miles to Branxton Hill. The Scottish artillery, as described by an English source, included five great curtals, two great culverins, four sakers, and six great serpentines. The King's secretary, Patrick Paniter was in charge of these cannon. When the armies were within three miles of each other Surrey sent the Rouge Croix pursuivant to James, who answered that he would wait till noon. At 11 o'clock, Thomas, Lord Howard's vanguard and artillery crossed the Twizel Bridge. (Pitscottie says the king would not allow the Scots artillery to fire on the vulnerable English during this manoeuvre.)
The Scots army was in good order in five formations, after the Almain (German) manner. On Friday afternoon the Scots host descended without speaking any word to meet the English. Western side of the battlefield, looking south-south-east from the monument erected in 1910. The Scottish army advanced down the ploughed field, the English down the grassy field in the foreground, and they met, presumably at the valley boundary between the two fields.The English army had formed two "battles" each with two wings. Lord Howard combined his "vanguard" with the soldiers of his father's "rearward" to meet the Scots.
According to English report, the groups commanded by the Earls of Huntly and Crawford and Erroll, totalling 6000 men, engaged Lord Howard and were repulsed and mostly slain. Then James IV himself leading a great force came on to Surrey and Lord Darcy's son who "bore all the brunt of the battle". Lennox and Argyll's commands were met by Sir Edward Stanley.
After the artillery fire ended, according to the English chronicler Edward Hall, "the battle was cruel, none spared other, and the King himself fought valiantly". James was killed within a spear length from Surrey and his body taken to Berwick-upon-Tweed. Hall says the King was fatally wounded by an arrow and a bill. Meanwhile, Lord Howard's brother, Edmund Howard, commanding men from Cheshire and Lancashire, fought the section of the Scottish army commanded by the Chamberlain of Scotland, Alexander, Lord Home, and Thomas, Lord Dacre's force, who had been fighting Huntley, came to assist him. The Earl of Surrey captured the Scottish guns, including a group of culverins made in Edinburgh by Robert Borthwick called the "seven sisters", which were dragged to Etal Castle.
The Bishop of Durham thought them the finest ever seen. The treasurer of the English army Sir Philip Tilney valued seventeen captured guns as 'well worth 1700 marks', and that 'the value of the getyng of thaym from Scotland is to the Kingis grace of muche more valew'. Soon after the battle, the council of Scotland decided to send for help from Christian II of Denmark. The Scottish ambassador, Andrew Brounhill, was given instructions to explain "how this cais is hapnit." Brounhill's instructions blame James IV for moving down the hill to attack the English on marshy ground from a favourable position, and credits the victory to Scottish inexperience rather than English valour. The letter also mentions that the Scots placed their officers in the front line in medieval style who were vulnerable and killed, contrasting this loss of the nobility with the English great men who took their stand with the reserves and at the rear.
The English generals stayed behind the lines in the Renaissance style. The loss of so many Scottish officers meant there was no one to coordinate a retreat. However, according to contemporary English reports, Thomas Howard marched on foot leading the English vanguard to the foot of the hill. Howard was moved to dismount and do this by taunts of cowardice sent by James IV's heralds, apparently based on his role at sea and the death two years earlier of the Scottish naval officer Sir Andrew Braton. A version of Howard's declaration to James IV that he would lead the vanguard and take no prisoners was included in later English chronicle accounts of the battle. Howard claims his presence in "proper person" at the front is his Trail by combat for Barton's death.
The Battle of Summerdale
The battle was fought on May 19, 1529 between the Sinclairs of Orkney and the Sinclairs of Caithness, who had the support of James V, King of Scotland. The loyal Sinclairs were pushed out of Orkney to Caithness during a rebellion in which James Sinclair took over Kirkwall castle. The Moars were in Orkney around 1426, and joinned forces with Sinclairs of Orkney during the Sinclair uprising. It has been said that upon landing at Orphir, William Sinclair of Caithness encountered a witch. This witch unwound two balls of wool as they marched, one red and one blue. The red ball ran out first and the witch informed William Sinclair that this meant the side whose blood was spilt first would be defeated. Sinclair supposedly put great faith in the prophecy, and decided to kill the first Orcadian they came across.
Seeing a boy herding cattle, William Sinclair ordered his men to kill him, but once the boy was dead, he was recognised as a native of Caithness who had taken refuge in Orkney some time before. Tradition has it that this unnerved them, and contributed to their subsequent defeat. In another tradition, the land where the battle was fought was said to have been smooth grass without stones until the day of the battle. However, that morning so many stones had appeared that the Orcadians dropped the pitchfolks they were armed with and threw these stones at the oncoming Caithness men, preventing them from getting close enough to attack and eventually forcing them to flee, with the Orcadians in close pursuit. After the battle, William Sinclair of Caithness forces lost all his men except for one man, while James Sinclair and his Orcadians force lost only one. The victor is Orkney Sinclairs.
Battle of Pinkie Cleugh
On September 10 1547, in Musselburgh, Lothian, Scotland was a battle called Pinkie Cleugh, in which the English were victorious. Mungo Mure of Rowallan fought and die on that day. On the morning of Saturday, 10 September, Somerset advanced his army to close up with the detachment at Inveresk. He found that Arran had moved his army across the Esk by the 'Roman bridge', and was advancing rapidly to meet him. Arran knew himself to be outmatched in artillery and therefore tried to force close combat before the English artillery could deploy. Arran's left wing came under fire from English ships offshore. (Their advance meant that the guns on their former position could no longer protect them.)
They were thrown into disorder, and were pushed into Arran's own division in the centre. On the other flank, Somerset threw in his cavalry to delay the Scots' advance. The Scottish pikemen drove them off and inflicted heavy casualties on the English horsemen. Lord Grey himself was wounded by a pike thrust through his throat and into his mouth. The Scottish army was by now stalled and under heavy fire on three sides, from ships' cannon, artillery, arquebusiers and archers, to which they had no reply. When they broke, the English cavalry rejoined the battle following a vanguard of 300 experienced soldiers under the command of Sir John Luttrell.
Many of the retreating Scots were slaughtered or drowned as they tried to swim the fastflowing Esk or cross the bogs. The English eyewitness William Patten described the slaughter inflicted on the Scots.Soon after this notable strewing of their footmen's weapons, began a pitiful sight of the dead corpses lying dispersed abroad, some their legs off, some but houghed, and left lying half-dead, some thrust quite through the body, others the arms cut off, diverse their necks half asunder, many their heads cloven, of sundry the brains pasht out, some others again their heads quite off, with other many kinds of killing.
After that and further in chase, all for the most part killed either in the head or in the neck, for our horsemen could not well reach the lower with their swords. And thus with blood and slaughter of the enemy, this chase was continued five miles in length westward from the place of their standing, which was in the fallow fields of Inveresk until Edinburgh Park and well nigh to the gates of the town itself and unto Leith, and in breadth nigh 4 miles, from the Firth sands up toward Dalkeith southward. In all which space, the dead bodies lay as thick as a man may note cattle grazing in a full replenished pasture.
The river ran all red with blood, so that in the same chase were counted, as well by some of our men that somewhat diligently did mark it as by some of them taken prisoners, that very much did lament it, to have been slain about 14 thousand. In all this compass of ground what with weapons, arms, hands, legs, heads, blood and dead bodies, their flight might have been easily tracked to every of their three refuges. And for the smallness of our number and the shortness of the time (which was scant five hours, from one to well nigh six) the mortality was so great, as it was thought, the like aforetime not to have been seen. The Imperial ambassador François van der Delft went to the court of Edward VI at Oatlands Palace to hear the news of the battle from William Paget. Van der Delft wrote to the Queen Dowager, Mary of Hungary, with his version on 19 September 1547.
He had heard of the cavalry skirmish the day before the battle. Next day, when the English army encountered the Scottish formation, the Scots advance horsemen dismounted and crossed their lances, which were like pikes, and stood in close formation. Van der Delft heard that the Earl of Warwick then attempted to attack the Scots from behind using smoky fires as a diversion.
When they engaged the Scottish rearguard the Scots took flight, apparently following those who already had an understanding with the Protector Somerset. The rest of the Scots army then attempted to flee the field. Van der Delft wrote another shorter description for Prince Philip on 21 October 1547. In this account he lays emphasis on the Scots attempting to change position. He said the Scots crossed the brook in order to occupy two hills which flanked both armies.
The Scottish army, "without any need whatever were seized with panic and began to fly." Another letter with derivative news of the battle was sent by John Hooper in Switzerland to the Reformer Henry Bullinger. Hooper mentions that Scots had to abandon their artillery due to the archers commanded by the Earl of Warwick, and when the Scots changed position the sun was in their eyes. He was told there were 15,000 Scottish casualties and 2,000 prisoners. There were 17,000 English in the field and 30,000 Scots. Hooper's letter is undated but he includes the false early report that Mary of Guise surrendered in person to Somerset after the battle. Although they had suffered a resounding defeat, the Scottish government refused to come to terms.
The infant Queen Mary was smuggled out of the country to France to be betrothed to the young dauphin Francis. Somerset occupied several Scottish strongholds and large parts of the Lowlands and Borders, but without peace these garrisons became a useless drain on the Treasury of England. Although the Scots blamed traitors within their own ranks for the defeat, it may be fair to say that a Renaissance army defeated a Mediaeval army. Henry VIII had taken steps towards creating standing naval and land forces which formed the nucleus of the fleet and army that gave Somerset the victory.
However, the military historian Gervase Phillips has defended Scottish tactics, pointing out that Arran moved from his position by the Esk as a rational response to English manouevres by sea and land. In his 1877 account of the battle, Major Sadleir Stoney commented that "every tyro knows that changing front in presence of an enemy is a perilous operation". Early commentators such as John Knox had focused on the move as the cause of the defeat and attributed the order to the influence of local landowners George Durie, Abbot of Dunfermline, and Hugh Rig of Carberry. Marcus Merriman sees the initial Scottish field encampment as the most sophisticated ever erected in Scotland, let down by their cavalry numbers.
Phillips maintains the defeat may be considered due to a crisis of morale after the English cavalry charge, and notes William Patten's praise of the Earl of Angus's pikemen. Merriman regards Somerset's failure to press on and capture Edinburgh and Leith as a loss of 'a magnificent opportunity' and 'a massive blunder' which cost him the war. In 1548, the Scottish Master of Artillery, Lord Methven, gave his opinion that the battle was lost due to growing support in Scotland for English policy, and the mis-order and great haste of the Scottish army on the day.The longbow continued to play a key role in England's battles and Pinkie was no exception. Though the combination of bill and longbow which England used was old, it could still hold its own against the pike and arquebus tactics used in Continental armies at this stage in the development of firearms.
The Mures served in the Garde-du- Corps of the French company served several of Mora, Mores, Mure and other varient of the spelling. The Garde-du-corps were an elite Scottish guards in which they fought and served as a body of the king's bodyguards. Clan Muir has been fighting for France under the " Auld Alliance" with bravery and honour. The battles they fought were:
The battle of Bauge The Siege of Orleans
The battle of Herrings The Battle of Cravant
The battle of Verneuil The Loire Campaign
The Mures of Auchendraine served oversea in the Netherlands and with the Regent, Earl of Morton during the civil war also known as the Marian Civil war.
Battle of Harlaw
The Moirs and Mores that had lands in Aberdeen city or around the area fought at the battle of Harlaw to defend their Allies of clan Gordon and Leslie's lands and home from the Highland army. Battle of Harlaw was fought July 24, 1444 of north of Inverurie. John More, Donald's brother, was placed with a detachment of the lightest and nimblest men as a reserve, either to assist the wings or main battle, as occasion required. To him was joined Mackenzie and Donald Cameron of Locheill. This Donald Balloch was son to John More, brother to Donald of the Isles and Earl of Ross.
According to the Scotichronicon, the two armies joined battle on the eve of the feast of St. James – Friday, 24 July 1411. The same source puts Donald's army at 10,000 islanders and men of Ross, although it was probably far less. They were armed with swords, bows and axes, short knives and round targe shields.It is likely that most ordinary highlanders would have worn for armour, if anything, a padded Gambeson, known as a cotun. Wealthier highlanders would have been equipped in a similar way to the Gallowglasses of Ireland and the Isles, with long padded Gambesons, mail hauberks and sometimes partial plate. Tradition has it that they faced a force numbering between 1000 and 2000 men, although it was probably several thousand, with significant numbers of knights.
Sir Gilbert de Greenlaw died at Harlaw and his tombstone at Kinkell Church gives an idea of how Mar's knights were equipped. Sir Gilbert carries a hand and a half sword and wears an open-faced bascinet helmet with a mail-reinforced arming doublet beneath plate armour. Mar's men also carried spears, maces and battle axes. Tradition has it that the black armour in the entrance hall of Aberdeen's Town House belonged to Robert Davidson, Provost of Aberdeen, who fell in the battle alongside most of the burgesses with him. On spotting the islanders, Mar organised his force into battle array, with the main army behind a small advance guard of men-atarms under Sir James Scrymgeour (Constable of Dundee, the hereditary standard-bearer of Scotland) and Sir Alexander Ogilvie of Auchterhouse (Sheriff of Angus). He probably split the army into three, with the knights as a cavalry reserve and the infantry arranged in schiltrons, close-packed arrays of spearmen. There is no mention of significant numbers of archers.
The islanders were arranged in the traditional cuneiform or wedge shape, with Hector MacLean commanding the right wing and the chief of Clan Mackintosh on the left. At first the clansmen launched themselves at Scrymgeour's men, but failed to make much impression on the armoured column and many were slain. However, every wave of islanders that was repulsed, was replaced by fresh men. Meanwhile, Mar led his knights into the main body of Donald's army with similar results. The islanders brought down the knights' horses and then used their dirks to finish off the riders.
By nightfall, the ballads claim that 600 of Mar's men were dead, including Ogilvie and his son, Scrymgeour, Sir Robert Maule, Sir Thomas Moray, William Abernethy, Alexander Straiton of Lauriston, James Lovel, Alexander Stirling and Sir Alexander Irvine of Drum; according to Maclean history the latter duelled with Hector Maclean until both were dead. Many families lost not just their chief but every male in their house; Lesley of Balquhain died with six of his sons.
Donald lost 900 men, a much smaller proportion of his total force, but including his two seconds-in-command. Too feeble to retreat, Mar and his surviving men camped on the battlefield, expecting combat to resume in the morning. Come dawn they found that Donald had withdrawn during the night, retreating first to Ross and then back to the Isles. The casualties on both sides meant that neither side felt it had won the day, but Mar had kept Donald from Aberdeen and for the islanders, the absence of conclusive victory was as bad as defeat. Many of those who fell were buried at Kinkell Church south of Inverurie. The heirs of the slain Scots were exempt from death duties in the same way as heirs of those who died fighting the English.
Suspecting that Donald had merely fallen back to rest and reinforce his troops, Albany collected an army and marched on Dingwall in the autumn, seizing the castle and regaining control of Ross. In the summer of 1412, he followed up with a three-pronged attack on Donald's possessions, forcing Donald to surrender his claim on Ross, become a vassal of the Scottish crown and give up hostages against his future good behaviour. The treaty was signed at Polgilbe/Polgillip (Loch Gilp), an inlet of Loch Fyne in Argyll.
It was proposed on 3 June 1415 that Euphemia should marry Thomas Dunbar, 3rd (6th) Earl of Moray but the papal commission would not have arrived before she surrendered her land and titles (possibly under compulsion) to Albany's son the Earl of Buchan on 12 June 1415, after which she appears to have entered a nunnery. However Buchan was killed at the Battle of Verneuil in 1424, and the rest of Albany's heirs were executed or exiled by James I on his return to Scotland. Mariota claimed the earldom of Ross once more, and James I awarded it to her in 1424. Donald's son Alexander succeeded to the title on her death in 1429.
After Harlaw, the Earl of Mar "ruled with acceptance nearly all the north of the country beyond the Mounth" according to the Scotichronicon. He entered into an "uneasy alliance" with his uncle Albany, but the ruin of Albany's heirs left Mar in control of the north. Alexander attempted an invasion of Ross in 1429 which led to his defeat and capture by Mar at the Battle of Lochaber. In turn Mar suffered a devastating defeat at the hands of Donald's nephew Donald Balloch, at the Battle of Inverlochy. The resulting power vacuum allowed Alexander to occupy Inverness and perhaps consider himself Earl of Ross by 1437; the title was officially confirmed by the new regent, the Earl of Douglas, after the death of James I that year.
Capture and Sacking of Bishop's Castles
The castle had been attacked in 1516 by the Mures of Caldwell, it was garrisoned against the Earl of Arran by the pro-English Earl of Lennox. During the Reformation it was occupied by French troops and in 1568 besieged by the Earl of Argyll. .An attacked with artillery in 1516 by the Mures of Caldwell who then sacked the castle by removed beds, jewels, utensils, provisions and ammunition, restitution was eventually obtained by the archbishop after the castle had been retaken by government force.
Battle of Glasgow Muir
During the battle of Glasgow Muir; there was two Muirs/ Mures fighting there but on opposite sides. Mungo Mure of Rowallan fought for Hamilton, while John Mure of Caldwell fought for Glencairn. The rejection, a breach of the Treaty of Greenwich, resulted in the declaration of war, the war now called the Rough Wooing. Lennox and Glencairn were thus caught offside and technically traitors. Lennox wrote to Mary of Guise on 7 March 1544 hoping to buy time by offering his innocence to be tried before a convention of his peers.
He wrote that it was heavily murmured by the Governor and his council; The Mures were also involved with a Raids on Dumfries. "that I am the principell man that causis division and braik be in this realme and makis daily insurrectionis and disobeance contrar the authority." However Arran had already ordered an attack on Glasgow. Artillery and hand guns were sent from Edinburgh Castle. Bothwell Castle was taken first on 8 March. Lennox's men took up position at the Castle and Cathedral, but he himself stayed at his stronghold, Dumbarton Castle. Arran's forces encountered Lennox's followers at Glasgow Muir (Moor), a mile east of the town.
The battle started well for Lennox, his force of about 800 men drove the first rank of more numerous forces of Hamilton back into the second rank and captured their cannon. At this juncture Robert Boyd of Kilmarnock and his friend Mungo Mure of Rowallan, at the head of a small party of horse, who having just arrived at the site of the battle, valiantly thrust themselves "into the midst of the combat", and decided the fate of the day favourably for the Regent Hamilton. There were about 300 slain on both sides. Lennox himself withdrew to Dumbarton Castle.
According to an English messenger, Edward Storye, who made a secret journey to Cumbernauld Castle at this time, Arran then took the town of Glasgow and laid siege to the Castle (Bishop's Palace) on Wednesday 26 March. Amongst the casualties at the moor was Arran's Master of Household, and a Glasgow barbersurgeon was hired to look after the injured. The gunner Hans Cochrane directed the artillery at the cathedral and castle. When Lennox's garrison surrendered, gallows were set up in the street outside the Tollbooth to hang the leaders. For his timely service in the first battle, Robert Boyd was rewarded with the family lands (which he held in tack), as well as the restoration of his family's title of Lord Boyd. Glencairn's heir, Lord Kilmaurs, and Lennox's brother Robert Stewart, Bishop- designate of Caithness, slipped away from Dumbarton Castle at night over the Clyde and then rode through the west country to England. Soon after this battle, in May 1544, an English army burnt Edinburgh.
Around 24 May 1544 Arran fought another battle on Glasgow Moor with the Earl of Glencairn. Glencairn's son, Andrew Cunningham, and John Hamilton of Cambuskeith, Arran's Master of Household, were killed. Glencairn retreated, and Lennox sailed for England from Dumbarton around 28 May 1544. Ten years later, a number of men received pardons for their presence at the battle on Lennox's side against the Regent including: William Cunningham, Earl of Glencairn; George Forrester of Kiddisdale; George Hay, 7th Earl of Erroll; Robert Drummond of Carnock; and John Wemyss of that ilk.
Wars of the Three Kingdoms
The Convenanter war or the English and Scottish civil war was from 1644-51. A number of Muirs and varient of the spelling joined the Convenanters.William Mure ,2nd Laird of Glanderston, Died 1640 the first revolutionary campaign against William I at Newburn. These Scots would not accept that King Charles 1 was head of the church; that only Jesus Christ could hold that position. I believe that the Muirs took part at the Battle of Newburn and Battle of Boldon Hill. During the first Civil war the convenanters fought along side with the Oliver Cromwall, then in the second civil war they change side to fight with Charles II. It isn't clear how many battles clan Muir fought during the Convenanter war also known as the English and Scottish civil wars.
Clan Muir/ Mure had been heavily in supporting and fighting for the convenanters, which resulted in their properties of Rowallan, Caldwell and Gladerston had been confiscated. " Pride, for instance, mentions that the ‘Inglishmen’ broke into the Tower of the Place of Caldwell at some point between 1644 and 1653. This suggests that the old castle suffered during the civil war of the mid-17th century."
Sir William Mure in the year of 1644 was with the Scottish covenanter army in England, and was presented at some engagements. Also he attack and brunt the gate of Drumlanrig, plundered and laid waste to the lands in 1650. There was a Colonel John Moore during the first English civil war and was in command of John Moore's regiment of Foot. He fought for the Parliamentarian forces and was riasing a force in Lancaster. In the year of 1644, John Moore was at the garrison of Liverpool, and in June he was being besieged by the Royalist's forces. In the year of 1645 in November to December, John Moore was possibility besieged at Skipton Castle or at the siege of York and resisted five days.
The Battle of Newburn
Attempting to force the Scots to accept a new prayer book in 1637, Charles sparked a crisis that led to the compilation and subscription of the National Covenant in early 1638, a document which rejected all innovations in worship that had not been subject to the approval of both the Scottish Parliament and the general assembly of the church. In November of the same year a General Assembly in Glasgow not only rejected the Prayer Book, but also expelled the bishops from the church, as suspect agents of the crown. Charles' refusal to accept this led to the outbreak of the First Bishop's war in 1639. This war saw much posturing but little real action. In the end the two sides, reluctant to push the issue, concluded hostilities in the Pacification of Berwick, an agreement without an agreement, that was at best a breathing space.
The Scots agreed that the Glasgow Assembly had been 'illegal'; Charles agreed that a new Assembly, together with a Parliament, should meet in Edinburgh in the summer of 1640. As none of the issues that had led to the signing of the National Covenant had been settled, it was obvious to all that the Edinburgh Assembly would simply confirm the decisions taken at Glasgow. This was to lead directly to the outbreak of the Second Bishops' War in which Newburn was the only battle.To raise the necessary funds Charles summoned a new Parliament to Westminster, the first to meet for eleven years, hoping to use English patriotism as a counter to the rebel Scots. But the short parliament was more interested in raising various grievances long suppressed and was quickly dismissed, leaving the king worse off than before.
The geography and progress of the battle have been described here. This emphasizes that what mattered at Newburn was control of the crossing point of the River Tyne, upstream of the only other one between Newburn and the sea at Newcastle, and under the control of whoever held the city. In short, the Scots forces occupied better ground to the north of the river than the King's forces located on the marshes of Stella and Ryton, and the latter were defeated as a consequence.
The Battle of Marston Moor
This battle was fought on July 2, 1644, in which Sir William Mure of Rowallan fought for the convenanters, commanding a company in the Ayrshire Regiment. Sir William fought and was wounded at the battle of Marston Moor. On learning that they had been outmanoeuvred, the allied commanders debated their options. They decided to march south to Tadcaster and Cawood, where they could both protect their own supply lines from Hull, and also block any move south by Rupert on either side of the Ouse. Their foot (infantry), ordnance and baggage set off early on 2 July, leaving the cavalry and dragoons, commanded by Sir Thomas Fairfax, as rearguard. At about 9 am, the allied generals learned that Rupert's army had crossed the captured bridge of boats at Poppleton, and was advancing onto Marston Moor.
The Covenanter and Parliamentarian foot, some of whom had already reached Tadcaster, were hastily recalled. However, Newcastle and his Lieutenant General, Lord Eythin, were opposed to any pitched battle and possibly offended by Rupert's high-handed attitude. Rather than join Rupert immediately they temporised, claiming that it would take time to clear the earth and rubble which had been used to block the city gates of York during the siege. Newcastle's soldiers in York then refused to fight unless given their delayed payment, a dispute which Eythin may have fomented. A number were also absent, pillaging the abandoned allied siege works and encampments outside the city, and had yet to return. Around midday, Rupert was joined on Marston Moor by Newcastle, accompanied by a mounted troop of "gentleman volunteers" only.
Rupert greeted him by saying, "My Lord, I wish you had come sooner with your forces, but I hope we shall yet have a glorious day." Newcastle counselled that the three allied armies, with separate garrisons, recruiting areas and lines of communication to protect, would eventually separate.
He also suggested waiting for a force of 3,000 under Colonel Clavering and collected garrisons amounting to another 2,000 to join the Royalist army. Rupert was adamant that the King's letter (which he never showed to Newcastle) was a command to engage and defeat the enemy immediately. Furthermore, Rupert wished to compensate for the Royalists' numerical inferiority by catching the enemy unawares, and before further Parliamentarian reinforcements could increase their superiority in numbers. However, without Newcastle's infantry, and with his own infantry exhausted from their long march on the previous day, Rupert was unable to attack, and the odds against him lengthened as the day wore on, and the Scots and Parliamentarian infantry and artillery returned from their aborted move south and took position. At about 2:00 pm, the allied artillery, consisting of around thirty pieces of ordnance commanded by General Alexander Hamilton, began a cannonade.
However, at about 5:00 pm, the firing ceased. Meanwhile, at about 4:00 pm, the Royalist contingent from York belatedly arrived, led by Eythin. Rupert and Eythin already knew and disliked one another. Both had fought at the battle of Vlotho in 1638, where Rupert had been captured and held prisoner for several years. Rupert blamed Eythin's caution for the defeat on that occasion, while Eythin blamed Rupert's rashness. On the Moor, Eythin criticised Rupert's dispositions as being drawn up too close to the enemy.
His main concern was that a fold in the ground (referred to by some eyewitnesses as a "glen") between the ridge on which the allied forces were drawn up and the track between Long Marston and Tockwith concealed the front line of the allied infantry from both view and artillery fire, allowing them to attack suddenly from a comparatively close distance. When Rupert proposed to either attack or move his army back as Eythin suggested, Eythin then pontificated that it was too late in the day for such a move. The Royalist army prepared to settle down for the night, close to the allied armies. Covenanters and Parliamentarians.
The Covenanters and Parliamentarians occupied Marston Hill, a low feature less than 100 feet (300 m) above the surrounding countryside but nevertheless prominent in the flat Vale of York, between the villages of Long Marston and Tockwith. They had the advantage of the higher ground, but cornfields stretching between the two villages hampered their deployment. At some point in the day, the Royalists attempted to seize a rabbit warren to the west of the cornfields from where they might enfilade the Parliamentarian position, but they were driven off and the Parliamentarian left wing of horse occupied the ground. The wing was under the command of Manchester's Lieutenant General, Oliver Cromwell.
The first two lines consisted of over 3,000 cavalry from the Eastern Association, including Cromwell's own double-strength regiment of ironsides. They were deployed in eleven divisions of three or four troops of cavalry each, with 600 "commanded" musketeers deployed as platoons between them. The use of musketeers to disrupt attacking cavalry or dragoons was a common practice in the Swedish Army during the Thirty Years' War, and was adopted by both the Parliamentarians and Royalists at Marston Moor. Three regiments of Covenanter horse, numbering 1,000 and mounted on lighter "nags", formed a third line to Cromwell's rear under Sir David Leslie. Five hundred Scottish dragoons under Colonel Hugh Fraser were deployed on the extreme left. The centre, under the direction of the Earl of Leven as nominated commander in chief, consisted of over 14,000 foot, with 30 to 40 pieces of artillery.
Thomas Stockdale recorded the disposition of the troops and the role of Leven in drawing up the order of battle: "The Yorkeshire forces strengthened with a great party of the Scotts army hauing the main battle, the Earl of Manchester’s forces the left wing, and the Scotts the right wing, each battle hauing severall reserues and winged with horse, according to Generall Lesleys direction whose great experience did worthyly challenge the prime power in ordering them."
The Covenanter Sergeant Major General of Foot, James Lumsden, nevertheless noted (in a note on the map he made of the allied army's dispositions) that "... the Brigads drawen up heir as we; it is not so formal as it ought to be." Most of Manchester's infantry under Sergeant Major General Lawrence Crawford were on the left of the front line. A brigade of Lord Fairfax's foot was in the centre. Two Covenanter brigades each of two regiments, the "vanguard" of the main battalia commanded by Lieutenant General William Baillie, made up the right of the front line. The second line consisted of four Covenanter brigades, their "main battle", commanded by Lumsden. There is confusion as to the disposition of the third line and of the infantry deployment on the right wing, as the only map (Lumsden's) is badly damaged.
The usual interpretation, based on Peter Young's reconstruction, is that the third line contained two or three Covenanter brigades and the Earl of Manchester's own regiment of foot. Young placed the main body of Fairfax's foot on the left of the third line, although more recent interpretations of accounts put them on the right of the third line or even behind the cavalry of the right wing. An unbrigaded Covenanter regiment may have formed an incomplete fourth line. (There were a total of nineteen Covenanter regiments of foot, some of them incomplete, present at the battle.) The right wing was commanded by Sir Thomas Fairfax, with John Lambert as his second in command. He had at least 2,000 horse from Yorkshire and Lancashire, deployed in nine divisions, with 600 musketeers posted between them in the same manner as on the left wing. There were also perhaps 500 dragoons. One regiment of Covenanter horse commanded by the Earl of Eglinton was deployed with Fairfax's front line, two more (one of them composed of lancers commanded by the Earl of Balgonie, Leven's son) were deployed behind Fairfax's second line.
The second and third lines of the right wing may also have included some units of foot, whose identity is uncertain. A plan of the Royalist dispositions at Marston Moor, drawn up by Sir Bernard de Gomme. The Royalists occupied the low-lying moor, behind a drainage ditch that Rupert noted as an effective obstacle to a cavalry charge. There is some dispute over the course of the ditch at the time of the battle.
Some contemporary accounts support the contention by later historians that it was non-existent on the Royalists' right wing. On the other hand, a near-contemporary plan of the Royalist dispositions by Rupert's chief engineer, Bernard de Gomme, shows the ditch in its present-day alignment. It is generally accepted that the ditch was at least less of an obstacle on the Royalist right. The Royalist left wing was commanded by Lord Goring. It consisted of 1,700 cavalry from the Marquess of Newcastle's cavalry (the "Northern Horse"), 400 cavalry from Derbyshire and 500 musketeers. The first line was commanded by Goring and the second by Sir Charles Lucas.
Their centre was commanded by Eythin. A brigade numbering 1,500 and consisting of Rupert's and Byron's regiments of foot under Colonel Robert Napier of Byron's regiment was deployed at the ditch, at the junction of the right wing and centre, possibly to protect some artillery which may have occupied a slight hummock near this point. To their left, a forlorn hope of musketeers lined the ditch. Behind them, the first line and the left wing of the second line were composed of the remaining infantry units of Rupert's army, numbering 5,500, under Rupert's Sergeant Major General, Henry Tillier.
The 3,000 infantry from Newcastle's army under Sergeant Major General Francis Mackworth formed the right wing of the second line and an incomplete third line behind the right centre when they arrived, though some at least of them may not have taken up their assigned positions when the battle began, leaving the right of the Royalist centre understrength. A brigade of 600 "Northern Horse" under Sir William Blakiston was deployed behind the left centre.
A total of 14 field guns were deployed in the centre. The right wing was commanded by Byron, with 2,600 horse and 500 musketeers. The second line, which included Rupert's Regiment of Horse but also some comparatively inexperienced regiments, was commanded by Lord Molyneux, although the experienced but unprincipled Sir John Urry (or "Hurry") was Sergeant Major General of Rupert's horse and therefore Byron's second in command.Unlike the Covenanters and Parliamentarians, Rupert retained a reserve of 600 cavalry, including his elite Lifeguard of Horse, under his personal command. This reserve was situated behind the centre. Delayed by the late arrival of the York garrison, it was late evening before the Royalists were fully deployed. A flurry of rain showers and the discouragement of Newcastle and Eythin persuaded Rupert to delay his attack until the next day.
From the ranks of the allied army he could hear the singing of psalms. As the Royalist troops broke ranks for their supper, Leven noted the lack of preparation among his opponents and ordered his men to attack at or shortly after 7:30 pm, just as a thunderstorm broke out over the moor. On the allied left, Crawford's infantry outflanked and drove back Napier's brigade while Cromwell's horse quickly defeated Byron's wing. Though Byron had been ordered to stand his ground and rely on the ditch and musket fire to slow and disorganize an enemy attack, he instead ordered a hasty counter-charge which disordered his own troops and prevented his musketeers and four "drakes" (field guns) attached to Napier's brigade from firing for fear of hitting their own cavalry. In the clashes which followed, Byron's front line regiments were put to flight. Cromwell was slightly wounded in the neck, by a pistol ball in most accounts, and briefly left the field to have the wound dressed.
Noting the setback on this flank, Rupert led his reserve towards the right, rallying his own fleeing regiment of horse and leading them in a counter-attack. A Parliamentarian officer wrote: "Cromwell's own division had a hard pull of it; for they were charged by Rupert's bravest men both in front and flank; they stood at the sword's point a pretty while, hacking one another; but at last (it so pleased God) he [Cromwell] brake through them, scattering them before him like a little dust." — Scoutmaster-General Watson to Henry Overton, quoted in Young, Marston Moor 1644:
Leslie's Covenanter regiments eventually swung the balance for Cromwell, outflanking and defeating the Royalist cavalry. Rupert's right wing and reserve were routed and he himself narrowly avoided capture by hiding in a nearby bean field. In the center, the main Covenanter foot initially succeeded in crossing the ditch, capturing at least three pieces of artillery. On the allied right, Sir Thomas Fairfax's wing fared worse. He later wrote: "Our Right Wing had not, all, so good success, by reason of the whins and ditches which we were to pass over before we could get to the Enemy, which put us into great disorder: notwithstanding, I drew up a body of 400 Horse.
But because the intervals of Horse, in this Wing only, were lined with Musketeers; which did us much hurt with their shot; I was necessitated to charge them. We were a long time engaged with one another, but at last we routed that part of their Wing ... I myself only returned presently, to get to the men I left behind me. But that part of the Enemy which stood, perceiving the disorder they were in, had charged and routed them, before I could get to them." — Sir Thomas Fairfax, quoted in Young (1970).
Fairfax wrote that his second-in-command, Major-General Lambert, could not get up to him, and so charged in another place. A lane, the present-day Atter with Lane, crossed the ditch on this flank, and some accounts suggest that several units were easy targets for the Royalist musketeers as they advanced along the lane only four abreast. When a small embankment alongside the ditch at this point was removed in the 1960s, several hundred musket balls were recovered.
When Goring launched a counter-charge, the disorganized Parliamentarians were routed, although some of the Covenanter cavalry regiments with Sir Thomas Fairfax's wing, especially the Earl of Eglinton's regiment, resisted stoutly for some time. As an eyewitness observed: "sir Thou. Fairfax his new levied Regiments being in the Van [of the right wing], they wheeled about, & being hotly pursued by the enemy, came back upon the L. Fairfax foot, and the reserve of the Scottish foot, broke them wholly, & trod the most part of them under foot." — Captain William Stewart, quoted in Murdoch & Grosjean.
Most of Goring's victorious wing then either scattered in pursuit, or fell out to loot the allied baggage train, but some of them under Lucas wheeled to attack the right flank of the allied infantry. Meanwhile, some of Newcastle's foot counter-attacked the brigade of Fairfax's foot in the center of the allied front line and threw them into confusion. Following up this advantage, Blakiston's brigade of horse, probably reinforced by the troop of "gentleman volunteers" under Newcastle himself, charged the allied center. Under Lucas's and Blakiston's assaults in the confusion and the gathering darkness, six of the Covenanter infantry regiments and all of Fairfax's infantry fled the field. The Scottish sergeant major general, Lumsden, on the right of the allied second line, stated that: "These that ran away shew themselves most baselie.
I commanding the battle was on the head of your Lordships [Loudoun's] Regiment, and Buccleuch's; but they carried themselves not so I could have wished, neither could I prevail with them: For these that fled, never came to charge with the enemies, but were so possest with and panic fear, that they ran for an example to others, and no enemy following them, which gave the enemy [an opportunity] to charge them, they intended not, &they had only the lose." — Sir James Lumsden to the Earl of Loudon, quoted in Young. One isolated Covenanter brigade that stood its ground was at the right of their front line and consisted of the regiments of the Earl of Crawford-Lindsay and Viscount Maitland. Lucas launched three cavalry charges against them. In the third charge, Lucas's horse was killed, and he was taken prisoner.
Behind them, Lumsden reformed the reserve of the allied center, pushing four regiments (those of the Earl of Cassilis, William Douglas of Kilhead, Lord Coupar and the Earl of Dunfermline) and part of the Clydesdale Regiment forward into the breach in the allied front line. Behind them in turn, the Earl of Manchester's regiment repulsed and scattered Blakiston's brigade. By now it was nearly fully dark, although the full moon was rising. The countryside for miles around was covered with fugitives from both sides.
A messenger from Ireland riding in search of Prince Rupert wrote: "In this horrible distraction did I coast the country; here meeting with a shoal of Scots crying out, 'Weys us, we are all undone'; and so full of lamentation and mourning, as if their day of doom had overtaken them, and from which they knew not whither to fly; and anon I met with a ragged troop reduced to four and a Cornet; by and by with a little foot officer without hat, band, sword, or indeed anything but feet and so much tongue as would serve to enquire the way to the next garrisons, which (to say the truth) were well filled with the stragglers on both sides within a few hours, though they lay distant from the place of the fight 20 or 30 miles." — Mr. Arthur Trevor to the Marquess of Ormonde, quoted in Young (1970).
Cromwell's disciplined horsemen had rallied behind the right of the original Royalist position. Sir Thomas Fairfax, finding himself alone in the midst of Goring's men, removed the "field sign" (a handkerchief or slip of white paper which identified him as a Parliamentarian) from his hat, and made his way to Cromwell's wing to relate the state of affairs on the allied right flank. Some five or six troops of Fairfax's cavalry and Balgonie's Covenanter regiment of horse (split into two bodies) also made their way though the Royalists to join Cromwell. Cromwell now led his cavalry, with Sir David Leslie still in support and Sergeant Major General Crawford's foot on his right flank, across the battlefield to attack Goring's cavalry.
By this time, Goring's troops were tired and disorganized, and several of his senior officers were prisoners. They nevertheless marched down the hill from the Parliamentarian baggage to occupy roughly the same position which Fairfax's cavalry had held at the start of the battle, which most contemporary accounts stated to be a disadvantageous position. When Cromwell attacked, Goring's outnumbered troops were driven back. Many of them retired to the "glen", the fold of ground beneath Marston Hill, but refused to take any further part in the battle despite the efforts of officers such as Sir Marmaduke Langdale and Sir Philip Monckton to rally them. Eventually they obeyed orders to retreat to York late at night.
The triumphant allies meanwhile turned against the remains of the Royalist center, overrunning successive units and cutting down many fugitives. Finally some of Newcastle's foot, the "whitecoats", gathered for a last stand in a ditched enclosure. This has usually been stated to be White Sike Close, in the rear of the Royalists' original position, where some of Newcastle's infantry would have retreated when they found their right flank "in the air" following the defeat of Byron's and Rupert's cavalry, and certainly where some mass burials later took place, although the enclosure may instead have been Fox Covert, a mile north of Long Marston on the natural line of retreat towards York. The whitecoats refused quarter and repulsed constant cavalry charges until infantry and Colonel Hugh Fraser's dragoons were brought up to break their formation with musket fire. The last 30 survivors finally surrendered. Approximately 4,000 Royalist soldiers had been killed, many in the last stand of the whitecoats, and 1,500 captured, including Lucas and Tillier.
The Royalists lost all their guns, with many hundreds of weapons and several standards also falling into the hands of the allied forces. The allied generals' dispatch, and other Parliamentarian accounts, stated that 300 of their soldiers were killed. One of those mortally wounded among the Parliamentarians was Sir Thomas Fairfax's brother, Charles. Another was Cromwell's nephew, Valentine Walton, who was struck by a cannonball early in the day. Cromwell was present when he died afterwards, and wrote a famous letter to the soldier's father, Cromwell's brother in-law, also named Valentine Walton, which briefly described the battle and then informed the father of the son's last words and death.
Siege and Storming of Newcastle
When Sir William Mure of Rowallan healed from his wounds at the battle; he was presented at the siege and storming of Newcastle in the following month. The Siege of Newcastle occurred in 1644, during the English Civil War. A Covenanter army from Scotland under the command of Lord General Alexander Leslie, 1st Earl of Leven crossed into England in January 1644. As he moved his army south he left six regiments under the direction of Lieutenant General James Livingstone, 1st Earl of Callander, to lay siege to the city of Newcastle-on-Tyne from 3 February (when the town was formally asked to surrender) until 19 October the same year when the Covenanters took the city by storm. There had been an earlier occupation during the Civil War when the General Leslie had occupied the city following the Battle of Newburn in 1640.
The city was not continually invested in this time. In a complicated situation, as the Earl of Callander diverted his troops to take surrounding towns like Newburn, as the main Covenanter army pressed south. In the meantime, the royalist governor having reinforced his position then committed forces south also where the main Covenanter-Parliamentarian allied armies clashed with the Royalists at the Battle of Marston Moor. It was the defeat of the Royalist field army at Marston Moor on 2 July that decided the fate of Newcastle and all the other Royalist strongholds in the North East of England, because without the means of relief from an army in the field the capitulation of all such strongholds was only a matter of time. From 15 August 1644, Newcastle and Tynemouth were again the main target for Callander, now joined by the main Covenanters under Leven.
Bombardment and mines were necessary to breach the walls. The western half fell on 19 October 1644. Those remaining loyal to the Royalist cause retreated into the Castle Keep. Finding the situation hopeless surrender was negotiated with General Leslie and Governor Sir John Marley on 21 October 1644. The Covenanters were delighted at the result, more so it is thought than the English Parliament. Tynemouth had fallen on 27 October 1644 and the Scots were now able to control the Tyneside coal trade for a second time which they did until they were persuaded to leave on 30 January 1647 with the demise of the Solemn League and Covenant.
Clan Muir's History Part III
Second and Third English Civil War
In these two finally civil war, there is a possibility that clan Muir have fought in these wars. The Moirs fought
along side the Gordons at the battlefields in Scotland, which include Battle of Aberdeen 1644 and 1646, battle of Auldearn, Alford, Siege of Inverness and Preston. There was a Sir John Mure of Auchindrane fought at the battles of Mauchline Muir, and Philiphaugh. There was James Moore, and other Mores who were prisoners at the battle of Worcester. There might of been John Moore of Cork, Ireland was at the battle of Naseby.
Battle of Carbisdale
In this battle the Moars joined the Orcadain infantry and fought on the Royalists side. Throughout the course of the year Montrose kept busy using his commission in an attempt to raise troops and money in the German state of Brandenburg, as well as Sweden and Denmark. This met with limited success; but by September he had managed to raise and equip a small force of 80 officers and 100 Danish soldiers. Under the leadership of the Earl of Kinnoul these men were sent as an advance party to occupy the Orkney Isles, charged with recruiting local forces, while Montrose remained on the Continent employing professional troops.
In March 1650 Montrose came in person, landing at Kirkwall with some more foreign mercenaries to join his advance party and the Orcadian levies. Amongst his officers was Sir John Hurry, his old opponent at the Battle of Auldearn in 1645. Altogether he had 40 horse, 500 mercenaries and 700 Orcadians, completely unskilled in the arts of war. On board his ship, the Herderinnan, anchored in Scapa Flow, Montrose issued his orders to Hurry at a conference on 9 April.
He was instructed to cross to Caithness that same evening with part of the little army and advance to Ord of Caithness, a high hill overhanging the sea just north of Kildonan. Montrose crossed with the rest of his force a few days later. Montrose had heard that the local Highland Scottish clans of Munro, Ross and Mackenzie were up in arms and were likely to join him, although as it turned out, they did not. Montrose hoped to meet up with the Clan Munro and Clan Ross. When none of the clans arrived he pressed on the Strathoikell and into the narrow valley of Carbisdale. For two days he waited in the valley for the Munros and Rosses. Waiting for them was his biggest mistake as the clans had sided with the Scottish government, and Argyll had already set his counter plans in operation.
Montrose's army was in a narrow glen, where the Culrain Burn flows into the Kyle of Sutherland. To his rear the ground rose up to the wooded hill of Creag a' Choineachan. With a good view of the surrounding countryside he would be able to deploy his men on the hill if subject to a sudden attack. Yet, believing there was only a small body of enemy horse in the area, he failed to carry out a thorough reconnaissance, thus making the same mistake that led to the disaster at the Battle of Philiphaugh. Strachan had now reached Wester Fern to the south-east of Carbisdale. On his onward march he still had the River Carron to cross by a ford which left him some miles short of the enemy position.
A direct approach would only alert the royalists to his position. Fortunately, much of the way was covered by thick broom, which ended just before the Culrain Burn was reached. Close to the Burn, Strachan concealed his men in a gully overshadowed by broom, allowing only a single troop to emerge into the open. Montrose sent his cavalry under Major John Lisle to investigate, while the infantry took cover in the woods of Creag a' Choineachan. Before these deployments were complete Strachan's whole force emerged and charged. Lisle was immediately overwhelmed, as the Covenanters rode on towards the infantry.
The Germans and Danes, seeing their cavalry defeated, retreated into nearby Scroggie Wood. Here Clan Munro and Clan Ross joined in the fight, eager to grab their share of any plunder. The Germans and Danes fought gallantly, retreating deeper and deeper into the wood, but they were losing the battle. The need for self-preservation took over and those that were left attempted to flee, with the bloodshed in the wood continuing for over two hours. Even after the battle ended the slaughter did not cease; the clansmen of Ross-shire and Sutherland for many days after continued pursuing and killing those who had escaped the battle.
Hurry and some of the Danish and German musketeers attempted to make a stand, but the Orcadians crumbled in panic. Two hundred of them were drowned trying to escape across the waters of the Kyle of Sutherland. In a matter of minutes the whole affair was over.
Carbisdale was not a battle: it was a rout. The defeated soldiers were hunted over the slopes of Creag a' Choineachan by Strachan's troopers and local hostile clansmen for two hours. Four hundred were killed, and over four hundred and fifty taken prisoner, including Sir John Hurry, whose amazing career as a soldier was shortly to come to an end. Colonel Strachan's scout had been Monro of Lemlair while Montrose's scout had been Robert Monro of Achness. Historians have speculated whether Monro of Achness had lured Montrose into a trap by giving him false information.
Battle of Rothiemurchus
Supposely during the Convenanter war, there was a skirmish at Loch an Eilean castle. During their residence there, they were attacked from the shore, while a smart fire of musketry was kept up from the castle by Grizel More, the lady Rothiemurchus, who was clever, active woman, was busily employed all the time of the attack, in casting leaden balls for the defence.
The Battle of Philiphuagh
When the Covenanters became allies of the English Parliamentarians, Montrose was given a commission as King Charles's Lieutenant General in Scotland. He was able to raise an army consisting of regiments of Irish soldiers sent to Scotland by the Irish Confederates and shifting numbers of Highland clansmen. With these troops, Montrose had won a remarkable series of victories in the year preceding the Battle of Philiphaugh. The last of these was at Kilsyth, which destroyed the last Covenanter army in Scotland and put the lowland towns at his mercy. Montrose refused to allow his army to loot Glasgow, instead accepting a sum of £500 from the Town Council as pay for his soldiers. He then summoned a Parliament to be held in Glasgow.
The Council complained at the cost which would be involved and asked to be excused the levy of £500. Montrose agreed, leaving his army without pay. Although Montrose intended to strike into England to aid the King's cause there, the Highlanders under Alasdair MacColla who made up most of Montrose's infantry refused to go any further south leaving their traditional foes, the Campbells, in their rear. At the same time, Montrose appointed the former prisoner, the Earl of Crawford as his Lieutenant General of Horse. Most of his horsemen were Gordons under Lord James Aboyne. Affronted by Crawford's appointment, they too left the army.
Montrose hoped to gain recruits from the Borders, and marched south with only 500 musketeers from his Irish Catholic regiments and a small troop of horse. He made for Kelso, but found that only a few Borders gentry joined his army instead of the thousands of recruits he expected. Meanwhile, the Earl of Leven, who commanded the main Scottish Covenanter Army in England, had heard of the result of the Battle of Kilsyth, and sent Sir David Leslie, the Lieutenant General of Horse, back into Scotland with all the cavalry he could muster. Leslie collected reinforcements from Covenanter garrisons in Newcastle upon Tyne and Berwick, and crossed the border on 6 September, with 5000 horse and dragoons and 1000 infantry.
He marched along the east coast intending to cut off Montrose from the Highlands, but learned (possibly from the turncoat Earls of Home and Roxburgh) of Montrose's position and strength, and turned south to intercept him. Contemporary accounts give only a broad outline of the battle. Subsequent authors have interpreted this in various ways in an attempt to arrive at a more detailed account.
Montrose himself, many of his officers and some of the cavalry were quartered in the town of Selkirk, with the infantry and the rest of the cavalry encamped on flat ground the other side of the river (the Ettrick Water) at Philiphaugh. Warner puts this just below the junction of the Yarrow Water and the Ettrick Water and hence about 2 miles (3.2 km) away. However, a contemporary description of the Royalist infantry position has them behind on one hand an unpassable ditch, and on the other Dikes and Hedges, and where these were not strong enough, they further fortified them by casting up ditches, and lined their Hedges with Musketeers, hence other interpretations would put the royalists within field enclosures shown on an 18th-century map between 1 kilometre (0.62 mi) and 1.5 kilometres (0.93 mi) from Selkirk.
Leslie had arrived at nearby Melrose the evening before, and advanced up the valley of the Tweed, driving in the Royalist outposts at Sunderland (at the junction of the Ettrick Water with the Tweed, about 4 kilometres (2.5 mi) downstream of Selkirk) without apparently alarming or alerting the main Royalist force. The following morning was misty, and whatever scouting was undertaken by the Royalists failed to reveal the presence of Leslie's forces.
Leslie divided his force into two wings, one of which attacked the Royalist position directly, getting to within half a mile before the alarm was raised. The other executed a flanking manoeuvre, probably on the south bank of the Ettrick Water although some interpretations follow a later ballad and say through hilly ground to the north.
Montrose was alerted to Leslie's attack by the sound of gunfire, but arrived on the battlefield to find his forces in considerable confusion. Although the Royalist infantry's strong defensive position enabled them to repel at least two Covenanter attacks, the arrival of Leslie's flanking force ensured their defeat. After Montrose made a brief attempt to restore the situation by charging 2,000 Covenanter dragoons with only 100 cavalry of his own, he was urged by his friends that the Royalist cause in Scotland would die without him.
He cut his way out with 30 men, and retreated over the Minchmoor road toward Peebles. Many of Montrose's Irish foot soldiers from Manus O'Cahan's regiment had been killed in the battle, but after fighting on for some time after the flight of the cavalry about 100 of them surrendered on promise of quarter. Some Presbyterian Ministers who accompanied Leslie persuaded him that this clemency was foolish, and the prisoners and 300 camp followers (many of them women and children) were slaughtered in cold blood. Montrose attempted to raise another army in the Highlands, but was unable to take the field against Leslie's army. After fighting a guerilla campaign over the following winter and spring, he received orders from King Charles (who was now himself a prisoner) to lay down his arms. Montrose, Crawford and Sir John Hurry, who had changed sides to join Montrose after the Battle of Auldearn, were refused pardon by the victorious Committee of Estates and went into exile.
The Battle of Mauchline Muir
In June 1648, a members of the Kirk party gathered in Mauchline to join in a celebration of the Eucharist that lasted several days. No small gathering, following the celebration 2000 armed Kirk party supporters gathered on the Mauchline Moor, choosing leaders in evident preparation of making their dissatisfaction with the Engagement known. Into the midst of this rode five troops loyal to the Scottish Parliament and the Engagement. They were commanded by John Middleton, 1st Earl of Middleton, and James Livingstone, Earl of Callender.
The Kirk party supporters had in their company seven ministers, who managed to obtain assurance from the Engager leaders that if their group surrendered, there would be an amnesty. But the majority of the Kirk party did not accept these terms. Many were eager for the fight, and some 200 of the party were deserters who were excluded from the amnesty. For some time, the Kirk party supporters held their own, but when reinforcements arrived to more than double the Engager troops, the day was decided. Though the Engagers took the day, each side of the conflict lost roughly equal numbers, weith combined fatalities estimated between 30 and 40 men. All seven ministers and 65 members of the Kirk party were arrested, but later freed.
While the Engagers were victorious, the battle itself helped firm Scottish opposition to the Engagement.
A couple of months after this small victory the Engager army commanded by James Duke of Hamilton suffered a crushing defeat by New Model Army at the Battle of Preston, and after a short civil war in Scotland the Kirk party emerged as victors (see Whiggamore Raid, the Battle of Stirling and the Treaty of Stirling). Subsequently, a Scottish Parliament convened in Edinburgh on the 4 January 1649, "approved the opposition" represented by those at Mauchline.
The Battle of Dunbar ( 1650)
On September 3, 1650 a battle took place in Dunbar, Scotland between the English Parliamentarians and the Scottish convenanters. According to a prisoner of war during the wars of the three kingdom or is known as the convenanter war, there were Matthew Moore and Walter Morey who took part of this battle, but unfortunately they were both taken prisoners and shipped to the Americas. By early September, the English army, weakened by illness and demoralised by lack of success, began to withdraw towards its supply base at Dunbar.
Leslie, believing that the English army was retreating, ordered his army to advance in pursuit. The Scots reached Dunbar first and Leslie positioned his troops on Doon Hill on the eastern edge of the Lammermuir Hills, overlooking the town and the Berwick Road, which was Cromwell's land route back to England. Cromwell wrote to the governor of Newcastle: "We are upon an engagement very difficult. The enemy hath blocked up our way at the pass of Copperspath, through which we cannot get without almost a miracle. He lieth so upon the hills that we know not how to come that way without great difficulty; and our lying here daily consumeth our men, who fall sick beyond imagination." — Cromwell.
However, the Scots army, commissioned and funded by the Committee of Estates and Kirk representing the Scottish Parliament and the Church of Scotland, manoeuvred itself into a new position, a move that turned out to be a major tactical blunder. Eager to curtail the mounting cost of the campaign, the ministers of the Kirk in attendance are said to have put Leslie under great pressure to press on with an attack. On 2 September 1650, he brought his army down from Doon Hill and approached the town, hoping to secure the road south over the Spott Burn in preparation for an attack on Cromwell's encampment.
Witnessing Leslie's men wedge themselves between the deep ditch of the Spott Burn, and the slopes of the Lammermuirs behind them, Cromwell quickly realised that here was an opportunity for him to turn the tables on the Scots. He knew that an attack on the Scottish right flank would leave the left flank unengaged and that a successful push against the right would roll back the latter.
On observing the Scots maneuvering into their new positions, he is said to have exclaimed, "The Lord hath delivered them into our hands!" The Major-General [Lambert] and myself coming to the Earl of Roxburgh's House [Brocksmouth House], and observing this posture, I told him I thought it did give us an opportunity and advantage to attempt upon the Enemy. To which he immediately replied, That he had thought to have said the same thing to me. So that it pleased the Lord to set this apprehension upon both of our hearts, at the same instant. We called for Colonel Monk, and showed him the thing: and coming to our quarters at night, and demonstrating our apprehensions to some of the Colonels, they also cheerfully concurred. — Cromwell.
That night, under cover of darkness, Cromwell stealthily redeployed a large number of his troops to a position opposite the Scottish right flank. Just before dawn on 3 September, the English troops, shouting their battle cry "The Lord of Hosts!", launched a surprise frontal attack on the Scots, while Cromwell engaged their right flank. Soldiers in the English centre and on the right caught Leslie's men unawares but were held at bay by the long pikes of their Scottish opponents. The right flank of the Scots, however, with less freedom to manoeuvre, was pushed back under the weight of superior English numbers until its lines started to disintegrate. Cromwell's horse then clashed furiously with the Scottish cavalry and succeeded in scattering them. Observing this disaster, the rest of the Scottish army, hopelessly wedged between the Spott or Brox Burn and Doon Hill, lost heart, broke ranks and fled.
Cromwell's secretary Rushworth wrote: I never beheld a more terrible charge of foot than was given by our army, our foot alone making the Scots foot give ground for three-quarters of a mile together. In the rout that followed, the English cavalry drove the Scots army from the field in disorder.Cromwell reported to Parliament that the "chase and execution" of the fleeing Scots had extended for eight miles.Cromwell claimed that 3,000 Scots were killed. On the other hand, Sir James Balfour, a senior officer with the Scottish army, noted in his journal that there were "8 or 900 killed".
There is similar disagreement about the number of Scottish prisoners taken: Cromwell claimed that there were 10,000,(Cromwell said in his letter to Parliament that he had dismissed 5,000 men because they were Starved, sick or wounded. (Ref:Thomas Carlyle, Letters and speeches) while the English Royalist leader, Sir Edward Walker put the number at 6,000, of which 1,000 sick and wounded men were quickly released. The more conservative estimates of the Scottish casualties are borne out by the fact that, the day after the battle, Leslie retreated to Stirling with some 4,000-5,000 of his remaining troops.
In his post-battle report to the Speaker of the English Parliament, Cromwell described the victory as "...one of the most signal mercies God hath done for England and His people...". As a result of the destruction of the Scottish army, he was able to march unopposed to Edinburgh and quickly occupied the Scottish capital, although Edinburgh Castle held out until the end of December. The prisoners taken at Dunbar were force-marched south towards England in order to prevent any attempt to rescue them.(and because it would be impossible to release the men into the local community) The conditions on the march were so appalling that many died of starvation, illness or exhaustion.
By 11 September, when the remnants arrived at Durham Cathedral where they were to be imprisoned, only 3,000 Scottish soldiers were still alive. If Sir Edward Walker's statement is correct, that 6,000 prisoners were taken and 5,000 of them were marched south, then 2,000 captives perished on the way to Durham. Even today, where, between Dunbar and Durham would you find food for up to 4,500 people? Of the estimated 5,000 Scottish soldiers that began the march southwards from Dunbar, over 3,500 died either on the march or during imprisonment in Durham Cathedral, more than the total number killed on the battlefield In Arthur Heslerig's letter to parliament on 2nd October.
He says that he received 3,000 prisoners at Durham and says that the prisoners had not been 'told' (counted) at Berwick. Of the 1,400 survivors, the majority were eventually transported as convict labourers to English colonies in New England, Virginia and the Caribbean.
After formally accepting the Solemn League and Covenant, Charles was finally crowned King in Scotland on 1
January 1651.
The Battle of Wocester
In this final battle to end the war between Scotland, Ireland, and England, in which the Parliamentarians were victious over the Royalist in a bloody conflict. In battle there were Daniel More, James Moore, John Morre, another John Morre, and an unknown More who ended up as prisoners at the end of this battle, and they to where shipped off to America. Cromwell took his measures deliberately. Lilburne from Lancashire and Major Mercer with the Worcestershire horse were to secure Bewdley Bridge, 20 miles (32 km) north of Worcester and on the enemy's line of retreat. Fleetwood was to force his way across the Teme and attack St John's, the western suburb of Worcester. While Lambert commanded the Eastern Flank of the Army which would advance and encircle the Eastern walls of Worcester, Cromwell would lead the attack on the southern ramparts of the city. The assault started on the morning of 3 September and initially the initiative lay with the Parliamentarians.
Fleetwood forced the passage of the Teme over the pontoon bridges against Royalists under the command of Major General Montgomery. Colonel Richard Deane's initial attempts to cross the Powick Bridge (where Prince Rupert of the Rhine had won the Battle of Powick Bridge, his first victory in 1642) failed against stubborn resistance by the Royalists (many of whom were Scottish Highlanders) commanded by Colonel Keith. By force of arms and numbers the Royalist army was pushed backward by the New Model Army with Cromwell on the eastern bank of the Severn and Fleetwood on the western sweeping in a semicircle four miles long up toward Worcester.
The Royalists contested every hedgerow around Powick meadows. This stubborn resistance on the west bank of the Severn north of the Teme was becoming a serious problem for the Parliamentarians, so Cromwell led Parliamentary reinforcements from the eastern side of the town over the Severn pontoon bridge to aid Fleetwood. Charles II from his vantage point on top of Worcester cathedral's tower realised that an opportunity existed to attack the now-exposed eastern flank of the Parliamentary army.
As the defenders on the Western side of the city retreated in good order into the city (although during this maneuver Keith was captured and Montgomery was badly wounded), Charles ordered two sorties to attack the Parliamentary forces east of the city. The north-eastern sortie through St. Martin's Gate was commanded by the Duke of Hamilton and attacked the Parliamentary lines at Perry Wood.
The south-eastern one through Sidbury Gate was led by Charles II and attacked Red Hill. The Royalist cavalry under the command of David Leslie that was gathered on Pitchcroft meadow on the northern side of the city did not receive orders to aid the sorties and Leslie chose not to do so under his own initiative. Cromwell seeing the difficulty that his east flank was under rushed back over the Severn pontoon bridge with three brigades of troops to reinforce the flank. Although they were pushed back, the Parliamentarians under Lambert were too numerous and experienced to be defeated by such a move.
After an hour in which the Parliamentarians initially retreated under the unexpected attack, when reinforced by Cromwell's three brigades, they in turn forced the Royalists to retreat back toward the city.The Royalist retreat turned into a rout in which Parliamentarian and Royalist forces intermingled and skirmished up to and into the city. The Royalist position became untenable when the Essex militia stormed and captured Fort Royal, (a redoubt on a small hill to the south-east of Worcester overlooking the Sidbury gate), turning the Royalist guns to fire on Worcester.
Once in the city, Charles II removed his armour and found a fresh mount; he attempted to rally his troops but it was to no avail. A desperate Royalist cavalry charge down Sidbury Street and High Street, led by the Earl of Cleveland and Major Careless amongst others, allowed King Charles to escape the city by St. Martin's Gate. This cavalry force was composed of the few Midland English Royalists who had rallied to Charles II, and largely consisted of Lord Talbot's troop of horse.
The defenses of the city were stormed from three different directions as darkness came on, regulars and militia fighting with equal gallantry. Most of the few thousands of the Royalists who escaped during the night were easily captured by Lilburne and Mercer, or by the militia which watched every road in Yorkshire and Lancashire. Even the country people brought in scores of prisoners, for officers and men alike, stunned by the suddenness of the disaster, offered no resistance. About 3,000 men were killed during the battle and a further 10,000 were taken prisoner at Worcester or soon afterwards. The Earl of Derby was executed, while the other English prisoners were conscripted into the New Model Army and sent to Ireland. Around 8,000 Scottish prisoners were deported to New England, Bermuda, and the West Indies to work for landowners as indentured labourers. Parliamentary casualties numbered in the low hundreds. Charles II's escape included various incidents, including one of his hiding from a Parliamentarian patrol in an oak tree in the grounds of Boscobel House.
The result of the battle was, in brief, one of those rare victories in which a pursuit is superfluous. In announcing the Worcester victory of the day earlier, Cromwell's 4 September 1651 despatch to William Lenthall, the Speaker of the House of Commons, has become famous: "The dimensions of this mercy are above my thoughts. It is, for aught I know, a crowning mercy." Hence, Cromwell thought the victory was the greatest of all the favours, or mercies, given to him by God, and the expression "crowning mercy" is frequently linked to the battle, thought to be descriptive of the impact of the end of the English Civil War through complete destruction of the last Royalist army.
The Parliamentary militia were sent home within a week. Cromwell, who had ridiculed "such stuff" six months ago, knew them better now. "Your new raised forces," he wrote to the Rump Parliament, "did perform singular good service, for which they deserve a very high estimation and acknowledgement". The New England preacher Hugh Peters gave the militia a rousing farewell sermon "when their wives and children should ask them where they had been and what news, they should say they had been at Worcester, where England's sorrows began, and where they were happily ended", referring to the first clash of the Royalist and Parliamentarian Armies at the Battle of Powick Bridge on 23 September 1642, almost exactly nine years before. Before the battle King Charles II contracted the Worcester Clothiers Company to outfit his army with uniforms but was unable to pay the £453.3s bill. In June 2008 Charles, Prince of Wales paid off the 357-year-old debt (less the interest, which would have amounted to around £47,500.)
The Battle of Rullion Green
They came that day from Collinton to the house of the Moore( telling me that clan Muir was present at this battle), and there, upon thier fatal spot called Rollion Green, they drew up thier discouraged remnant and not exceeding 900 spent men. The Battle of Rullion Green in the Pentland Hills, in Lothian, Scotland on 28 November 1666 was the culmination of the brief Pentland Rising (15– 28 November 1666). At least 3000 men of the Scottish Royal Army led by Tam Dalyell of the Binns opposed about 900 Covenanter rebels. The Pentland Rising was in the context of the long-running government campaign to impose episcopalianism upon Scotland.
The uprising began in St. John’s Town of Dalry, where troops were beating an elderly man who had defaulted on a fine for not attending government-approved church services. The troops were interrupted by four covenanters and then supported by the local populace, who disarmed the soldiers. Robert McClellan of Barscobe led the Rising; he gathered some men in Dalry, led them to Balmaclellan, where after a skirmish with other troops, he raised more men. McClellan led them to Dumfries, and there they captured the local commander, General Turner, at 5.30 in the morning, still in his nightshirt, in his lodgings on the Whitesands. McClellan, aided by Neilson of Corsock, took the gathering force up to Ayrshire, thence to Lanarkshire, and then to Colinton near Edinburgh, on their way to present their petition to the Parliament.
Many deserted the group following bad weather, a poor choice of routes and the news received at Colinton that they could not expect a sympathetic reception in Edinburgh. From a peak of perhaps 3000 men the force had diminished by half at Colinton, and then further dispersed as the group headed home towards Galloway. The rebels included experienced professional soldiers as well as citizenry, and were commanded by Colonel James Wallace of Auchens.The monument outside Dreghorn Barracks at Colinton near Edinburgh, which commemorates Rullion Green.
The rebel forces decided to hold a parade and review by Colonel Wallace at Rullion Green in the Pentland Hills. General Tam Dalyell of the Binns was with a force in Currie, and cut through the Pentland Hills to confront the rebels. The survivors were treated with cruelty; 15, including Neilson of Corsock, were hanged, drawn and quartered, and several, including two boys of 18, were tortured first with the boot.
The Rye House Plot
The Ryehouse Plot was a scheme in 1683 with the object of assassinating King Charles II and his brother James, Duke of York (later James II ) in order to secure the succession of the Duke of Monmouth, an illegitimate son of Charles II and Lucy Walter. Born in 1649 he was raised by Lord Croft and made Duke of Monmouth in 1663. He later married the wealthy Ann, Countess of Buccleuch. The plot was intended to put him on the throne in place of his father ( and in lieu of the openly Catholic James). The hope was that the Protestant people would rise up, but they had already had enough of civil war and the rebellion failed. At the same time the mounted an invasion of Scotland, but his plan also failed for lack of support; he was was caught and executed. In England during 1682 plans were being made to further a revolution which would leave a constitutional monarchy but exclude the accession of James.
The main conspirators were the Duke of Monmouth, Lord William Russell, Lord Essex and Sir Algernon Sydney. Monmouth had commanded the royalist forces against the Covenanters at Bothwell Brig . The others were patriots concerned that James, a Catholic, would succeed to the throne. They were in contact with the Earl of Argyll and had thoughts of collaboration with him for simultaneous revolution in Scotland and England. They suggested a variety of venues and methods to take the King and his brother. Proposals included shooting them from Bow Steeple, attack them in St James Park; or in their barge on the river Thames. Outside London they considered the road between London and Winchester; the road betwen Hampton Court and Windsor.
Finally a conspirator named Rumbold ( a fearless officer from the Ironsides and a staunch republican) offered his home - Rye House as a base, about eighteen miles from London. The King and Duke of York were known by various nicknames - ` Slavery` and `Popery ` were one label , another was after their complexions - Charles was dark complexion and called ` Blackbird` while James , Duke of York, was fair and called ` Goldfinch`. There were several suggestions how they might be killed but eventually the conspirators met at Rye House, near Hoddesdon in Hertforshire to make their final plans. Near to Rye House ran a narrow lane that was regularly used by the King when he went to Newmarket. Along it was a thick hedge on one side and on the other an outhouse that afforded good cover and vantage for the assassins.
The house itself was surrounded by a moat and was easily defended by a small party if needs be. But there was no attempt made on the King`s life for he returned from Newmarket a day earlier than anticipated. The plot was discovered and Lord William Russell and Algernon Sydney were beheaded.The Rye House Plot was the excuse the government needed to arrest the chivalrous patriot Robert Baillie of Jerviswood. Baillie had been in London and had discussions about the establishment of a settlement in Carolina. In the course of several meetings there had been discussion about the succession and what might be done about it. Baillie recognised the desirability of doing something to prevent the Catholic Duke of York from the throne, but assassination was not one of them. Baillie and his fellow Scots ( Including Sir William Muir of Rowallan) were arrested and sent to Edinburgh in October 1683. He lingered in the Tolbooth suffering ill health, but was eventually tried for high treason, found guilty by a packed jury ( nothing was left to chance) and executed 23 December 1684.
The Battle of Bothwell Bridge
The Battle of Bothwell Bridge took place on 22 June 1679 in Lanarkshire, Scotland. The Covenanters had established their camp on the south bank of the Clyde, north of Hamilton. The rebels numbered around 6000 men, but were poorly disciplined and deeply divided by religious disagreements. They had few competent commanders, being nominally led by Robert Hamilton of Preston, although his rigid stance against the Indulged ministers only encouraged division. The preacher Donald Cargill and William Clevland, the victor of Drumclog, were present, as were David Hackston of Rathillet and John Balfour of Kinloch, known as Burley, who were among the group who murdered Archbishop Sharp on 3 May. The government army numbered around 5000 regular troops and militia, and was commanded by Monmouth, supported by Claverhouse and the Earl of Linlithgow.
The royalist troops were massed on the northern or Bothwell bank of the river Clyde on sloping ground that included a field that has since become known, ironically enough, as the Covenanters Field - not because the battle was fought there but because for many years it was the venue for a covenanters conventicle organised by the Scottish Covenanters Memorial Association. The battle centred on the narrow bridge across the Clyde, the passage of which Monmouth was required to force in order to come at the Covenanters. Hackston led the defence of the bridge and had some initial success in the initial skirmishes at the bridge itself. But his men lacked artillery and ammunition, and were forced to withdraw after around an hour. Once Monmouth's men were across the bridge, the Covenanters were quickly routed. Many fled into the parks of nearby Hamilton Palace, seat of Duchess Anne, who was sympathetic to the Presbyterian cause, and it was in this area that the final engagements took place.
The numbers of covenanters who were killed varies widely with estimates ranging from 7 - 700 according to the Scottish Battles Gazetteer. Around 1200 were taken prisoner. The prisoners taken at Bothwel, were banished to America; who were taken away by Paterson merchant at Leith, who transacted for them with Provost Milns, laird of Barnton, the man that first burnt the covenant; whereof 200 were drowned by shipwreck at a place called the Mule-head of Darness near Orkney, being shut up by the said Paterson’s order beneath the hatches; 50 escaped, whereof the names, so many of them as could be had, follow; these who escaped are printed in italic characters, for distinction’s sake.
Amongest those was an unknow More. Other Mores fought along side clan Leslie, Grant and Moirs who fought in clan Gordon during the Scottish and English civil wars. The list of the prisoners now in Dunnottar, not banished; all of them refused the oath of alleadgeance, and mannie of them refused His Majestie’s authoritie, and to swear the oath of abjuratione befor the Ld of Gosford, at Bruntilland, the 19th May, 1685: George Moore (George Muir), Geo Moorhead (George Moorhead), Wm. Gilmore (William Gilmore), Robert Gilmoore (Robert Gilmore).
The other clan battles and battles that the Moirs fought with the Gordons, Mores with Leslie, Boyds and other allied clans: Battle of Linlithgow, The battle of Linlithgow Bridge, Battle of Hadden Rig, Siege of Carlisle (1315), Capture of Edinburgh, Battle of Haddington, Siege of Broughty castles, Battle of Boroughmuir, Battle of Crossraguel abbey, Battle of Minishant, Siege of Kilmarnock, Skirmish of Irvine, Battle of Harpsdale, Siege of Inverness 1429, Battle of Arbroath, Siege of Stirling by Edward Mure of Middletoune and Mungo Muir of Rowallan, Battle of Glenlivet, Battle of Sauchieburn, Battle of Kerelaw, Battle of Auchenharvie, Battle of Waterstoun, Battle of Eglinton, Battle of Ardoch,Battle of Aiket, Battle of Druminnor, Battle of Auchendraine Castle, Battle of Rowallan castle, Battle of Glendale, Battle of Morranside, Battle of Lochaber, Battle of Alltan- Beath, Battle of Corgarff, Battle of Craibstone, Battle of Brechin and Battle of Torran Dubh.
Battle of Alltachuilain, Battle of Tillieangus, Battle of Corrichie, Siege of Inverness 1562, 1649 and 1650, Battle of Langside, Battle of Carberry Hill, Battle of Dornoch, Skirmish of Duppil Burn, Battle of Inverlochy, Battle of Dalnaspidal, Siege of Balquhain castle, Battle of Perth, Battle of Rhunahaorine Moss, Battle of Dunaverty, Battle of Lagganmore, Siege of Carlisle 1645, Battle of Stirling, and Battle of Inverkeithing.
The Thirty Years War
The Thirty Years' War was a series of wars in central Europe between 1618 and 1648. It was one of the longest, most destructive conflicts in European history. Initially a war between Protestant and Catholic states in the fragmenting Holy Roman empire, it gradually developed into a more general conflict involving most of the great powers of Europe,, becoming less about religion and more a continuation of the France-Habsburg rivalry for European political pre-eminence. The war began when the Holy Roman Empire tried to impose religious uniformity on its domains. The northern Protestant states, angered by the violation of their rights, banded together to form the Protestant Union.
The new emperor, Ferdinand II, was a staunch Catholic and pretty much intolerant when compared to his predecessor. His policies were considered heavily pro-Catholic and extreme to a certain degree. These fears caused the Protestant Bohemians, dominion of Habsburg, Austria to revolt against their rulers. They ousted the Habsburgs and instead elect Frederick V, elector of Palatinate as their monarch. Frederick took the offer without the support of the union. The southern states, mainly Catholic, was angered by this treachery. Led by Bavaria, these states form the Catholic League to expell Frederick in support of the Emperor.
The Empire soon crushed this perceived rebellion, but reactions around the Protestant world condemned the Emperor's action. Feeling uneasy after the atrocities committed in Bohemia, Saxony finally gave its support to the union and decided to fight back. Sweden soon intervened in 1630 and began the full scale Great war on the continent. Spain, wishing to crush the Dutch rebels, intervened under the pretext of helping their dynastic ally, Austria. No longer able to tolerate the encirclement of two major Habsburg powers on its border, Catholic France entered the coalition on the side of the Protestants to counter the Habsburgs. The Thirty Years' War saw the devastation of entire regions, with famine and disease significantly decreasing the population of the German and Italian states, the Kingdom of Bohemia, and the low countries. The war also bankrupted most of the combatant powers.
Both mercenaries and soldiers in fighting armies were expected to fund themselves by looting or extorting tribute, which imposed severe hardships on the inhabitants of occupied territories. The Thirty Years' War ended with the treaties of Osnabruck and Munster, part of the wider peace of Westphalia. The war altered the previous political order of European Powers. The rise of Bourbon France, the curtailing of Habsburg ambition, and the ascendancy of Sweden as a great power, created a new balance of power on the continent. France's dominant position would be the central tenet of European politics in the upcoming years, until another great war saw Britain rise as the foremost world power in the 18th Century. Mores/ Muir fought in the Swedish Army.
There were Sir William Muir/ Mure of Rowallan, Patrick More, Jacob Mur, and others. They all fought for the Swedish army and some have held the rank of general at the end of their services. The battles that these clansmen fought in which includes the following: Siege of Paderborn, Zusmarshausen Skirmish and others, while Sir William Muir of Rowallan fought under the brillant commander of Gustavus Adolphus of Sweden in Germany. Battle of Frankfurt an der Oder, Battle of Werben, First Battle of Breitenfeld,Battle of Rain or Battle of Lech or Battle of the River Lech, Battle of Alte Veste, Battle of Fürth and Battle of Lützen. There was a John Muire of Captain Johne Hamitouns, company of Sir John Meldrums regiment at Maribrig on August 1, 1629.
Colonel Patrick More
Patrick More served twenty years during the thirty years war. He recieved the commandant's position in Buxtehude, with the donations of the land ( The island of Krautsandt) serving as a partial payment for his services. In June, Patrick More also became both an adjutant general to Wittenberg and was a colonel over a German cavalry regiment in recognition of his services. Barclay and More muust have been in the forces used by Douglas to laid siege to Paderborn in June as Douglas said to have command all the Swedish cavarly and two regiments of dragoons in the blockade of the city, in which More was part of the dragoons.
Skirmish at Zusmarshausen
Wrangel's army contained five regiments led by the Scottish which includes William Forbes, Herbert Gladstone, John Nairn, Patrick More, and LT. General Robert Douglas. The Battle of Zusmarshausen was fought on 17 May 1648 between the Holy Roman Empire, Sweden and France modern Augsburg district of Bavaria, Germany. The Swedish-French force was victorious, and the Imperial army barely escaped annihilation. The French army, led by Turenne, first captured several pieces of artillery, before they met up with the Swedish army. When the armies met, they numbered about 26,000 men, while the Empire only had 10,000 men. This battle was one of the last fought in the Thirty years War; its consequences were the weakening of the Habsburg Monarchy and the Holy Roman Empire and signalled the rise of France as the most powerful state of Europe. Patrick More and William Forbes also served as colonels of german regiments part of a group of eleven Scottish officers who commanded between them some thirteen non Swedish regiments and Garrisons in 1648.
Sir William Muir of Rowallan
Sir William Mure was the sixteenth and last Mure of Rowallan. He served in Germany under Gustavus Adolphus. At the following engagements in which William Mure fought at the battles of Battle of Frankfurt an der Oder, Battle of Werben, First Battle of Breitenfeld,Battle of Rain or Battle of Lech or Battle of the River Lech, Battle of Alte Veste, Battle of Fürth and Battle of Lützen. It's not clear if Sir William Mure stayed or left after his commander Gustavus was killed.
On 26 June or 6 July 1630, William Mure joinned Gustavus Adolphus of Sweden with a fleet of 27 ships arrived at the island of Usedom and made landfall near Peenemunde with 13,000 troops(10,000 infantry and 3,000 cavalry on thirteen transport ships. The core of the invasion force consisted of trained peasants, recruited to the Swedish army following Gustavus Adolphus' military reforms of 1623.The western flank of the Swedish invasion force was cleared from Stralsund, which served as the basis for Swedish forces clearing Rugen and the adjacent mainland from 29 March until June 1630.
Battle of Frankfurt an der Oder
Swedish king Gustavus Adolphus started to intervene in the Thirty Years War by supporting Stralsund against Wallenstein in 1628, and landed in Pomerania in June 1630. With the central parts of the Duchy of Pomerania, Sweden had gained a bridgehead in the Holy Roman Empire's northeastern most corner, while the rest of the empire was occupied by forces of the Catholic league and FerdinandII, Holy Roman Emperor. Except for Magdeburg, which had allied with Sweden on 1 August, the German Protestant states distrusted Gustavus Adolphus and hesitated to enter an alliance.
In January 1631, Swedish forces garrisoned in the Pomeranian bridgehead proceeded southwards, and sacked the Pomeranian towns of Gartz and Greifenhagen (now Gryfino) near Pomerania's border with Brandenburg. Further southward advances along the Oder into the territory of George William, Elector of Brandenburg followed, and on 23 January 1631, Sweden allied with France in the Treaty of Barwalde, concluded in Brandenburgian Barwalde (now Mieszkowice).
The Swedish forces, commanded by Gustavus Adolphus, were supported by Scottish auxiliaries commanded by John Hepburn and Robert Monro. They laid siege on the town for two days, and stormed it on the second day. The assault was successful and resulted in the sack of the town.The success was in part due to internal quarrels in the defending force--mercenaries who had not been paid refused to fight without receiving their pay first.The defenders were "slaughtered [...] where they stood" and suffered 3,000 deaths, compared to 800 casualties on the Swedish side. Many deaths occurred when the town was looted. Scottish major general in Swedish service John Leslie was appointed governor of the town and gave orders to have its defenses strengthened and the thousands of bodies buried.
The latter task was achieved by digging mass graves for over a hundred bodies each; after six days, all dead had been buried. John Leslie was soon succeeded as Frankfurt's governor by another Scot, James MacDougal , who was in turn succeeded by a third Scot, Alexander Leslie. Frankfurt served to protect the rear of the advancing Swedish army. The other major town in northeastern Brandenburg, Landsberg (Warthe) (now Gorzow) was taken on 23 April. Subsequently, George William, Elector of Brandenburg was forced into treaties with Sweden on 14 May, 20 June, and 10 September 1631, which put Sweden in charge of the Brandenburgian military capacities, but did not have the status of an actual alliance. Throughout 1631, Gustavus Adolphus of Sweden advanced into central Germany, and while Magdeburg was lost in May and Gustavus Adolphus was hard-pressed at Werben in July, the subsequent victory at Breitenfeld in September paved the way for his advance into southern Germany.
Battle of Werben
The Battle of Werben was a battle of the Thirty Years' War, fought on July 22, 1631, between the Swedish Empire and the Holy Roman Empire. The Swedes had 16,000 soldiers and were led by Gustavus Adolphus, while the Imperialists had 23,000 soldiers and were led by Field-Marshal Count Tilly. Tilly's troops attacked Gustavus' entrenchments in front of Werben (Elbe), but Swedish batteries and the cavalry under Wolf Heinrich von Baudissin forced them to retreat. The attack was renewed a few days later with a similar result, and Tilly then drew off his forces, having suffered a loss of 6,000 men.
First Battle of Breitenfeld
The battle started in the middle of the day and lasted over six hours. The first two hours consisted of an exchange of artillery fire. This was followed by an imperial attack with cavalry from both wings to both ends of the Unionist line. The cavalry attack routed the Saxon troops on the Unionist left flank. The imperial army then conducted a general attack to exploit the exposed left flank. The Swedes repositioned their second line to cover the left flank and counterattacked with their cavalry to both imperial flanks. The attack on the imperial left was led personally by the Swedish King, Gustavus Adolphus.
It captured the imperial artillery and enveloped the imperial left flank. The Swedish now had much greater weight of fire from their artillery, infantry, and the captured imperial artillery. The imperial line became disorganized under the heavy fire and was enveloped. The imperial line collapsed and over 80% of the imperial forces were killed or captured. 120 standards of the Imperial and Bavarian armies were taken (and are still on display in the Riddarholm church in Stockholm); and Gustav's innovations in military operations and tactics were confirmed.
The combined Swedish-Saxon forces were to the north of Leipzig centered around hamlet of Podelwitz, facing southwest toward Breitenfeld and Leipzig. The battle began around mid-day, with a two-hour exchange of artillery fire, during which the Swedes demonstrated firepower in a rate of fire of three to five volleys to one Imperial volley. Gustavus had lightened his artillery park, and each colonel had four highly mobile, rapid firing, copper-cast three pounders, the cream of Sweden’s metallurgical industry. When the artillery fire ceased, Pappenheim's Black Cuirassiers charged without orders, attempting to turn the Swedish right. Instead, their attack fell between Johan Banér's line and the Swedish reserves.
They attacked with a caracole and were driven back, repeating the maneuver six more times to little effect. The small companies of musketeers dispersed between the squadrons of horse fired a salvo at point blank range, disrupting the charge of the Imperialist cuirassier and allowing the Swedish cavalry to counterattack at an advantage. The same tactics worked an hour or so later when the imperial cavalry charged the Swedish left flank. Following the rebuff of the seventh assault, General Banér sallied forth with both his light (Finnish and West Gaetlanders) and heavy cavalry (Smalanders and East Gaetlanders).
Banér’s cavalry had been taught to deliver its impact with the saber, not to caracole with the hard-to-aim pistols or carbines, forcing Pappenheim and his cavalry quit the field in disarray, retreating 15 miles northwest to Halle. During the charges of the Cuirassiers, Tilly's infantry had remained stationary, but then the cavalry on his right charged the Saxon cavalry and routed it towards Eilenburg. There may have been confusion in the imperial command at seeing Pappenheim’s charge; in their assessment of the battle, military historians have wondered if Pappenheim precipitated an attempted double envelopment, or if he followed Tilly’s preconceived plan.
At any rate, recognizing an opportunity, Tilly sent the majority of his infantry against the remaining Saxon forces in an oblique march diagonally across his front. Tilly ordered his infantry to march ahead diagonally to the right, concentrating his forces on the weaker Saxon flank. The entire Saxon force was routed, leaving the Swedish left flank exposed. Before the Imperial forces could regroup and change face towards the Swedes, the commander of the Swedish Left, Marshal Gustav Horn, refused his line and counter-attacked before the tercios could regroup and change face. With the Imperial forces engaged, the Swedish right and center pivoted on the refused angle, bringing them in line with Horn. Banér's cavalry, under the direct command of Gustavus Adolphus, attacked across the former front to strike the Imperial right and capture their artillery.
As Tilly's men came under fire from their own captured batteries, the Swedish cannon, under Lennart Torstensson, rotated, catching the tercios in a crossfire. After several hours of punishment, nearing sunset, the Catholic line finally broke. Tilly and Pappenheim were both wounded, though escaped. 7,600 Imperial soldiers were killed, and 6,000 were captured. The Saxon artillery was recaptured, along with all the Imperial guns and 120 regimental flags. After the battle, Gustav moved on Halle, following the same track that Tilly had taken coming east to enforce the Edict of Restitution on the Electorate of Saxony. Two days later Gustav's forces captured another 3,000 men after a brief skirmish at Merseburg, and took Halle two days after that.
Battle of Lützen
Morning mist delayed the Swedish army's advance, but by 9 am the rival armies were in sight of each other. Because of a complex network of waterways and further misty weather, it took until 11 am before the Protestant force was deployed and ready to launch its attack. Gustavus Adolphus rode his war-horse Streiff, a brown Oldenburg that he had purchased from a Colonel Johan Streiff von Lauenstein for the sum of 1000 riksdaler (the sum for a regular horse was about 70-80 riksdaler). Its saddle of gold embroiled red velvet was a gift from the King's wife, Maria Eleonora. Protecting the upper part of the King's body was a buff coat made of moosehide - his old musket wound to his shoulder blade making it impossible for him to wear heavy amour.
Initially, the battle went well for the Protestants, who managed to outflank Wallenstein's weak left wing. After a while, Pappenheim arrived with 2,000–3,000 cavalry and halted the Swedish assault. This made Wallenstein exclaim, "Thus I know my Pappenheim!". However, during the charge, Pappenheim was fatally wounded by a small-calibre Swedish cannonball. At the same time, Pappenheim's counterattack collapsed. He died later in the day while being evacuated from the field in a coach. The cavalry action on the open Imperial left wing continued, with both sides deploying reserves in an attempt to gain the upper hand. Soon afterwards, towards 1:00 pm, Gustavus Adolphus was himself killed while leading a cavalry charge on this wing. In the thick mix of gun smoke and fog covering the field, he was separated from his fellow riders and killed by several shots. A bullet crushed his left arm below the elbow. Almost simultaneously his horse suffered a shot to the neck that made it hard to control.
In the mix of fog and smoke from the burning town of Lützen the king rode astray behind enemy lines. There he sustained yet another shot in the back, was stabbed and fell from his horse. Lying on the ground, he received a final, fatal shot to the temple. His fate remained unknown for some time. However, when the gunnery paused and the smoke cleared, his horse was spotted between the two lines, Gustavus himself not on it and nowhere to be seen. His disappearance stopped the initiative of the hitherto successful Swedish right wing, while a search was conducted.
His partly stripped body was found an hour or two later, and was secretly evacuated from the field in a Swedish artillery wagon. Meanwhile, the veteran infantry of the Swedish center had continued to follow orders and tried to assault the strongly entrenched Imperial center and right wing.
Their attack was a catastrophic failure they were first decimated by Imperial artillery and infantry fire and then ridden over by Imperial cavalry charging from behind the cover of their own infantry. Two of the oldest and most experienced infantry units of the Swedish army, the 'Old Blue' Regiment and the Yellow or 'Court' Regiment were effectively wiped out in these assaults; remnants from them streamed to the rear. Soon most of the Swedish front line was in chaotic retreat.
The royal preacher, Jakob Fabricius, rallied a few Swedish officers around him and started to sing a psalm. This act had many of the soldiers halt in hundreds. The foresight of Swedish third-in-command 'Generalmajor' Dodo zu Innhausen und Knyphausen also helped staunch the rout: he had kept the Swedish second or reserve line well out of range of Imperial gunfire, and this allowed the broken Swedish front line to rally. By about 3 PM, the Protestant second-in-command Bernhard of Saxe-Weimar, having learned of the king's death, returned from the left wing and assumed command over the entire army.
He vowed to win the battle in retribution for Gustavus or die trying, but contrary to popular legend tried to keep the king's fate secret from the army as a whole. (Although rumors were circulating much earlier, it was only the following day that Bernhard collected his surviving officers together and told them the truth.) The result was a grim struggle, with terrible casualties on both sides. Finally, with dusk falling, the Swedes captured the linchpin of Wallenstein's position, the main Imperial artillery battery. The Imperial forces retired back out of its range, leaving the field to the Swedes. At about 6 pm, Pappenheim's infantry, about 3,000–4,000 strong, after marching all day towards the gunfire, arrived on the battlefield. Although night had fallen, they wished to counterattack the Swedes.
Wallenstein, however, believed the situation hopeless and instead ordered his army to withdraw to Leipzig under cover of the fresh infantry. The body of Gustav II Adolf was plundered of its clothes and gold jewelry and left on the battlefield dressed only in his shirts and long stockings. His buff coat was taken as a trophy to the emperor in Vienna. It was returned to Sweden in 1920, in recognition of relief efforts by the Swedish red cross during and after the First World War. The king's horse, Streiff, followed the procession with the king's body through northern Germany. When Streiff died at Wolgast in 1633, his hide was saved and sent to Stockholm and Sweden where it was mounted on a wooden model. "The Hero-king's war horse" would soon be displayed in the Royal Armory as a monument to the King.
Today Streiff is permanently displayed in the Royal Armory in Stockholm, Sweden. Strategically and tactically speaking, the Battle of Lützen was a Protestant victory. Having been forced to assault an entrenched position, Sweden lost about 6,000 men including badly wounded and deserters, many of whom may have drifted back to the ranks in the following weeks.
The Imperial army probably lost slightly fewer men than the Swedes on the field, but because of the loss of the battlefield and general theatre of operations to the Swedes, fewer of the wounded and stragglers were able to rejoin the ranks. The Swedish army achieved the main goals of its campaign. The Imperial onslaught on Saxony was halted, Wallenstein chose to withdraw from Saxony into Bohemia for the winter, and Saxony continued in its alliance with the Swedes. A more long-lasting consequence of the battle was the death of the Swedish king Gustavus Adolphus, leader of the Protestant forces. Without him to unify the German Protestants, their war effort lost direction. As a result, the Catholic Habsburgs were able to restore their balance and subsequently regain some of the losses Gustavus Adolphus had inflicted on them.
The Mures of Auchendraine who served in the Dutch Army
The Mures of Auchendraine also served in the Duke of Buceleuch regiment, which was under the command of Prince Maurice of Nassau; commander of the Dutch forces. The following battles the Mures of Auchendraine fought at includes:
The Battle of Axel
The Battle of 3rd Reinberg 1598
The Battle of 1st Bergen op Zoom, 1588
The Battle of Doetinchem
The Battle of Medemblik, 1588
The Battle of Rees 1599
The Battle of Geertruidenberg, 1589
The Battle of Nieuwpoort 1600
The Battle of 3rd Breda, 1590
The Battle of Ostend 1601
The Battle of 2nd Steenbergen 1590
The Siege of S-Hertogenbosch 1601
The Battle of 3rd Zutphen, 1591
The Siege of Sluis 1604
The Battle of Deventer 1591
The Battle of 2nd Oldenzaal 1605
The Battle of Huy 1595
The Battle of 2nd Lingen 1605
The Battle of 2nd Groenlo 1595
The Battle of Mulheim 1605
The Battle of 1st Halst 1596
The Battle of Wachtendock
The Battle of Turnhout 1597
The Battle of Krakau Castle
The Battle of 2nd Venlo 1597
The Battle of 2nd Bredevoot 1606
The Battle of 2nd Rheinberg 1597
The Battle of 4th Rheinberg 1606
The Battle of 1st Meurs 1597
The Battle of 4th Groenlo 1606
The Battle of 3rd Groenlo 1597
The Battle of 3rd Venlo 1606
The Battle of 1st Bredevoort 1597
The Battle of Julich 1621- 1622
The Battle of Enschede 1597
The Battle of 2nd Bergen op Zoom 1622
The Battle of Ootmarsum 1597
The Battle of 3rd Steenbergen 1622
The Battle of 1st Oldenzaal 1597
The Battle of 4th Breda 1624
The Battle of 1st Lingen 1597
The Battle of 2nd Meurs 1598
In March 1568, John Brown, a servant of Robert Stewart, feuar of Orkney, went to morning prayers in the cathedral. Afterwards, he apparently made for one of the turnpike stairs leading up to the triforium. The men of the bishop who were guarding the building warned Brown that they would shoot him if he did not leave. Brown went out in high dudgeon and returned with seven companions. They rushed into the cathedral and opened fire on the bishop's men, who were only five in number. Two of them, Nicol Alexander and James Moir, were killed; the others scampered upstairs and let themselves down the outside of the building on a rope, leaving Robert's men in possession of the building.
The British Empire
The Mure, Muir, Moore and the variant of spelling has played an enormous part of the British empire. They have help built and maintain the British empire throughout the centuries. The British empire started with the last Jacobite rising of the 1745-1746. In which brought Scotland and England into harmony and creating the most powerful and largest empire in history. From mainland Europe, to Africa, Pacific, Asia, North America and the Caribbean. The British will face two other empires in a struggle for dominance worldwide against the Spanish and the French empires. There was a Moore at the battle of Copenhagen.
Sir Graham Moore
Sir Graham Moore was an admiral in the British navy. Moore was born in Glasgow, Scotland, the son of Jean Simson and John Moore, doctor and author. He entered the Navy in 1777 at the age of 13. He was promoted to lieutenant on 8 March 1782 to serve aboard Crown, taking part in the relief of Gibraltar under Lord Howe, and the subsequent battle of Cape Spartel in October. During the peace he travelled through France, but was recalled to serve aboard Perseus, Dido, and then Adamant, the flagship of Sir Richard Hughes on the North American Station. On 22 November 1790 he was promoted to commander in the sloop Bonetta, before finally returning to England in 1793. Moore was promoted to post-captain on 2 April 1794, soon after the start of the Revolutionary War, with command of the 32-gun frigate Syren, in the North Sea and the coast of France.
He then commanded the 36-gun frigate Melampus from September 1795. In her he took part in the Battle of Tory Island on 12 October 1798, capturing the French frigate Résolue two days later. In February 1800 he went out to the West Indies, but was invalided home after eighteen months. On the renewal of the war in 1803 he was appointed to Indefatigable (44), and with three other frigates -- Medusa (32), Lively (38) and Amphion (32) -- under his command, captured a Spanish treasure fleet of four frigates -- Medea (40), Clara (34), Fama (34) and Mercedes (36) -- carrying bullion from the Caribbean back to Spain off Cadiz in the Action of 5 October 1804. Moore was then attached to Sir Robert Calder's squadron blockading Ferrol. In 1808, he served as commodore, flying his broad pennant in the new ship Marlborough assisting Admiral Sir Sidney Smith with the Portuguese royal family's escape to Brazil, and was subsequently made a Knight of the Order of the Tower and Sword. He later served as part of the North Sea fleet for several years.
At the close of the Walcheren campaign in December 1809, he was entrusted with destroying the basin, arsenal, and sea defenses of Flushing (Vlissingen). Moore commanded Chatham from March 1812, until promoted to rear-admiral on 12 August 1812, and served as Commander-in-Chief in the Baltic for a short time, flying his flag in HMS Fame. In 1814 he served as captain of the fleet to Lord Keith in the Channel, and became second-in command, Mediterranean Fleet in 1815. Following the end of the war he served on the Board of Admiralty between 1816 and 1820, being promoted to vice admiral on 12 August 1819. He was Commander-in-Chief, Mediterranean Fleet between 1820 and 1823,promoted to full admiral on 10 January 1837, and served as Commander-in-Chief, Plymouth from 1839 to 1842 flying his flag in Impregnable.
The Siege of Gibraltar
The combined Spanish and French fleets blockaded Gibraltar from the sea, while on the land side an enormous army constructed forts, redoubts, entrenchments, and batteries from which to attack. General Elliott formed a corps of sharpshooters. As the winter of 1779 came down the garrison began to suffer from want of fresh provisions, which became very scarce and dear. Bread was almost impossible to get, and was not permitted to be issued except to the sick and children. Salt meat and biscuits, and not much of that, soon became the food of the troops, with an occasional issue of four ounces of rice as a full day's ration. Fuel was exhausted, and fires were only made with difficulty, the salt-encrusted timbers of old ships broken up in the harbor for the purpose.
To the rigors of the siege was added a violent outbreak of scurvy among the troops, due to the want of fresh vegetables and medicines. As the winter wore on, the scanty store of food grew so alarmingly low that the already meagre ration was reduced to just enough to keep life in the bodies of the men. But their morale remained high and the troops continued to take their turns at trench or battery, and endured the inclement weather and the shortage of food with fortitude. The Spanish were forced to commit increasing number of troops and ships to the siege, postponing the planned Invasion of England, due to this and the cancellation of the Armada of 1779. Admiral George Rodney, after capturing a Spanish convoy off Cape Finisterre on 8 January 1780, and eight days later defeating a Spanish fleet at the Battle of Cape St. Vincent, reached Gibraltar in the spring of 1780, bringing reinforcements of 1,052 men and an abundance of supplies.
This greatly heartened the garrison, who, as soon as Rodney's fleet left, found the fortress as closely besieged as ever. The British defenders resisted every attempt to capture Gibraltar by assault. While the two sides unceasingly exchanged shot and shell, by the end of the summer provisions again began to be meagre and scurvy began to reappear, reducing the effective strength of the garrison. Through the use of small, fast-sailing ships that ran the blockade they were able to keep in touch with the British forces on Minorca until 1782, when that island fell. Throughout the second winter the garrison faced foes, elements, disease, and starvation, until in April 1781 another British fleet succeeded in reaching the harbor with stores and food. On 12 April 1781, Vice Admiral George Darby's squadron of 29 ships of the line escorting 100 store ships from England laden for Gibraltar entered the bay. The Spanish fleet was unable to intercept Darby's relief.
The Spanish, frustrated by this failure, opened up a terrific barrage while the stores were unloaded, but only did great damage to the town. The civilian population of Gibraltar sailed with Darby for England on 21 April, again without hindrance from the blockading Spanish and French fleet. The French and Spanish found it was impossible to starve the garrison out. They therefore resolved to make further attacks by land and sea and assembled a large army and fleet to carry this out. But on 27 November 1781, the night before they were to launch the grand attack, half the British garrison filed silently out of their defense works and made a surprise sortie. The sortie routed the whole body of the besieging infantry in the trenches, set their batteries on fire, blew up and spiked their cannon, destroyed their entrenchments, and killed or took prisoner a large number of the Spaniards.
The British did damage to the extent of two million pounds to the besiegers' stores and equipment that night. Spanish losses were over 200 and Governor Elliott claimed many were 'killed on the spot' because of the surprise. As the Spanish recovered and prepared to launch a counterattack, the British withdrew back inside their fortifications.
This reverse postponed the grand assault on Gibraltar for some time. Still, the Spaniards closely maintained the siege. A new depressing gun-carriage was devised by George Koehler which allowed guns to be fired down a slope. This was demonstrated on 15 February 1782 at Princess Royal's Battery. This new carriage enabled the defending guns to take advantage of the height of the Rock of Gibraltar. Eventually on 13 September 1782 the Bourbon allies launched their great attack; 5190 fighting men both French and Spanish aboard ten of the newly engineered 'floating batteries' with 138 heavy guns, as well as 18 ships of the line, 40 Spanish gunboats and 20 bomb-vessels with a total of 30,000 sailors and marines.
They were supported by 86 land guns and 35,000 Spanish and French troops (7,000–8,000 French) on land intending to assault the fortifications once they had been demolished. An 'army' of over 80,000 spectators thronged the adjacent hills over the Spanish border, among them the highest families in the land, assembled to see the fortress beaten to powder and 'the British flag trailed in the dust'. The 138 guns opened fire from floating batteries in the Bay and the 86 guns on the land side, directed on the fortifications after weeks of preparatory artillery fire. But the garrison replied with red-hot shot to set fire to and sink the attacker's floating batteries and warships in the Bay. In that great conflict, the British destroyed three of the floating batteries, which blew up as the 'red-hot shot' did its job. The other seven batteries were scuttled by the Spanish because they were too heavily damaged to continue the fight. In addition 719 men on board the ships (many of whom drowned) were casualties.
On 10 October a Spanish ship of the line San Miguel of seventy two guns under the command of Don Juan Moreno was captured by the garrison after it had lost its mizzen mast in a storm. Cannon fire from the King's Bastion was fired at the vessel some of which penetrated causing damage and casualties. The San Miguel then trying with great difficulty to get out of danger was grounded. Gunboats from the garrison quickly captured her being too close to the guns of Gibraltar. Moreno agreed to surrender to avoid any further bloodshed, and a total of 634 Spanish sailors, marines and dismounted dragoons were captured.
An attempt on 17 December to bombard the San Miguel by the Spanish and French with mortars failed causing only minimal damage. By this time the powder magazine had been removed or thrown overboard. In Britain the Admiralty considered plans for a major relief of Gibraltar, opting to send a larger, but slower fleet, rather than a smaller faster one. In September 1782 a large fleet left Spithead under Richard Howe, arriving off Cape St Vincent on 9 October. The following evening a gale blew up, scattering the Spanish and French fleet. This allowed Howe to sail unopposed into Gibraltar.
A total of 34 ships of the line escorted 31 transport ships which delivered supplies, food, and ammunition. The fleet also brought the 25th, 59th, and 97th regiments of foot bringing the total number of the garrison to over 7,000. Howe then sailed out and fought an indecisive battle with the combined allied fleet before withdrawing to Britain in line with his orders. The siege was continued for some months longer, but in the spring of 1783 a preliminary peace agreement brought the cessation of hostilities. Finally, in February 1783 the siege was lifted. The French and Spanish troops retired disheartened and defeated, after three years and seven months' conflict. Although the Spanish attempted to regain Gibraltar at the negotiating table, they preferred to retain Minorca and territories in the West Indies, and the final peace treaty left Gibraltar with the British. The victorious British garrison sustained a loss of 1,231 men, and expended 8,000 barrels of gunpowder.
George Augustus Elliott was made a Knight of the Bath and was created 1st Baron Heathfield of Gibraltar. The Treaties of Versailles reaffirmed previous treaties. Many British regiments engaged in the defense were given the badge of the Castle of Gibraltar with the motto 'Montis Insignia Calpe', in commemoration of the gallant part it took in the 'Great Siege'.
Battle of Cape Santa Maria
At dawn on 5 October, the Spanish frigates sighted the coast of Portugal. At 7 a.m. they sighted the four British frigates. Bustamante ordered his ships into line of battle, and within an hour the British came up in line, to windward of the Spaniards and "within pistol-shot". Moore, the British Commodore, sent Lieutenant A Scott to the Spanish flagship Medea, to explain his orders. Bustamante naturally refused to surrender, and impatient of delays, at 10 a.m. Moore ordered a shot be fired ahead over the bows of Medea.
Almost immediately a general exchange of fire broke out. Within ten minutes the magazine of the Mercedes exploded destroying the ship, and killing all but 40 of her 240 crew. Within half an hour the Santa Clara and the Medea had surrendered, and the Fama broke away and trying to flee, the Medusa quickly followed.
However, Moore ordered the faster Lively to pursue, capturing the Fama a few hours later. The three frigates were taken to Gibraltar, and then to Gosport, England. Spain declared war on Great Britain on 14 December 1804, only to suffer a catastrophic defeat less than a year later at the Battle of Trafalgar in October 1805.
Napoleon, having crowned himself Emperor on 2 December, gained Spain as an ally in his war against Britain. In practical terms, the British interception of the four Real Armada frigates represented the end of an era for Bourbon Spain and regular specie shipments from the Spanish Empire's New World mines and mints. The squadron to which Mercedes belonged was the last of its kind that the world would see: a Spanish treasure fleet moving bullion from the New World Viceroyalties to the Iberian kingdoms.
Under the terms of the Cruisers and Convoys Act of 1708 ships captured at sea were "Droits of the Crown" and became the property of their captors, who received the full value of the ships and cargo in prize money. However, since technically Britain and Spain were not at war at the time of the action, the Admiralty Court ruled that the three ships were "Droits of the Admiralty", and all revenues would revert to them. The four Spanish ships carried a total of 4,286,508 Spanish dollars in silver and gold coin, as well as 150,000 gold ingots, 75 sacks of wool, 1,666 bars of tin, 571 pigs of copper, seal skins and oil, although 1.2 million in silver, half the copper and a quarter of the tin went down with the Mercedes. Still, the remaining ships and cargo were assessed at a value of £900,000 (equivalent to £69,103,000 today.). After much legal argument an ex gratia payment was made amounting to £160,000, of which the four Captains would have received £15,000 each (around £1,152,000 at present day values.).
The Medea was taken into the Royal Navy as HMS Iphigenia (later renamed HMS Imperieuse), Santa Clara as HMS Leocadia and the Fama as HMS Fama. In March 2007 the Florida-based company Odyssey Marine Exploration recovered 17 tons of gold and silver from the Mercedes, insisting that it had been found in international waters and therefore beyond the legal jurisdiction of any one country. The Spanish government branded the Odyssey team "21st century pirates" and in May 2007 launched legal proceedings arguing that the wreck was protected by "sovereign immunity" which prohibits the unauthorized disturbance or commercial exploitation of state-owned naval vessels.
In June 2009 the Federal Court in Tampa found against Odyssey and ordered the treasure to be returned to Spain as has been done on 25 February 2012. Order of battle: Spain Medea 40 gun frigate, Flagship carrying Admiral Bustamante, commanded by Capitán Francisco de Piedrola y Verdugo, Fama 34 gun frigate, Capitán Miguel Zapiain y Valladares, Mercedes 36 gun frigate, Capitán Jose Manuel De Goicoa y Labart, Santa Clara 34 gun frigate, Capitán Aleson y Bueno, for Britain: HMS Indefatigable, 44 gun frigate, Flagship, Commodore Graham Moore, HMS Lively 38 gun frigate, Captain Graham Eden Hamond, HMS Amphion 32 gun frigate, Captain Samuel Sutton, and HMS Medusa 38 gun frigate, Captain John Gore.
Sir John Moore
Sir John Moore was the brother of Sir Graham Moore. While Graham Moore served in the British navy; John Moore went on joining the British army in which he will become one of Britain's best field commanders in history. John Moore will be involved in six wars total from the American Revolutionary war, French revolutionary wars, Irish rebellion of 1798, Anglo-Russian invasion of Holland, French campaign in Egypt and Syria and the Peninsular war. He fought in many engagements such as the Penobscot expedition, Siege of Calvi, Battle of Foulksmills, Battles of Callantsoog, Krabbendam, Alkmaar, Aburkir, Alexandria, and the Battle of Corunna. Sir John Moore has won all nine battles.
Battle of Foulksmills
Moore's force was to link up and combine with the isolated garrison holding Duncannon before moving deeper into County Wexford, but after waiting several hours with no sign of their arrival, Moore decided to press ahead to the village of Taghmon alone. Upon nearing Goffs Bridge at Foulkesmill, his scouts reported a rapidly moving rebel force of some 5,000 moving quickly along the road with the intent to give battle. Moore dispatched a force of riflemen from the 60th Regiment to hold the bridge until artillery could be brought up in support. The rebels however, led by Fr. Phillip Roche, spotted this move and moved away from the road to the high ground on the left intending to outflank Moore's force. The 60th were forced to engage the rebels on the roads, fields and forests of the area and the rebel flanking move briefly threatened to overturn Moore's left.
Moore had to personally rally his fleeing troops to hold the line and led them in successful counter-attack. As more troops began to arrive the rebels were flushed out of their concealed positions, allowing the artillery to be brought into play and the rebels' move was foiled. The rebels were gradually pushed back field by field but were able to withdraw the bulk of their force safely. The road to Wexford was opened and the town recaptured by the Crown next day but during this battle, followers of rebel captain Thomas Dixon massacred between 35-100 (estimates vary) loyalist prisoners at Wexford bridge. Casualties are estimated at 500 on the rebel side and 100 of the military.
Battle of Callantsoog
Major-General Moore was in charge of the 4th Brigade with the 2/1st Royals, 25th, 49th Foot, 79th and 92nd Highlanders. At 3 AM on the morning of August 23, the British vanguard under Gen. Pulteney embarked in the boats of the British invasion fleet. There were not enough boats to accommodate all troops at once, so the landing had to be performed in stages. These 2500 men of the 3rd Brigade and Reserve landed without mishap; the first to put foot ashore was Lt. Macdonald of the Grenadier company of the 25th. The fleet had meanwhile swept the beach clear with a vigorous cannonade that displaced a lot of sand, but did no damage to the defenders as those were positioned behind the first row of dunes. The British had landed at the location that was locally known as Kleine Keeten (after a cluster of sheds, Dutch: Keten; further to the south existed a similar cluster, known as Groote Keeten).
On top of the dune near this location stood a semaphore station (Dutch: Telegraaf), which, as the nearest "strategic object", was immediately attacked by the British. The Batavian jagers tried to prevent its capture but were driven back on Kleine Keeten, as had been anticipated since they were just a skirmishing line. However, the inexperienced Line battalion that stood in reserve at this location, instead of letting the jagers into their line in an orderly fashion, panicked and were routed; their commander, Lt.Col. Luck, died in action during this melee. Another Batavian battalion, the 2nd of the 5th Demi-brigade counter-attacked with the bayonet, but the British numerical superiority was too great and this battalion was also driven back, again with the loss of its commander, Lt.Col. Herbig.
Gen. Guericke then decided to intervene on his own initiative and marched south from his command on the Batavian right wing with the 2nd battalion of the 7th Demi-brigade (2/VII) and two squadrons of cavalry and horse artillery, on the way rallying the 2/5th. Unfortunately, he deployed in the swamp area of the Koegras, behind the canal bordering the Zanddijk. This effectively cut him off from communications with not only his own command, but also the divisional command on the Batavian right wing. As a consequence, not only was his intervention ineffective (the canal was too much of an obstacle to attack the British around the semaphore), but also the remainder of the 7th Demi-brigade under Col. Gilquin (that was supposed to attack the British left flank) remained motionless during the entire battle for lack of orders to proceed.
All Batavian activity during the main phase of the battle was therefore on the British right flank, by the Batavian left wing. Here Daendels deployed his forces in three lines, as the front was too narrow to deploy more than two battalions in line at a time. He first had Col. Crass attack with the 1st and 3rd battalions of the 5th Demi-brigade, supported by cavalry and two pieces of horse artillery under Capt. d'Anguerand. He was opposed by the British 3rd Brigade (now under command of Gen. Coote, as Gen. Pulteney had received a wound in the arm and been forced to leave the field). The British had only enough room to deploy one battalion in line and there was a threat that they would be outflanked near Groote Keeten, where the main action was fought.
However, the Batavians were severely hampered by the terrain. The horses sometimes sank to their bellies into the dune sand and the artillery was constantly immobilized by the loose sand. Besides, the British gunboats were able to get very close to the beach and supported the British infantry vigorously, whenever they got sight of the enemy though gaps in the dunes. This British naval gunfire wrought havoc on the Batavian troops. While Col. Crass's troops were mauled by the British and slowly being driven back, Daendels piecemeal fed reinforcements into the battle. Elements of the 1st, 3rd and 6th Demi-brigades were so used up without much positive effect.
Meanwhile, the British disembarkation progressed almost without mishap; only one boat overturned, though with the loss of its crew of 20 drowned.) The British numerical superiority on their right wing kept growing, while they were able to bring up field artillery through the loose sand, manhandled by British seamen. Around 6 PM Daendels saw the futility of further fighting and withdrew to his starting position; the British did not pursue. Daendels was joined there by Guericke with his detachment.
This left only the troops of Col. Gilquin north of the British position near the batteries at Den Helder. Daendels decided to withdraw these troops also, as they were too few in number to withstand an assault by the far-superior British forces. Besides, the Helder batteries of course had their guns trained to seaward, and they therefore could not defend against an attack from the land side. (In the opinion of Admiral Story, they would have been unable to prevent an advance of the British fleet through the Marsdiep, anyway.) After spiking the 86 guns in the batteries, these Batavian troops left Den Helder by a roundabout route through the Koegras and arrived safely at the Batavian main force.
The consequence was that the roadstead of Nieuwe Diep fell into British hands without a fight, providing the British and Russian invasion forces in later phases of the invasion with a more convenient disembarkation location. Also, a number of inactive Batavian ships of the line were an easy prey for the British, as were the contents of the naval arsenal in Den Helder. The squadron of Admiral Story was forced to move away to the roadstead of De Vlieter further east. The British losses during the battle were 74 killed (including the 20 men that drowned), 376 wounded, and 20 missing. Among the dead were only three officers, but two of them were field officers: Lt.Cols. Hay, RE, and Smollett, 1st Foot.
The Dutch lost 137 dead and 950 wounded. On the night of the battle Daendels fell back on the nearby Zijpe polder where he occupied a defensive line. In the next few days he withdrew even further south, as he feared another amphibious landing near Petten in his rear, that would have placed him between two British forces. Such a landing would have exposed Alkmaar and points South to an easy British advance, too.
At first he seems to have considered retreating all the way to the line Purmerend-Monnikendam, but in the event he took up a defensive position in the Schermer polder near Alkmaar. Later historians have held this retreat against him (as they did the abandonment of the "fortress" of Den Helder). General Krayenhoff points out, however, that the abandonment of Den Helder, though deplorable in its effects, was probably unavoidable. The formidable fortress of Kijkduin, that Napoleon Bonaparte had built after 1810, and that was so tenaciously defended against the Dutch by Admiral Carel Hendrik Ver Huell in 1814, did not exist as yet.
Daendels's abandonment of the Zijpe seems more questionable, but only because the British in the event did not perform the obvious landing at Petten, of which they should have been fully capable. An important consideration was also, that the Batavians had exhausted their ammunition during the battle. They were for the moment unable to engage in a new battle for that reason. While Daendels arrived in his new position near Alkmaar on August 30, dramatic developments took place on the Batavian fleet. The crews and some officers mutinied during the notorious Vlieter Incident of that day, and the squadron of Admiral Story ignominiously surrendered to Admiral Mitchell without firing a shot.
Battle of Alexandria
The British position on the night of 20 March extended across the isthmus, the right wing resting upon the ruins of Nicopolis and the sea, the left on the lake of Abukir and the Alexandria canal. The line faced generally south-west towards the city, the reserve division under Major-General Sir John Moore on the right, the Foot Guards brigade in the center, and three other brigades on the left. In the second line were two infantry brigades and the cavalry (dismounted). On 21 March, the troops were under arms at 3 a.m., and at 3:30 a.m. the French attacked and drove in the outposts. The French army now moved forward with great rapidity in their usual formation of columns.
The brunt of the attack fell upon Moore's command, and in particular upon the 28th (North Gloucestershire) Regiment of Foot. The British repulsed the first shock but a French column penetrated in the dark between two British regiments. A confused fight ensued in the ruins, in which the 42nd Black Watch captured a color. The front and rear ranks of the 28th were simultaneously engaged, whereby the soldiers received the order "Front rank stay as you are, rear rank about turn" and the conduct of the regiment won for it the distinction of wearing badges both at the front and at the back of their head-dress. Other regiments that assisted in the overthrow of the French column were the 23rd, 40th and 58th. In a second attack the enemy's cavalry inflicted severe losses on the 42nd. Sir Ralph Abercrombie was here engaged in personal conflict with some French dragoons, and about this time received a mortal wound, though he remained on the field and in command to the end.
The attack on the center was repulsed by the cool and steady fire of the Guards, and the left wing maintained its position with ease, but the French cavalry for the second time came to close quarters with the reserve. About half-past eight the combat began to wane, and the last shots were fired at ten. The real attack had been pressed home on the British right, and the History of the Queen's Royal West Surrey Regiment gives no undue praise to the regiments of the reserve in saying that "the determined attack would have been successful against almost any other troops." Technically, the details of the action show that, while not markedly better in a melee than the war-seasoned French, the British infantry had in its volleys a power that no other troops then existing possessed, and it was these volleys that decided the day even more than the individual stubbornness of the men. The 42nd, twice charged by cavalry, had but 13 men wounded by the sabre.
Part of the French losses were caused by the gunboats which lay close inshore and cannonaded the left flank of the French columns, and by a heavy naval gun which was placed in battery near the position of 28 March. The forces engaged on this day were approximately 14,000 British to about 20,000 French. Losses for the British were, 1468 killed, wounded and missing, including Abercrombie (who died on 28 March), Moore and three other generals wounded. The French on the other hand had 1160 killed and (?) 3000 wounded. The British advanced upon Alexandria and laid siege to it. The French garrison surrendered on 2 September 1801.
the Battle of Corunna
As day broke on 16 January the French were in position on the heights, and all through the morning both armies observed each across the valley between them. Moore planned to continue with the embarkation later that day if Soult did not attack. By afternoon Moore considered an attack unlikely and ordered the first divisions to make their way to the port; the rest of the army would follow at dusk, but shortly afterwards, at 2:00 pm, he learned that the French were attacking. Soult's plan was to move against the strongly placed British infantry of the left and center in order to contain it while the infantry division of Mermet attacked the more vulnerable British right above the village of Elvina. The cavalry was deployed further west near the more open country leading to Corunna. If the attacks succeeded they could seize the western end of the British lines and push on to cut off the bulk of the army from Corunna.
Mermet’s infantry advanced quickly and soon pushed the British parquets back, carrying the town of Elvina and attacking the heights beyond. The first French column divided into two with Gaulois' and Jardon's brigades attacking Baird front and flank, and the third French brigade pushing up the valley on the British right in an attempt to turn their flank with Lahoussaye's dragoons moving with difficulty over the broken ground and walls trying to cover the left of the French advance. The fiercest fighting took place in and around Elvina as the possession of this village would change hands several times, and the British suffered particularly from the fire of the heavy artillery on the heights opposite. As the French attack broke through Elvina and came up the hill behind it, Moore sent in the 50th Foot and the 42nd (Black Watch) to stop the French infantry while the 4th Foot held the left flank of the British line.
The ground around the village was broken up by numerous stone walls and hollow roads. Moore remained in this area to direct the battle, ordering the 4th Foot to fire down upon the flank of the second French column that was attempting the turning movement and calling up the reserve under Paget to meet it. The British advance carried beyond the village but some confusion among the British allowed Mermet's reserves to drive into and through Elvina again chasing the 50th and 42nd back up the slope.
Moore called up his divisional reserve, some 800 men from two battalions of the Guards, and together with the 42nd they halted the French advance. The British commander had just rallied the 42nd that had fallen back from Elvina and had ordered the Guards to advance on the village when he was struck by a cannonball. He fell mortally wounded, struck "on the left shoulder, carrying it away with part of the collar-bone, and leaving the arm hanging only by the flesh and muscles above the armpit". He remained conscious, and composed, throughout the several hours of his dying. The second advance again drove the French back through Elvina. Mermet now threw in his last reserves with one of Merle's brigade attacking the east side of the village. This was countered by an advance by Manningham's brigade and a long fire-fight broke out between two British: the 3/1st and the 2/81st and two French regiments: the 2nd Légere and 36th Ligne of Reynaud's brigade.
The 81st was forced out of the fight and relieved by the 2/59th and the fighting petered out here late in the day with the French finally retiring. For a time the British were without a leader until General John Hope took command as Baird was also seriously wounded. This hampered attempts at a counterattack in the crucial sector of Elvina, but the fighting continued unabated. Further west the French cavalry pushed forward as part of the flank attack and made a few charges but they were impeded by the rough terrain. Lahoussaye dismounted some his Dragoons which fought as skirmishers but they were eventually driven back by the advance of the 95th Rifles, 28th Foot and 91st Foot of the British reserves. Franceschi's cavalry moved to flank the extreme right of the British attempting to cut them off at the gates of Corunna but were countered again by the terrain and Fraser's division drawn up on the Santa Margarita ridge which covered the neck of the peninsula and the gates.
As Lahoussaye retired, Franceschi conformed with his movement. Night brought an end to the fighting by which time the French attacks had been repulsed and they returned to their original positions; both sides holding much the same ground as before the fight. Command of the British army had passed to General Hope who decided to continue the embarkation rather than to attempt to hold their ground or attack Soult. At around 9:00 pm the British began to silently withdraw from their lines, leaving behind strong picquets who maintained watch-fires throughout the night.
At daybreak on 17 January the picquets were withdrawn behind the rearguard and went aboard ship; by morning most of the army had embarked. When Soult perceived that the British had left the ridge, he posted six guns on the heights above the southern end of the bay and by midday the French were able to fire upon the outlying ships. This caused panic amongst some of the transports, four of which ran aground and were then burned to prevent their capture.
Fire from the warships then silenced the battery. On 18 January, the British rearguard embarked as the Spanish garrison under General Alcedo "faithfully" held the citadel until the fleet was well out to sea before surrendering. The city of Corunna was taken by the French, two Spanish regiments surrendering along with 500 horses and considerable military stores captured including numerous cannon, 20,000 muskets, hundreds of thousands of cartridges and tons of gunpowder.
A week later Soult's forces captured Ferrol, an even greater arsenal and a major Spanish naval base across the bay, taking eight ships of the line, three with 112 guns, two with 80, one 74, two 64s, three frigates and numerous corvettes, as well as a large arsenal with over 1,000 cannon, 20,000 new muskets from England and military stores of all kinds. As a result of the battle the British suffered around 900 men dead or wounded and had killed all their nearly 2,000 cavalry horses and as many as 4,000 more horses of the artillery and train.
The French lost around 1,000 men killed, wounded or captured. The most notable casualty was the British commander Sir John Moore, who survived long enough to learn of his success. Sir David Baird, Moore's second in command, was seriously wounded earlier in the battle and had to retire from the field. In addition two of Mermet's three brigadiers were also casualties: Gaulois was shot dead and Lefebvre badly hurt. These men were all involved in the fighting on the British right. On the morning of the battle 4,035 British were listed sick, a few hundred of these were too sick to embark and were left behind.
Two more transports were lost with about 300 troops mostly from the King's German Legion. By the time the army returned to England four days later some 6,000 were ill, with the sick returns listed at Portsmouth and Plymouth alone as 5,000. Within ten days the French had captured two fortresses containing an immense amount of military materiel which, with more resolution, could have been defended against the French for many months.
Ney and his corps reinforced with two cavalry regiments took on the task of occupying Galicia. Soult was able to refit his corps, which had been on the march and fighting since 9 November, with the captured stores so that, with half a million cartridges and 3,000 artillery rounds carried on mules (the roads not being suitable for wheeled transport), and with his stragglers now closed up on the main body, he was able to begin his march on Portugal on 1 February with a strength of 19,000 infantry, 4,000 cavalry and 58 guns.
The Burial of Sir John Moore after Corunna
(1817) By Charles Wolfe
Not a drum was heard, not a funeral note,
As his corse to the rampart we hurried;
Not a soldier discharged his farewell shot
O’er the grave where our hero we buried.
We buried him darkly at dead of night,
The sods with our bayonets turning;
By the struggling moonbeam’s misty light
And the lantern dimly burning.
No useless coffin enclosed his breast,
Nor in sheet nor in shroud we wound him,
But he lay like a warrior taking his rest
With his martial cloak around him.
Few and short were the prayers we said,
And we spoke not a word of sorrow;
But we steadfastly gazed on the face that was dead,
And we bitterly thought of the morrow.
We thought, as we hollowed his narrow bed
And smoothed down his lonely pillow,
That the foe and the stranger would tread o’er his head,
And we far away on the billow!
Lightly they’ll talk of the spirit that’s gone
And o’er his cold ashes upbraid him,
But little he’ll reck, if they let him sleep on
In the grave where a Briton has laid him.
But half of our heavy task was done
When the clock struck the hour for retiring;
And we heard the distant and random gun
That the foe was sullenly firing.
Slowly and sadly we laid him down,
From the field of his fame fresh and gory;
We carved not a line, and we raised not a stone,
But left him alone with his glory.
Battle of Waterloo
At this battle many Mores, Moores and the variant spelling of this name fought at Waterloo. In the 2nd Regiment of Life Guard was James Moore, 2nd Royal worth British Dragoons were Andrew, and John Muir, Robert Muirhead, the 6th Inniskilling Dragoons were Samuel, and William Moore, John Moorhead, in the 17th (prince of Wales) regiment of Light dragoons were John and Thomas Moore, the 15th king's regiment of light Dragoons were James Morey, the 18th regiment of light dragoons was Thomas Moore, the 23rd regiment of light Dragoons was Michael, and Samuel Moore, the 10th regiment of light dragoons were Matthew Moorefoot and Robert Muirhead, the 11th regiment of light Dragoons were Edward and William Moore, the 13th regiment light Dragoons was William S. Moore, and in the 16th Queen's regiment of light Dragoons were George, James, John and William ( who lost his leg) Moore.
There was also a Benjamin Moir who stood beside Sir John Moore at the battle. On the 18th of June, 1815, the armies of Napoleon and Field Marshall the Duke of Wellington met near Waterloo (in present day Belgium). The ensuing battle came to be a defining moment in European history, and the end of Napoleon’s reign as Emperor of the French. Waterloo was the battle that brought the War of the Seventh Coalition to a close. It was fought between war-hardened French troops – mostly volunteers loyal to Napoleon – and a coalition of armies that comprised the British, Dutch, Hanoverians, Prussians (commanded by Gebhard Leberecht von Blücher) as well as troops from Nassau and Brunswick.
Although Napoleon’s soldiers were outnumbered by the Coalition (73,000 facing 118,000), they were all veterans of at least one campaign, while Wellington’s troops were, in his own words, ‘very weak and ill-equipped’, with the majority of Britain’s experienced troops already having been sent to the United States to fight the War of 1812. Wellington’s cavalry was similarly inexperienced, with a severe shortage of heavy cavalry to call upon. In addition, Blücher’s 40,000 Prussian troops had been routed by Napoleon’s army two days previously, and so would not march into battle until the early evening, prompting Wellington to portentously say that ‘night or the Prussians must come’. Come the Prussians did, however, and by 8.30 that evening the French were defeated after a battle that Wellington would describe as ‘the nearest run things you ever saw in your life’. 44,000 men and 12,000 horses had been killed or wounded. Napoleon surrendered almost a month later, aboard the HMS Bellerophon on July 15th.
The Africa War
The British fought mostly in South Africa, even thou they annex some lands in the Northern part of Africa. They have fought against the Zulu empire and the Boers. Among them was a privates A. Moir, G. Moir, and R. Moir of the Gordon Highlanders; in which they were killed in the South Africa war. Another clansmen was Capt. James Philip Moir who served in the Nile Expedition in 1898 at the battle of Atbara. During the South Africa war in 1899-1902, which includes the battles of Belmont, Modder releif of Kimberly, paardeberg, Johannesburg, Diamond Hill, and also fought in Belfast, Ireland. There was also a Maurice George Moore of the Connaught Rangers Regiment that fought in the Xhosa, Zulu and the second Boer wars. In the Boer war, he fought at Ladysmith, Colenso, Spion Kop and Vaal Krantz.
There were also Captain Waldo Alington Gwennap Moore during the South Africa war of the Welsh regiment. The engagements he fought at was Driefontein, Vet and Zand rivers, Diamond Hill, Colesberg and also in Belfast, Ireland.
The Zulu War
The Zulu war was fought from January 11 to July 4 1879. The Zulu army put up a tough fight against the British. There were Moores who fought at Isandlwana and Gingindlovu. There were probably more of our clansmen who fought in this war.
The Battle of Isandlwana
The Zulu Army was commanded by in Dunas (Princes) Ntshingwayo kaMahole Khoza and Mavumengwana kaNdlela Ntuli. The inDuna Dabulamanzi kaMpande, half brother of Cetshwayo, would command the Undi Corps after kaMapitha, the regular inkhosi, or commander, was wounded. While Chelmsford was in the field seeking them, the entire Zulu army had outmanoeuvred him, moving behind his force with the intention of attacking the British Army on the 23rd. Pulleine had received reports of large forces of Zulus throughout the morning of the 22nd from 8:00am on. Vedettes had observed Zulus on the hills to the left front, and Lt. Chard, while he was at the camp, observed a large force of several thousand Zulu moving to the British left around the hill of Isandlwana.
Pulleine sent word to Chelmsford, which was received by the General between 9:00am and 10:00am. The main Zulu force was discovered at around 11:00am by men of Lt. Charles Raw's troop of scouts, who chased a number of Zulus into a valley, only then seeing most of the 20,000 men of the main enemy force sitting in total quiet. This valley has generally been thought to be the Ngwebeni some 7 miles (11 km) from the British camp but may have been closer in the area of the spurs of Nqutu hill. Having been discovered, the Zulu force leapt to the offensive. Raw's men began a fighting retreat back to the camp and a messenger was sent to warn Pulleine. The Zulu attack then developed in the traditional horns and chest of the buffalo, with the aim of encircling the British position.
From Pulleine's vantage point in the camp, at first only the right horn and then the chest (center) of the attack seemed to be developing. Pulleine sent out first one, then all six companies of the 24th Foot into an extended firing line, with the aim of meeting the Zulu attack head on and checking it with firepower. Durnford's men, upon meeting elements of the Zulu center, had retreated to a donga, a dried out watercourse, on the British right flank where they formed a defensive line. The Rocket Battery under Durnford's command, which was not mounted and dropped behind the rest of the force, was isolated and overrun very early in the engagement. The two battalions of native troops were in Durnford's line; while all the officers and NCOs carried rifles, only one in 10 in the ranks was armed with a muzzle-loading musket with limited ammunition and many of them started to leave the battlefield at this point.
Pulleine only made one change to the original disposition after about 20 minutes of firing, bringing in the companies in the firing line slightly closer to the camp. For an hour or so until after noon, the disciplined British volleys pinned down the Zulu center, inflicting some casualties and causing the advance to stall. Indeed, morale remained high within the British line. The Martini–Henry rifle was a powerful weapon and the men were experienced. Additionally, the shell fire of the Royal Artillery forced some Zulu regiments to take cover behind the reverse slope of a hill. Nevertheless, the left horn of the Zulu advance was moving to outflank and envelop the British right. Durnford's men, who had been fighting the longest, began to withdraw and their rate of fire diminished. Durnford's withdrawal exposed the right flank of the British regulars, which, with the general threat of the Zulu encirclement, caused Pulleine to order a withdrawal back to the camp.
The regulars' retreat was performed with order and discipline and the men of the 24th conducted a fighting withdrawal into the camp. Durnford's retreat, however, exposed the flank of G Company, 2nd/24th, which was overrun relatively quickly. An officer in advance from Chelmsford's force gave this eyewitness account of the final stage of the battle at about 3:00pm. "In a few seconds we distinctly saw the guns fired again, one after the other, sharp. This was done several times - a pause, and then a flash – flash! The sun was shining on the camp at the time, and then the camp looked dark, just as if a shadow was passing over it. The guns did not fire after that, and in a few minutes all the tents had disappeared." Nearly the same moment is described in a Zulu warrior's account. "The sun turned black in the middle of the battle; we could still see it over us, or should have thought we had been fighting till evening.
Then we got into the camp, and there was a great deal of smoke and firing. Afterwards the sun came out bright again." The time of the solar eclipse on that day is calculated as 2:29pm. The presence of large numbers of bodies grouped together suggests the resistance was more protracted than originally thought, and a number of desperate last stands were made. Evidence shows that many of the bodies, today marked by cairns, were found in several large groups around the camp -- including one stand of around 150 men.
A Zulu account describes a group of the 24th forming a square on the neck of Isandlwana. Colonial cavalry, the NMP and the carabineers, who could easily have fled as they had horses, died around Durnford in his last stand, while nearby their horses were found dead on their picket rope. What is clear is that the slaughter was complete in the area around the camp and back to Natal along the Fugitive's Drift. The fighting had been hand-to-hand combat and no quarter was given to the British regulars. The Zulus had been commanded to ignore the civilians in black coats and this meant that some officers, whose patrol dress was dark blue and black at the time, were spared and escaped. The British fought back-to-back with bayonet and rifle butt when their ammunition had finally been expended.
A Zulu account relates the single-handed fight by the guard of Chelmsford's tent, a big Irishman of the 24th who kept the Zulus back with his bayonet until he was speared and the general's Union flag captured. Both the colors of the 2/24th were lost, while the Queen's color of the 1/24th was carried off the field by Lieutenant Melvill on horseback but lost when he crossed the river, despite Lieutenant Coghill coming to his aid. Both Melvill and Coghill were killed after crossing the river, and would receive posthumous Victoria Crosses in 1907 as the legend of their gallantry grew, and, after twenty seven years of steady campaigning by the late Mrs. Melvill (who had died in 1906), on the strength of Queen Victoria being quoted as saying that 'if they had survived they would have been awarded the Victoria Cross'. Garnet Wolseley, who would replace Chelmsford, felt otherwise at the time and stated, "I don't like the idea of officers escaping on horseback when their men on foot are being killed."
Of the 1,700-plus force of British troops and African auxiliaries, about 1,300 were killed, most of them Europeans, including field commanders Pulleine and Durnford. Only five Imperial officers survived, and the 52 officers lost was the most lost by any British battalion up to that time. Amongst those killed was Surgeon Major Peter Shepherd, a first-aid pioneer. The Natal Native Contingent lost some 400 men, and there were 240 lost from the group of 249 amaChunu African auxiliaries.
Perhaps the last to die was Gabangaye, the portly chief of the amaChunu Natal Native Contingent, who was given over to be killed by the udibi boys. The captured Natal Native Contingent soldiers were regarded as traitors by the Zulu and executed. There was no casualty count of the Zulu losses by the British such as made in many of the other battles since they abandoned the field. Nor was there any count by the Zulu. Modern historians have rejected and reduced the older unfounded estimates.
Historians Lock and Quantrill estimate the Zulu casualties as "... perhaps between 1,500 and 2,000 dead. Historian Ian Knight stated: "Zulu casualties were almost as heavy. Although it is impossible to say with certainty, at least 1,000 were killed outright in the assault..." Some 1,000 Martini-Henry rifles, the two field artillery guns, 400,000 rounds of ammunition, three colours, most of the 2,000 draft animals and 130 wagons, provisions such as tinned food, biscuits, beer, overcoats, tents and other supplies, were taken by the Zulu or left abandoned on the field. Of the survivors, most were from the auxiliaries.
The Battle of Gingindlovu
At daybreak on 2 April 1879, the morning sun revealed a muddy and sodden ground and a heavy mist. Chelmsford could not move his wagons until the ground dried out, and so sent out the Natal Native Contingent to provoke the Zulus into an attack while he held a strong position. Once the mist lifted, the left horn of the impi was seen advancing eastwards over the river towards the British laager before disappearing into tall grass. A long burst of fire from one of the Gatling guns saw the warriors disappear into the long grass. When the left horn re-emerged it had joined the rest of the impi and the left horn, chest and right horn were advancing over Umisi Hill.
The whole charging buffalo formation came in at a run on the three sides of the laager. This was the scenario Chelmsford had planned for, at a range of between 300 and 400 yards (300 to 400 m), the British infantry opened fire, supported by the Gatling guns and rockets. Zulu marksmen caused a few casualties within the laager, but the defenders kept the Zulus at bay and Chelmsford's defence was working. Though the Zulu regiments made persistent rushes to get within stabbing range, their charges lacked the drive and spirit that had pushed them forward at the Battle of Isandlwana and Rorke's Drift.
The only Zulu to reach the laager was a 10-year-old boy, who was taken prisoner by members of the naval brigade and later served as a kind of mascotte on their ship, HMS Boadicea. After 20 minutes, the Zulu impi began to crumble away. Seeing this, Chelmsford ordered pursuit by the mounted troops and the native contingent. Large numbers of Zulu warriors were killed in this chase. By 07:30, the Zulus had fled and the grim task of killing Zulu wounded was undertaken. Around the laager itself, 700 Zulu bodies were counted and 300 more were killed in the mounted chase of the retreating warriors. The British took eleven dead, including a Lieutenant-Colonel, and 48 wounded.
According to the House of Gordon of Australia claims that the Moirs; “The main Moir homelands were between Aberdeen and Glasgow and also found in Otterbourne, Abergeldie, Invernettie, Scotstown, Stoneywood and Hilton. Also Gordon inhabited areas. Caithness in older times was most of northern Scotland and these Moirs may have been part of the Sutherland Gordons in the North but the Moirs like most families were widespread but held large tracts of land in Aberdeenshire .”
If these Moirs were from Caithness, then it is most likely that they came from areas like Loch More, and Ben More. One thing about these highlands & Aberdeen Moirs is that they are extremely close allies of Clan Gordon.William Moir, led an apprising against Inverlael in 1671 and proceeded to obtain an adjudication against Coul. Sir Alexander, who had by then succeeded his father, was forced not only to purchase this adjudication but also to acquire several other adjudications led against the Mackenzies of lnverlael
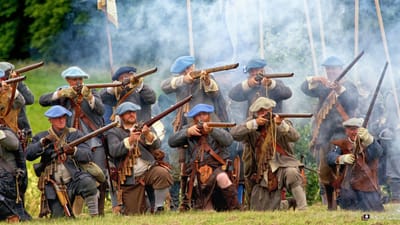
The Jacobite Clan
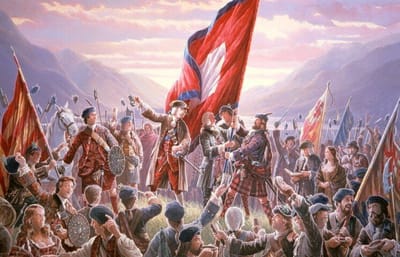
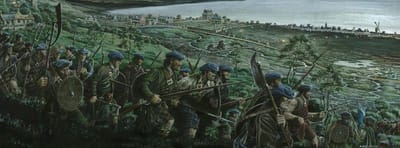
Jacobite Rising ( 1689- 1692)
After the wars of the three kingdoms has ended about seventy eight covenanters were executed between 1684-85 without trail for refusing to retract their allegiance to the declaration, while others were executed after a show trail. Among them was James Muir who was hanged for his beliefs on February 22,1684 in Edinburgh. This led to three Jacobite risings to restore the Stewart's kingship over Britain and once again pinned Catholics against the Protestants. The most famous Jacobite family is the Moirs of Stoneywood, and their clansmen. In this rising, we don't know the exact number of Moirs, Moore, and the other spellings joined up in this rising.
Now according to Moir Genealogy and Collateral lines, with historical notes claimed that "Alexander Moir, being a Protestant, and the contestants were Roman Catholics. He joined the Cameronians staunch and true to the last, and fought the last battle of wild Killiecrankie." The Battle of Killeicrankie was fought on July 27, 1689 in Killiecrankie, Scotland. The Jacobite was victorious in this battle even thou Claverhouse, 1st Viscount Dundee was killed.
Battle of Killiecrankie
Sir Ewen Cameron of Lochiel, Chief of Clan Cameron, had set about forming a confederation of Highland clans loyal to James as soon as William had arrived in England, and Dundee was in contact with him. When Dundee went north, he was pursued by a governmental force of about 3,500, led by General Hugh Mackay of Scourie, a Highlander who had been in Dutch service with the Scots Brigade for many years. Dundee, moving quickly, outmaneuvered Mackay, and on 16 May arrived in Glenroy, where the clans had been summoned to meet him on 18 May. With a total of some 1800 men, Dundee marched, in hopes of meeting Mackay on grounds favorable to the Highlanders. Unable to do so, he retreated back to Glenroy, where he arrived on 11 June. Many of the Highlanders returned to their homes, but some remained. Blair Castle was in a key position that controlled access to the Lowlands.
It was owned by the Marquis of Atholl; he promptly headed south to Bath to take the waters for his health. His heir, Lord Murray, was on the government's side. Dundee ordered Patrick Stuart of Ballechin, a relative of the Murrays, to hold Blair Castle for the King; Lord Murray ended up besieging his own castle. Dundee learned that Mackay was at Perth, on his way to assist in taking Blair Castle. Dundee was determined to intercept Mackay near Blair Atholl, astride the road through the hills that Mackay would have to pass. Many of the clans had not arrived yet, but he set out anyway and ordered them to follow "with all haste." Ewen himself also had a force of about 240 Camerons with him at the time, and tried to catch up while he dispatched his sons to raise support along the path of march. Ewen overtook Dundee just before he reached Athole, where they were joined by about 300 Irish, under the command of Major-General Cannon.
Dundee held a quick war council with those clan leaders who had arrived, and then immediately set out for the field with his force, now numbering about 2,400. He arrived at the pass before Mackay and set up position on a ridge above the pass. When Mackay's troops arrived, they saw they had no hope of attacking Dundee's force. They instead deployed in a line and started firing on them with muskets. The Jacobite line was shorter than the Government's, due to the disparity in numbers, leaving Ewen in the middle with an open flank on the left. By the time all of the forces were formed up, it was late afternoon, and the Jacobites had the sun in their eyes, so they simply waited for sunset under the desultory fire from Mackay's forces.
At seven o'clock, Dundee gave the order to advance, at which point the entirety of the Highlanders dropped their gear, fired what muskets they had, and charged. Mackay's forces, realizing the battle was on, stepped up their rate of fire; however, due to a shallow terrace on the hillside shielding the advancing Jacobites, this fire was partly masked. Eventually the lines met, and Mackay's men in the center were "swept away by the furious onset of the Camerons". So fast was the Jacobite charge that many government troops had insufficient time to fix their bayonets, leaving them defenseless at close quarters. (During this period, the plug bayonet was used, which fitted into the barrel of the musket and prevented further reloading or firing--this meant that fixing bayonets was delayed until the last possible moment.)
The battle soon ended with the entirety of Mackay's force fleeing the field, quickly turning into a rout in which 2,000 were killed. However, the cost of victory was enormous. About one-third of the Highlander force was killed, and Dundee was fatally wounded towards the end of the battle. The Jacobite advance continued until it was stopped by government forces at the Battle of Dunkeld. It is belief that Alexander Moir, fought only at Killiecrankie, but if he decided to continue to fight for the Cameronians, then he would most likely have been presented at the battle of Dunkeld, and Cromdale. We also don't know if any other Moirs, Moore, Mor, ect... were involved in the 1689 rising.
Massacre of Glencoe
On February 12-13, 1692, the Macdonalds of Glencoe was massacre by Earl of Argyll's Regiment of Foot ( Clan Campbell and other Lowland Scots), led by Robert Campbell of Glenlyon. In this infamous massacre, John Moore was shot dead in his garden. His wife, finding him dead, covered his body with a sheet, and fled to a malt-kiln for safety. That night she was delivered of a son, the John Moor , who was among the early settlers of Londonderry, New Hampshire. Mrs. Moor had two daughters, Elizabeth and Beatrix, whom she left in the care of a servant while she fled for safety. She remained in the malt kiln three days, when she took her young son and returned to her house.
She found the body of her husband had been taken away, and the daughters and servant had gone, and the house deserted and she alone with her babe. Her husband's brother, Samuel Moor, with most of her family relatives, had removed some time before this event, to Antrim Co., Ireland. By the help of friends, she Joined her relatives in Ireland. Two years later, the servant brought the two daughters to her. On 27 August 1691, William offered all Highland clans a pardon for their part in the Jacobite uprising, as long as they took an oath of allegiance before 1 January 1692 in front of a magistrate. He also threatened them with reprisals if they did not sign. The Highland chiefs sent word to James, now in exile in France, asking for his permission to take the oath. James dithered over his decision, convinced that he was close to returning to Britain to reclaim his throne.
When it became apparent that this was not going to happen before the deadline, James sent orders back to Scotland authorizing the chiefs to take the oath. This message reached its recipients in mid-December, in difficult winter conditions, only a few weeks before the deadline. A few managed to comply promptly but others did not, including Alastair Maclain, 12th Chief of Glencoe, who waited until the last day before setting out to take the oath. On 31 December 1691 MacIain travelled to Fort William to ask the governor, Colonel Hill, to administer the required oath, but Hill demurred on the grounds that he was not authorized to receive it. He instructed MacIain to proceed quickly to Inveraray to make his oath before Sir Colin Campbell, sheriff of Argyll. Hill gave Maclain a letter of protection and a letter to Sir Colin asking that he receive Maclain's oath since Maclain had come to him within the allotted time.
Hill also reassured MacIain that no action would be taken against him without him having the opportunity to make his case before the King or the King's privy council. It took Maclain three days to reach Inveraray, partly due to winter weather, partly due to his being detained for a day at Barcaldine Castle by the 1st company of the Earl of Argyll's Regiment of Foot, at the command of Captain Drummond, as a ruse to delay him. On arrival at Inveraray, he then had to wait three days for the arrival of Sir Colin, who was spending the New Year with his family across the waters of Loch Fyne. Upon his return, Sir Colin reluctantly accepted Maclain's oath. Maclain had satisfied the spirit of the oath, and was confident there would be no action against him or his people. However, he reckoned without the Secretary of State over Scotland and Lord Advocate, John Dalrymple, Master of Stair.
Dalrymple was a Lowlander who disliked the Highlanders and thought their way of life was a hindrance to Scotland, which he thought would be better served in union with England. Copy of order to Capt. Campbell by Maj. Duncanson You are hereby ordered to fall upon the rebels, the McDonalds of Glencoe, and put all to the sword under seventy. you are to have a special care that the old Fox and his sones doe upon no account escape your hands, you are to secure all the avenues that no man escape. This you are to putt in execution at five of the clock precisely; and by that time, or very shortly after it, I’ll strive to be at you with a stronger party: if I doe not come to you at five, you are not to tarry for me, but to fall on.
This is by the Kings special command, for the good & safety of the Country, that these miscreants be cut off root and branch. See that this be putt in execution without feud or favor, else you may expect to be dealt with as one not true to King nor Government, nor a man fit to carry Commissioned in the Kings service. Expecting you will not fail in the full-filling hereof, as you love your self, I subscribe these with my hand at Balicholis Feb: 12, 1692.
For their Majesties service (signed) R. Duncanson To Capt. Robert Campbell of Glenlyon In late January or early February 1692 the first and second companies of the Earl of Argyll's Regiment of Foot, which consisted of approximately 120 men under the command of Captain Robert Campbell of Glenlyon, were billeted on the MacDonalds in Glencoe, who received them in the hospitable tradition of the Highlands. Most of the regiment was recruited from the Argyll estates but only a minority actually bore the Campbell name. Others, including many of the officers, came from the Lowlands. Captain Campbell was related by marriage to old MacIain himself and so it was natural that he should be billeted at the Chief's own house.
Each morning for about two weeks, Captain Campbell visited the home of Alexander MacDonald, MacIain's youngest son, who was married to Campbell's niece, the sister of Rob Roy MacGregor. At this stage, it is not clear that Campbell knew the nature of their mission; ostensibly they were there to collect the Cess tax, a property tax or assessment instituted by the Scots Parliament in 1690.
The planning was meticulous enough for them to be able to produce legitimate orders to this effect from Colonel Hill, the man who had tried to help MacIain complete his oath in the first place, thus dispelling any suspicions the MacDonalds may have had. However, it was Colonel Hill who issued the orders to begin the massacre two weeks later. On 12 February 1692, Captain Drummond arrived. Due to his role in ensuring MacIain was late in giving his oath, Drummond would not have been welcomed. As the captain of the 1st company of the regiment, the Grenadiers, he was the ranking officer, yet did not take command. Drummond was bearing instructions (see inset) for Robert Campbell, from his superior officer, Major Duncanson. He spent the evening playing cards with his unsuspecting victims and upon retiring, wished them goodnight and accepted an invitation to dine with MacIain, the chief, the following day.
Alasdair MacIain was killed while trying to rise from his bed by Lt Lindsay and Ensign Lundie but his sons escaped, as initially did his wife. In all, 38 men were murdered either in their homes or as they tried to flee the glen. Another 40 women and children died of exposure after their homes were burned. The first clansman to be killed was Duncan Rankin. He was shot down as he tried to escape by crossing the River Coe near the chief's house. Elsewhere, various members of the two companies found ways of warning their hosts. Two lieutenants, Lt Francis Farquhar and Lt Gilbert Kennedy even broke their swords rather than carry out their orders. They were arrested and imprisoned, but were exonerated, released and later gave evidence for the prosecution against their superior officers.
In addition to the soldiers who were actually in Glencoe that night, two other detachments, each of four hundred men were, according to the plan, to have converged on the escape routes. Both were late in taking up their positions. It is possible that a snowstorm made arrival on time quite difficult especially for those approaching over the Devil's staircase from Kinlochleven. It is equally possible that they simply didn't want to play any part in what they knew to be a heinous crime. Under Scots law there was a special category of murder, known as "murder under trust", which was considered to be even more heinous than ordinary murder.
The Glencoe massacre was a clear example of this, as shown by the results of the inquiry: Though the command of superior officers be very absolute, yet no command against the laws of nature is binding; so that a soldier, retaining his commission, ought to refuse to execute any barbarity, as if a soldier should be commanded to shoot a man passing by inoffensively, upon the street, no such command would exempt him from the punishment of murder. The challenge to the inquiry which had been established, was to apportion blame on those responsible for the massacre, and yet the orders which led to it were signed by the King himself, who could not be seen to be responsible. The scandal was further enhanced when the leading Scottish jurist Sir John Lauder, Lord Fountain hall was, in 1692, offered the post of Lord Advocate but declined it because the condition was attached that he should not prosecute the persons implicated in the Glencoe Massacre.
Sir George Mackenzie, who had been Lord Advocate under King Charles II, also refused to concur in this partial application of the penal laws but, unlike Fountain hall, his refusal led to his temporary disgrace. The Glencoe massacre became a propaganda piece for Jacobite sympathies, which were to come to a head in the next generation in the Jacobite risings of 1715 and 1745. Due to the involvement of Argyll's regiment under Glenlyon's command, the massacre was regarded by many (who were schooled in the romantic 19th-century school of Scottish history) not as a government action, but as a consequence of the ancient MacDonald–Campbell rivalry. Memory of this massacre has been kept alive by continued ill feeling between MacDonalds and Campbells.
Since the late 20th century the Clachaig Inn, a hotel and pub in Glencoe popular with climbers, has had a sign on its door saying "No Hawkers or Campbells" although it has been said that this is probably more for the amusement of tourists than from any lasting sense of revenge. In 1883 Macdonald of Aberdeen sculpted the Upper Carnoch memorial to the massacre, a tapering Celtic cross on a cairn which stands at the eastern end of Glencoe village, which was formerly known as Carnoch.
Each year, on 13 February, the Clan Donald Society of Edinburgh arranges an annual wreath laying ceremony at the memorial to the Massacre of Glencoe. Clansmen from Clan Donald, from across the world, attend the ceremony, along with local people. The ceremony originated in 1930 when the late Miss Mary Rankin, Taigh a’phuirt, Glencoe, decided that a wreath should be laid annually on the monument. Miss Rankin, who supplied the wreath up to the time of her death in 1944, commissioned the late Mr. Angus MacDonald to lay it on her behalf. On Mr. MacDonald’s death in 1936, his second son Robert took over the duty, the wreath being supplied after Miss Rankin's death by Robert’s sister, Miss Annie MacDonald.
Jacobite Rising of 1715
Just like the first Jacobite rebellion of 1689-1692; the Moirs have not been a major factor of the second rising of 1715. There was a tenant William Moir of David Lumsden of Cushnie who was force into the 1715 rebellion by the threats of the Earl of Mar. William Moir fought at the battle of Preston and was taken prisoner. It is also said that both the James Moir III and IV were active during this rising. We are not sure how many Moirs fought in this rebellion.
Battle of Preston
The Battle of Preston (9–14 November 1715), also referred to as the Preston Fight, was fought during the Jacobite Rising of 1715 (often referred to as the First Jacobite Rising, or Rebellion by supporters of the Hanoverian government).The Jacobites moved south into England with little opposition, and by the time they reached Preston in Lancashire had grown to about 4,000 in number. Their horse troops entered Preston on the night of 9 November 1715, and as they approached two troops of dragoons and part of a militia regiment retreated to Wigan.
General Charles Wills was ordered to halt their advance, and left Manchester on 11 November with six regiments, arriving on the 12th. The Jacobite leader Thomas Forster, a Northumberland squire, had intended to move on that day, but, learning of Wills's approach, decided to stay and made the mistake of withdrawing troops from a strong defensive position at Ribble bridge, 0.5 miles (0.80 km) outside Preston.
The Jacobites had barricaded the principal streets of Preston, and Wills ordered an immediate attack, which met with fire from the barricades and from houses, resulting in the Hanoverian attack being repulsed with heavy losses. Wills then had houses set on fire, with the aim of fires spreading along to the Jacobite positions, and the Jacobites tried to do the same to houses taken as government positions.
At night, Wills's order to light the government-held positions for identification helped the Jacobite snipers, but overnight many Jacobites left the town. The legend of these actions is recounted in a well-known Lancashire ballad, Lo! The Bird is Fallen. On the morning of Sunday 13 November more government forces arrived and, finding that the town was insufficiently encircled, Wills stationed more troops to prevent the besieged Jacobite army from escaping. The Jacobites had also suffered losses in the fighting, as well as losing defectors overnight, and although the Highlanders' full intention was to fight on and take the attack to the enemy, Forster agreed to an offer from his officer Colonel Oxburgh to open negotiations with Wills for capitulation on favorable terms. This was done without informing the Highlanders, but Wills refused to treat with rebels.
When the Highlanders learned of this that night, they were infuriated and paraded the streets threatening any Jacobites who might even allude to a surrender, killing or wounding several people. James Moir III, rescue of the Earl of Winton in 1715, then under sentence of death in the Tower of London for his concern in the Rebellion of that period. At seven o'clock on the morning of Monday 14 November, Forster offered an unconditional surrender, which was turned down unless it applied to the Highlanders. Forster then sent back confirmation that the Scots noblemen would surrender on the same terms.
When the government forces entered the town, the Highlanders were drawn up under arms in the market-place ready to surrender. 1,468 Jacobites were taken prisoner, 463 of them English. George Seton, 5th Earl of Winton, William Gordon, 6th Viscount of Kenmure, William Maxwell, 5th Earl of Nithsdale, James Radclyffe, 3rd Earl of Derwentwater, and William Murray, 2nd Lord Nairne, were among those captured and later sentenced to be executed for treason under an act of attainder. However, Winton and Nithsdale escaped from the Tower of London.
All surviving prisoners except for members of the Clan Gregor were later pardoned by the Indemnity Act 1717. Seventeen Jacobites were killed and twenty-five wounded. Government casualties were close to 300 killed and wounded. Of the ordinary Highland clansmen defeated at the Battle of Preston, many were transported to the Americas. If the Moirs were part of the Gordons, Earl of Sutherland, then they were most likely fighting on the Government side during the 1715 rising (stated by Clan Gordon of Australia). The Moirs would of fought at the battles of Sheriffmuir, Skirmish at Alness, Siege of Brahan and battle of Glen Sheil.
Jacobite Rising of 1745
During the third Jacobite rising also known as the forty fifth was the only rebellion that came so close to achieving it's goal of returning the Stewarts back on the throne. During the last two rebellions have failed miserably. In this rebellion there were loads of Moirs who joined the ranks of the Jacobites. The list below will contain the names of clansmen who ended up in joining Prince Charles army:
James Moir IV of Stoneywood
Charles Moir of Stoneywood
Moirs of Stoneywood
Moirs of Aberdeenshire
John Moir
Donald Moir
Charles Moir (Aberdeen)
Allister Moir
Charles Moir
Alexander Moir
William Moir (Dundee)
Andrew Moir
Dr. Henery Moir ( Kelso)
Captain Charles Moir
John Moir (Templand)
Francis Moir
Kenneth Moir ( Miltoun of Ord)
Henry Moir
Robert Moir ( Kelso)
James Moir
William Moir of Lonmay
William Moir
Moirs of Cromar
Robert Moir
Henry Moir
William Mair
Robert Moir
William Moar ( Dundee)
William Moir( Peterhead)
LT. Moore
William Moore ( Dundee)
Angus Mor ( Glenfinnan)
Evan More ( Teanclan)
Private George Moir
Moirs of Leckie
Charles Longmuir
William Moir
Robert Muir
James Moir
Capt. Charles Moir
John Moir
Kenneth Moir
William Moir
William Moir of Longmay
Alex Muir
Peter More
William Moor
Adolphus Muir
Robert Moir
William Moir Esq.
James Moir
John More
There are probably others as well. Not all these Moirs, Mor, Moore, More, Mair, O'Moores and others fought in the same regiments. Most of them served in the Stoneywood's Battalion also known as the Stoneywood's Aberdeen Regiment, Capt. Lord Lewis Gordon’s Regiment, Ogilvy’s Regiment, Pitsligo’s Horse Cavalry, Bannerman of Elsick’s, Lord Balmerino's troop of the Lifeguards, Fitz James Horse, Irish Brigade of France and others. Some were prisoners, wounded, banished, and probably killed in action.
Battle of Prestonpan
There were few Moirs at this battle under the battalions of Duke of Perth and also Tullibardine regiment under the command of Lord George Murray. The battle of Prestonpans was fought September 21, 1745. This battle was a decisive win for the Jacobites. Despite the poor state of his cavalry and artillery, Cope determined to engage the Jacobite army. He had good intelligence that the Jacobite army numbered just under 2,000 men, mostly composed of fit and hardy men, but badly armed.
His officers apparently believed that the rebels would never attack a single force including both infantry and cavalry. They assured locals during their march that there would be no battle. Although the Jacobite army had secured the high ground to the south of Cope's army, they were dismayed by the natural advantages of Cope's position. A frontal Highland charge would flounder in the marshy ground in front of the Royalist army's center and be shot to pieces by musket and cannon fire.
Although there was much argument among the senior Jacobite officers, Lord George Murray was convinced that only an attack against the open left flank of Cope's army stood any chance of success. However, Jacobite Lieutenant Anderson was a local farmer's son who knew the area well and convinced Murray that he knew an excellent route through the marshlands. Following his advice, Murray began to move the entire Jacobite force at 4 am walking three abreast along the Riggonhead Defile far to the east of Cope's position. Cope, meanwhile, had observed some eastward movement of the Jacobite army as it grew dark, though this move was the result of confusion in the Jacobite ranks and was abandoned. He feared an attack against both his flanks, and realigned his army on a northsouth front, in the position in which they would fight on the next day.
Three companies of Loudon's Highlanders were detailed to guard the baggage park in Cockenzie. Some 100 Volunteers were dismissed and ordered to report again the next morning, thus missing the ensuing battle. Cope also made a last-minute attempt to get some artillerymen from Edinburgh Castle. Some half-dozen gunners left the Castle disguised as tradesmen but their guide became lost. To prevent a surprise attack during the night, Cope kept fires burning in front of his position and posted no fewer than 200 dragoons and 300 infantry as pickets. At the crack of dawn, however, at 6 am on 21 September 1745, Cope's dragoons beheld the spectacle of 1,400 Highlanders charging through the early mist, making "wild Highland war cries and with the bloodcurdling skirl of the pipes....". Cope's inexperienced army wheeled to its left by platoons to face the Highlanders, who were charging in from the east following their night march. Cope managed to scramble some cannon up onto his right flank.
Although most of his artillerymen (most of whom were aged or "invalids") fled, the two officers in charge of them opened fire as soon as the Highlanders were in range. Undaunted by the light, inaccurate guns, the Highlander army continued its charge; however, the center became bogged down in marshy terrain, and, as they continued forward, their different speeds of advance caused them to form into a "V". The wings on either side met the inexperienced dragoons on either side of the British center, and the dragoons immediately fled the field. This left the British center, containing the experienced royal infantry, facing the center of the "V" on their front, and the two unopposed wings on either side. The effect of this unplanned flanking maneuver meant that the royal foot soldiers were effectively sandwiched.
They suffered heavy casualties and gave way. The battle was over in less than 10 minutes, with hundreds of government troops killed or wounded and 1500 taken prisoner. Cope's baggage train at Cockenzie was captured, with only a single shot fired. It contained £5000, many muskets and ammunition. The Jacobite Army suffered fewer than 100 troops killed or wounded. The wounded and prisoners were given the best care possible at Prince Charles Stuart's insistence. Cope tried to rally his men, but could only lead about two hundred stragglers up a side lane (Johnnie Cope's Road) to reorganize in an adjacent field, where they refused further engagement. Cope and his aide-de-camp had no choice but to travel southwards to Lauder and Coldstream and then on to the safety of Berwick-upon-Tweed, 50 miles (80 km) away, the following day, Brigadier Fowke causing scandal by arriving ahead of the troops. Out of the 2,300 men in the royal army, only 170 troops managed to escape.
Colonel James Gardiner, a senior royal commander, who stayed at Bankton House close by the scene of battle, was mortally wounded in a final skirmish that included Sir Thomas Hay of Park who fought by his side and survived. Colonel Gardiner's fatal wounds were inflicted beneath a white thorntree, of which a portion is today in Edinburgh's Naval and Military Museum. Gardiner was stripped to the waist after his possessions were looted by the Highlanders. A servant took the mortally wounded Colonel after the battle, to The Manse at Tranent, where he died in the arms of the Minister's daughter during the night. An obelisk to Gardiner's memory was raised in the mid 19th century.
Others battles and sieges that the Moirs, Moore, More were apart of during the forty fifth.
The battles, skirmishes and sieges that they fought in include: Battle of Clifton Moor, Battle of 1st Crlislie, Siege of Stirling, Siege of Ruthven Barracks (1746), Siege of Inverness (1746) ,Siege of Fort William , and Battle of Littleferry. Stoneywood Battalions/ Regiment James Moir IV of stoneywood founding the regiment. James Moir was a Lieutenant General of the Stoneywood's Aberdeen Regiment, part of Lord Gordon forces. Moir of Stoneywood set out with this little fleet in the beginning of the night, got safe across the firth of Moray, and arrived in the morning at Tain, where the Duke of Perth, whom the Prince had sent to command this expedition, was ready. They will play a major part in the rising.
James Moir IV Of Stoneywood
His battalion or regiment was at the battle of Inverurie and eventually meet up with the main Jacobite force. Lord Lewis Gordon had been raising Jacobite forces and had managed to create two battalions. James Moir of Stoneywood commanded one battalion and Gordon of Abbachy commanded the other.
Battle of Inverurie
This battle was fought on December 23, 1745, and the Jacobite was victorious. This battle was between 450 of Clan Macleod, and two hundred Monroes and other volunteers commanded by Monroe of Culcarin, against Lord Lewis Gordon who brought up seven hundred men under arms and chiefly lowland men of Aberdeenshire under Moir of Stoneywood. The casualties of the Macleod independent Highland regiment has suffered many killed, and fifty were taken prisoners, which the Gordon lost were sixty killed and twenty wound, but according to another source from Wiki... says Lord Lewis Gordon had been raising Jacobite forces and had managed to create two battalions.
James Moir of Stoneywood commanded one battalion and Gordon of Abbachy commanded the other. Lord Lewis Gordon had also raised a considerable sum of money, but he was thwarted by his brother; Cosmo George Gordon, 3rd Duke of Gordon, who supported the British Government. To put an end to Lord Lewis Gordon's Jacobite recruitment, John Campbell, 4th Earl of Loudoun who was the King's commander in chief in the North, despatched the Laird MacLeod of MacLeod from Inverness with 500 men. MacLeod gained support from George Munro of Culcairn with 200 men and the Laird of Grant with 500 men. Lord Lewis Gordon ordered his men to fall back to Aberdeen where he was joined by a number of men from Forfarshire and Kincardineshire.
He was also joined by Lord Drummon's French troops who had just landed in Montrose. Later he was also joined by 300 men of the Clan Farquharson as well as his own two battalions under James Moir of Stoneywood. The Laird of Grant fearing for his own country decided to return home and George Munro of Culcairn held post at Oldmeldrum. MacLeod however thought otherwise, he advanced and occupied the town of Inverurie, 16 miles north-west of Aberdeen. Lord Lewis Gordon on hearing of MacLeod's incautious movement was determined to attack his opponent. Lord Lewis Gordon moved from Aberdeen on 23 December with 1,100 men and 5 pieces of cannon which had been taken off a ship in the harbour.
With the main body of his army he crossed the Bridge of Don and took the route by Fintray up the left bank of the river, while he sent a detachment of 300 men, French and others, by the Tyrebagger road, the main road to Inverurie, so as to deceive the Macleods with their real intentions. At about four o'clock in the afternoon the French party, who had marched by the right bank of the River Don, dashed into the river and waded across. They then attacked the Macleods on the southwest side of Inverurie. Lord Lewis Gordon then immediately crossed the River Ury on the east side of the town near Inverurie Parish Church, (The Auld Kirk of Inverurie) now known as St Andrew's Parish Church, Inverurie, and attacked the town from there where the Macleods were taken completely by surprise.
The MacLeods opened fire from the ditches and from behind walls, but were outnumbered, and being vigorously pressed, they gave way and retreated, and were pushed back to Elgin. The chief of the MacLeods gathered his men, and while retreating, fought by the moonlight. An account of MacLeod's actions are given in contemporary documents the Culloden Papers which belonged to Forbes of Culloden.:McKlaudes (MacLeods) Resolute Behavior in running to the Enemy with so few of his men about him and the stand they made with not one half of their little army against 900 till they were overpowered by numbers is much to his honor.
Ruairi MacLeod's account 20th century historian Ruairi MacLeod gives an account of the Battle of Inverurie in volume LIII of the Transactions of the Gaelic Society of Inverness, quoting from contemporary documents. Ruairi MacLeod states that the rebel advance was led by the French Picquets, crossing the river Urie at the ford south of Inverurie.
MacLeod brought about 60 of his men to the ford to engage them and it was here that the rebels lost most of their casualties, including eleven French killed. MacLeod then brought 300 men together at the south of the town and fired three or four volleys. The rebels then crossed the river, although 100 of them deserted and ran off. The MacLeods then retired down the main street of Inverurie, leaving all their possessions behind, turning once to fire. At the north of the town they turned once more to fire and then retreated northwards. According to Ruairi MacLeod the Government troops lost seven dead; five killed in battle.
The Government troops suffered fifteen wounded with the enemy, seven wounded brought back to Elgin and fifty-nine taken prisoner. The rebels concealed their number of dead but a Jacobite present at the battle admitted fourteen dead and a Government officer estimated that the rebels had lost between 30 - 40 dead. Many of MacLeod's men were killed, and about fifty were taken prisoner, including two of his main allies who were a Gordon, the younger son of Gordon of Ardoch and Forbes of Echt. Also taken prisoner was John Chalmers, formerly Principal and Professor of King's College, Aberdeen. Most of the MacLeods including their chief retreated safely back to their own country.
Another man taken prisoner by the Jacobites was Donald Ban MacCrimmon who was said to be the greatest of all Highland Pipers, from the distinguished MacCrimmon (piping family). As a mark of respect the Jacobite Pipers refused to play until he was released. The silence of the Jacobite pipers ensured his release and Donald Ban rejoined the Government Hanoverians.
Night Crossing by Moir of Stoneywood
Moir of Stoneywood, however, undertook to convey the boats to Tain and he accordingly set out one night with his little fleet and arrived at his destination by next morning without being observed by the enemey. On the flotilla reaching the Tain, the Duke of Perth divided his forces into two parts and while one of them he marched about by the head of the frith; he directed the other to cross in the boats. Under the cover of thick fog; this division upon Dornoch. When near that town, he came up with a party of two hundred men who were on their march to join up with lord Loudon. This party instantly fled but Major Mackenzie who commanded it with four or five officers and sixty privates were made prisoners. Among the officers was a son of Mr. MacDonald of Scothouse who was taken prisoner by his own father.
The main body under Lord Loudon abandoned Dornoch in great consternation and fled north towards Glenmore pursued by the Jacobite forces. Both parties marched all night but the fugitives kept ahead of their pursuers. After a chase of about thirty miles, the duke of Perth discontinued the pursuit and halted at the head of Loch Shin. While following the enemy during the night a great anxiety prevailed among the Macdonalds in the duke of Perth's detachment; lest in the event of an engagement they might not be able to withstanding their white cockades to distinguish themselves from the Macdonalds of Skye who like the other Macdonalds wore heather in their bonnets. Upon reaching the head of Sutherlandshire Lord Loudon separated his army.
Accompained by the lord president and the laird of Macleod he marched to the sea coast with eight hundred of the Macdonalds and Macleods and embarked for the isle of Skye. Part of his own regiment with several officers took refuge in Lord Reay's country. Finding that lord Loudon's troops had dispersed; the duke of Perth returned to Inverness leaving Lord Cromarty in Sutherland with a sufficient force to keep Lord Sutherland and Lord Reay's people in check. The dispersion of Lord Loudon's army was considered of such importance by Charles that he immediately dispatched an officer to France with the intelligence. In this expedition several vessels in the Firth of Dornoch having some valuable effects on board fell into the hands of the insurgents.
Battle of Falkirk Muir
In this battle both the Scottish Moirs, and the Irish O'Moores fought side by side. The Irish O'Moore was fighting in the Irish Brigade of France. This battle was fought on January 16, 1746 and the Jacobites were victorious. The Jacobite army left Glasgow on 3 January in two columns. One column of six Highland battalions, led by Lord George Murray marched towards Falkirk, via Cumbernauld, to make it appear as if they were heading towards Edinburgh. Instead he turned north before reaching Falkirk and moved just outside Stirling in Bannockburn. Murray stationed Lord Elcho at Linlithgow with a detachment of cavalry to patrol the road to Edinburgh. Charles Edward Stuart moved another column to Bannockburn via Kilsyth.
There he set his headquarters and resided at Bannockburn House as the guest of Sir Hugh Paterson, a Jacobite supporter. Lord John Drummond set forth from Perth with four thousand men and heavy artillery. Now boasting a force of 8,000 men the Jacobites sent a drummer to Stirling on 5 January demanding the surrender of the town. A garrison of 500 militiamen responded by shooting at the drummer who then ran for his life. Three days later the town council agreed to surrender. Yet, Stirling Castle itself was held by a small garrison of trained militiamen and troops under the command of Major General William Blakeney, who politely declined to surrender. Thereupon the Pretender ordered the castle to be besieged.
He entrusted this task to a French artillery 'expert' of Scottish descent, Monsieur Mirabel de Gordon. Gordon chose a poor location in digging trenches for the Jacobite cannons, lower and completely in range of the castle's own guns. Following the victory at Falkirk the cannon would be destroyed after firing a single shot. Because of the man's demonstrated incapacity, the Scots afterward referred to Mirabel as "Mr. Admirable." At the same time, dissension arose as the Highland chiefs resented the Pretender's decision to not hold councils, relying only on the advice of his Irish "Men of Moidart." Also causing concern was Charles's continued drinking. As this went on, General Hawley brought an army of 13,000 from Newcastle upon Tyne to Edinburgh, sending an advance unit to Linlithgow on 13 January.
Lord Elcho fell back to Falkirk where he met Lord George Murray. Hawley advanced with his main army of 6,000 on 15 January, intending to relieve Stirling Castle, whereupon Murray and Elcho withdrew to Bannockburn. The Jacobites planned for battle on 15 January at Plean Muir, just southeast of Bannockburn. They were expecting an attack from Hawley's forces, but it never came. Hawley was encamped at Falkirk, and showed no signs of moving. Thus, on the morning of 17 January, the Jacobites planned an offensive. The army moved cautiously towards Falkirk, avoiding the main road and heading for the Hill of Falkirk which overlooked Hawley's encampment below. With General Hawley established at nearby Callendar House, the government army was taken by surprise.At 1:00 pm an officer informed Hawley of the Jacobite approach. Hawley refused to believe the message and did not verify the information for himself. Instead, he remained at Callendar House, 2000 yards behind his camp, and only sent instructions for his troops to put on their equipment as a precaution.
By 2:00 pm the Jacobite attack was imminent and a second messenger from Major General John Huske was sent to Callendar House. Finally aware of the seriousness of the situation, Hawley arrived at his camp hatless and at the gallop. Led by the dragoons, the Hanoverian army rapidly filed south on Maggie Wood's Lane past the Bantaskin House and up the slope of the Falkirk ridge. As the leading elements reached the summit, they could see the Pretender's army bearing down on them from the northwest. Marching across the front of the Highlanders, the dragoon regiments reached a bog on the far side of the rise and faced to their right.
The infantry began to form to the right of the dragoons, facing west. About this time a storm struck the area with very heavy rain, hindering deployment and wetting the black powder cartridges. In the subsequent action one out of four muskets missed fire. From left to right, the Hanoverian front line consisted of Ligonier's (13th), Cobham's (10th) and Hamilton's (14th) Dragoon Regiments. Continuing the first line were Edward Wolfe's (8th), Cholmondeley's (34th), Pulteney's (13th), The Royal (1st), Price's (14th) and Ligonier's (59th) British Regiments of Foot. In the second line stood Blakeney's (27th), Munro's (37th), Fleming's (36th), Barrel's (4th) and Battereau's (62nd) British foot regiments. Last to arrive, Howard's (3rd Old Buffs) regiment took position in a third line. A few hundred yards behind the dragoons, the Glasgow militia were drawn up. The Argyll militia took position on the far right of Hawley's line.
Two cannon became stuck in a bog. When the battle began, the English gun crews were still trying to free them. The Jacobite army marched up and deployed in three lines, facing east. In the front line, from right to left were the MacDonalds, Camerons, Frasers, MacPhersons, Mackintoshes, Mackenzies, Farquharsons, and Stewarts of Appin. Posted in the second line were the regiments of Lord Lewis Gordon, Lord Ogilvy and the Atholl Brigade. In the third line were small units of horsemen, plus a unit of French regulars (Irish Picquets from the Irish Brigade). The Prince failed to appoint a left wing commander, though Lord George Murray took charge of the right wing. Murray dismounted and led the three MacDonald regiments on the extreme right. Because Hawley's army formed up so hurriedly, its dispositions were unusual. The dragoons on the left wing were directly opposed to the Highland right flank foot soldiers.
The left of the British infantry faced the Highland army's center. Three foot regiments on the Hanoverian right completely overlapped the Jacobite left, but there was a ravine separating the two sides. The ravine prevented the British units from flanking the Stewarts of Appin, but it also protected Hawley's right. At 4:00 pm, Colonel Francis Ligonier received orders to charge the Jacobite right with the British dragoons. Hawley apparently believed in the superiority of cavalry over the Highlanders. The Jacobites waited until the dragoons trotted into pistol range then let loose with a crushing volley. "Eighty dragoons fell dead upon the spot." A handful of the British horsemen closed with the Highlanders, but most fled. Cobham's dragoons rode north between the infantry battle lines. The other two regiments bolted to the rear. One company of the Glasgow militia was ridden over and scattered by Hamilton's fleeing dragoons.
Those horsemen who continued to fight fell victim to an unusual tactic. The Highlanders dropped their muskets and crouched on the ground, using their dirks to kill the horses and stabbing the riders as they fell. Another Highlander tactic when confronted with cavalry was to aim their swords at the horse's head rather than the rider. A horse wounded this way will tend to circle and render the rider an easy target. The complete rout of the cavalry compromised the entire Hanoverian position. Murray tried to restrain the MacDonalds, but they spontaneously rushed after the fleeing horsemen. The Highland right and center fired one volley, flung down their muskets and dashed toward the Hanoverian infantry, claymores in hand. Attacked in front and flank, with rain now beating in their faces, Hawley's left-wing infantry fired an ineffective volley and ran for the rear, carrying away the second line as well. Shielded by the ravine in their front, only the government right flank regiments held firm.
Price's and Ligonier's regiments were joined by Barrel's from the second line. General Huske marched them a short distance uphill where they fired into the flank of the Highlanders who were in pursuit of the panicked Hanoverian left and center. Soon they were joined by Cobham's rallied dragoons, who tried to attack the Jacobite rear. This attack was foiled by the Irish Picquets (French regulars) who had been held in reserve. Most of Hawley's army was routed while most of the Jacobite army was scattered in pursuit or pillaging the dead. The Atholl Brigade remained intact and Murray took charge of it and some MacDonalds. Huske soon withdrew with his three foot regiments, leaving the field to the Jacobites. It was now dark and the storm was growing fiercer; confusion ensued and Murray lost sight of the enemy.
The Hanoverian survivors retreated east towards Linlithgow, with Grenadiers pulling Hawley's remaining cannon as the artillery horses had been lost. Murray had won a huge victory but did not realize it yet. It was not until the next morning that some 300 Hanoverian soldiers were seen lying dead in the rain. The Jacobites emerged victorious, but failed to take advantage of the encounter. Hawley claimed to have suffered only 280 casualties, but his losses were much greater. Around 350 Royal troops were killed, wounded or missing, and some 300 captured.
On the Hanoverian side, Sir Robert Munro and three lieutenant-colonels were killed. Ligonier fell ill and died soon after the battle. The Jacobite losses were around 50 dead and 80 wounded. The Jacobites seized some Hanoverian tents, ammunition, wagons, and three of their cannons, but they remained in or around Falkirk for most of the month and lost any initiative they may have gained from the victory. Instead of pursuing Hawley, the Young Pretender chose to stay in Bannockburn House, where he developed a feverish cold and was taken care of by Clementina Walkinshaw. This gave Hawley the opportunity to reorganize and strengthen his army in Edinburgh.Following the Battle of Falkirk, the Royal troops were billeted at the Palace of Holyroodhouse, where they did a huge amount of damage to the famous Jacob de Wett paintings in the Great Gallery. The paintings were restored in 2003 by Brian McGlauchlen.
Battle of Culloden Moor
The Battle of Culloden was the biggest defeat for the Jacobite Army and this battle was the last. On this battlefield all the Moirs, Moores, O'Moores and other spelling were included at this battle. This was a decisive victory for the Government forces.the first line attack Cumberland's rear, while Perth with the left wing would attack the government's front. In support of Perth, Charles Edward Stuart would bring up the second line. The Jacobite force however started out well after dark at about 20:00. At Culloden; Moir of Stoneywood's lowland battalions were at the left wing of the second line.
Murray led the force cross country with the intention of avoiding government outposts. This however led to very slow going in the dark. Murray's one time aide-de-camp, James Chevalier de Johnstone later wrote, "this march across country in a dark night which did not allow us to follow any track, and accompanied with confusion and disorder". By the time the leading troop had reached Culraick, still 2 miles (3.2 km) from where Murray's wing was to cross the River Nairn and encircle the town, there was only one hour left before dawn. After a heated council with other officers, Murray concluded that there was not enough time to mount a surprise attack and that the offensive should be aborted. O'Sullivan went to inform Charles Edward Stuart of the change of plan, but missed him in the dark. Meanwhile, instead of retracing his path back, Murray led his men left, down the Inverness road. In the darkness, while Murray led one-third of the Jacobite forces back to camp, the other two-thirds continued towards their original objective, unaware of the change in plan.
One account of that night even records that Perth and Drummond made contact with government troops before realising the rest of the Jacobite force had turned home. Not long after the exhausted Jacobite forces had made it back to Culloden, reports came of the advancing government troops. By then, many Jacobite soldiers had dispersed in search of food, while others were asleep in ditches and outbuildings. However, military historian Jeremy Black has contended that even though the Jacobite force had become disordered and lost the element of surprise the night attack remained viable, and that if the Jacobites had advanced the conditions would have made British morale vulnerable and disrupted their fire discipline.
On 30 January, the Duke of Cumberland arrived in Scotland to take command of the government forces after the previous failures by Cope and Hawley. Cumberland decided to wait out the winter, and moved his troops northwards to Aberdeen. Around this time, the army was increased by 5,000 Hessian troops. The Hessian force, led by Prince Frederick of Hesse, took up position to the south to cut off any path of retreat for the Jacobites. The weather had improved to such an extent by 8 April that Cumberland again resumed the campaign. The government army reached Cullen on 11 April, where it was joined by six battalions and two cavalry regiments. Days later, the government army approached the River Spey, which was guarded by a Jacobite force of 2,000, made up of the Jacobite cavalry, the Lowland regiments and over half of the army's French regulars. The Jacobites quickly turned and fled, first towards Elgin and then to Nairn.
By 14 April, the Jacobites had evacuated Nairn, and Cumberland camped his army at Balblair just west of the town. The Jacobite forces of about 5,400 left their base at Inverness, leaving most of their supplies, and assembled 5 miles (8 km) to the east near Drummossie, around 12 miles (19 km) before Nairn. Charles Edward Stuart had decided to personally command his forces and took the advice of his adjutant general, Secretary O’Sullivan, who chose to stage a defensive action at Drummossie Moor, a stretch of open moorland enclosed between the walled Culloden enclosures to the North and the walls of Culloden Park to the South.
Lord George Murray "did not like the ground" and with other senior officers pointed out the unsuitability of the rough moorland terrain which was highly advantageous to the Duke with the marshy and uneven ground making the famed Highland charge somewhat more difficult while remaining open to Cumberland’s powerful artillery. They had argued for a guerrilla campaign, but Charles Edward Stuart refused to change his mind.
Night attack at Nairn
On 15 April, the government army celebrated Cumberland's twenty-fifth birthday by issuing two gallons of brandy to each regiment. At Murray's suggestion, the Jacobites tried that evening to repeat the success of Prestonpans by carrying out a night attack on the government encampment. Murray proposed that they set off at dusk and march to Nairn.
Murray planned to have the right wing of Early on a rainy 16 April, the well rested Government army struck camp and at about 05:00 set off towards the moorland around Culloden and Drummossie. Jacobite pickets first sighted the Government advance guard at about 08:00, when the advancing army came within 4 miles (6.4 km) of Drummossie. Cumberland's informers alerted him that the Jacobite army was forming up about 1 mile (1.6 km) from Culloden House--upon Culloden Moor. At about 11:00 the two armies were within sight of one another with about 2 miles (3.2 km) of open moorland between them.
As the Government forces steadily advanced across the moor, the driving rain and sleet blew from the north-east into the faces of the exhausted Jacobite army. Opening moves The Jacobite army was originally arrayed between the corners of Culloden and Culwhiniac parks (from left to right): the three Macdonald battalions; a small one of Chisholms; another small one of Macleans and Maclachlans; Lady Mackintosh and Monaltrie's regiments; Lord Lovat's Regiment; Ardsheal's Appin Stewarts; Lochiel's Regiment; and three battalions of the Atholl Brigade.
Murray who commanded the right wing, however became aware of the Leanach enclosure that lay ahead of him would become an obstacle in the event of a Jacobite advance. Without any consultation he then moved the brigade down the moor and formed into three columns. It seems probable that Murray intended to shift the axis of the Jacobite advance to a more northerly direction, thus having the right wing clear the Leanach enclosure and possibly taking advantage of the downward slope of the moor to the north. Jacobite front line skews and stretches, Government forces compensate; others break into and through Culwhiniac enclosure.
However, the Duke of Perth seems to have misinterpreted Murray's actions as only a general advance, and the Macdonalds on the far left simply ignored him. The result was the skewing of the Jacobite front line, with the (left wing) Macdonalds still rooted on the Culloden Parks wall and the (right wing) Atholl Brigade halfway down the Culwhiniac Parks wall. In consequence, large gaps immediately appeared in the severely over-stretched Jacobite lines. A shocked Sullivan had no choice but to position the meagre 'second line' to fill the gaps.
This second line was (left to right): the Irish Picquets; the Duke of Perth's Regiment; Glenbuchat's; Lord Kilmarnock's Footguards; John Roy Stuart's Regiment; two battalions of Lord Ogilvy's Regiment; the Royal Écossais; two battalions of Lord Lewis Gordon's Regiment. Farther back were cavalry units. On the left were: Lord Strathallan's Horse Bagot's Hussars and possibly Balmerino's Lifeguards. On the right were Lord Elcho's Lifeguards and Fitzjames's Horse.
In the center was Charles Edward Stuart's tiny escort made up of Fitzjames's Horse and Lifeguards. When Sullivan's redeployment was completed Perth's and Glenbuchat's regiments were standing on the extreme left wing and John Roy Stuart's was standing beside Ardsheal's. Cumberland brought forward the 13th and 62nd to extend his first and second lines. At the same time, two squadrons of Kingston's Horse were brought forward to cover the right flank. These were then joined by two troops of Cobham's 10th Dragoons.
While this was taking place, Hawley began making his way through the Culwhiniac Parks intending to outflank the Jacobite right wing. Anticipating this, the two battalions of Lord Lewis Gordon's regiment had lined the wall. However, since the Government dragoons stayed out of range, and the Jacobites were partly in dead ground they moved back and formed up on a re-entrant at Culchunaig, facing south and covering the army's rear. Once Hawley had led the dragoons through the Parks he deployed them in two lines beneath the Jacobite guarded reentrant. By this time the Jacobites were guarding the re-entrant from above with four battalions of Lord Lewis Gordon's and Lord Ogilvy's regiments, and the combined squadron of Fitzjames's Horse and Elcho's Lifeguards.
Unable to see behind the Jacobites above him, Hawley had his men stand and face the enemy. Over the next twenty minutes, Cumberland's superior artillery battered the Jacobite lines, while Charles, moved for safety out of sight of his own forces, waited for the Government forces to move. Inexplicably, he left his forces arrayed under Government fire for over half an hour.
Although the marshy terrain minimized casualties, the morale of the Jacobites began to suffer. Several clan leaders, angry at the lack of action, pressured Charles to issue the order to charge. The Clan Chattan was first of the Jacobite army to receive this order, but an area of boggy ground in front of them forced them to veer right so that they obstructed the following regiments and the attack was pushed towards the wall. The Jacobites advanced on the left flank of the Government troops, but were subjected to volleys of musket fire and the artillery which had switched from round shot to grapeshot.
Highland charge Despite this, many Jacobites reached the Government lines, and for the first time a battle was decided by a direct clash between charging highlanders and formed redcoats equipped with muskets and socket bayonets. The brunt of the Jacobite impact was taken by only two Government regiments-- Barrell's 4th Foot and Dejean's 37th Foot. Barrell's regiment lost 17 and suffered 108 wounded, out of a total of 373 officers and men.
Dejean's lost 14 and had 68 wounded, with this unit's left wing taking a disproportionately higher number of casualties. Barrell's regiment temporarily lost one of its two colors. Major-General Huske, who was in command of the Government second line, quickly organized the counter attack. Huske ordered forward all of Lord Sempill's Fourth Brigade which had a combined total of 1,078 men (Sempill's 25th Foot, Conway's 59th Foot, and Wolfe's 8th Foot).
Also sent forward to plug the gap was Bligh's 20th Foot, which took up position between Sempill's 25th and Dejean's 37th. Huske's counter formed a five battalion strong horseshoe-shaped formation which trapped the Jacobite right wing on three sides. Poor Barrell's regiment were sorely pressed by those desperadoes and outflanked. One stand of their colors was taken; Colonel Riches hand cut off in their defense... We marched up to the enemy, and our left, outflanking them, wheeled in upon them; the whole then gave them 5 or 6 fires with vast execution, while their front had nothing left to oppose us, but their pistols and broadswords; and fire from their center and rear, (as, by this time, they were 20 or 30 deep) was vastly more fatal to themselves, than us. — Captain-Lieutenant James Ashe Lee of Wolfe's 8th Foot.
Bayonet drill innovation said to have been developed to counter the "Highland charge". Each
soldier would thrust at the enemy on his right--rather than the one straight ahead--in order to bypass the targe of Highlanders.
Located on the Jacobite extreme left wing were the Macdonald regiments. Popular legend has it that these regiments refused to charge when ordered to do so, due to the perceived insult of being placed on the left wing. Even so, due to the skewing of the Jacobite front lines, the left wing had a further 200 meters (660 ft) of much boggier ground to cover than the right. When the Macdonalds charged, their progress was much slower than that of the rest of the Jacobite forces. Standing on the right of these regiments were the much smaller units of Chisholms and the combined unit of Macleans and Maclachlans. Every officer in the Chisholm unit was killed or wounded and Col. Lachlan Maclachlan, who led the combined unit of Macleans and Maclachlans, was gruesomely killed by a cannon shot.
As the Macdonalds suffered casualties they began to give way. Immediately Cumberland then pressed the advantage, ordering two troops of Cobham's 10th Dragoons to ride them down. The boggy ground however impeded the cavalry and they turned to engage the Irish Picquets whom Sullivan had brought up in an attempt to stabilise the deteriorating Jacobite left flank. Jacobite collapse and rout With the collapse of the left wing, Murray brought up the Royal Écossais and Kilmarnock's Footguards who were still at this time unengaged. However, by the time they had been brought into position, the Jacobite army was in rout. The Royal Écossais exchanged musket fire with Campbell's 21st and commenced an orderly retreat, moving along the Culwhiniac enclosure in order to shield themselves from artillery fire.
Immediately the half battalion of Highland militia commanded by Captain Colin Campbell of Ballimore which had stood inside the enclosure ambushed the Royal Écossais. Hawley had previously left this Highland unit behind the enclosure, with orders to avoid contact with the Jacobites, to limit any chance of a friendly fire incident. In the encounter Campbell of Ballimore was killed along with five of his men.
The result was that the Royal Écossais and Kilmarnock's Foot guards were forced out into the open moor and were rushed at by three squadrons of Kerr's 11th Dragoons. The fleeing Jacobites must have put up a fight for Kerr's 11th recorded at least 16 horses killed during the entirety of the battle. The Irish picquets bravely covered the Highlanders retreat from the battlefield and prevented a massacre. This action cost half of the 100 casualties suffered in the battle. The Royal Écossais appear to have retired from the field in two wings. One part of the regiment surrendered upon the field after suffering 50 killed or wounded, but their colours were not taken and a large number retired from the field with the Jacobite Lowland regiments.
This stand by the Royal Écossais may have given Charles Edward Stuart the time to make his escape. At the time when the Macdonald regiments were crumbling and fleeing the field, Stuart seems to have been rallying Perth's and Glenbuchat's regiments when O'Sullivan rode up to Captain Shea who commanded Stuart's bodyguard: "Yu see all is going to pot. Yu can be of no great succor, so before a general deroute wch will soon be, Seize upon the Prince & take him off...". Shea then led Stuart from the field along with Perth's and Glenbuchat's regiments. From this point on the fleeing Jacobite forces were split into two groups: the Lowland regiments retired in order southwards, making their way to Ruthven Barracks; the Highland regiments however were cut off by the Government cavalry, and forced to retreat down the road to Inverness.
The result was that they were a perfect target for the Government dragoons. Major-general Humphrey Bland led the charge against the fleeing Highlanders, giving "Quarter to None but about Fifty French Officers and Soldiers He picked up in his Pursuit". Conclusion: casualties and prisoners.
The total of Jacobite casualties during the battle has been estimated at about 1,500–2,000 killed or wounded. Cumberland's official list of prisoners taken includes 154 Jacobites and 222 "French" prisoners (men from the 'foreign units' in the French service). Added to the official list of those apprehended were 172 of the Earl of Cromartie's men, captured after a brief engagement the day before near Littleferry. In striking contrast to the Jacobite losses, the Government forces suffered 50 dead and 259 wounded, although a high proportion of those recorded as wounded are likely to have died of their wounds. For example, only 29 out of 104 wounded from Barrell's 4th Foot survived to claim pensions. All six of the artillerymen recorded as wounded died. The only Government casualty of high rank was Lord Robert Kerr, the son of William Kerr, 3rd Marquess of Lothian.
The Duke of Cumberland moving with all his forces had arrived at Aberdeen on the 27th and Moir of stoneywood who commanded there for the Prince was compelled to retreat to Fochabers where he and Captain Shee who accompained him met with Lord John Drummond who had advanced so far to protect the disembarkation. After the battle Moir of Cromar was wounded, some Moirs were taken prisoners and sent to the America, William Moore was transported and banished, James Moir of stoneywood and his brother escape to Sweden. It is unknown if any Moirs, O'Moores were killed but most likely some were Killed. Moir managed to take his men off Culloden with their banner and went to Ruthven. On hearing the Prince's message to disband they tore the banner off from the staff and dispersed.
The Haggis at War
In 1746, after the battle of Culloden, a small group of Jacobite soldiers, led by James Moir of Stoneywood, were on the run. They had paused on the slope of Bennachie to light a fire and cook themselves a meal, thinking to themselves safe from pursuit. Just as they were cooking haggis in a pot, they were surprised by a troop of Hanoverian soldiers. As they sprang up to flee, the pot was overturned and the haggis rolled out. An English trooper caught it on his bayonet, whereupon the Haggis disintegrated, showering him and his companions with it's boiling, hot contents, temporarily halting the chase. As the refugees made their escape, one of Stoneywood's companions, John Gunn, called out in Gaelic: " Even the Haggis, God bless her, can charge downhill."
Below is a list of Moirs, and varient of the name served in the following regiment of the Jacobite army.
1. James Moir of Stoneywood - Stoneywood’s Aberdeen Regiment
2.John Moir- Stoneywood’s Aberdeen Regiment
3. Charles Moir of Stoneywood (Brothers)- Stoneywood’s Aberdeen Regiment ( Charles Moir commanding 2nd Company of Stoneywoods 100 well equipped Lowland volunteers)- http://aberdeenwargamesclub.com/art...
4. Robert Moir
5. Charles Moir (Aberdeen)- Stoneywood’s Aberdeen Regiment
6. Charles Moir- Capt. Lord Lewis Gordon’s Regiment (https://books.google.com/books?id=c...)
7. William Moir (Dundee)- Ogilvy’s Regiment
8. Dr. Henery Moir ( Kelso)- Bannerman of Elsick’s
9. John Moir (Templand)- Pitsligo’s Horse Cavalry
10. Kenneth Moir ( Miltoun of Ord)- Pitsligo’s Horse Cavalry
11. Robert Moir ( Kelso)- Lord Balmerino's troop of the Lifeguards
12. William Moir of Lonmay- Pitsligo’s Horse Cavalry
13. ? Moir of Cromar ( wounded at Colluden)- Stoneywood’s Aberdeen Regiment
14. Henry Moir- Lord Balmerino's troop of the Lifeguards
15. Robert Moir- Lord Balmerino's troop of the Lifeguards
(https://books.google.com/books?id=N...)
16. William Moir( Peterhead)- Pitsligo’s Horse Cavalry
17. LT. Moore- Lord John Drummond’s Regiment
18. William Moore ( Dundee)
19. Angus Mor ( Glenfinnan)
20. Evan More ( Teanclan)
21. William Moar ( Dundee)
22. William Mair- Bannerman of Elsick’s
A head court of the burgh was thereupon convened by the earl in the New or East Church of St Nicholas and a Jacobite council elected on his nomination with Patrick Bannerman as provost while Moir of Stoneywood Moir of Scotston and James Bisset younger of Lessen drum country gentlemen who were also burgesses of the city were appointed councilors. In Aberdeen itself the most active of the Jacobites was James Moir of Stoneywood nephew of the governor and of the old families in the neighbourhood. Irvine of Drum Menzies of Pitfodels and Sir Alexander Bannerman espoused the Jacobite cause Francis Farquharson of Monaltry commanded the Aboyne battalion consisting to a large extent of his own kinsmen and their retainers from Upper Deeside Among the other gentlemen of Banffshire and Aberdeenshire who took part in the insurrection were Sir William Dunbar of Durn Sir William Gordon of Park the Gordons of Avochie Blelack Carnousie Cobairdy and Hallhead Ogilvie of Auchiries Byres of Tonley Hay of Rannes and Fullerton of Dudwick but the representation of the two counties is significantly meagre and confined for the most part to houses of minor importance.
Lord Lewis who was occasionally in Aberdeen zealously seconded by Moir of Stoneywood who was constantly there did his best to induce Aberdonians to enlist. Of the reluctance of the people of Aberdeenshire to rally to the standard of their lawful prince he writes to Stoneywood with much bitterness and of Banffshire with regard to raising the cess and levying men he says We have been obliged to use great threatening's although no real hardships have been used and in the lazy way the country is in together with the unnatural methods the ministers and other disaffected people make use of to restrain the people from doing their duty there is no raising the quotas of men without seeming violence 2 Another of Stoneywood's correspondents reports having engaged nine servant lads who were induced to draw back by the diabolical lies of their Presbyterian preacher.
There was no actual warfare in either county except the at Inverurie December 23 in which Lord Gordon with his Aberdeenshire Lowlanders including the Aberdeen men under Moir of Stoneywood with the Aboyne battalion under Farquharson of Monaltry surprised and defeated a body of Highlanders consisting chiefly of the two loyal clans of Macleod and Munro whom Lord Loudon had sent from Inverness to the relief of Aberdeen A few of the loyalists were killed and forty one taken prisoners The warfare at this stage was not without its chivalrous features Lord Lewis in response to an appeal addressed to him by the laird of Macleod from Gordon Castle the day after the battle undertook that all possible care should be taken of the wounded and every civility shown to the prisoners with the exception of Regent Chalmers of King's College Forbes of Echt and Maitland of Pittrichie who he said had acted the infamous part of spies and informers and the two last especially who had given a great deal of bad advice to a certain great man who shall be nameless no doubt his own ducal brother These he held it to be consistent neither with honor nor inclination to treat as prisoners of war.
The north eastern regiments had their part in the battle of Prestonpans in the expedition to England at Falkirk and at Culloden There was no bolder braver or more inspiriting warrior in the field than Old Glenbucket as he was called and the other officers Lord Lewis Gordon Lord Pitsligo Monaltry Stoneywood Gordon of Avochie and their subalterns acquitted themselves with credit and with the zeal of men who had staked everything on the issue The general direction of the campaign was not in their hands and for its blunders they were not responsible Some of the men who had been forced into the ranks were more eager to escape from them than to fight On the Government side a company of local militia lately enrolled in the Deeside Highlands as an auxiliary or reserve for the Black Watch which had been transformed into the forty third regiment of regular troops 1 refused to embark with Cope Aberdeen and from another there were numerous on the eve of the battle of Prestonpans Similar desertions occurred on the Jacobite side as in the case of a of Stoneywood's men who were ordered to embark at Find horn for a search expedition in Sutherlandshire and individual desertions appear to have been numerous But is no reason to doubt that on the whole the north regiments consisting though they did almost entirely of inexperienced soldiers fought resolutely and steadily in Jacobite cause.
Gordon of Glenbucket than whom there was no more thorough soldier was again in the forefront In Aberdeen itself the most active of the Jacobites was James Moir of Stoneywood nephew of the governor and of the old families in the neighborhood Irvine of Drum Menzies of Pitfodels and Sir Alexander Bannerman espoused the Jacobite cause. Opposed to it were the Earl of Erroll and the Earl Marischal who saw in it the loss of their hereditary offices of High Constable and great Marischal of Scotland and Moir of Stoneywood Gordon of Pitlurg and James Ogilvie younger of Boyne.
Clan Muir's Castles
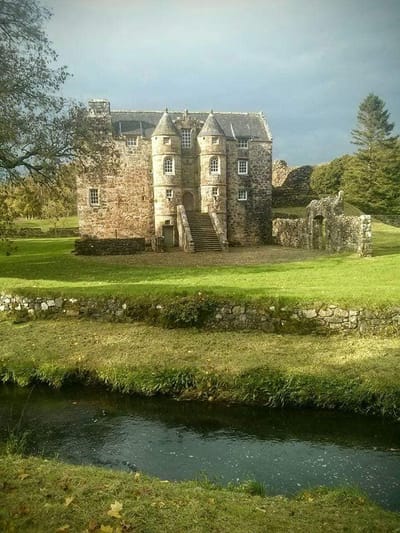
1. Dunadd Ancient Fortress- Held by Fergus Mor the founder of Clan Muir in Scotland.
2. Bothwell Castle- On June 25, 1311, John de la More and Brice de la More were two of several defenders of this castle.
3. Polkelly Castle- Built and controlled by the Mure family for more then 500 years. This is the other Historic and Ancient Seats by the clan Chieftains, in which the younger sons own Polkelly.
4. Rowallan Castle - The castle and barony has been owned, held, and built by the clan Muir. Rowallan castle is one of the Historic and Ancient seats by the clan's chieftains . This includes the new Rowallan Castle.
5. Caldwell Castle- the tower has lay derelict for centuries, once the home and seat of the Mure family " Records for the Caldwell estate near Uplawmoor in East Renfrewshire go back to 1294. Gilchrist Mure acquired the lands and castle of Caldwell through marriage to the heiress of Caldwell of that Ilk and the estate remained with the family until the late 17th century. Caldwell Tower is all that remains of Caldwell Castle, which was probably built in the 16th century.
6. Caldwell Mansion- A new mansion house was built around 1712 by William Mure on the lands of Ramshead, however the present Robert Adam designed house was built by his son, William 'Baron Mure' about 200 yards lower down from the original. Caldwell is the last in a series of early experimental houses in the castle style which began in England with Ugbrooke House and in Scotland with Mellerstain House in Berwickshire. The house is protected as a Category A. In 1799, Jean Hunter Mure, writing from Caldwell, records that Mr Mure is at present in the very agony of making a new garden on the Brandy Hill behind the stables and offices. He has converted the old house into stables and means next year to take away the offices entirely which will make an immense improvement to the place for at present they are not a beautiful ornament.[ This new garden was extensive and incorporated a hot-house. Caldwell House was the Mure family home until 1909.
7. Hall of Caldwell- In 1715 William Mure, advocate, built a hall house on the Caldwell Estate about half a mile south-west of his ancestral home, the old Castle of Caldwell. Called Hall of Caldwell, this remained in the Mure family until the 1930's. The last of the line to live there was Colonel William Mure, with his wife Georgiana and their children William (b.1898) and Marjorie Janet (b.1896). On the Colonel's return from the Boer War in 1902 he developed and extended the Hall, as well as carrying out extensive tree-planting across the parish.
8. Abercorn Castle- The Mures of Abercorn owned Abercorn Castle Rankine's Mure grandson long held out the castle of Abercorn for the Douglases and was slain when it was stormed and the power of that great family ( Mure) overthrown.
9. Abercorn Manor- At one time the Mure clan owned Abercorn Manor, Abercorn Church and were in control of the village of Abercorn.
10. Skaithmuir Tower Castle- The gist of Gibson’s remarks about Skaithmuir are contained in the following extract:- “ The lands of Skaithmuir, from the reign of David II till about the middle of the 16th century, belonged to the family of More, or Mure, of Skaithmuir. The old castle, of which it is supposed a square tower about five hundred yards west of Carron Hall mansion is all that now remains, was said to have been built by Sir Reginald More, Lord Great Chamberlain under David II.“About 1488, Alexander Mure of Skaithmuir was tenant, with his son, James, of Westerton of Bothkenner. A charter, granted by Robert Bisset of Quarrell, is dated at Skaithmuir, 21st May 1543, sic (probably 1534), and William Muir of Skamur is a witness. The confirmation of this charter is dated 9th September, 1542. Probably about this date the Bissets came into possession of the lands. On 31st October, 1582, Alexander Mure of Skaithmuir was retoured heir of Alexander Mure of Skaithmuir, his father, in the lands of Skaithmuir, and as late as 1617, Alexander Mure, eldest son of Alexander Mure of Skaithmuir, was alive. From this time Skaithmuir ceased to be used as a territorial title.”
11. Auchindrane Castle- This was a property of the Browns, but they supported the wrong side in the Wars of Independence, and the property was given to the Annans by Robert the Bruce, then went to the Mures. There are no visible remains of the tower-house which stood at Auchendrane, probably on the site occupied by the present house (a listed building, built in 1856).
12. Cloncaird Castle- 1500s, Walter Muir begins the building of Cloncaird Castle 12 miles southeast of Ayr. Cloncaird Castle remained in the possession of the descendants of Edward for several centuries
13. Burgh Muir Castle- Once belonging and owned by the Muir clan.
14. Craichlaw Castle- In the early fifteenth century as are also the Mures who then owned Craichlaw Castle "The Agnews of Lachnaw. A History of the Hereditary Sheriffs of Galloway
15. Erskine Castle- Built, occupied and controlled by the Mure Clan in Erskine, Renfrewshire. It was granted to Robert Mure, second lawful son to William Muir of Rowallan. His heirs and clansmen heritably subject to legal reversion the lands of Erskine.
16. Skeldon Castle- Built, and controlled by the Mures of Skeldon.
17. Blacklaw Tower castle- Built and control by the Mures of Blacklaw.
18. Cowden Hall/ Mansion- The hall passed to the Mures of Caldwell in 1776- 1910.
19. Monkstoun Castle- belonging to the Mures of the lands and castle of Munktoun.
20. Rothienorman Castle- Once owned and control by the Moirs of Aberdeen for several centuries.
21. Tonley Mansion- was owned and controlled by the Mures and Byres families. What’s left standing, not much, hints at the once grand Scottish baronial residence and estate of around 5000 acres belonging to the Moir-Byres family.
22. Cassencarrie Castle- originally a four-story tower-house built and occupied by the Muirs of Cassencarie in the late 16th century, it was extended to the north in the late 18th century with a service wing added in the early 19th century.
23. Ravenscraig Castle (Kirkcadly)- was built by Mures and most likely defended for the kings of Scotland, but king James III gave it to clan Sinclairs rather than clan Muir.
24. Glanderstoun Castle- Crawford mentions a confirmation of Glanderston to the Mures in 1507, it appears to be earlier. From 1500 to 1516 it was the cause of a feud between the Mures and Maxwells of Nether Pollock. The tower is probably 1500 or earlier. I speculate that the feature in Glanderston Woods is a watch tower, since there was such a tower (standing today) opposite Old Caldwell Castle, and possibly at Capelrig.
25. Gladerstoun Mansion-Glanderston Estate, associated with the Stewart Kings of Scotland, passed from the de Croc family to the Earls of Lennox and thence to John Mure of Caldwell who was recorded as living in Glanderston House in 1560.A new house was built in 1697 and in 1774 the estate was sold to Speirs of Elderslie, a Glasgow tobacco baron.
26. Stanecastle Tower- Andro Mure and Robert Mure residing there and the Mure family 1640-1876.
27. Leckie Castle- David Moir of Craigarnhall, Sheriff Clerk of Stirling, who was probably his law agent. At all events the crisis ended in the transference of the estate of Leckie to the lawyer, and there was no longer a Leckie of that ilk, although the dispossessed Laird continued by courtesy to be so designed. With this Laird, therefore ends the long line of Leckies of Leckie. The Moirs held Leckie lands and castle since 1664? - 1906.
28. Watson House/ Mansion- The new mansion house of Leckie was built by Robert Moir in 1829.
29. Stoneywood Mansion- The Stoneywood house was owned by all the four generations of Moirs. These Moir of stoneywood would be famous for taken part in the Jacobite Rising.
30. Dundonald Castle- Dundonald Castle was the favourite home of Robert II and his wife Elizabeth Mure.
31. Perceton Castle- Perceton House was the site of an old castle, owned by the Mure family.
32. Loch an Eilein Castle- Mores of Drumcork was in charge of this castle. GRIZEL MORE OF ROTHIEMURCHUS: There is an incident thus recorded in the Fair Collections During the troubles of 1688 -9. The Covenanters the family of Rothiemurchus and some of the neighbors were obliged to take refuge in the castle of Loch an Eilean their own property During their residence there they were attacked from the shore while a smart fire of musketry was kept up from the castle to carry on Grlzel More the Lady Rothiemurchus who was a clever active woman was busily employed all the time of the attack in casting leaden balls for the defence.
33. Loch Doon Castle- Edward Mure was a keepership of Loch Doon castle.
34. Ellon Castle- In an between the hostile forces Thomas Forbes of was killed and Kermuck and his eldest son John were outlawed An exhaustive account of the has been compiled and written by Mr Thomas Moir Ellon. In 1657 the Kennedys made over estates to John Moir afterwards of Stoneywood his wife who held them till 1669 when they were disposed of for 42,500 Scots to Sir John Forbes of Vatcrton son of the slaughtered Thomas Bailie.
35. Dalmusternock House- Built and owned by the Mures of Rowallan. was a dower house built and occupied by William Mure after his marriage and prior to inheriting the family seat of Rowallan Castle.
36. Blairdrummond Castle- The original Blair Drummond House was built in 1715. Sir John Kay, a tea merchant from Glasgow, purchased the house and its surrounding land in 1916. Because he had no sons, Kay passed the property to his nephew Sir John Muir, the father of the park's present owner Jamie Muir.
37. Capelrig House- 1600, the estate of Capelrig was bought by the Mure family of Caldwell. During the bloody, Covenanting era the Mures temporarily lost Capelrig to King Charles's general in Renfrewshire, Sir Tam Dalziel of Binns. The lands were later restored to the family and then sold to Robert Barclay, a Glasgow lawyer in 1765.
38. Glasgow Bishop Castle- The Mures of Caldwell attack and capture the castle, but eventually the government attack the castle, but the Mures of Caldwell sacked the castle and left before the government forces.
39. Loudoun Castle- The Mures and the Campbells shared this castle together.
40. Morton Castle- At one time the Morton family a variant spelling of Moor who built, occupied and controlled.
41. Drumsuie Castle- The Muirs of Drumsoy owned and built by the Mures of Drumsoy.
42. Longcaster Castle- The M' Dowalls of Garthland who built a castle on an Island in Dowalton Loch in which in 1496 it was in possession of the Mures of Claichlaw.
43. Bedrule Castle- Sir Walter Comyn gave Sir Gilchrist Muir of Rowallan the lands in the borders with Bedrule castle.
44. Foveran Castle- Built, controlled and occupied by the Mures of Foveran.
45. Castle Muir " Rueberry" Castle- Castle was built by the and owned by the Mure clan in Kirkcudbright.
46. Craigskean Castle- Mures of Craigskean had a castle there." Extracts from: Carrick Gallovidian by J.K.McDowell (1947).
47. Knockdon Castle- Owned by the Mure of Auchendrane .
48. Denmore House- George Charles and Mary Agnes Moir who owned this house.
49. Hunterhill House- Owned by Thomas Muir.
50. Crossbasket Castle- James Muir, merchant in Glasgow was one of the heirs to purchase castle/ house.
51. Birdston Farm House- Thomas Muir’s ancestors, who were farmers from Ayrshire, purchased land at Birdston around 1650 and built dwellings there. A later Birdston Farm House still stands today, its design very similar to that of Huntershill House at Bishopbriggs. Thomas Muir’s father owned land at both Birdston and Hayston nearby. Birdston was also the birthplace and residence of ‘The Campsie Poet’, William Muir.
52. Kermuck Castle- Owned by the Mures after they took it from the Kennedy clan.
53. Lonmay Castle- Was occupied by the Moirs of Lonmay.
54. Park House- In 1820 the lands of Park estate passed from the Irvines to the Moirs of Aberdeen.
55. Bark Mill/ Mains house- Mains lodge as Muir Lodge after William Muir who built Main House.
56. Myres Castle- Upper addition to south east turret bears a datestone, and armorial panels of Stephen Paterson and Elizabeth Mure, his wife, who had acquired Myres by 1611.
57. Fenwick Parish Church- Outside the stairs to Rowallan loft with the coats of arms of the Mure of Rowallan. Built attend and where the convenanters Mures went to church.
58. Caldwell Parish Church- This town church was built in 1889 by the owners of the Caldwell Estates, the Mure family.
59. Neilston Parish Church- The chieftains of the Mure of Caldwell are buried in a vault at this church.
60. Kilwinning Abbey- Gilchrist Mure as a reward for his valour at the battle of Largs to commemorate his good fortune and devoted certain of his lands for religious purposes to founded the abbey.
61. Carron Hall- Built and occupied by Sir Reginald Mure and the Mures of Skaithmuir.
62. St. Laurence Chapel- Built by Sir Gilchrist Mure.
63. St. Michael Chapel- Built by Sir Gilchrist Mure.
64. Chapel of Kilmarnock- Built by Sir Gilchrist Mure and the burial of the chieftains of Mure of Rowallan.
65. Penkill Castle- Controlled and owned by the Mures before they were ejected wrongfully by the Boyds.
66. Lauchope House- Home to the Muirheads.
67. Craigmiller Castle- Home to the Gilmores.
68. Sempill Castle and Church- Robert Mure of Caldwell married into the Sempill, and changed his name to Robert Sempill, and owned Sempill castle.
69. House Old Beid House- Owned by the Moirs.
70. Perceton Church- serves as the burial ground for the Macreddies and Mures of Perceton.
Clan Muir's Feuds and Raids
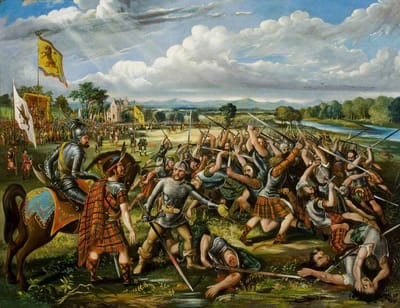
Clan Muir's Allies
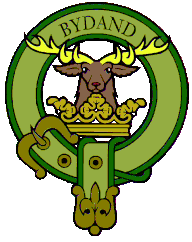
Clan Gordon
Clan Muir is a close ally to Clan Gordon. The following statement is made by Clan Gordon about the Moirs " The Moirs had always been told that their people were Scottish and from Caithness and part of Clan Gordon. This belief is true, the Moir family is a sept of clan Gordon as they married into the Gordon clan, a number of times in the past. Whilst they are related and part of clan Gordon, they have their own crest and chieftain but remain as stalwarts ( Stalwarts- loyal, reliable and hardworking supporters " allies") of the clan. The main homelands of the Moir family were between Aberdeen and Glasgow, Otterbourne, Abergeldie, Invernettie, Scotstown, Stoneywood and Hilton. Also Gordon inhabited areas. Caithness in older times was most of northern Scotland and these Moirs may have been part of the Sutherland Gordons in the North but the Moirs like most families were widespread but held large tracts of land in Aberdeenshire .”If these Moirs were from Caithness, then it is most likely that they came from areas like Loch More, and Ben More. One thing about these highlands & Aberdeen Moirs is that they are extremely close allies of Clan Gordon.
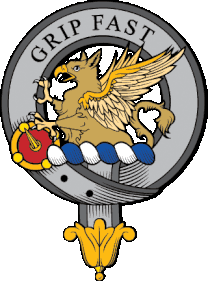
Clan Leslie
The Laurus Leslaeana (1692) states that the third successor to Bartholomew, married around 1250 to Catherine Mure, heiress of Tasseis ( taces) of Fife, which would be the earliest connection between the Mures and Leslie clans. Ever since we helped the Leslies to fight in battles and in their feuds.
 Clan Stewart
 The Stewarts and the Mures have a strong, and tight relationship between the two clans. The first connections between these two clans; is when Elizabeth Muir who married the king, Robert II of Scotland, in which they produce the Royal Stewarts line. In another account, it is believe that the Mures of Rowallan support the Stewarts of Darnely at the battle of Craignaught Hill, which eventually lead to the feud of the Mures of Rowallan and Clan Boyd. The Mures of Auchendrane, Cloncaird, Stewarts of Ochiltree and Dunduff against the clan Kennedy and Fergusson.
Clan Douglas
Sir Adam Muir had two younger sons, Alexander and Rankine, were steady adherents of the Douglases. Rankine, the youngest son, was "commonlie called of Abercorn," says the 'Historie,' "not that he had these lands in heritage, for that doth never appear by historie nor evident that ever come to my hands, notwithstanding of the common tradition thairanent, being established thair as bailiffe and a chief officer under his lord, the earle of Duglass, having charge of his men thair in all his noble atchiefements." He "rose to no mean respect, place, and power, and is said to have attained to large possessions in Stirlingshire within Abercorn, the Carses Calder and other places adjacent where he also settled divers of his surname and friends." He was an active and stirring adversary of Sir Alexander Livingstone of Calender, guardian of the young king, James II., one of the principal enemies of the earl of Douglas. Rankine's grandson long held out the castle of Abercorn for the Douglases, and was slain when it was stormed, and the power of that great family overthrown. Another account was Kenneth Moir who went on crusade with a Douglas, to bring King Robert the Bruce's Heart to Jerusalem but never made it. They were detour to Spain to help the king of Spain to fight the Muslims at the battle of Teba. Unfortunately all the knights were killed except for Kenneth Moir who ended up bring back the heart and his fallen comrade back to Scotland.
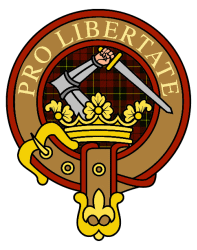
Clan Wallace
Clan Muir during the Scottish independence war against Edward's army joined forces with Clan Wallace, and have been a close ally. The Mures were also a close allies to Clan Wallace. The Mures of Cloncaird has intermarried with the Wallaces of Dulloris. The Mures of Rowallan has also intermarried with the Wallace clan.
Clan Boyd
Both the Mures of Rowallan and Polkelly had a special bond with Clan Boyd. Both of these clans fought side by side in battles, and sometime would come to the aid when one of these clans were feuding. In one instance, a Margaret Boyd had married John Muir of Rowallan to end a feud between the lord of Rowallan and the laird of Craufurdland. In a feud between the Mures and Clan Cunningham states " There is Patrick Boyde, a brother to the laird of Rowallan and twenty six of his men, taking part of a raid upon the Cunninghams of Cuninghamehead. The Mures of Rowallan and Boyds fought on the same side at the battle of Glasgow Muir.
Clan Agnew
The Muirs of South Ayrshire and in Galloway, supported and ally themselves with clan Agnews against Clan Kennedies at the battle of Brockloch Burn. The Mores continue to fight and served Agnew in Wigtiown.
Clan Grant
The Mores of Drmcork has played a vital role as allies to clan Grant. These Mores served Clan Grant during war time and during feuds. These Mores also held and defend Loch an Eilein Castle.
Clan Montgomery
Mure of Caldwell with overwhelming of debt; married Mongomery's duagther to relieved him from the incumbrance but at the expense of a Bond of by which the Laird bound himself to be the Earl's man and to render military service as long as the sum lent remained unpaid a condition simply involved him still more deeply in the Montgomeiy Cunningham feud. Battles: Battle of Sauchieburn (1488), Battle of Kerelaw (1488) Auchenharvie (1526), Waterstoun (1528) Eglinton and (1528), Aiket (1586).
Clan Campbell
There are however two instances of a Campbell connection on which, presumably, the attribution is based. James Mure Campbell, who succeeded his cousin as 5th Earl of Loudoun in 1782 had added the name Mure to his own on succeeding to the estates of Rowallan. These he inherited through his mother who was the daughter of David Earl of Glasgow and Jean Mure, heiress of Rowallan. Members of the same family had been among the Presbyterian lowlanders imported into Kintyre the previous century by the Marquess of Argyll in order to ensure the payment of rent from his estates there and from the later 1600s onwards, the name figures among the Earl’s tenants in Kintyre. This Lowland family ( The Mures of Rowallan) was originally from Ayrshire/ Renfrewshire area, having been brought with other yeoman families to the Campeltown region of Kintyre, to assist in calming the clan feuds.
In 1650, Mure received in tack an eight merk land “ piece of land” from the Marquis of Argyll.
The first mention and association between clan Campbell and Clan Muir. He moved with his wife, his brother Robert and his three sons to the Kintyre peninsula. There he became part of the general strategy of the Campbells to supplant the Macdonalds in the area. The Mures were given the lands in the Campbelltown area. Alexander Mure continue to fight along side with clan Campbell and was eventually killed in Ireland in 1657. All the male line of the Mures in the Kintyre area, where they all served with the Campbells in both Scotland and Ireland. The Mure of Kintyre maintain a relationships with the Ayrshire families which includes: Muir of Rowallan and Caldwell, Campbells of Louden, Dunlops of that Ilk, and the Wallaces of Craigie. William Mure of Kildavie rose with the Earl in 1685 against James II. Mure of Kildavie was arrested by the Earl of Atholl and banished with his family to Ireland. His son, Charles Mure a Captain, fought on behalf of William III in 1689.
Clan Lindsay
One of Clan Muir's Ally.
Clan Hamilton
One of Clan Muir's Ally.
Clan Muir's Feuds
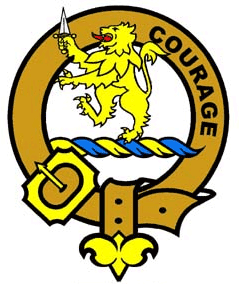
Clan Cumming
This feud's date was around 1220- 1286, Gilchrist Mure was dispossessed of the house and living at Rowallan by the strong hand of Sir Walter Cuming, and was compelled to keep close in his castle of Polkelly until the King Alexander III raised sufficient forces to subdue Cuming and his adherents. " The first of the Mures of Polkelly the historian of the Mures was Ranald kinsman of Sir Gilehrist More of Rowallan come from Ireland and aided him in his feuds with the Cumins as well as fighting under at the Largs where Sir Gilehrist credit for his prowess." There were several battles at Polkelly castle attack by the Cummings.
In the beginning of the reign of Alexander III., Sir Walter Cumyn took forcible possession of the house and living of Rowallan, "the owner thereof, Gilchrist More, being redacted for his safety to keep close in his castle of Pokellie."As some workmen were making a level for a quarry near the site we can hardly say ruins of the Castle of Polkelly they found an ancient spear head with some of the wood of the shaft still attached to it In form it is like one of the halberts as they are called which are usually carried by the town officers in front of the magistrates of our Scottish burghs and is unquestionably a very old specimen of the Scottish spear in the use of which Scotsmen were so famous in days of yore .
A quantity of bones were found at the same time but whether they were human bones or not we cannot say as they were not preserved. It is impossible to say how long this relique of the olden time has remained in the earth but that it had been lost in some stricken field there can be very little doubt. The neighbourhood of Polkelly and Rowallan must often have been the scene of broils and battles during the times in which the castles were held by the Cummins and the Mures and in some of these no doubt fell the follower of one or other of these houses who had handled the spear. During the reign of Alexander III when the powerful family of the Cummins lorded it over Scotland. Sir Walter Cummin took possession of Rowallan Castle by force and Gilchrist Mure the Baron of Rowallan was obliged for a time to seek safety in the Castle of Polkelly. It may have been in some of the skirmishes which this state of things would often bring about that the owner of the spear was slain or he may have been a follower of the famous Rud of Rowallane who in after times was head of the ancient house of Mure.
But enough of speculation on this ancient spear head. The Castle of Polkelly seems to have been extensive but hardly a stone of it now remains above the surface of the earth to speak of its form or its strength. Immediately behind however there is a level field which has obviously been the garden. The soil of it is particularly deep and rich. We have been informed that it never was known in the memory of man to be left lea but is cropped yearly with advantage. The lands of Polkelly are now the property of the Earl of Glasgow. The spear head has been sent to the museum of Anderson's University Glasgow.
Clan Cunningham
Date: 3 November 3, 1508 or September 20, 1570- ? Result: Mure Victor. Cunningham wins Aikett lands and Mure lose Aikett. Can Mure of Polkelly victory against Cunningham over their rights regarding grazing. Clan Muir of Rowallan and Cunningham both were almost fully destroy. Mure disposed of Cuninghame of Cuninghamehead Clan branches involvement: Clan Mure of Pokelly, Caldwell and Rowallan. Cunningham of Aikett, Kilmarus, and Cuninghamehead.
"There is Patrick Boyde, a brother of the Laird of Rowallan, and twenty-six of his followers, who are there charged with taking part in a raid upon the Cuninghames of Cuninghamehead. Close by is another brother to Rowallan, indicted for oppression done to the Laird of Busby and one of his adherents, in the town of Stewarton. Their hereditary enemy, Cuninghame of Cuninghamehead, is waiting to account for his share in the strife and for a series of other offences against his neighbours." In the year 1554 by son John Mure knighted by James V .He married Jonet Kennedy of Bargany in Ayrshire by whom he had several sons. He was killed in the Cunningham and Eglinton feud September 10 1570 One of his letters to his kinsman Hugh third Earl of Eglinton has been preserved and partly printed in the Eglinton MSS.
Mure of Caldwell with overwhelming of debt; married Mongomery's duagther to relieved him from the incumbrance but at the expense of a Bond of by which the Laird bound himself to be the Earl's man and to render military service as long as the sum lent remained unpaid a condition simply involved him still more deeply in the Montgomeiy Cunningham feud. Battles: Battle of Sauchieburn (1488), Battle of Kerelaw (1488) Auchenharvie (1526), Waterstoun (1528) Eglinton and (1528), Aiket (1586). The Mures fought at the battle of Beith against the Cunninghams, and John Muir of Blacklaw was killed in Battle.
The preliminaries over, the Court proceeds to hear three different cases all arising from a feud between the Cuninghames and the Mures. Old opponents these, and destined to be opponents for many years still to come. In the first of the three, Patrick Boyde, in all probability one of the Boydes of Kilmarnock and connected by marriage with the family of Mure, is charged, in company with Neill Smyth, the tenant of Girdrum, and twenty-five others, with having come to the Kir...k of Stewarton in company with John Mure of Rowallan and there engaged in conflict with Cuninghame and his servants. The immediate cause of dispute seems to have been the office of parish clerk, the Mures, on the one hand, and the Cuninghames on the other, forcibly insisting on the appointment of their own nominees.
The Mures thus disposed of, Cuninghame of Cuninghamehead is called to the bar, first for engaging in the contest concerning the parish clerkship and, in addition, for other offences. Not only had he taken part in the fray, but, turning his attention homewards, he had set covetous eves upon a piece of land belonging to Lady Cuninghame. Apparently he seems to have been at variance with his relative concerning her right to the lands of Cuninghamehead, and to have thought that he had a right to share her possessions.
The preliminaries over the court proceeds to hear three different cases all arising from a feud between Clan Cunningham and Clan Muir. Old Opponents these, and destined to be opponents for many years still to come. In the first of the three, Patrick Boyde, in all probability was one of the Boydes of Kilmarnock and connected by marriage with the Mure family, is charged in company with Neill Smith, the tenant of Girdrum, and twenty five others, with having come to the Kirk of Stewarton in company with John Muir of Rowallan and there were engaged in conflict with the Cunningham and his servants. The immediate cause of dispute seems to have been the office of parish clerk, The Mures, on the one hand, and the Cunninghams on the other, focibly insisting on the appointment of their own nominees.
In the 16th century, the Ryeburns were caught up in a centuries long feud between the Cunninghams under the Earl of Glencairn, and the Mures, Sempills and Montgomeries lead by the Earl of Eglinton. The feud had started in 1448, when the king unwisely transferred the ballieship of Cunningham, long held by the Earls of Glencairn, to the Earl of Eglinton.
On November 4, 1570, William Cunningham of Aiket and two servants with John Ryeburn of that Ilk, his son in-law, were put on trail for the murder of Sir John Mure of Caldwell, when they pleaded that the deed was committed by the deceased, Alexander Cunningham of Aiket and they were unanimously acquitted. Muir of Caldwell whose father was slain by the Cunninghams in 1570 was acting as another of Giffen's cautioner's in 1591 and was charged with having his men in arms that year. Mure of Rowallan, himself may have been put off to close; an alliance with the Montgomeries because of his ill- feelings towards Lord Boyd with whom he had been at feud with and in fact a Muir of Thornton and a brother of either of Rowallan or Caldwell are listed as friends of Glencairn.

Clan Kennedy
Date: 1425-1600; Result Close Clan Muir victor; King's intervetion in feud. "If the Cassisslis Kennedys were turbulent, they were well matched by their neighbors on the other side of the Polnatibber burn, the Mures of Auchendrane. Auchendrane looked northwards spiritually towards Kyle, but their house stood on the Carrick side of the river Doon, giving them a toehold in the Kennedy kingdom which added edge to the feud between the two families." "Soon the Mures, a branch of the Rowallan family, took hold of Auchendrane, and for two centuries Mures and Kennedys faced one another across the Polnatibber burn. Monklands, lying between the two great houses, was at times as hotly contested as any part of the Anglo-Scottish Border." Known Battles between these clan. Clan Fergusson Joined with the Kennedies during their civil war.
1525- James Mure in Ballochtoyll and others in their part of the slaughter of Martin Kennedy of Lochland.
Ladycross Skirmish
The Cassillis Kennedy's murdered Kennedy of Bargany in a skirmish at Ladycross in 1601. John Mure of Auchendrane, who was present at the Ladycross skirmish, took revenge for his friend Bargany's death by arranging the murder of Cassillis' uncle, Sir Thomas Kennedy of Culzean. At this time my Lord rode to London [King James VI being there, now King James I of England] and left his retainers with my Lady his wife and the Master.
The Master. The Master and the retainers were daily pursuing Auchendrayne. And there being a tryst between the sons of Cloncaird and John Kennedy of Creich at which Auchendrayne should have been, the Master and my Lord's entire household came and lay in wait. But Auchendrayne suspecting a plot did not attend and asked the others to come to him instead. At seeing this they followed and besieged Auchendrayne's house. Auchendrayne's few defenders fired blanks to disperse the attackers and chased them through the woods to the Ash Wood Dykes where they hurt some of the Earl's horses and one of the Earl's retainers was shot through the doublet and his horse in the head, but was not killed.
Ambush at Nisbett's Yard
On 1st January 1597 the Laird of Culzean being in the house of Sir Thomas Nisbett [a border family] at supper, and his servants having gone past his own house of Maybole, through the said Sir Thomas' yard, the Lairds of Auchendrayne and Dunduff and some of their servants accompanied the servant Alexander Kennedy to the Laird of Bargany, and David Moor his servant and lay in wait for him in Nisbett's yard, and the night being dark they discharged some pistolet shots at him. He fled and they chased him through the streets of Maybole to the house of Matthew Macgowan, Merchant; here he escaped between two houses.
Having escaped he pursued the Lairds of Auchendrayne and Dunduff before the Council. The Laird of Auchendrayne and his and the Laird of Bargany's servants were brought to the horn. Yet that was not enough for they bore a great feud against him as they did the Laird of Auchendrayne. The Laird of Culzean took the house of the Laird of Auchendrayne and ransacked it, the furniture and the outbuildings. Also they made many attempts to get [Auchendrayne] himself but God preserved him from their tyranny.
2nd Ambush near Maybole
Having taken this precaution, he proceeded to instigate the brother of the slain Gilbert of Barganie, Thomas Kennedy of Drumurghie by name, and Walter Muir of Cloncaird, a kinsman of his own. to take this opportunity of revenging Barganie's death. The fiery young men were easily induced to undertake the crime. They waylaid the unsuspecting Sir Thomas of Culleyne at the place appointed to meet the traitor Auch-indrane, and the murderers having in company five or six servants well mounted and armed, assaulted and cruelly murdered him with many wounds.
Battle of Cassilis Castle
Accordingly, this hot-headed youth, at the instigation of Auchindrane, rode past the gate O' the Earl of Cassilis without waiting on his chief, or sending him any message of civility. This led to mutual defiance, being regarded by the earl, according to the ideas of the time, as a personal insult. Both parties took the field with their followers, at the head of about two hundred and fifty men on each side. The action which ensued was shorter and less bloody than might have been expected. Young Barganie, with the rashness of headlong courage, and Auchindrane, fired by deadly enmity to the house of Cassilis, made a precipitate attack on the earl, whose men were strongly posted and under cover. They were received by a heavy fire. Barganie was slain. Muir of Auchindrane, severely wounded in the thigh, became unable to sit on his horse, and the leaders thus slain or disabled, their party drew off without continuing the action.
This suggested to Muir another diabolical plot. He instigated his brother to meet Sir Thomas at the place appointed and murder him, which they accomplished. Sir Thomas Kennedy of Culzean lay dead, shot several times in the back with pisolets. Capture of Mure of Auchendrane at Castle Kennedy Culzean had promised not to ride with Cassilis but he broke that promise so [Bargany] sent the Laird of Auchendrayne that morning to Castle Kennedy to speak with Culzean about this. When he got there Culzean asked him to take the boat to the island [where the old castle was] which he did, and they spoke for an hour. Cassilis meanwhile had ordered that Auchendrayne should be kept prisoner on the island. Cassilis at length himself came to the garden and accused Auchendrayne and his associates of having designs on his life. Auchendrayne rejected the charge and insisted that the person who had made the accusation to withdraw it, if he was there.
Immediately my Lord was called away to dinner and Auchendrayne's man, on seeing that the boat wasn't being watched, made a sign to his master. Auchendrayne, aware of the danger he was in, took the boat along with [Kennedy of] Ardmillan's brother who was with him and rowing over, leapt on their horses and rode away. They reached Ballantrae where the friends of Bargany were assembled and Auchendrayne told what had happened. The Laird of Bargany was much offended and despatched the Gudeman of Ardmillan and young Carlton [Cathcart] to my Lord Cassilis to ask what he had to say of the affair. The Earl denied that he had ever made such an accusation and when they returned and told Bargany this, Auchendrayne was blamed for inventing the story [Really ??] with a view to aggravating the feud between Cassilis and Bargany. Auchendrayne wrote to the Earl threatening to publish him at the market cross of every town if he denied what he had said to him [farcical !] The Earl returned an evasive answer to the effect that he denied use of the words but saying the same in other words.
The Battle of Minishant
Minishant is situated in the Burns Country five miles south of Ayr - a charming, straggling village in the lee of Brown Carrick Hill. It is too small to be marked on many maps and at first sight would appear to have little history. Yet Henrietta and Hugh Douglas have dug deeply into the past to uncover details of the days when this was the granary of the monks of Crossraguel Abbey, when Kennedys and Mures fought fiercely for power and when the ...village became a busy little place with two woollen mills. Their book is a blend of history, legend and detail of everyday life. It introduces many fascinating characters: Johnny Faa the gypsy who loved the Countess of Cassillis, John Loudon Macadam of tarmacadam roads fame, and Sir Rowland Hill who drank tea and ate newly-baked scones straight from the girdle in the kitchen of the village post-mistress. Here too are.
The Drummer, the Provost and the Maister, all characters who helped to make Minishant. Henrietta Douglas has known Minishant for over 70 years and her son, Hugh, was born there. Both retain strong links with the area and their book combines years of research with a lifetime's affection. It will stir memories of Minishanters and lure strangers to take a look at this fascinating and beautiful corner of Ayrshire.
Skirmish/ Battle of the Brig O' Doon
Bargany, encouraged by Bennane and his sister took to horse and accompanied them along with ten or twenty horsemen riding to Ayr, passing the Bogend, within a quarter mile of Cassilis gate. The Earl saw them and gathered all his retainers and servants and kept them together from Tuesday till Friday, whilst spies watched Bargany in Ayr to inform him when they left town. Bargany was told of the danger but he felt he had his retinue with him and also he held the tithes of the town and therefore felt he could count on the town to provide followers to ride back with him. Contrary to his friends' advice he set out from Ayr on 11th December, a very snowy day such that nobody can see a lance length in front of him.
He had eighty men on horse and on foot. Shortly after leaving town they saw the Cassilis scouts William Cunninghame and Hew Pennandgow at which Auchendrayne counselled Bargany to return, because his followers were not those he could count on and the scouts would not fail to let their master know that he was on his way. And so saying Auchendrayne rode to the Brig O' Doon and first took the two Cassilis scouts. They sent Cunninghame on to Ayr on his word, and took Pennandgow with them as a free friend for he was of the same blood as Auchendrayne. The Laird of Bargany came to the Bridge O' Doon and stayed there, gathered his retinue together and said "Sirs I am here to protest before God, I don't seek the blood of my Lord in any manner but to ride home, if he will let me. And if my Lord does pursue me I hope you will do your duty as befits men; and he that does not want to do this with me can go now." And they all answered "We will die in your defense if he pursues you!" And so they rode forward, dividing into two companies, one with himself and the other with the young Laird of Carlton.
There was with him the Lairds of Auchendrayne, Cloncaird, his brother Thomas, Gilbert Kennedy of Knockdaw, a servant of Auchendrayne's called James Kennedy with two others Edward Irving his page and Thomas McAlexander and some others I need not name. The rest were all with Carlton; so they went to Brochloch near Lady Corse and there was my Lord coming out of Maybole, with his household servants to the number of two hundred men on foot and horse with twenty musketeers, and he reached Lady Corse first. They halted within a musket shot of each other and they began to shout abuse at each other. Patrick Rippeth shouted "Laird of Bennane, Laird of Bennane, it is I Patrick Rippeth who took your hackbut, come down here and if you value your life" but Bennane did not answer even though he had urged Bargany down that way before.
Battle of Dinene
The men of Ayr would have begun to shoot at this point but Bargany stayed them saying "I will not try to kill my Lord nor anyone that comes after me." He then moved onward riding down the Bog side of Dinene [variously spelt place a mile north of Maybole] in order to avoid the Earl's forces. But the latter followed on the other side. At the foot of the bog there were turf dykes to which the hagbutters on both sides rode, the one taking the head of them the other the foot. The Earl's men began shooting first. Bargany seeing that his hagbutters were liable to be attacked because they were near the Earl's men, went to them. My Lord's musketeers seeing him come forward shot at him and the horsemen with him.
At the foot of the bog there was a small burn which the Laird and his men had to cross; here Gilbert Kennedy's horse was slain and also the Laird's brother Thomas's bridle was shot in two so that he was thrown and his shoulder was put out of joint. None crossed the stream save Bargany, the Auchendraynes and Cloncaird, James Bannatyne [a crucial figure at the end of this affair] and Edward Irving. For some reason the Laird was not supported by his cavalry – and it cannot have been due to lack of willingness to fight on the part of the men of Ayr. The group who had crossed the stream came under fire from the Earl's musketeers then were charged by the Earl's cavalry led by Captain Forster or Forrester. They resisted despite the uneven odds and combat continued for a spell.
On the Earl's side young Laird [McIlwaine] Grimat was struck through the chin and he and his horse struck in the ear. Row Cunningham, Pochquhairn's brother was struck in the knee with a lance and out at the buttock. Captain Foster's horse was injured by swords and his pistolet struck out of his hand. His steel helmet protected his head from many blows with a sword. Richard Spense, Master of my Lord's household was slain by Cloncaird. On the Laird's side the Laird himself was slain, Auchendrayne shot and injured in the thigh and his horse also, James Bannatyne's horse was slain, Edward Irving the page was slain by the stroke of a lance and John McAlexander was hurt with a bullet in the thigh.
But now to speak of the noble youth, how gallantly he behaved, my pen cannot express it for against the five there were thirty horsemen who all engaged in the fight. When there was only himself left to fight, Bargany rode hard at the Earl shouting "Where is my Lord himself? Let him now break his promise to me!" The horsemen around Cassilis immediately assailed Bargany, especially Hew Kennedy of Garryhorne and Patrick Rippeth and Quentin Craufurd of Sillyhoil the younger, Garryhorne broke a lance on the Laird and the others struck at him with swords and so forced him to retire.
Then a fellow named John Dick who had been favoured by Bargany before and had never suffered an injury at his hand, threw a lance at him and it went through his head and his throat as he was fighting. The lance broke in him and stuck in his throat, preventing him from breathing. Quentin Craufurd struck him in the face with his sword now that he could not defend himself, however his horse being a very good gelding carried him back to his men where he fell dead being unable to breathe.
By this time a number of Bargany's followers seeing the superior force at the Earl's command and their wounded leaders had left the field. Those remaining took him up and pulling the lance from his throat carried him on horseback in their retreat. Some of Auchendrayne's people took him to Dineme [also styled Dinene or Dinehame, a mile north of Maybole] a quarter of a mile away where he sent his men away saying that they could not defend him and he did not want them to be killed too. A boy remained to tend him.
Shortly afterwards the Earl came to the barn where he lay and would have killed him there and then, but his men counselled him that Bargany would die anyway, or if not Cassilis should have him executed in a legal fashion – for the Earl was the Judge for the whole area. He was kept in Maybole for 24 hours then sent to Ayr where he showed concern for the safety of his friends. Cassilis appealed to the King in Edinburgh for a commission to try Bargany and his retainers. [It is odd that the Earl allowed Bargany to live and cause yet further complications, it seems the Earl was a stupid man.]
Skirmish of Newark Hill
Now the Master sought revenge. He came to Newark Hill with sixteen horsemen, in order to catch Auchendrayne between his houses but by chance Lady Auchendrayne was passing with a servant and she saw them and sent her man servant to warn her husband. He asked for assistance from his friends in Ayr and when they appeared the Master was outnumbered and had to retire in shame. Skirmish at Auchendrayne's house- Clan Mure victory raid of Inch Now to avenge of this act Walter Mure of Cloncaird and Thomas Wallas the page raided the Earl's Estate of Inch in Galloway and there in the house of Mathew Miller set upon David Girvan, son and heir of John Girvan of Calliboliston and slew him, he being my Lord Cassilis' Master of Works for his new house at Auchins. My Lord was highly offended at this and pursued them with renewed vigour. Skirmish at the Foullveir In the month of October 1607 Auchendrayne, his son and a servant were coming from Ayr to Auchendrayne and at a place before the town called the Foullveir [Foul Vennel] they saw Kennedy of Garriehorne one of the attackers of Bargany.
With him were his two brother sons and Gilbert Fergusson of Dunduff, Thomas Fergusson, brother to the Gudeman of Threff and Gilbert McHareine with one Walter McCaw. Upon meeting they shot pistols at each other then took up swords at which the Young Laird of Auchendrayne was hurt on the middle finger with a sword. But the Provost and his men were able to separate them though they could not be reconciled.
Ambush of Sir Thomas Kennedy
Mure of Cloncaird lay waiting for Sir Thomas among the sandhills of St. Leonard's chapel; the four assassins attacked Sir Thomas and slay him with bullets; they took Sir Thomas's purse, ring, sundrie diamonds with his golden buttons.
The Battle of Bloody Burn
The Battle of Bloody Burn were met by the sheriff's men who barred their passage and a muse ensured in which spears and swords thrusted were so freely exchanged that the brook is figuratively asserted to have run red and that day got the name Bloody Burn which has clung to it ever since. Sir David Kennedy called up numerous clansmen from Carrick. The Sheriff was supported by his kinsmen, the lairds of Loch Invar, other and few Mures including Patrick Mure, who delighted in a tuilzie seem to have acted the part of aides decamp. The campaign was opened by Sir David Kennedy riding after formal announcement in force from the house of Inch to Leswalt. The house of Leswalt lay about two miles from Lochnaw at the foot of Aldouran Glen and no sooner had Sir David come in sight of it by the way of St. John chapel, then the sheriff's forces began to appeared descending from the so-called Danish camp in superior force and warned him off.
The conduct of the sheriff on this occasion seems to have been unimpeachable. Backed by numbers, able to enforce his rights he made, a dignified protest and retired. Such a peaceful ending to the day's work seemed to tame the wilder spirits such as the Mures who after seeing the sheriff safely housed; doubled back at full speed, overtook the kennedys and had a glorious tussle in which he had the best of it, and returned in triumph with the spoils of war.
The Battle of Brockloch Burn The Earl of Cassillis had no great difficulty in a remission from the Crown for the slaughter of the Laird. Some of those who had accompanied among them Blairquhan, younger Kennedy, Girvanmains Hew, Thomas Kennedy of Bennan, and Walter Mure of Cloncaird had been rebels at the encounter by the Brockloch burn and the had been endowed with power to pursue them with and swords. On this ground he was formally relieved the consequences of the combat.
Other battles
In 1602 William then a boy at Ayr School was kidnapped by the Mures kept away from home for several years and made to change his name. This was to prevent him giving evidence as to the slaughter of Sir Thomas Kennedy having returned he was murdered on Girvan sands and his body thrown into the sea. The wee folk allowed the fort to be built beside the river Doon, a grim square tower with walls nearly 16 feet thick in places to resist Campbells, Mures or other marauders from the Kyle side of the debated border.
If the Cassisslis Kennedys were turbulent, they were well matched by their neighbours on the other side of the Polnatibber burn, the Mures of Auchendrane. Auchendrane looked northwards spiritually towards Kyle, but their house stood on the Carrick side of the river... Doon, giving them a toehold in the Kennedy kingdom which added edge to the feud between the two families.Soon the Mures, a branch of the Rowallan family, took hold of Auchendrane, and for two centuries Mures and Kennedys faced one another across the Polnatibber burn. Monklands, lying between the two great houses, was at times as hotly contested as any part of the Anglo-Scottish Border.
James Muir of Achendraine in 1590s, married the daughter of Kennedy of Culzean was to bring peace between the Mures of Achendraine and Clan Kennedy of Culzean., and as well bring peace within clan Kennedy.
Clan Crawford
Date: 1476?
Result: Close Victory of Clan Muir: both houses were almost destroyed.
The Raid on Barbieston
result : Clan Mure of Cloncaird and Kennedys victory: Raid was successful.
Sir Adam Mure, the son of John Mure, probably of Cowdams, who succeeded the John Mure just mentioned, is described by Clan Crawford " a gallant stout man, having many feuds with his neighbours, which were managed with great fierceness and much bloodshed." Raid on Barbieston As night was falling, a September night of the year 1530, there was a gathering of the troopers of Carrick in the court-yard of Cloncaird. Sixty Men and more came riding in. Some of these from Doonside, some from the Girvan's banks: not common yoemen and men-atarms, who rode at the beck and call of their chiefs, but nearly all scions of powerful houses.
Blairquhan sent its contingent of Kennedys; so, too, did Bargany, and Cassillis, and Guiltree, and when the raiders assembled at Cloncaird, there was a fair representation of every branch of the great family of Carrick. The power of the Kennedys was unbroken over the whole of Ayrshire, from the Doon to the confines of the shire. Their castles sat upon the rising grounds of the woody vale of Stinchar, they graced the haughs of the Girvan, their walls were washed by the murmuring stream which separated Kyle from the free lances of the bailiary, they were found in the thickest of the woodland, in the shelter of the rocks, on the sea-grit coast. At any time, and at all times, a raid upon their hereditary foes was an attraction.
The Craufurds, who kept the frontier, were as ready to reciprocate; and often in the nights of the fall, when the moon shone bright, rival bands crossed from one side of the Doon to the other to sweep the beeves from the lea and drive the sheep from the pen on the hill side. These cattle-lifting raids were periodical. Many a stout conflict they engendered, and many a man went down before the onslaught of the raiders or under the keen blades of the defenders. Retaliation was always in the air. It only needed the word to be passed to bring the horsemen together ; and so, when the message sped from Cloncaird that a raid was forthcoming on the herds and flocks of green Barbieston Glen, the houses and the castles of Carrick sent forth their representatives to shave in the excitement. The Laird of Cloncaird, Patrick Mure, was connected by marriage with the Kennedys.
He followed the fortunes of the Earl of Cassillis. It was at his instigation the raid was promoted, and it was in response to his summons that the Kennedys assembled. From Cloncaird to the southerly bank of the Doon was not a long ride, and it was not until the moon had risen that the raiders set out on their expedition. The villagers of Kirkmichael heard their horse hoofs as they passed. Well they knew their meaning. Such sounds were familiar to thern, and they only shrugged their shoulders as they thought that some of the raiders might return no more to tell the tale of the night's adventure. A nearer way might have been chosen, but Cloneaird intended to keep his own side of the Doon as long as he could; and so he followed the highway until he entered the shades of Cassillis. They are quiet enough to-day, these shades.
The Doon maintains its ceaseless babble, carrying its story onwards as it flows, and rythmically running as if its waters had never borne a secret on their breast. And yet, were the divinities of the river to speak in comprehensible tones, what a tale they could tell ! In that square old peel that sits so placidly there, dwelt a succession of men who held Carrick in a grip of iron. They are all lying peacefully in the churchyard at Maybole; but from the day when the laird of grey Dunure crossed from the coast and wedded the mistress of Cassillis, down through three long centuries, the men who dwelt within the walls of that historic house made a whole country-side subservient to them. By the force of indomitable will they became the recognized chiefs of all southern Ayrshire and of a great part of Galloway, and by the strength of their arms and the valour of their bearing they relentlessly crushed out all opposition to their iron rule. The memories clustered thick around the castle and the branches of the great planes nodded their knowledge of many a wild and lawless deed, even when Cloncaird and his followers rode beneath the shadow of the keep and beneath the branches of the trees.
It was a familiar echo that the walls gave back as the raiders passed, holding on their way towards the Kirk of Dalrymple and the river ford close by. The night was still. Not a breath of wind stirred the foliage of the Dalrymple forest. Overhead sailed the moon, bringing out in relief the dense arborial mass, the flat top of the Downans, the interlacing streak of the river, the sleeping hamlets, and the distant hills along the coast and inland. Hitherto the route had been through a friendly country but when the Doon was crossed at the ford and the riders were upon the territory of the Craufurds, there was need for extreme caution.
Kerse was a watchful, wary fox. Not once or twice had his followers awaited on the verge of the river the coming of the Kennedys, and driven them back into the stream ere their struggling, horses could obtain a footing on the yielding banks ; and even when the passage of the river had been accomplished, the horsemen of Kyle had been found awaiting the arrival of the cattle lifters under the dark shadow of the woodland. When the Craufurds were not out in force, a solitary watchman had been discovered by the clattering of his horse as he rode away across the country towards Kerse, to tell that the Carrick raiders were abroad and to summon the lads of Kyle to the contest.
There was need, therefore, for caution, and at the same time for speed. The horses broke into a canter, and across the country they carried their riders towards the glen of Barbieston. The landscape was thickly studded with belts of trees, which cast friendly shadows over the troop. The night was still, and nothing stirred save the sheep on the hillsides and the cattle on the grass. If sounds were heard, they were those of nature, animate and inanimate, the lowing of the kine, the bleating of the flocks, the call of the lapwing, the screeching of the owl, the gentle sighing of the wind in the trees, and the distant rush of the river.
On hurried the riders. Well they knew their way. Oft had they ridden across these same fields. Oft harried them of their bovine wealth. It was not a long ride to Barbieston Glen, and they reached it unobserved. Unobserved? Not quite. The sharp eyes of a solitary watchman had seen them ere they entered the river; and ere they had reached the northern bank of the ford, he was speeding with all the haste he could muster towards Kerse. His steed was fleet, the distance could be accomplished in half an hour, and the miles were rapidly slipping away under the striding gallop of the horse.
The warder at Kerse heard him come and threw open the gate to receive him. There was commotion in the castle when he told his tale ; the commotion of excitement, a hasty girding on of swords, of donning of light armour, of snatching the ready hagbuts from their places, of the harnessing of horses in the stalls, of the calling in of the yeomen who lived at hand, of the mustering to repulse the Kennedys and the Mures. It was an old story, and the Craufurds knew every detail of it by heart. Meanwhile the Kennedys and the Mures had entered the glen, and their horsemen were scouring the fields adjacent, for the spoil. Six score oxen fed there, and twelve horses were at the grass in the meadows. Two or three score of sheep completed the number of the live stock.
The moon showed where they were, and there was no searching for them; yet it took time ere they were all collected. For it had to be done quietly. The cattle were gathered together in a group, the horses were secured, and the sheep. Every attempt to break away, or to stampede, was checked by the ready riders. The gates were thrown open, the prey was driven out into the open, unenclosed country, and the raiders moved off towards the river." Me thinks," said Mure of Cloncaird, is they turned their faces to the Doon, "that Kerse has slept over-soundly." "Aye," responded Kennedy of Guiltree, "the old fox has been caught napping for once."
With what speed they could muster, they steadily drove the spoil in front of them. Within an hour they would cross the march of Kyle and re-enter Carrick, and then farewell to the hope of rescue. For Cassillis House was just over there amid the gloom of the trees, and from the rising ground they could all but espy its dark square towers, against the night. An hour! If so, what need to haste? The night was still serene, and sound traveled far; and from the direction in which the Castle of Kerse stood there fell on their ears an indistinct, undefined noise. Guiltree looked at Cloncaird, and they both reined in their horses and listened.
The sound was faint, for it was far off, but, as they listened, it gradually shaped itself into what they could quite well comprehend. It came down more clearly, and more clearly still, until they recognized the rattle of a troop of horsemen across the rough stony road which led from Dalrymple to the hills above Cumnock. There was no need for caution now, and no time to be lost. It could be no other than the Craufurds, hard on their track.
"Drive on the cattle, and reach the ford" shouted Mure of Cloncaird. The Kennedys and the Mures obeyed. The horsemen spread themselves out fan-like in rear of the booty, whips were applied to the Hanks of the steers, the frightened sheep were driven at a run, and the captive horses required no urging on to hurry from the tumult which rose behind. All the while the sound of the coming Craufurds became more and more distinct. They were making for the ford, and if the Kennedys were to drive off the prey they must reach it before their pursuers. The most strenuous efforts were made, therefore, to accomplish their object; but, unless their expedition was to be bootless, there was a point beyond which they could not force their pace. They could have left the cattle, but as well might they have remained at home.
To give them up without a struggle was not one of the contingencies. What they must do was to send a party forward with the booty, and to retain in the rear the service of all who were not thus employed. This they did. About a dozen yeomen were accordingly instructed to drive the, flocks on towards the Doon, and to make the passage with all available speed; the remainder took up their position on the path as it ran through between two belts of trees, and there awaited the inevitable conflict. The Craufurds came full sixty strong, and thus had rather the advantage in numbers.
There was nothing to delay or to stay their progress save the living barrier of Kennedys and Mures under the peaceful shadow of the woodland, and this barrier they must force at all hazards, unless they were to return to Kerse to tell the grey-haired chief whom they had left behind them that they had failed in their object, As the Kennedys and Mures saw them enter between the stretching plantations, they raised a shout of defiance. The Craufurds gave it back, and rode on ready for the shock. Each man held sword or battle-axe in hand, and all were eager for the fray.
The quiet night air, which so shortly before was vocal only with the congenial voices of Nature, was filled with contending cries. These were but the prelude to the rushing of the yeomen, the rattling of steel upon steel, the, prancing of the horses, and the groans of the wounded. Right stoutly did the Kennedys and Mures oppose the men of Kyle. They met them man to man and hand to hand stubbornly, tenaciously contesting every inch of ground. Saddles were emptied of their riders, wounded horses fled across the country, wounded men crept under the shelter of the plantations. But thee Craufurds pressed on and would not be denied. All down the path resounded the echoes of the fray, until the clashing of the armour and the cries of the struggling horsemen awoke, the sleepers in Dalrymple hamlet, and bade them wonder and cower because of the strange, wild medley of the sounds.
The fight was now a running one. Yonder, not two-hundred yards ahead, were the advance guard of the Kennedys, driving on with whip and yell the affrighted flocks. The ford was within sight. The nearer the Craufurds drew, the more desperate were the Kennedys and Mures to stay their progress. Who would reach the ford first? Already some of the oxen had stampeded, and solved the question so far as they were concerned, but the larger portion of the drove was still under control, and might yet be secured. The haughs of Cassillis were but over there, could they be won ere the men of Kerse should intervene and get between the cattle and the river. The banks of the Doon were reached, and there the affray was decided.
Craufurds, Kennedys, and Mures were mingled in struggling confusion, fighting on the haughs by the stream, and in the river's bed the oxen, bewildered, terrified, ran hither and thither in their fright, plunging into the cooling waters, or scattering in all directions across the country. Part of the booty was secured, part was not, and the echoes of the struggle died away in the silence of the night. By common consent the combatants drew off, arid attended to their wounded. There were some who needed no attention.
The battle-axe or the sharp sword-thrust had for ever put them beyond the need for further care. But many there were with cruel wounds, and these were sought out all along the long line of the contest; the flowing blood was staunched, and they were put upon the backs of the horses and taken, the Kennedys across the Doon to where Cassillis opened its portals to receive them; the Craufurds back by the way over which they had come, to the friendly walls of Kerse.
When the dead had been interred and the wounded healed, Kerse lodged information with the criminal authorities against those concerned in the raid of Barbieston. Kennedy of Guiltree, Kennedy of Blairquhan, Mure of Cloncaird, and fifty-seven others, were accordingly brought to book for their misdemeanour. They were sent from the Court of Justiciary in Edinburgh for trial to Ayr, where the leaders became surety for one another, and bound themselves to settle all lawful claims made by the Craufurds for the loss of the cattle lifted. As for the men slain, these were not scheduled in the indictment; and as for the, wounds inflicted, these were a necessity of the situation, a natural outcome of the struggle which went on between the lords of Kyle and of Carrick. The number of cattle, of sheep, and of horses was duly paraded before the Judge, and the Kennedys had to pay accordingly.
John was succeeded by his eldest son Sir Adam Mure of Caldwell who as Crawfurd says " he was a gallant stout man having many feuds with his neighbours which were managed with a great fierceness and much bloodshed.These other clans were Clan Pollock, Cochrane, Blair, Erskine, Mckenna, Torrance, Marjoribanks n probably Hamilton.
Crawfordlandes- From this statement appears that Sir William Mure also held a portion of the estates known as Crawfurdland in the parish of Kilmarnock. The Mansion house ( Crawford's Castle/ House) on his ( Sir William Mure of Rowallan) portion of the property which stands on the submmit of a steep bank. The estate and castle are now in the hands of Clan Crawford. " An historical account of the Macdonnells of Antrim by George Hill.
Clan Maxwell of Pollock
Date: 1499- 1516 Result: Clan Muir Victor
With the Maxwells of Pollok and the Mure of Caldwell they had a long standing feud apparently about the lands of Glanderstone (The battle of Gladerstone). Hector, his second son, was killed in a feud at Renfrew, in 1499, by John and Hugh Maxwell, eldest son and brother of the Laird of Nether Pollok, with which family the Mures had a longstanding quarrel. How it arose does not seem to be exactly. No other infomation about this feud. This forefather Adam knighted by James IV as a preux chevalier and Cid Campeador is described by flattering annalists as a gallant stout man having many feuds with his neighbours which were managed with great fierceness and much bloodshed. Hector Mwyr son of this worthy sire was killed in 1499 by the Maxwells of Pollok whose laird narrowly escaped the vendetta of Caledonia and the wild justice of Hector's brother.
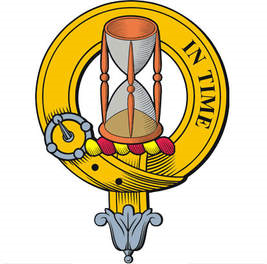
Clan Houston of that Ilk
Date: April 11, 1550- December 7, 1580
Robert Mure, one of the Laird’s sons, was killed by Sir Patrick Houstoun of that ilk and others. The records of the Justiciary Court4 describe the act as " a crewall slauchter, committed under silence of night, on ancient feud and forthocht felony." Two months later, Archibald Houstoun, the actual perpetrator of the crime, was tried and beheaded. This, however, was not considered a sufficient atonement for the deed, and the feud between the two families was not settled for thirty years.
By a written agreement, dated December 7, 1580, between Sir Robert Muir, then of Caldwell, and the same Sir Patrick Houstoun, the amount of compensation due by Sir Patrick for his share in the matter was referred to the arbitration of eight of the leading men in the counties of Ayr and Renfrew.
Clan Ralston
Date: Janurary 24,1500-?
A remission under the Privy Seal was granted to Robert, son of Adam Mure of Caldwell, for the slaughter of the late Patrick Boure and for "forthocht felony " done upon the Laird of Ralston. No other infomation about this feud
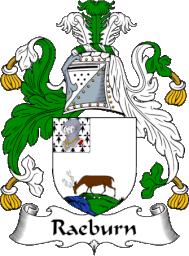
Clan Raeburn/ Ryeburn
Date: September 20, 1570
Sir John Mure, whom James V. knighted, was killed, September 20, 1570, by the Cunninghams of Aitkett and the Ryeburns of that ilk,6 who were also amongst those who slew his kinsman, Hugh, third of Eglinton, April 18, 1586.
John Ryeburn in 1571 was killed in revenge by Sir John Mure's eldest son, Robert Mure who had become " Laird of Caldwell" on the death of his father. Obligation by Hugh, third Earl of Eglinton, to assist the Earl of Glencairn in the pursuit and punishment of the laird of Caldwell amongest others, concerned in the slaughter of John Ryeburn in May 1571. To no avail, as Sir Robert Mure was still the laird of Caldwell when he died in 1617. He was on terms of great intimacy and confidence with James VI of Scotland, who knighted him.
Clan Reid of Kittochside
Location: Kittochside Results: Clan Mure of Caldwell having successful Raids against Reid, until possiblity that the king intervein, in which Reid keep the lands of Kittochside with an additional money.
Two Raids were made by the Mure of Caldwell The Raids by Mure of Caldwell, 1597-1600 It's not clear if James Reid of Wester Kittochside (floruit 1600-41) was present in Kittochside on 21 June 1600 when Robert Mure of Caldwell, with a company of 100 men, armed with lances, spears, swords and other "feirfull wapponis", came looking to murder his father but his father would afterwards complain to the King and the Lords of the Privy Mure of Caldwell, with a company of 100 men, armed with lances, spears, swords and other "feirfull wapponis", came looking to murder his father but Council that the Laird of Caldwell did: "brak up his duris and kistis, and the kistis of his sones and dochteris, Johnne, James, and Beatrix Reidis".
He also complained about the loss of property including: "ane chalder of meill and ane chalder of seid aittis" belonging to his sons John and James: "with thair claithis and pursis, quhairin wes ane hundredth pundis or thairby" [David Masson, LL.D., The Register of the Privy Council of Scotland (H. M. Register House, Edinburgh, 1884), First Series, volume vi, A.D. 1599-1604, pages 118-119].
On 11 June 1597 a small raiding party, led by James Mure of Caldwell, younger, broke down the doors of John Reid's house in Kittochside and terrorized his wife and children by brandishing swords and discharging firearms inside the house.They also set three fires inside the house, and threatened to burn the house down with the family still inside, if they would not say where John was hiding.
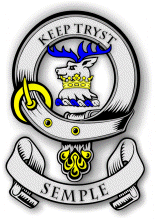
Clan Semple/ Sempill
Date: May 27 1549-1581?
Towards the close of the year 1526. he and his son, Robert Master of Semple, and their friends, invaded and besieged John Mure of Caldwell in " feire of weire with bowis, speiris, gunnys and uthir waponis " at the Place of Caldwell ( Siege/ Battle of Caldwell Castle). The Mure of caldwell fought and routed clan Semple. No other info found.
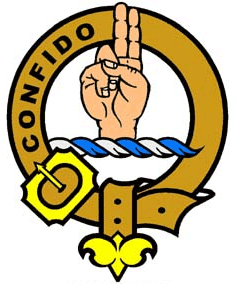
Clan Boyd
Date: (beginning of the feud?) July 9 1422 - September 14, 1589
Result: Clan Mure of Rowallan Victory: Lord Boyd paid John Mure of Rowallan 350 merks for the slaughter of his father. " Notwithstanding the friendship that had long existed between the Mures of Rowallen and the Boyd family of which various instances have been already recorded a deadly feud occurred about this time between them It seems to have arisen out of the slaughter of Sir Robert Colville of Ochiltree (battle of craignaught hill) maternal grandfather to the fourth Lord Boyd in which the Mures were concerned." Thomas maister boyd James boyd of Kipiiis Alexr baillio of Kilmaruok James slos Asloss of yt ilk Ros in bordland Jhenno erawfuird in Wellstoun their accomplices to the number of sixteen all boidin feir of weir wt Jackis speirs secrcitis steil bonnctis lang eulweringis duggis and pistolottis beset John in the Well near the kirk of Prestwick on his way riding alone from Ayr He was assailed and slain on spot Mure of Rowallane as the chief of the deceased Lord Boyd for satisfaction. Ambush near Kirk of Prestwick- Boyd's Victory in the Killing of John Mure.
Clan Muir's other feuds
Clans Mure, Home, Heatleys, Cunninghams, Montgomeries, Ogilvies and Turnbulls were all at feuds with one another.
Clan Moir/ More feuds with Clan Ross.
The Moirs and Mores were involved in a feud against clan Ross; in which these highland Mores, and Moirs sided with the Mackays. June 28, 1550 raided clan Ross. Neill M. Moir, Rory, Moir, Murdoch Mcane More, two John More(s), Tormat More and Donald Dow More were charged for the cruel slaughter of Alexander Ross, Mcillemychell, tormat Macalexander and five other Ross of Balnagovvne.
Clan Mure of Wigtown and Clan MacCulloch of Ardwell feud
Clan MacCulloch slaughter Patrick Mure, and in response Mure of Cloncaird attacked clan MacCulloch.
Clan Mure, Gordon against Clan Maclellan, and Clan Dunbar feud:
The Maclellans were allies with Clan Dunbar which had a blood feud with Clan Gordon, in which the Mures of Wigtown where allies with. Patrick Maclellan and two other clansmen were declare rebels for killing of Robert Mure; in turned push the Mures to fight against Clan Maclellan and band together with the Gordons.
Clan Muir and Clan Barclay of Towie
Patrick Barclay, and his clansmen with swords drawn, charge at William Mure. William Mure was hit by a sword in the back and then shot by a pistol. Clan Muir in return, revenage their fallen clansman.
Clan Muir and Clan Mowat of Busbie
A party of clansmen and a brother of Rowallan went to Stewarton and has provoked a contest with John Mowatt of Busbie and his clansmen.The Judge hears the evidence, which is conclusive of the strife having, taken place, and imposes a fine; and the laird of Rowallan and Arnot of Lochrig having offered themselves in security for its payment, Boyde and his followers are let go. But another of the same party and a brother of Rowallan is waiting. He too has been in arms, on his own account, in the same, town of Stewarton, and has provoked a contest with John Mowatt, the laird of Busby, and with a certain Andrew Stevenston, and for him also the laird of Rowallan is accepted as surety for the payment of five pounds Scots, a sum regarded as sufficient to meet the ends and the claims of justice.
Clan Muir of Skaithmuir and Clan Elphinestone feud:
George Elphinestone and his clansmen attack Thomas Muir.
Clan Muir and Clan Mackay feud:
Clan Mackay in Wigtown was attacked by Patrick Mure and his clansmen. Clan Mackay attack a small vessal of Andrew Mure and stole Clan Muir goods, and they killed John Mure, his son and four other clansmen and wounded Andrew Mure.
Clan Muir and Clan Blair of that Ilk
On May 21, James Mure with the Mures of Caldwell went with pistols drawn, fired upon Clan Blair of that Ilk.
Clan Muir of Caldwell and Clan Erskine feud:
John was succeeded by his eldest son Sir Adam Mure of Caldwell who as Crawfurd says " he was a gallant stout man having many feuds with his neighbours which were managed with a great fierceness and much bloodshed." The question is who were these clans that were Neighbours in which we fought against?These other clans may have been Clan Pollock, Cochrane, Blair, Erskine, Mckenna, Torrance, Marjoribanks n probably Hamilton.
Clan Muir of Caldwell and Clan Torrance feud:
John was succeeded by his eldest son Sir Adam Mure of Caldwell who as Crawfurd says " he was a gallant stout man having many feuds with his neighbours which were managed with a great fierceness and much bloodshed." The question is who were these clans that were Neighbours in which we fought against?These other clans may have been Clan Pollock, Cochrane, Blair, Erskine, Mckenna, Torrance, Marjoribanks n probably Hamilton.
Clan Moar of Orkney and Clan Sinclair of Caithness feud:
The Moars of Orkney had joinned with the Sinclairs of Orkney during the Sinclair uprising. The Moars fought at the battle of Summerdale.
Mure of Anystoun and Clan Hope of Craighall feud
Mure of Auchindrane against Clans Campbell of Lochfergus, Kirkwood, and Wilson feud
Clan More lead by Kenneth More and Clan Gunn feud
Clan More of Meilde and Clan Macdonald of Sleat and Clanranald feud
The Trublesome Mures
During the reign of the Stewarts; there was much choas in Scotland. In these times of truble justice always finds a way to punish those who comminted murder and feuds between clans. The following are clansmen of clan Muir who committed murder, stealing and other troubles.
July 28, 1528- Alexander Kennedy of Bagany, Huge his son, John Mure of Auchindrane and others which comes to the total of seventy five including the heads of the chief branches of the kennedies were dilated for the sluaghter of Robert Campbell in Lochfergus, Alexander Kirkwod and Patrick Wilson.
Patrick Mure previously mentioned as a free lance, open to engagements with every faction was summoned within a limited peroid on a variety of charges which we quote as a curiosity.
For forcibly occupying the lands of Andrew Dunbar in Mochrum.
Spulzying the annual rent of lands belonging to the laird of Bomby.
Contempt done to the king in taking one called Lang Mackie out of the stocks wherein he had been placed by the sheriff depute for hurting a Spainard.
For heirischip of five oxen from John Mclean.
Breaking up the doors of Mr Richard Aikenhead Vicar of Wigtown and keeping him futher there of and with Thomas Mure and Nicholas Mure his servants, casting the Vicar's servant over his own stair.
For forethought felony done to Symon M Chrystine sheriff depute in Wigtown by chasing him with a drawn quhinzear.
Stealing a young gray horse from Andrew Boyd.
For carrying off ten bolls of victual and twenty four threaves of fodder.
Stouthrief of five score sheep from Andrew Dunbar in Derry of Mochrum.
Theft from James Poter of ten score bolls of wheat.
Robbery of goods from Andrew Mure.
Forcible occupation of the laird of Bomby's farm near Wigtown for two years.
There were also others which includes John Muir of Caldwell, and Arch Muir brother to Caldwell for hurting and wounding the tutor of Pollock. There was a complaint by Sir David Livingstoun of Donypace against Alexander Mure of Skaithmure. A complaint by Sir Thomas Hope of Craighall against John Mure of Anystoun.
John Moir, husband to Elspet Reid who was killed in the defence of his house at the walk mill of Balvenie, the 13th of October 1660. Tradition says gives Moir the reputation of having been a wealthy man and of being killed while barricading his door against an attack from the Highland caterans.
Mores help Clan Leslie with the feuds against Clan Ruthven and Clan Moncreiffe.
The Moirs help Clan Gordon with their feuds against Clan Lindsay, Clan Douglas, Clan Forbes, Clan Munro, clan Fraser, clan Mackenzie, Clan Macintosh, Clan Cameron, Clan Macneil, Clan Hay, Clan Keith, Clan Sutherland, Clan Sinclair, Clan Campbell, Clan Murray, Clan Stewart, Clan Macgillivray, Clan Maclean, Clan Grant, Clan Chattan, Clan Leask, and Clan Crichton.
Raid of Dumfries
Walter Mure of Cloncaird and Robert Mure of Knokmarloch was involved in a raid on Dumfries and was punish and fined in 1600.
The raid of Luader
Alexander Muir of Skaithrauir ( possible skaithmuir) and John Muir of Nesbet with their clansmen were involved in this raid.
Muir of Gladismuir was probably the victim of a raid on Gladismuir by the Quuen's army.
Raid of Linlithgow:
Sir John Muir was involved in a raid on Linlithgow.
Raid of Brechin:
Involved Capt. James Muir
Raid of Cowbog:
Reverend Thomas Moir and clansmen on September 3,1616 were involved in the raid of Cowbog.
Other raids conducted by the Muirs were Raids of Stirling, Scone, Cunninghamhead, Ruthven, The Great raid of 1322, The Raid of Barbieston, and the Whiggamore raid.
The Bloody fields of America
The King Philips War
The King Philips War was fought on June 20 1675- April 12, 1678, and was sometimes called the first Indian War or Metacom's war/ rebellion, was an armed conflict between the Native American and the English Colonies. Our clansmen once again answer the called to fight against the Indians. Such clansmen like Edmond Moore fought under the command of Capt. Thomas Lathrop at the battle of the Bloody Brook on Sept. 18, 1675 in South Deerfield, Mass. This is where the Indians ambushed the English Colonists that were escorting or on the wagon train going from Deerfield to Hadley. The Indians were victorious in their ambush leaving 40 Militia men and 17 teamsters dead out of 79.
Other Moores like Danfell and Richard Moore who were at the siege of Blackpoint Garrison, which these colonists surrender to the Indians. There was an unknown clansman under the command of Capt. Peirse's company that was presented at the skirmish of Seekonk. In this battle, the company rush into battle and was suddenly ambush by the Indians, and the company was destroyed by the Indians. Meanwhile another force led by Capt. Nicholas Manning and his company fought in the Mount Hope campaign and also at the battle of the Great Swamp. In this company was a man named, Jonathan Moore who fought along side with the New England confederation.
The Great Swamp Battle took place on the bitterly cold and stormy day of Dec. 9, 1675. The Militia from Plymouth Colony, Connecticut colony, and Massachusetts Bay Colony was heading towards Narragansett settlement in South Kingstown, Rhode Island by an Indian guide named Indian Peter. The massive fort occupied about 5 acres of land and was initially occupied by thousand of people, but it was eventually overrun after a fierce fight. The settlement was burned, it's inhabitants killed or evicted, and most of the tribe's winter stores were destroyed. It is believed that at least 97 Narragansett warriors and some where between 300-1,000 non- combatants were killed.
Many of the warriors and their families escaped into the frozen swamp: hundreds more died there from wounds combined with the harsh conditions. The colonists lost many of their officers in this assault, and about 70 of their men were killed and nearly 150 were wounded. the dead and the wounded colonial militiamen were evacuated to the settlements on Aquidneck Island in Narragansett bay where they buried or cared for by many of the Rhode Island colonists.
Queen Anne's War/ War of the Spanish Succession
Queen Anne's War (1702–1713) was the second in a series of French and Indian Wars fought in England's Thirteen American Colonies; in Europe, it is viewed as the North American theater of the War of the Spanish Succession. It was fought between France and England (plus England's colonial forces) for control of the American continent, while the War of the Spanish Succession was primarily fought in Europe. The war also involved numerous American Indian tribes allied with each nation, and Spain was allied with France. It is also known as the Third Indian War or in France as the Second Intercolonial War. It was fought on three fronts:
- Spanish Florida and the English Province of Carolina attacked one another, and the English forces engaged the French based at Mobile, Alabama in a proxy war involving allied Indians on both sides. The southern war did not result in significant territorial changes, but it had the effect of nearly wiping out the Indian population of Spanish Florida, including parts of southern Georgia, and destroying the network of Spanish missions in Florida.
- The English colonies of New England fought against French and Indian forces based in Acadia and Canada. Quebec City was repeatedly targeted by British expeditions, and the Acadian capital Port Royal was taken in 1710. The French and Wabanaki Confederacy sought to thwart New England expansion into Acadia, whose border New France defined as the Kennebec River in southern Maine. Toward this end, they executed raids against targets in the Province of Massachusetts Bay (including Maine), most famously the raid on Deerfield in 1704.
- English colonists based at St. John's, Newfoundland and Labrador disputed control of the island with the French based at Plaisance. Most of the conflict consisted of economically destructive raids on settlements. The French successfully captured St. John's in 1709, but the British quickly reoccupied it after the French abandoned it.
Daniell's forces landed on Amelia Island, and began attacks on the northern end of the island at midnight on 3 November, killing two Spanish soldiers and overrunning the village of San Pedro de Tupiqui. They advanced south, driving southward a flood of refugees and the few Spanish troops on the island.[18] The main settlements at San Felipe and San Marcos were overrun the next day, as the Spanish were in the process of evacuating them. Zúñiga learned of the advance on 5 November, and sent 20 men under Captain Joseph de Horruytiner north, with instructions to make a stand at San Juan del Puerto, seven leagues from St. Augustine, which Zúñiga saw as the "key to the province of Guale". The news also prompted Zúñiga to mobilize all able-bodied men over 14, and order all available food into the fort.
Horruytiner never made it beyond the St. Johns River; he did capture three enemy soldiers (two Englishmen and a Chiluque Indian) on 6 November, and returned with them to St. Augustine two days later. Zúñiga learned from these captives that the English had brought three months' provisions, and that they had only brought smaller cannons (6 to 10 pounders). In the meantime, Moore sailed south with the fleet. Three ships were sent ahead of the main fleet to blockade the entrance to Matanzas Bay, south of St. Augustine. These were spotted from the fort on 7 November. The next day the main body of the fleet began arriving at the bar outside the St. Augustine inlet. This prompted Zúñiga to order his two frigates, La Gloria and Nuestra Señora de la Piedad y el Niño Jesús, to anchor under the fort's guns. The Nuestra, which was outside the bar, was unable to cross, and was eventually burned. Sixteen of her men joined the fort's garrison, providing valuable gunnery skills.
Daniell's force, after being landed, made good progress. The small Spanish force on Amelia Island was unable to check the English advance at San Juan del Puerto, and was dispersed; some of them took days to reach St. Augustine. Daniels continued to advance, and entered the town of St. Augustine without resistance on 10 November. Eight of the English ships crossed the bar and began landing men that day. As the English began to close the circle around the fortress, a Spanish foraging expedition successfully drove 163 head of cattle through the English lines and into the fort's (dry) moat.
The Spanish guns opened fire on the English as they began siege preparations on 10 November. One of the older Spanish cannon exploded that day, killing three and wounding five. A few days later, Zúñiga ordered a sally to destroy portions of the town within firing range of the fort; according to later accounts, this action destroyed more than 15,000 pesos worth of property.Moore had brought four small cannon, but these made little impression on the coquina walls of the fortress, and the Spanish guns had longer range, keeping most of his forces at bay.
Around November 22, Moore dispatched Deputy Governor Daniell to Jamaica for larger cannons and ammunition. The English continued digging siege trenches, and began firing on the fortress from musket range on November 24. This cannon fire continued to have little effect, and Moore ordered more of the town torched the next day, including the Franciscan monastery. Since his cannon were not effective against the fort's walls, Moore attempted a deception to gain entry to the fort. On 14 December a Yamasee couple managed to gain entry to the fort posing as refugees, apparently with the goal of detonating the fort's powder magazine. However, Zúñiga was suspicious of their behavior and, according to his account of the siege, they were tortured into admitting the plot. By 19 December the English trenches had closed on the fort to the point that they threatened nearby fields from which the Spanish had been collecting forage. As a result, Zúñiga ordered a sally. There was a skirmish, and Spanish casualties were light: one killed and several wounded.
Spanish leaders at San Luis de Apalachee (present-day Tallahassee, Florida) began mobilizing when they received the news of the siege. Short on supplies, they appealed to the French at Mobile, who provided critical guns and gunpowder; the Pensacola garrison also spared ten men. The relief force left San Luis de Apalachee on December 24, but turned back when news was received that the siege had been lifted.[33]
Also on December 24, sails from a pair of ships were spotted approaching St. Augustine. English records do not indicate what these ships were; Spanish records show that they were English in origin, but probably not from Jamaica, since the nature of the siege did not change with their arrival. The expedition to Jamaica, having failed in its mission, returned directly to Charles Town. Spanish messengers from Pensacola eventually reported St. Augustine's plight to Havana. Governor Pedro Nicolás Benítez held a war council on December 2, in which a relief expedition was organized. A detachment of over 200 infantry under the command of Captain López de Solloso was embarked on a small fleet headed by General Estevan de Berroa in the Black Eagle.[36] Berroa's fleet arrived outside St. Augustine's harbor on December 28. Apparently believing the siege to already be over, Berroa did not land any troops. The next day, Governor Zúñiga sneaked some men out of the fort and made contact with the fleet. Berroa then landed Solloso and about 70 raw recruits on Anastasia Island, about 3 miles (4.8 km) below the fort.
This action prompted Moore to lift the siege and prepare a retreat Berroa also dispatched smaller ships to block the southern inlet to Matanzas Bay, trapping some of Moore's ships in the bayMoore ordered the remaining buildings in the town, including the church, put to the torch. Some of his men departed north via the mainland, while the rest crossed Matanzas Bay to their boats. Moore burned the eight ships trapped in the bay, and retreated to the north, eventually returning to Charles Town in disgrace. Zúñiga sent men out after the English departure; they were able to recover three of the English boats that failed to burn completely. Casualty reports made by both sides varied; historian Charles Arnade notes that all of the numbers reported are probably unreliable. Moore's report listed only two men killed, while Zúñiga in his report claimed that more than 60 of the English force were killed. Zúñiga claimed only three or four killed and 20 wounded for the Spanish contingent, none of which were caused by English cannon fire.
Moore was forced to resign his post as governor because of the failed raid, and its cost to the province (which included compensating owners for the loss of their ships) caused riots in Charles Town. Some of Moore's contemporary critics accused him of executing the raid for the purpose of seizing slaves or booty; the Spanish characterized it in religious terms, citing the "English provincial hatred against the Church of God." Moore continued to be active in the war, leading a small number of Carolinians and a large band of Indians on the destruction of Spanish missions in Florida in 1704. By 1705 the English and their Indian allies had destroyed 32 Spanish mission communities, and by 1711 there were reported to be only about 400 Indians left in Florida.
The only major event of former Carolina Governor James Moore's expedition was the Battle of Ayubale, which marked the only large-scale resistance to the English raids. Significant numbers of the Apalachee, unhappy with the conditions they lived in under the Spanish, simply abandoned their towns and joined Moore's expedition. They were resettled near the Savannah and Ocmulgee Rivers, where conditions were only slightly better. Moore's raiding expedition was preceded and followed by other raiding activity that was principally conducted by English-allied Creeks. The cumulative effect of these raids, conducted between 1702 and 1709, was to depopulate Spanish Florida beyond the immediate confines of Saint Augustine and Pensacola.
Following the battle at Ayubale, Moore continued his march through Apalachee. One village, San Lorenzo de Ivitachuco, survived when its leader surrendered his church's gold ornaments and a train of supplies.[2] Moore moved slowly, since many of the Apalachee apparently wanted to leave with the English. According to his report, most of the population of seven villages joined his march voluntarily.
In Moore's report of the expedition he claimed to have killed more than 1,100 men, women, and children. He also stated that he "removed into exile" 300 and "captured as slaves" more than 4,300 people, mostly women and children.[23] The only major missions to survive in Apalachee were San Luis and San Lorenzo de Ivitachuco.
The Spanish at first attempted to fortify these places, but they were eventually judged to be indefensible and abandoned. The survivors were consolidated at Abosaya, east of San Francisco de Potano. James Moore did not identify by name the places his force destroyed. Historian Mark Boyd has analyzed English and Spanish sources documenting the missions and the effects of Moore's raid. According to his analysis, the following missions were the ones most likely to have been destroyed:
- La Concepción de Ayubale
- San Francisco de Oconi
- San Antonio de Bacqua
- San Martín de Tomole
- Santa Cruz y San Pedro de Alcántara de Ychuntafun
American Revolutionary War:
The next conflict in which the Moore(s) took part in was the American Revolutionary War against the British Empire. During the American Revolutionary war about 7,000- 12,000 Moore(s) including the different variant spellings of Moore participate during this war, while serving in the Continental army, and few with the British army. Their roles during this war has help the American army to be the very first rebel force to defeat the great British empire.
Thomas Moore and Francis Moore were participated in the Boston Tea Party. But the most interesting biographical fact is that the Francis Moore was the only documented participant who participated in the Boston Tea Party undisguised. This fact is mentioned on his headstone at a cemetery in Lynn, MA. Moore moved to Lynn soon after the Revolution and spent the remainder of his long life there. The Lynn Record of August fourteenth, 1833, in a notice of his death gives a short account of the part that he took in the Revolutionary struggle. It speaks of him as one of the few daring individuals who participated in the celebrated act of throwing over the tea in Boston Harbor. Unlike most of his comrades who were dressed as Indians, Francis Moore participate in the Tea Party openly and without disguise.
The Battle of Alamance
The Battle of Alamance was the final battle of the War of the Regulation, a rebellion in colonial North Carolina over issues of taxation and local control. Some historians in the late nineteenth-early twentieth centuries considered the battle to be the opening salvo of the American Revolution, and locals agreed with this assessment. Yet, this has been questioned by present-day historians arguing that the Regulators (though viewed in the eyes of the royal governor and his allies as being in rebellion against King, country, and law) were not intending a complete overthrow of His Majesty's Government in North Carolina. They were only standing up against those certain local officials who had become corrupt and unworthy tools of the King, and they only turned to riot and armed rebellion as a last resort when all other peaceful means through petitions, elections to the Assembly, etc. had failed to redress their grievances. Many surviving ex-Regulators became loyalists during the Revolution, and several anti-Regulators [e.g. William Hooper, Alexander Martin, and Francis Nash] became patriots during the Revolution. Named for nearby Great Alamance Creek, the battle took place in what was then Orange County and has since become Alamance County in the central Piedmont about 6 miles (9.7 km) south of present-day Burlington, North Carolina.
According to Tryon's journal, the following men served under his command in the Colonial Militia:
- Major-generals: John Ashe and Thomas Lloyd
- Lieutenant-generals: John Rutherford, Lewis Henry deRosset, John Sampson, Robert Palmer, Benjamin Heron, and Samuel Strudwick
- Majors of brigade: Abner Nash and Robert Howe
- Colonels: Alexander Osborne, Edmund Fanning, Robert Harris, James Sampson, Samuel Spencer, James Moore, and Maurice Moore
- Lieutenant-colonels: John Frohock, Moses Alexander, Alexander Lillington, John Gray, Samuel Benton, and Robert Schaw
- Majors: William Bullock, Walter Lindsay, Thomas Lloyd, Martin Fifer, and John Hinton
- Alexander Lillington and James Moore were both American patriots at the Battle of Moore's Creek Bridge
- Richard Caswell was delegate to the Continental Congress in Philadelphia, one of the principal authors of the 1776 constitution of North Carolina, and the first governor of the newly independent state
- Francis Nash, whose guilt for extortion precipitated the War of the Regulation, fought and died as an American patriot in the Revolution
- Griffith Rutherford served as a brigadier general in the Continental Army
Tryon sent one of his aides-de-camp, Captain Philemon Hawkins II, and the Sheriff of Orange County with a proclamation:
| Alamance Camp, Thursday, May 16, 1771. To Those Who Style Themselves "Regulators": In reply to your petition of yesterday, I am to acquaint you that I have ever been attentive to the interests of your County and to every individual residing therein. I lament the fatal necessity to which you have now reduced me by withdrawing yourselves from the mercy of the crown and from the laws of your country. To require you who are now assembled as Regulators, to quietly lay down your arms, to surrender up your leaders, to the laws of your country and rest on the leniency of the Government. By accepting these terms within one hour from the delivery of this dispatch, you will prevent an effusion of blood, as you are at this time in a state of rebellion against your King, your country, and your laws. (Signed) William Tryon. |
While the terms were being read, Tryon's troops began to move forward. Shortly after that, Tryon was informed that the Regulators had rejected his terms. Herman Husband, a Quaker, realizing violence was about to take place, left the area.
By midday the hour had expired. Tryon sent one final warning:
| Gentlemen and Regulators: Those of you who are not too far committed should desist and quietly return to your homes, those of you who have laid yourselves liable should submit without resistance. I and others promise to obtain for you the best possible terms. The Governor will grant you nothing. You are unprepared for war! You have no cannon! You have no military training! You have no commanding officers to lead you in battle. You have no ammunition. You will be defeated! |
Some of the Regulators petitioned the Royal Governor to give up seven captured Regulators in exchange for two of his men that they had captured the previous day. Tryon agreed, but after a half an hour, the captured officers did not appear. He became suspicious that his positions were being flanked and ordered the militia to march within 30 yards of the Regulators. Shortly thereafter, a large crowd of Regulators appeared in front of the militia, waving their hats and daring the militia to open fire.
At about this time, two men who had been attempting to negotiate a peace between the two sides left Tryon's camp: Reverend Caldwell and Robert Thompson. Caldwell made it to the field between the two lines, but was warned by the Regulators, who saw that the Governor was about to open fire. Thompson was detained by Tryon as a prisoner. Tryon, in a moment of anger, took a musket from a militiaman and shot Thompson dead. Realizing what he had done, he sent a flag bearer named Donald Malcolm with a white flag in hopes of calming things quickly. The flag bearer was himself fired upon by the Regulators, who called out, "Fire and be damned".
The Regulators lacked the leadership, organization, and ammunition that Tryon had, but the early course of the battle went well for them. They employed what was referred to as "Indian style" fighting, hiding behind trees and avoiding structure and lines. This allowed two of the Regulators, brothers named McPherson, to capture one of Tryon's three cannons. Unfortunately for them, the Regulators had no ammunition and it could not be used.
A man considered one of the principal military leaders of the Regulators, Captain Montgomery, was killed by a shell at about the same time a bullet hit Tryon's hat. The Governor sent a second white flag, but the aide-de-camp was killed while regulator Patrick Muller called for his fellow insurgents to cease fire. Outraged at the disregard of a second white flag, the Governor rallied his troops against the insurgents, whose ammunition was running out. Many of the Regulators fled the field. Delays prevented the 300 reinforcements under Captain Benjamin Merrill from arriving in time. Some of the Regulators remained behind to continue firing upon the militia. Tryon then ordered the woods to be set on fire.
Losses for both sides are disputed. Tryon reported nine dead and 61 wounded among the militia. Other historians indicate much greater numbers, between 15 and 27 killed.Both sides counted nine dead among the Regulators and from dozens to over one-hundred wounded.
Tryon took 13 prisoners. One of them, James Few, was executed at the camp, and six were executed later in nearby Hillsborough. Many Regulators traveled on to frontier areas beyond North Carolina. The Royal Governor pardoned others and allowed them to stay on the condition that they pledge an oath of allegiance to the royal government. The battle took place in what was then Orange County. During the American Revolution a decade later, the same section of Orange County (subdivided into Alamance County in 1849) saw several minor skirmishes, including the infamous Pyle's Hacking Match in 1781. Recent archaeological studies at the site have shown that the area now known as Alamance Battleground was also the site of another skirmish in the revolutionary war and of a civil war era Confederate encampment.
Battle of Moore's Creek:
Pursuant to resolutions of the Second Continental Congress, the provincial congress had raised the 1st North Carolina Regiment of the Continental Army in fall 1775, and given command to Colonel James Moore. By the time of their arrival at Moore's Creek, the Loyalist contingent had shrunk to between 700 and 800 men. About 600 of these were Scots and the remainder were Regulators. Furthermore, the marching had taken its toll on the elderly MacDonald; he fell ill and turned command over to Lieutenant Colonel Donald MacLeod. The Loyalists broke camp at 1 am on February 27 and marched the few miles from their camp to the bridge. Arriving shortly before dawn, they found the defenses on the west side of the bridge unoccupied. MacLeod ordered his men to adopt a defensive line behind nearby trees when a Revolutionary sentry across the river fired his musket to warn Caswell of the Loyalist arrival. Hearing this, MacLeod immediately ordered the attack.
In the pre-dawn mist, a company of Scots approached the bridge. In response to a call for identification shouted across the creek, Captain Alexander Mclean identified himself as a friend of the King, and responded with his own challenge in Gaelic. Hearing no answer, he ordered his company to open fire, beginning an exchange of gunfire with the Patriot sentries. Colonel MacLeod and Captain John Campbell then led a picked company of swordsmen on a charge across the bridge.
During the night, Caswell and his men had established a semicircular earthworks around the bridge end, and armed them with two small pieces of field artillery. When the Scots were within 30 paces of the earthworks, the Patriots opened fire to devastating effect. MacLeod and Campbell both went down in a hail of gunfire; Colonel Moore reported that MacLeod had been struck by upwards of 20 musket balls. Armed only with swords and faced with overwhelming firepower from muskets and artillery, the Scots could do little else other than retreat. The surviving elements of Campbell's company got back over the bridge, and the Loyalist force dissolved and retreated.
Capitalizing on the success, the Revolutionary forces quickly replaced the bridge planking and gave chase. One enterprising company led by one of Caswell's lieutenants forded the creek above the bridge, flanking the retreating Loyalists. Colonel Moore arrived on the scene a few hours after the battle. He stated in his report that 30 Loyalists were killed or wounded, "but as numbers of them must have fallen into the creek, besides more that were carried off, I suppose their loss may be estimated at fifty." The Revolutionary leaders reported one killed and one wounded.
The Battle of King's Mountain
The seven Colonels chose Co!. William Campbell to act as overall commander. The Overmountain Men moved south in search of Major Patrick Ferguson. From the Rebel spy Joseph Kerr, they learned that Ferguson was thirty miles to the north, camped at Kings Mountain. It is said that Isaac Shelby was especially delighted to learn that Ferguson was quoted as saying, "He was on King's Mountain, that he was King of that mountain and that God Almighty and all the Rebels of Hell could not drive him from it." Shelby was very familiar with the Kings Mountain region and knew that it could prove to be an almost impossible position to defend. The Colonels wanted to catch up with Ferguson before he reached Charlotte and Lt. General Charles Cornwallis' protection, so they chose 900 of the best men and quickly made their way north. The combined force of Overmountain Men arrived at Kings Mountain the afternoon of October 7, 1780. Having little insight into the methods and philosophies of warfare of the southern frontiersmen, Ferguson had chosen the position feeling no enemy could fire upon him without showing themselves. The Patriot force decided to surround the mountain and use continuous fire to slowly close in like an unavoidable noose.
The force was divided into four columns. Col. Isaac Shelby and Col. Wm. Campbell led the interior columns, with Shelby on the left and Campbell on the right. Colonel John Sevier led the right flanking column and Colonel Benjamin Cleveland the left. They moved into their respective positions and began moving toward the summit. The battle commenced at 3 o'clock with the middle two columns exchanging fire with Major Ferguson for fifteen minutes while the flanking columns moved into position. Ferguson used Provincial Corps to drive back Colonels Campbell and Shelby with a bayonet charge, but then his troops had to fall back from under sharpshooter fire.
Ferguson was right in believing that his attackers would expose themselves to musket fire if they attempted to scale the summit. But he did not realize that his men could only fire if they went into the open, rendering themselves vulnerable to returning rifle fire. Most all of the Patriot troops were skilled hunters, woodsmen and above all, "riflemen" who routinely killed fast moving animals to feed themselves. Most were veterans of many years of frontier Indians war and were experts on "tree to tree" no rules combat. On this day, Ferguson's men would find escaping an impossible task.
Because of their exposed position, Major Ferguson's men were being overwhelmed. The sharpshooters were picking them off from behind rocks, trees and brush that surrounded the summit; while the Loyalists' aim was high, a common sighting problem when shooting downhill. The Overmountain Men gained a foothold on the summit, driving back the staggering Loyalists. The noose was quickly closing in. Major Ferguson's bold and final attempt was to try and personally cut a path through the Patriot line so his forces might possibly escape, but this heroic effort failed as Ferguson fell from his horse, his body riddled with bullets. Some accounts say he died before he hit the ground; others say that his men propped him against a tree, where he died. Ferguson was the only British soldier killed in the battle, all others were Americans, either Loyalist or Patriot.
Ferguson's second-in-command, Capt. Abraham DePevster, bravely continued to fight for a brief time, but the confusion was so great and his followers in such a vulnerable position that he realized further resistance was suicidal. He quickly raised the white flag of surrender. He surrendered his sword to Major Evan Shelby, Jr., younger brother of Kentucky's first Governor Isaac Shelby. Gen. William Campbell was the commanding officer of the day, but it is said that he had removed his tattered coat "and with open collar", not recognized as the commander. Despite the call for surrender by the Loyalists, the Patriot Colonels could not immediately stop their men from shooting. Many Patriots remembered that the notorious "Tarleton" had mowed down Patriot troops at Waxhaws despite the fact they were trying to surrender. But eventually...the fighting at Kings Mountain diminished.
Captain William Moore, commanding a Company in Col. William Campbell's Regiment was with them. They surrounded the mountain top defenses of Ferguson, with Campbell's Command being stationed at the southwest siege lines. Colonel John Sevier's line of battle connected to Campbell's line, on the north west. The other commands completed the surrounding Ferguson. Ferguson had made a terrible tactical mistake. Being on top of a mountain, the attackers did not have to be concerned about friendly fire - they were firing upwards, hence, all sides of the attacking force could fire into Ferguson's position.
It soon became clear to Ferguson that he was trapped and would be disseminated by the frontiersmen's accurate fire. He launched not one, but four, bayonet charges to try to break through the Patriot's lines. fierce hand-to-hand combat ensued, but to no avail. The Patriots had him trapped and were not going to let him escape. After several hours of extremely heavy fighting and Ferguson having been killed, the surviving British and Loyalists surrendered.
AFTERMATH OF THE ENCOUNTER
The battle had lasted a little over an hour and not a single man of Ferguson's force escaped. Though the number of casualties reported varies from source to source, some of the most commonly reported figures are that 225 Loyalists had been killed, 163 wounded and 716 were captured, while only 28 Patriots were killed, including Colonel James Williams, and 68 wounded. When General Cornwallis learned of Major Patrick Ferguson's defeat, he retreated from Charlotte, North Carolina back to Winnsborough, South Carolina.
Historians agree that the Battle of Kings Mountain was the "beginning of the end" of British rule in its former colonies. In less than one hour of battle, the Overmountain Men not only captured the day but also undermined the British strategy for keeping America under its control. A defeat so crushing as that suffered by Major Patrick Ferguson is rare in any war. Although skewed, his position on Kings Mountain was thoughtfully selected using much experience and consideration. The plateau of the mountain was just large enough to serve as a battleground for his command and to provide space for his camp and wagon train. Water was near and plentiful. The slopes of the mountain would hinder the advance of the attackers. When attacked he expected that any retreat would be rendered perilous by flanking or encircling detachments, a condition he desired as his militia would be put to the task to stand and fight instead of having the choice to flee. From Patrick Ferguson's point of view, a better position on which to take a stand could not have been found.
It can be assumed without a shred of doubt that Patrick Ferguson utterly underestimated the courage of the mountain men. Their apparent advantage in numbers did not discourage him from offering battle; otherwise he would have continued his march on October 7th in the direction of Charlotte and Cornwallis. But had he known that these Overmountain Men would so aggressively stand and fight with a fierceness and conviction never before experienced in his southern campaign, I'm sure he would have been much more cautious and considerably less heroic.
Colonel Campbell's men fought extremely well during the whole of the action, but it was a costly victory. Among the dead were 2 Captains, 4 lieutenants, 7 ensigns and 18 enlisted. Among the wounded was Captain William Moore - shot through the leg. So badly wounded was William that his leg had to be amputated on the field of battle.
Catherine Moore during the Revolutionary War
Catherine Moore Barry served her country with bravery and intelligence as a spy and messenger, and was instrumental in the pivotal Battle of Cowpens. This battle was a turning point in the reconquest of South Carolina from the British forces and ultimately lead to the Battle of Yorktown when General Washington accepted the surrender of General Cornwallis. She became one of the first American Heroines and was decorated with several medals after the War for Independence by South Carolina.
Catherine Moore was born on October 22, 1752, to Charles and Mary Moore. Catherine who was known as “Kate” was the eldest of ten children. She lived with her family in Piedmont, South Carolina until she married Andrew Barry at age 15. She moved with her husband to Walnut Grove Plantation in Roebuck, South Carolina. She had three children with her husband.
Kate was instrumental in warning the militia of the invading British forces before the Battle of Cowpens in 1781 using her extensive knowledge of the area to help the Patriots. According to legend, she tied her toddler to the bedpost while she rode out to warn neighbors that the British Army was advancing. She knew the Indian trails well and was able to notify the colonial militia forces of the approaching army. The British, under command of General Cornwallis were trying to stomp out Patriot resistance in the southern colonies. General Morgan was the commander of the American forces and he realized that he was out-manned. Morgan turned to Kate for help and she single-handedly rounded up an impressive amount of local Patriots to join Morgan’s cause. With her help, General Morgan laid a trap for General Corwallis and his men. After the trap proved as a success, Cornwallis retreated right into the hands of George Washington in Yorktown, Virginia.
Her husband Andrew became a general in the war, and Kate often assisted him in battle. Kate became a spy and a messenger in the War for Independence. She was a great asset to the Patriots, because she had a strong knowledge of the lands in South Carolina and was courageous in her service.
Many others Moore(s) fought in many battles which includes The Battle of Great Crane, Snow Campaign, Burnswick town, Brandywine creek, other battles and campaigns in the South; while in the Northern Campaign they fought in the battle of Trenton, Battle of Monmouth, Bernis Heights, The battles of Saratoga, Bunker Hill and many others.
Texas War of Independence
In remembrance of the clansmen who helped fought to liberate Texas from Mexico. These are the heroes of the Texas Revolution War. The Texas Revolution took take on October 2, 1835- April 21, 1836.
John W. Moore
John W. Moore, signer of the Texas Declaration of Independence and early Texas official, was born in Pennsylvania about 1797. He traveled to Texas from Tennessee in 1830 and settled in Harrisburg Municipality. In December 1831 the ayuntamiento of San Felipe de Austin announced his election as comisario of the precinct of San Jacinto. Moore was a friend of William B. Travis and was with him on July 30, 1835, when a company of volunteers under Travis forced the capitulation of Antonio Tenorio at the fort at Anahuac. Moore was a delegate from Harrisburg to the Consultation and was elected contractor for the army by the
General Council on November 18, 1835.
He was one of the three representatives from Harrisburg at the Convention of 1836 at Washington-on-the-Brazos and signed the Declaration of Independence. On October 3, 1836, Moore was seated in the House of the First Congress of the Republic of Texas as a member from Harrisburg County, but his election was contested and Jesse H. Cartwright was seated in his stead on October 11. In January 1837 Moore was elected captain of the Second Militia District and sheriff of Harrisburg County; he held the latter post at least until November 30, 1840. In 1839 he served as a trustee for the newly formed Harrisburg Town Company. On January 6, 1840, he was elected an alderman of the city of Houston. He was a charter member of the first Independent Order of Odd Fellows lodge of Texas, organized at Houston on July 25, 1838.
John H. Moore John Henry Moore, one of the Old Three Hundred and a participant in the Texas Revolution, was born in Rome, Tennessee, on August 13, 1800. According to tradition he ran away from college in Tennessee to avoid studying Latin and went to Texas in 1818. His father took him back to Tennessee, after which Moore returned to Texas in 1821 as one of the first settlers on the upper Colorado River. He fought the Indians along the Colorado in 1823 and 1824 and went into partnership with Thomas Gray as one of Stephen F. Austin's original settlers. Moore and Gray received title to a league and a labor of land now in Brazoria and Colorado counties on August 16, 1824. The census of March 1826 listed Moore as a farmer and stock raiser, aged between twenty-five and forty.
Col. John H. Moore, Commander at the Battle of Gonzales
He was then a single man with two servants. He married Eliza Cummins, daughter of James Cummins, probably before 1828, when he built a twin blockhouse called Moore's Fort at the site where La Grange was established on May 17, 1831. Moore lived at La Grange until 1838, when he built a home on his plantation nine miles north of the town. In 1834 he led an expedition against the Waco and Tawakoni Indians on the upper Brazos River, and in July 1835 he organized four companies of volunteers to attack the Tawakonis in Limestone County. In September 1835 he warned of the expected Mexican attack and was so outspoken in favor of Texas independence that he was ordered arrested by Martín Perfecto de Cos. On September 25, 1835, the Committee of Safety at Gonzales asked Moore for reinforcements, and he marched to Gonzales to take command of the Texans in the battle of Gonzales on October 2. He is said to have designed the "Come and Take It" banner (see GONZALES "COME AND TAKE IT" CANNON).
He was elected colonel of the volunteer army, and after serving as a member of the council of war called to discuss the best means of protection against the enemy, he was ordered by Austin to organize a cavalry company of the men who had pistols and double-barreled shotguns. In January 1839 Moore commanded three companies of volunteers in a campaign against the Comanches. When he returned from that campaign he was personally directed by President Sam Houston to raise 200 men to protect San Antonio from both Indian and Mexican attacks. Again in October 1840 he fought the Comanches between the Concho and Colorado rivers and carved his name on the ruins of the old San Sabá Presidio. In March 1842 Moore commanded two companies of volunteers raised in the Fayette County area to assist in driving Mexican raiders under the command of Rafael Vásquez from San Antonio.
In July 1842 he was authorized to raise 200 volunteers for the defense of the western frontier. While pursuing Indians who attacked on Cummins Creek in August 1842 Moore became so ill with inflammatory rheumatism that the Telegraph and Texas Register announced his death on August 17, 1842. The report, however, was premature. During the raid of Gen. Adrián Woll on San Antonio during September 1842, Moore again raised a company of volunteers and, serving under the command of Mathew Caldwell, participated in the pursuit of Woll to the Rio Grande. In September 1861 Moore enrolled in Company F, Terry's Texas Rangers (the Eighth Texas Cavalryqv). Too old to fight, he was appointed to a committee to secure bonds to finance the war. During the Civil War he lost most of his property, much of which was slaves, but he recovered financially before his death. He died on December 2, 1880, though the marker erected at his grave by the Texas Centennial Commission in 1936 gives the date of his death as February 25, 1877. Moore was buried in the family cemetery eight miles north of La Grange.
The Battle of Gonzales
Ponton anticipated that Ugartechea would send more troops to force the handover of the cannon. As soon as the first group of soldiers left Gonzales, Ponton sent a messenger to the closest town, Mina, to request help. Word quickly spread that up to 300 soldiers were expected to march on Gonzales. Stephen Austin, one of the most respected men in Texas and the de facto leader of the settlers, sent messengers to inform surrounding communities of the situation. Austin cautioned Texians to remain on the defensive, as any unprovoked attacks against Mexican forces could limit the support Texians might receive from the United States if war officially began. On September 27, 1835, a detachment of 100 dragoons, led by Francisco de Castañeda, left San Antonio de Béxar, carrying an official order for Ponton to surrender the cannon. Castañeda had been instructed to avoid using force if possible. When the troops neared Gonzales on September 29, they found that the settlers had removed the ferry and all other boats from the Guadalupe River. On the other side of the swiftly moving river waited eighteen Texians. Albert Martin, captain of the Gonzales militia, informed the soldiers that Ponton was out of town, and until his return the army must remain on the west side of the river. With no easy way to cross the river, Castañeda and his men made camp at the highest ground in the area, about 300 yards (300 meters) from the river.
Three Texians hurried to bury the cannon, while others traveled to nearby communities to ask for assistance. By the end of the day, more than 80 men had arrived from Fayette and Columbus. Texian militias generally elected their own leaders, and the men now gathered in Gonzales invoked their right to choose their own captain rather than report to Martin. John Henry Moore of Fayette was elected leader, with Joseph Washington Elliot Wallace and Edward Burleson, both of Columbus, respectively elected second and third in command. On September 30, Castañeda reiterated his request for the cannon and was again rebuffed. Texians insisted on discussing the matter directly with Ugartechea. According to their spokesman, until this was possible "the only answer I can therefore give you is that I cannot now [and] will not deliver to you the cannon". Castañeda reported to Ugartechea that the Texians were stalling, likely to give reinforcements time to gather.
In San Antonio de Béxar, Ugartechea asked Dr. Launcelot Smither, a Gonzales resident in town on personal business, to help Castañeda convince the settlers to follow orders. When Smither arrived on October 1, he met with militia captain Mathew Caldwell to explain that the soldiers meant no harm if the settlers would peacefully relinquish the cannon. Caldwell instructed Smither to bring Castañeda to the town the following morning to discuss the matter. At roughly the same time, Moore called a war council, which quickly voted to initiate a fight. It is unclear whether the war council was aware that Caldwell had promised Castañeda safe passage to Gonzales the next morning. Texians dug up the cannon and mounted it on cart wheels. In the absence of cannonballs, they gathered metal scraps to fill the cannon. James C. Neill, who had served in an artillery company during the War of 1812, was given command of the cannon. He gathered several men, including Almaron Dickinson, together to form the first artillery company of Texians. A local Methodist minister, W. P. Smith, blessed their activities in a sermon which made frequent reference to the American Revolution.
As the Texians made plans for an attack, Castañeda learned from a Coushatta Indian that about 140 men were gathered in Gonzales, with more expected. The Mexican soldiers began searching for a safe place to cross the river. At nightfall on October 1 they stopped to make camp, 7 miles (11 km) upriver from their previous spot. Texians began crossing the river at about 7 pm. Less than half of the men were mounted, slowing their progress as they tracked the Mexican soldiers. A thick fog rolled in around midnight, further delaying them. At around 3 am, Texians reached the new Mexican camp. A dog barked at their approach, alerting the Mexican soldiers, who began to fire. The noise caused one of the Texian horses to panic and throw his rider, who suffered a bloody nose. Moore and his men hid in the thick trees until dawn. As they waited, some of the Texians raided a nearby field and snacked on watermelon. With the darkness and fog, Mexican soldiers could not estimate how many men had surrounded them. They withdrew 300 yards (meters) to a nearby bluff.
At about 6 am, Texians emerged from the trees and began firing at the Mexican soldiers. Lieutenant Gregorio Pérez counterattacked with 40 mounted soldiers. The Texians fell back to the trees and fired a volley, injuring a Mexican private. According to some accounts, the cannon fell out of the wagon upon the shot. Unable to safely maneuver among the trees, the Mexican horsemen returned to the bluff. As the fog lifted, Castañeda sent Smither to request a meeting between the two commanders. Smither was promptly arrested by the Texians, who were suspicious of his presence among the Mexican soldiers. Nevertheless, Moore agreed to meet Castañeda. Moore explained that his followers no longer recognized the centralist government of Santa Anna and instead remained faithful to the Constitution of 1824, which Santa Anna had repudiated. Castañeda revealed that he shared their federalist leanings, but that he was honor-bound to follow orders.
As Moore returned to camp, the Texians raised a homemade white banner with an image of the cannon painted in black in the center, over the words "Come and Take It". The makeshift flag evoked the American Revolutionary-era slogan "Don't Tread on Me". Texians then fired their cannon at the Mexican camp. Realizing that he was outnumbered and outgunned, Castañeda led his troops back to San Antonio de Béxar. The troops were gone before the Texians finished reloading. In his report to Ugartechea, Castañeda wrote "since the orders from your Lordship were for me to withdraw without compromising the honor of Mexican arms, I did so".One spirit and one purpose animates the people of this party of the country, and that is to take Bexar, and drive the military out of Texas. ... A combined effort of all Texas would soon free our soil of Military despots—we should then have peace, for the present Government of Mexico have too much to do at home ... to send another army to Texas.
Two Mexican soldiers were killed in the attack. The only Texian casualty was the bloody nose suffered by the man bucked off his horse. Although the event was, as characterized by Davis, "an inconsequential skirmish in which one side did not try to fight", Texians soon declared it a victory over Mexican troops. Despite its minimal military impact, Hardin asserts that the skirmish's "political significance was immeasurable". A large number of Texians had taken an armed stand against the Mexican army, and they had no intention of returning to their neutral stance towards Santa Anna's government. Two days after the battle, Austin wrote to the San Felipe de Austin Committee of Public Safety, "War is declared—public opinion has proclaimed it against a Military despotism—The campaign has commenced". News of the skirmish, originally called "the fight at Williams' place", spread throughout the United States, encouraging many adventurers to come to Texas and assist in the fight against Mexico.
Newspapers referred to the conflict as the "Lexington of Texas"; as the Battles of Lexington and Concord began the American Revolution, the Gonzales skirmish launched the Texas Revolution. Before fighting had officially erupted, Santa Anna had realized that stronger measures were needed to ensure calm in Texas. He ordered his brother-in-law, General Martín Perfecto de Cos to bring approximately 500 soldiers to Texas. Cos and his men arrived in Goliad on October 2. Three days later, after learning of the events at Gonzales, the soldiers left for San Antonio de Béxar. Gonzales became a rallying point for Texians opposed to Santa Anna's policies. On October 11, they unanimously elected Austin their commander, despite his lack of military training. The following day, Austin led the men on a march towards San Antonio de Béxar to lay siege to Cos's troops. By the end of the year, the Texians had driven all Mexican troops from Texas. The cannon's fate is disputed. According to the memoirs (written in the 1890s) of Gonzales blacksmith Noah Smithwick, the cannon was abandoned after the cart's axles began to smoke during a march to San Antonio de Béxar to assist in Austin's siege.
Smithwick reported that the cannon was buried near a creek not far from Gonzales. A small iron cannon was exposed during a June 1936 flood near Gonzales. In 1979, this cannon was purchased by Dr. Patrick Wagner, who believed it matched Smithwick's descriptions of the cannon used in the battle. The Curator of Military History at the Smithsonian Institution verified that Wagner's cannon was a type of small swivel gun used in America through 1836. The Conservation Laboratory at the University of Texas confirmed that Wagner's cannon had been buried in moist ground for an extended time period. Writing in The Handbook of Texas, historian Thomas Ricks Lindley maintains that the Wagner cannon does not match the Smithwick account. The Wagner gun is made of iron and is smaller than a six-pounder. Historians such as Lindley think it more likely that the Gonzales cannon was taken to San Antonio de Béxar, where it was used during the Battle of the Alamo and captured by Mexican troops in March 1836. It was likely melted down with many of the other cannons when the Mexican army retreated.
The Siege of Bexar
There were Francis, Luke, and William Moore, also there were E. Stevens Mora at the siege. Texian morale began to drop severely, and with winter approaching and supplies running low, Burleson considered withdrawing into winter quarters. In a council of war, Burleson's officers overruled his decision to withdraw, and the army stayed. One of the officers who adamantly opposed the withdrawal was Colonel Ben Milam. Undaunted, Milam stalked into the Texian camp and called out "Who will go with old Ben Milam into San Antonio?" 300 soldiers cheered their support for Milam. Reports from a captured Mexican soldier and escaped Texian prisoners alerted Burleson that Mexican morale was just as low. Burleson ordered a two-column attack.
One attack was to be carried out by Milam's troops, and the other was to be carried out by those of Colonel Francis W. Johnson. On December 5, Milam and Johnson launched a surprise attack and seized two houses in the Military Plaza (one of the houses seized belonged to the in-laws of Jim Bowie). The Texians were unable to advance any further that day, but they fortified the houses and remained there during the night, digging trenches and destroying nearby buildings. On December 7, the attack continued, and Milam's force captured another foothold in the city. However, Milam was killed while leading the attack. Colonel Johnson subsequently took command of both his and Milam's men and continued the street fighting, gradually driving the Mexicans back into the city. Cos withdrew into the Alamo, where he was joined by Colonel Ugartechea and 600 reinforcements, but it was too late. Cos entrenched his position, and Texian artillery pounded the fortified mission. As the Texians advanced closer to the plazas, Cos realized that his best defensive position would be within the Alamo Mission just outside Bexar. In his official report to Santa Anna, Cos wrote that ""In such critical circumstances there was no other measure than to advance and occupy the Alamo which, due to its small size and military position, was easier to hold.
In doing so, I took with me the artillery, packs and the rest of the utensils I was able to transport.” At 1 a.m. on December 9, the cavalry began to pull back towards the Alamo. Colonel Nicolas Condell, his small force of 50 men from the Morelos and Tamaulipas units, and two cannon remained as the rear guard at the plaza. Years later, however, Sanchez Navarro maintained that Cos was not planning to abandon the town but wished to move the wounded to the relative safety of the Alamo. Inside the Alamo, Cos presented a plan for a counterattack; cavalry officers believed that they would be surrounded by Texians and refused their orders. Possibly 175–soldiers from four of the cavalry companies left the mission and rode south. According to Barr, Cos ran after the horseman to tell them to stop and was almost run down. For a brief period, those in the mission believed that Cos might have been killed. Sanchez Navarro said the troops were not deserting but misunderstood their orders and were withdrawing all the way to the Rio Grande. By daylight, only 120 experienced infantry remained in the Mexican garrison. Cos called Sanchez Navarro to the Alamo and gave him orders to "go save those brave men.
Approach the enemy and obtain the best terms possible". Sanchez Navarro first returned to his post at the plaza to inform the soldiers of the imminent surrender. Several officers argued with him, explaining that "the Morelos Battalion has never surrendered", but Sanchez Navarro held firm to his orders. Bugle calls for a parley received no response from the Texians, and at 7 am Sanchez Navarro raised a flag of truce. Father de la Garza and William Cooke came forward to escort Sanchez Navarro and two other officers to Johnson, who summoned Burleson. When Burleson arrived two hours later, he found that the Mexican soldiers did not have written authorization from Cos. One of the Mexican officers was sent to bring back formal permission for the surrender. Burleson agreed to an immediate cease-fire, and negotiations began. Johnson, Morris, and James Swisher represented the Texians, while José Miguel de Arciniega and John Cameron interpreted. The men haggled for much of the day before reaching terms at 2 a.m. on December 10. According to the terms of the agreement, Mexican troops could remain in the Alamo for six days to prepare for the trip to the Mexican interior.
During that time frame, Mexican and Texian troops were not to carry arms if they interacted. Regular soldiers who had established ties to the area could remain in Bexar; all recently arrived troops were expected to return to Mexico. Each Mexican soldier would receive a musket and ten rounds of ammunition, and the Texians would allow one four-pound cannon and ten rounds of powder and shot to accompany the troops. All other weapons and all supplies would remain with the Texians, who agreed to sell some of the provisions to the Mexicans for their journey. As the final term of their parole, all of Cos's men were required to pledge that they would not fight against the Constitution of 1824. At 10 a.m. on December 11, the Texian army paraded. Johnson presented the terms of surrender and asked for the army's approval, stressing that the Texians had little ammunition left to continue the fight. Most of the Texians voted in favor of the surrender, although some termed it a "child's bargain", too weak to be useful. The Siege of Bexar was the longest Texian campaign of the Texas Revolution, and according to Barr, it was "the only major Texian success other than San Jacinto". According to Barr, of the 780 Texians who had participated in some way in the battle, between 30 and 35 were wounded, with 5 or 6 killed. Historian Stephen Hardin places the Texian casualties slightly lower, with 4 killed and 14 wounded. The losses were spread evenly amongst Texas residents and newcomers from the United States. Although some Texians estimated that as many as 300 Mexican soldiers were killed, historians agree that it likely that a total of 150 Mexican soldiers were killed or wounded during the five-day battle.
About two-thirds of the Mexican casualties came from the infantry units defending the plazas. To celebrate their victory, Texian troops threw a fandango on the evening of December 10. Governor Henry Smith and the governing council sent a letter to the army, calling the soldiers "invincible" and "the brave sons of Washington and freedom". After the war, those who could prove they had participated in this campaign were granted 320 acres (130 ha) of land. Eventually, 504 claims were certified. At least 79 of the Texians who participated later died at the Battle of the Alamo or the Goliad Massacre, and 90 participated in the final battle of the Texas Revolution, at San Jacinto. The Texians confiscated 400 small arms, 20 cannon, and supplies, uniforms, and equipment. During the siege, Cos's men had strengthened the Alamo mission, and the Texians chose to concentrate their forces within the Alamo rather than continue to fortify the plazas. Cos left Bexar on December 14 with 800 men.
The soldiers who were too weak to travel were left in the care of the Texian doctors. With his departure, there was no longer an organized garrison of Mexican troops in Texas, and many of the Texians believed that the war was over. Johnson described the battle as "the period put to our present war". Burleson resigned his leadership of the army on December 15 and returned to his home. Many of the men did likewise, and Johnson assumed command of the soldiers who remained. Soon after, a new contingent of Texians and volunteers from the United States arrived with more heavy artillery.
According to Barr, the large number of American volunteers "contributed to the Mexican view that Texian opposition stemmed from outside influences. That belief may have contributed in turn to Santa Anna's order of 'no quarter' in his 1836 campaign." Santa Anna was outraged that Cos had surrendered. Already in preparations to move a larger army to Texas, Santa Anna moved quickly on hearing of his brother-in-law's defeat, and by late December 1835 had begun to move his Army of Operations northward. Although many of his officers disagreed with the decision to march towards the Texian interior rather than take a coastal approach, Santa Anna was determined to first take Bexar and avenge his family's honor.
The Battle of the Alamo
At the battle of the Alamo was the main turning point for the Texans. Even thou the Texans lost this battle to the Mexicans, it gave the Texans the fighting spirits to defeat and won their independence from Mexico. Amongst the brave defenders were Robert B. Moore from Virginia and Willis A. Moore from North Carolina.
The first night of the siege was relatively quiet. Over the next few days, Mexican soldiers established artillery batteries, initially about 1,000 feet (300 m) from the south and east walls of the Alamo. A third battery was positioned southeast of the fort. Each night the batteries inched closer to the Alamo walls. During the first week of the siege more than 200 cannonballs landed in the Alamo plaza. At first the Texians matched Mexican artillery fire, often reusing the Mexican cannonballs. On February 26 Travis ordered the artillery to conserve powder and shot. Two notable events occurred on Wednesday, February 24. At some point that day, Bowie collapsed from illness, leaving Travis in sole command of the garrison. Late that afternoon, two Mexican scouts became the first fatalities of the siege. The following morning, 200–300 Mexican soldiers crossed the San Antonio River and took cover in abandoned shacks near the Alamo walls. Several Texians ventured out to burn the huts while Texians within the Alamo provided cover fire.After a two-hour skirmish the Mexican troops retreated to Béxar. Six Mexican soldiers were killed and four others were wounded. No Texians were injured. A blue norther blew in on February 25, dropping the temperature to 39 °F (4 °C). Neither army was prepared for the cold temperatures.
Texian attempts to gather firewood were thwarted by Mexican troops. On the evening of February 26 Colonel Juan Bringas engaged several Texians who were burning more huts. According to historian J.R. Edmondson, one Texian was killed. Four days later, Texians shot and killed Private First Class Secundino Alvarez, a soldier from one of two battalions that Santa Anna had stationed on two sides of the Alamo. By March 1, the number of Mexican casualties were nine dead and four wounded, while the Texian garrison had lost only one man. Santa Anna posted one company east of the Alamo, on the road to Gonzales. Almonte and 800 dragoons were stationed along the road to Goliad. Throughout the siege these towns had received multiple couriers, dispatched by Travis to plead for reinforcements and supplies. The most famous of his missives, written February 24, was addressed To the People of Texas & All Americans in the World.
According to historian Mary Deborah Petite, the letter is "considered by many as one of the masterpieces of American patriotism." Copies of the letter were distributed across Texas, and eventually reprinted throughout the United States and much of Europe. At the end of the first day of the siege, Santa Anna's troops were reinforced by 600 men under General Joaquin Ramirez y Sesma, bringing the Mexican army up to more than 2,000 men. As news of the siege spread throughout Texas, potential reinforcements gathered in Gonzales. They hoped to rendezvous with Colonel James Fannin, who was expected to arrive from Goliad with his garrison. On February 26, after days of indecision, Fannin ordered 320 men, four cannons, and several supply wagons to march towards the Alamo, 90 miles (140 km) away. This group traveled less than 1.0 mile (1.6 km) before turning back.Fannin blamed the retreat on his officers; the officers and enlisted men accused Fannin of aborting the mission. Texians gathered in Gonzales were unaware of Fannin's return to Goliad, and most continued to wait. Impatient with the delay, on February 27 Travis ordered Samuel G. Bastian to go to Gonzales "to hurry up reinforcements".
According to historian Thomas Ricks Lindley, Bastian encountered the Gonzales Ranging Company led by Lieutenant George C. Kimble and Travis' courier to Gonzales, Albert Martin, who had tired of waiting for Fannin. A Mexican patrol attacked, driving off four of the men including Bastian. In the darkness, the Texians fired on the remaining 32 men, whom they assumed were Mexican soldiers. One man was wounded, and his English curses convinced the defenders to open the gates. On March 3, the Texians watched from the walls as approximately 1,000 Mexicans marched into Béxar. The Mexican army celebrated loudly throughout the afternoon, both in honor of their reinforcements and at the news that troops under General José de Urrea had soundly defeated Texian Colonel Frank W. Johnson at the Battle of San Patricio on February 27. Most of the Texians in the Alamo believed that Sesma had been leading the Mexican forces during the siege, and they mistakenly attributed the celebration to the arrival of Santa Anna. The reinforcements brought the number of Mexican soldiers in Béxar to almost 3,100.
The arrival of the Mexican reinforcements prompted Travis to send three men, including Davy Crockett, to find Fannin's force, which he still believed to be en route. The scouts discovered a large group of Texians camped 20 miles (32 km) from the Alamo. Lindley's research indicates that up to 50 of these men had come from Goliad after Fannin's aborted rescue mission. The others had left Gonzales several days earlier. Just before daylight on March 4, part of the Texian force broke through Mexican lines and entered the Alamo. Mexican soldiers drove a second group across the prairie. On March 4, the day after his reinforcements arrived, Santa Anna proposed an assault on the Alamo. Many of his senior officers recommended that they wait for two 12pounder cannons anticipated to arrive on March 7. That evening, a local woman, likely Bowie's cousin-in-law Juana Navarro Alsbury, approached Santa Anna to negotiate a surrender for the Alamo defenders. According to many historians, this visit probably increased Santa Anna's impatience; as historian Timothy Todish noted, "there would have been little glory in a bloodless victory". The following morning, Santa Anna announced to his staff that the assault would take place early on March 6.
Santa Anna arranged for troops from Béxar to be excused from the front lines so that they would not be forced to fight their own families. Legend holds that at some point on March 5, Travis gathered his men and explained that an attack was imminent, and that they were greatly outnumbered by the Mexican Army. He supposedly drew a line in the ground and asked those willing to die for the Texian cause to cross and stand alongside him; only one man (Moses Rose) was said to have declined. Most scholars disregard this tale as there is no primary source evidence to support it (the story only surfaced decades after the battle in a third-hand account). However, Travis apparently did, at some point prior to the final assault, assemble the men for a conference to inform them of the dire situation and giving them the chance to either escape or stay and die for the cause. Susannah Dickinson recalled Travis announcing that any men who wished to escape should let it be known and step out of ranks.
The last Texian verified to have left the Alamo was James Allen, a courier who carried personal messages from Travis and several of the other men on March 5. At 10 p.m. on March 5, the Mexican artillery ceased their bombardment. As Santa Anna had anticipated, the exhausted Texians soon fell into the first uninterrupted sleep many of them had since the siege began. Just after midnight, more than 2,000 Mexican soldiers began preparing for the final assault. Fewer than 1,800 were divided into four columns, commanded by Cos, Colonel Francisco Duque, Colonel José María Romero and Colonel Juan Morales. Veterans were positioned on the outside of the columns to better control the new recruits and conscripts in the middle. As a precaution, 500 Mexican cavalry were positioned around the Alamo to prevent escape of either Texian or Mexican soldiers. Santa Anna remained in camp with the 400 reserves. Despite the bitter cold, the soldiers were ordered not to wear overcoats which could impede their movements. Clouds concealed the moon and thus the movements of the soldiers.
At 5:30 a.m. troops silently advanced. Cos and his men approached the northwest corner of the Alamo, while Duque led his men from the northwest towards a repaired breach in the Alamo's north wall. The column commanded by Romero marched towards the east wall, and Morales's column aimed for the low parapet by the chapel. The three Texian sentinels stationed outside the walls were killed in their sleep, allowing Mexican soldiers to approach undetected within musket range of the walls. At this point, the silence was broken by shouts of "¡Viva Santa Anna!" and music from the buglers. The noise woke the Texians. Most of the noncombatants gathered in the church sacristy for safety. Travis rushed to his post yelling, "Come on boys, the Mexicans are upon us and we'll give them hell!" and, as he passed a group of Tejanos, "¡No rendirse, muchachos!" ("Don't surrender, boys"). In the initial moments of the assault Mexican troops were at a disadvantage. Their column formation allowed only the front rows of soldiers to fire safely. Unaware of the dangers, the untrained recruits in the ranks "blindly fir[ed] their guns", injuring or killing the troops in front of them.
The tight concentration of troops also offered an excellent target for the Texian artillery. Lacking canister shot, Texians filled their cannon with any metal they could find, including door hinges, nails, and chopped up horseshoes, essentially turning the cannon into giant shotguns. According to the diary of José Enrique de la Peña, "a single cannon volley did away with half the company of chasseurs from Toluca". Duque fell from his horse after suffering a wound in his thigh and was almost trampled by his own men. General Manuel Castrillón quickly assumed command of Duque's column. Although some in the front of the Mexican ranks wavered, soldiers in the rear pushed them on. As the troops massed against the walls, Texians were forced to lean over the walls to shoot, leaving them exposed to Mexican fire.
Travis became one of the first defenders to die, shot while firing his shotgun into the soldiers below him, though one source says that he drew his sword and stabbed a Mexican officer who had stormed the wall before succumbing to his injury. Few of the Mexican ladders reached the walls. The few soldiers who were able to climb the ladders were quickly killed or beaten back. As the Texians discharged their previously loaded rifles, however, they found it increasingly difficult to reload while attempting to keep Mexican soldiers from scaling the walls. Mexican soldiers withdrew and regrouped, but their second attack was repulsed. Fifteen minutes into the battle, they attacked a third time. During the third strike, Romero's column, aiming for the east wall, was exposed to cannon fire and shifted to the north, mingling with the second column. Cos' column, under fire from Texians on the west wall, also veered north. When Santa Anna saw that the bulk of his army was massed against the north wall, he feared a rout; "panicked", he sent the reserves into the same area.
The Mexican soldiers closest to the north wall realized that the makeshift wall contained many gaps and toeholds. One of the first to scale the 12-foot (3.7 m) wall was General Juan Amador; at his challenge, his men began swarming up the wall. Amador opened the postern in the north wall, allowing Mexican soldiers to pour into the complex. Others climbed through gun ports in the west wall, which had few defenders. As the Texian defenders abandoned the north wall and the northern end of the west wall, Texian gunners at the south end of the mission turned their cannon towards the north and fired into the advancing Mexican soldiers. This left the south end of the mission unprotected; within minutes Mexican soldiers had climbed the walls and killed the gunners, gaining control of the Alamo's 18pounder cannon. By this time Romero's men had taken the east wall of the compound and were pouring in through the cattle pen. As previously planned, most of the Texians fell back to the barracks and the chapel. Holes had been carved in the walls to allow the Texians to fire. Unable to reach the barracks, Texians stationed along the west wall headed west for the San Antonio River.
When the cavalry charged, the Texians took cover and began firing from a ditch. Sesma was forced to send reinforcements, and the Texians were eventually killed. Sesma reported that this skirmish involved 50 Texians, but Edmondson believes that number was inflated. The defenders in the cattle pen retreated into the horse corral. After discharging their weapons, the small band of Texians scrambled over the low wall, circled behind the church and raced on foot for the east prairie, which appeared empty. As the Mexican cavalry advanced on the group, Almaron Dickinson and his artillery crew turned a cannon around and fired into the cavalry, probably inflicting casualties. Nevertheless, all of the escaping Texians were killed. The last Texian group to remain in the open were Crockett and his men, defending the low wall in front of the church. Unable to reload, they used their rifles as clubs and fought with knives. After a volley of fire and a wave of Mexican bayonets, the few remaining Texians in this group fell back towards the church.
The Mexican army now controlled all of the outer walls and the interior of the Alamo compound except for the church and rooms along the east and west walls. Mexican soldiers turned their attention to a Texian flag waving from the roof of one building. Four Mexicans were killed before the flag of Mexico was raised in that location. For the next hour, the Mexican army worked to secure complete control of the Alamo. Many of the remaining defenders were ensconced in the fortified barracks rooms. In the confusion, the Texians had neglected to spike their cannon before retreating. Mexican soldiers turned the cannon towards the barracks. As each door was blown off Mexican soldiers would fire a volley of muskets into the dark room, then charge in for hand-to-hand combat. Too sick to participate in the battle, Bowie likely died in bed. Eyewitnesses to the battle gave conflicting accounts of his death. Some witnesses maintained that they saw several Mexican soldiers enter Bowie's room, bayonet him, and carry him alive from the room. Others claimed that Bowie shot himself or was killed by soldiers while too weak to lift his head. According to historian Wallace Chariton, the "most popular, and probably the most accurate" version is that Bowie died on his cot, "back braced against the wall, and using his pistols and his famous knife." The last of the Texians to die were the 11 men manning the two 12-pounder cannon in the chapel.
A shot from the 18 pounder cannon destroyed the barricades at the front of the church, and Mexican soldiers entered the building after firing an initial musket volley. Dickinson's crew fired their cannon from the apse into the Mexican soldiers at the door. With no time to reload, the Texians, including Dickinson, Gregorio Esparza and James Bonham, grabbed rifles and fired before being bayoneted to death. Texian Robert Evans, the master of ordnance, had been tasked with keeping the gunpowder from falling into Mexican hands. Wounded, he crawled towards the powder magazine but was killed by a musket ball with his torch only inches from the powder. Had he succeeded, the blast would have destroyed the church and killed the women and children hiding in the sacristy. As soldiers approached the sacristy, one of the young sons of defender Anthony Wolf stood to pull a blanket over his shoulders. In the dark, Mexican soldiers mistook him for an adult and killed him.
Possibly the last Texian to die in battle was Jacob Walker, who attempted to hide behind Susannah Dickinson and was bayoneted in front of the women. Another Texian, Brigido Guerrero, also sought refuge in the sacristy. Guerrero, who had deserted from the Mexican Army in December 1835, was spared after convincing the soldiers he was a Texian prisoner. By 6:30 a.m. the battle for the Alamo was over. Mexican soldiers inspected each corpse, bayoneting any body that moved. Even with all of the Texians dead, Mexican soldiers continued to shoot, some killing each other in the confusion. Mexican generals were unable to stop the bloodlust and appealed to Santa Anna for help. Although the general showed himself, the violence continued and the buglers were finally ordered to sound a retreat. For 15 minutes after that, soldiers continued to fire into dead bodies. According to many accounts of the battle, between five and seven Texians surrendered. Incensed that his orders had been ignored, Santa Anna demanded the immediate execution of the survivors.
Weeks after the battle, stories circulated that Crockett was among those who surrendered. However, Ben, a former American slave who cooked for one of Santa Anna's officers, maintained that Crockett's body was found surrounded by "no less than sixteen Mexican corpses". Historians disagree on which version of Crockett's death is accurate. Santa Anna reportedly told Captain Fernando Urizza that the battle "was but a small affair". Another officer then remarked that "with another such victory as this, we'll go to the devil". In his initial report Santa Anna claimed that 600 Texians had been killed, with only 70 Mexican soldiers killed and 300 wounded. His secretary, Ramón Martínez Caro, later repudiated the report. Other estimates of the number of Mexican soldiers killed ranged from 60–200, with an additional 250–300 wounded. Most Alamo historians place the number of Mexican casualties at 400–600. This would represent about one-third of the Mexican soldiers involved in the final assault, which Todish remarks is "a tremendous casualty rate by any standards". Most eyewitnesses counted between 182–257 Texians killed. Some historians believe that at least one Texian, Henry Warnell, successfully escaped from the battle. Warnell died several months later of wounds incurred either during the final battle or during his escape as a courier. Mexican soldiers were buried in the local cemetery, Campo Santo. Shortly after the battle, Colonel José Juan Sanchez Navarro proposed that a monument should be erected to the fallen Mexican soldiers. Cos rejected the idea. The Texian bodies were stacked and burned.
The only exception was the body of Gregorio Esparza. His brother Francisco, an officer in Santa Anna's army, received permission to give Gregorio a proper burial. The ashes were left where they fell until February 1837, when Juan Seguin returned to Béxar to examine the remains. A simple coffin inscribed with the names Travis, Crockett, and Bowie was filled with ashes from the funeral pyres. According to a March 28, 1837, article in the Telegraph and Texas Register, Seguin buried the coffin under a peach tree grove. The spot was not marked and cannot now be identified. Seguín later claimed that he had placed the coffin in front of the altar at the San Fernando Cathedral. In July 1936 a coffin was discovered buried in that location, but according to historian Wallace Chariton it is unlikely to actually contain the remains of the Alamo defenders. Fragments of uniforms were found in the coffin, and it is known that the Alamo defenders did not wear uniforms.
The Battle of San Jacinto
This battle was the last and decisive battle. This battle, the Texans army was about to get their revenge for their brothers who perish at the Alamo. The following clansmen who were engage at this battle were Captain Isaac N. Moreland of the regular artillery, 1st Corporal Robert Moore, Privates Robert and Samuel Moore of the Infantry company B Volunteers, Corporal William Moore and Private William A. Moore of the infantry of the 1st regiment, Private Robert D. Moore of the 1st regiment of D company, John D. Moore of the rear guard opposite Harrish compose of Splane's company, Azarian G. Moore of Arnold's company and Lewis and Morris Moore in Ware's company. The area along Buffalo Bayou had many thick oak groves, separated by marshes. This type of terrain was familiar to the Texians and quite alien to the Mexican soldiers. Houston's army, comprising 900 men, reached Lynch's Ferry mid-morning on April 20; Santa Anna's 700-man force arrived a few hours later. The Texians made camp in a wooded area along the bank of Buffalo Bayou; while the location provided good cover and helped hide their full strength, it also left the Texians no room for retreat.
Over the protests of several of his officers, Santa Anna chose to make camp in a vulnerable location, a plain near the San Jacinto River, bordered by woods on one side, marsh and lake on another. The two camps were approximately 500 yards (460 m) apart, separated by a grassy area with a slight rise in the middle.Colonel Pedro Delgado later wrote that "the camping ground of His Excellency's selection was in all respects, against military rules. Any youngster would have done better." Over the next several hours, two brief skirmishes occurred. Texians won the first, forcing a small group of dragoons and the Mexican artillery to withdraw. Mexican dragoons then forced the Texian cavalry to withdraw. In the melee, Rusk, on foot to reload his rifle, was almost captured by Mexican soldiers, but was rescued by newly arrived Texian volunteer Mirabeau B. Lamar.
Over Houston's objections, many infantrymen rushed onto the field. As the Texian cavalry fell back, Lamar remained behind to rescue another Texian who had been thrown from his horse; Mexican officers "reportedly applauded" his bravery. Houston was irate that the infantry had disobeyed his orders and given Santa Anna a better estimate of their strength; the men were equally upset that Houston had not allowed a full battle.Throughout the night, Mexican troops worked to fortify their camp, creating breastworks out of everything they could find, including saddles and brush. At 9 a.m. on April 21, Cos arrived with 540 reinforcements, bringing the Mexican force to 1,200 men, which outnumbered the Texians. Cos' men were raw recruits rather than experienced soldiers, and they had marched steadily for more than 24 hours, with no rest and no food. As the morning wore on with no Texian attack, Mexican officers lowered their guard. By afternoon, Santa Anna had given permission for Cos' men to sleep; his own tired troops also took advantage of the time to rest, eat, and bathe. Not long after the Mexican reinforcements arrived, Houston ordered Smith to destroy Vince's Bridge, 5 miles (8.0 km) away, to slow down any further Mexican reinforcements. At 4 p.m. the Texians began creeping quietly through the tall grass, pulling the cannon behind them.
The Texian cannon fired at 4:30, beginning the battle of San Jacinto. After a single volley, Texians broke ranks and swarmed over the Mexican breastworks to engage in hand-tohand combat. Mexican soldiers were taken completely by surprise. Santa Anna, Castrillón, and Almonte yelled often conflicting orders, attempting to organize their men into some form of defense. Within 18 minutes, Mexican soldiers abandoned their campsite and fled for their lives. The killing lasted for hours. Many Mexican soldiers retreated through the marsh to Peggy Lake. Texian riflemen stationed themselves on the banks and shot at anything that moved. Many Texian officers, including Houston and Rusk, attempted to stop the slaughter, but they were unable to gain control of the men. Texians continued to chant "Remember the Alamo! Remember Goliad!" while frightened Mexican infantry yelled "Me no Alamo!" and begged for mercy to no avail. In what historian Davis called "one of the most one-sided victories in history", 650 Mexican soldiers were killed and 300 captured. Eleven Texians died, with 30 others, including Houston, wounded.
Although Santa Anna's troops had been thoroughly vanquished, they did not represent the bulk of the Mexican army in Texas. An additional 4,000 troops remained under the commands of Urrea and General Vicente Filisola. Texians had won the battle due to mistakes made by Santa Anna, and Houston was well aware that his troops would have little hope of repeating their victory against Urrea or Filisola. As darkness fell, a large group of prisoners were led into camp. Houston initially mistook the group for Mexican reinforcements and shouted out that all was lost.
The Bloody Fields of America Part II
Commodor Edwin Ward Moore
Moore was born in Alexandria, Virginia. His grandfather and uncle had served in the American Revolution. Moore was a classmate of Robert E. Lee at the Alexandria Academy. In his early naval career, Moore entered the US Navy as a midshipman in 1825 at the age of fifteen. His first assignment came when he was posted to the USS Hornet, followed by stints on the Fairchild and the Delware. He saw active service on the Atlantic Coast and the Mediterranean Sea. In 1830, Moore was stationed at the Gosport Navy Yard and five years later was commissioned a lieutenant and assigned to the sloop-of-war Boston on July 1, 1836. While serving on the Boston, Moore saved the ship from sinking when it encountered heavy seas in a hurricane.
In September 1836, the Boston, captured the Texas privateer Terrible off the coast of New Orleans. The Texas ship was sent to Pensacola, Florida, on piracy charges. It is believed this contact with the Texans prompted Moore to re-evaluate his military career. Promotion within the U.S. Navy at this time was a slow process as many of the officers who served in the War of 1812 still held rank above Moore. Moore's Journey to and with the Republic's Navy
In 1839, Moore was accused of recruiting officers and up to eighty sailors from the Boston to join him in enlisting with the Republic of Texas Navy. Moore's cousin, Alexander Moore, confirmed this rumor to Commodore Charles Ridgley who forwarded the charges to the Secretary of the navy. On July 8, 1839, Moore resigned from the U.S. Navy to become commander of the Republic of Texas Navy. U.S. Secretary of the Navy, John Forsyth tried to bring charges against Moore based on his violation of the Neutrality Act of 1819, but Moore resigned his commission before any trial was held.
From 1840–1841 he sailed off the Mexican coast to hasten peace negotiations between the Republic of Texas and Mexico. On collapse of the negotiations, Moore returned to Texas and to the support of Texas President Mirabeau B. Lamar. Lamar signed a treaty with the Mexican state of Yucatan for the lease of the Texas navy for $8,000 per month and to protect their ports from being blockaded by the Mexican Navy. On September 18, 1840, Moore received orders to guard the Yucatán coast in conformity with the Texas-Yucatan Treaty and on December 13, 1840, left Galveston, Texas with three ships to join the small Yucatán fleet at Sisal, Yucatan under the command of former Texas Navy officer Captain James D. Boylan. Moore later captured the town of San Juan Bautista, Tabasco and then surveyed the Texas coast. His chart was later published by the British Admiralty.
Invasion to Tabasco
In September of 1840, Moore invaded the Mexican state of Tabasco in support to the Tabasco federalist forces, collaborating in the overthrow of the centralist governor José Ignacio Gutierrez, capturing the state capital San Juan Bautista on November 17, 1840. Subsequently, and due to a disagreement with the new federalist government, for the lack of a payment of $25,000 Mexican pesos promised to Moore, on December 14, 1840, he bombed the capital again, until he reached a new agreement with the Government of Tabasco for the payment of the debt. President Sam Houston. Upon becoming President of the Republic of Texas, Sam Houston suspended the treaty with the Yucatán and ordered the fleet to return to Texas. Houston was not a big supporter of the Texas Navy. When funds for naval repairs, approved by the Texas Congress, were withheld by Houston, Moore re-instated the treaty with the Yucatán in defiance of Houston's orders. Moore and two other Texas ships, along with a few from the Yucatán navy, engaged the Mexican fleet in May 1843 in the Battle of Campeche.
The Battle of Campeche began on April 30, and involved the Texas Yucatan force that had been attacking and clearing the Gulf of Mexico of Mexican merchant and fishing boats, against a small Mexican squadron which consisted of sailing ships and a small steamer, the Regenerator. The initial battle lasted a few hours and was a draw, as both sides retired.
After rearming, the Texan ships, including the 600 ton flagship Austin, on May 16 encountered a much stronger Mexican squadron, which included the modern 1200 ton ironclad steamships Guadalupe and the Moctezuma, armed with Paixhan's guns able to fire exploding shells, commanded by British officers and manned by British and Mexican seamen. After three hours of broadsides, the battle was essentially a draw, with both sides again withdrawing after sustaining considerable damage and casualties. The Texas ships suffered some physical damage, but the Mexican and British sailors suffered many more casualties of both dead and wounded.
The battle scene was memorialized by Samuel Colt in an engraving on the cylinder of the famed 1851 and 1861 Colt Navy Revolvers and the Colt 1860 Army Revolver. This was in expression of gratitude to Commodore Moore who in 1837 had purchased Colt Paterson Revolvers for the Republic of Texas Navy. By the time of the Battle of Campeche, however, Colt's enterprise was bankrupt. He would make a comeback in 1847 when under Colonel John C. Hays he was rescued from oblivion and put back to work making guns the Texas Rangers would use in the Mexican War.
The Mexican steamship Regenerator and its battered attendant squadron rejoined the Guadalupe and the Moctezuma flotilla about May 19, and withdrew from the area, the Texas squadron retired to Galveston. They were acclaimed as heroes on their return, even though Texas President Sam Houston had declared Commodore Moore and the ships' captains and crew pirates for sailing against his wishes.
However, after a court martial, Commodore Moore was acquitted of all piracy charges. Having fought the ironclad Mexican steamships essentially to a draw using only wooden sailing ships was an achievement for Commodore Moore, the Naval Battle of Campeche becoming the only naval battle in world history in which sailing ships held their own against steam-powered ships in combat.
Mexico's naval fleet consisted of the British-built ironclad steam powered warship the Guadalupe and was the most advanced fleet ever assembled in the Gulf of Mexico at that time. Their battle was determined a draw even though Mexico suffered high casualties. The Mexican government even coined a medal of bravery for their sailors. Mexican Commodore Francisco de Paula Lopez, a naval veteran, was recalled for his failure to defeat a smaller and out-gunned force and was court-martialed. End of career On January 16, 1843, the Texas Congress ordered the sale of the Texas fleet. On June 1, 1843, Moore and the fleet had received Houston's proclamation accusing them of disobedience and piracy and suspending Moore from the Texas Navy. Houston even went so far as to ask for any friendly nation to capture and execute the Texas fleet. Moore returned to Galveston on July 14 and turned himself in at the port of Menard's Wharf, a hero to the people of Texas, and demanded a trial.
Later years After the dissolution of the Texas Navy, Moore spent many years in prosecuting financial claims against Texas. In 1844 the Texas House of Representatives concluded that Moore was owed $26,510.41. He was paid, in installments, with the last payment coming in 1856. Moore married Emma Matilda Stockton Cox of Philadelphia in 1849. She was a distant cousin of Commodore Robert Stockton.
In 1850, Moore and other officers petitioned the U.S. Navy to recognize their rank as officers with the Texas Navy. The House Naval Affairs Committee supported their claim, but the US Supreme Court did not agree holding that when Texas joined the Union, only property, and not human beings, belonged to the United States. On March 3, 1857, Congress finally closed the books on Moore and the other officers by granting them five years of back pay at the salaries of corresponding U.S. Navy officers.
He was in New York City for a time attempting to perfect a machine to revolutionize marine engineering. His quarrel with Sam Houston over the justice of his suspension from the navy continued during Houston's term as US Senator. In 1860, Moore returned to Galveston, where he built the Galveston Customhouse. Moore died in New York City on October 5, 1865, of apoplexy, and is buried in the First Presbyterian Church of Germantown, PA.
Moore(s) also fought in the Spanish- American War, even some fought with the rough riders. During the American Civil War, there were about 9, 766 Moore(s) who served and fought for the Confederate Army, while 15,186 Moore(s) served with the Union Army. The Moore(s) on both sides fought in many bloodiest battles and campaign; even at famous, and well known battles, such as Gettysburg to name one.
The Clansmen fought in Global wars and World Wars
In a short of time period from 1914-1918 to 1939-1945 the world is plunge into darkness and evil. These two world wars put together has killed over sixty million people. For the first time in history clansmen of clan Muir all over the world is uniting to bring the light back into a world that is in darkness and to restore freedom and liberty throughout the world. More than twenty five thousand has answer the call in both wars.
Clansmen of WW1
During this bloody conflict, many Moore, Muir, Mure, More and many more served in the British, French, Canadian, Australian, British commonwealth and of course the United States. Since there are many of our clansmen who served in this conflict; we be going over few of our noble and brave soldiers. Some of our clansmen die from Illness and disease. Private William Moore, Cloyd, Roy Otto, Jeremiah, James T., Harry J and Benjamin A Moore(s) die from pneumonia, and William A. Moore die from heart problem. Other clansmen die in Action like Arthur Moore of company F of eighteen infantry of first division who was killed on July 21, 1918, and other Moores like Ralph H. Moore was killed on Feburary 9, 1918 at the battle of Meuse- Argonne, and Peter Moore killed during the Argonne Drive. There was also an Edmond Alferd Moore, Robert Webster Moir that fought at the Gallipoli campaign, but both were killed. Edmond was killed on May 19, 1915 and Robert was killed August 7, 1915. Captain Ralph Ingram Moore fought in the third Types on October 7, 1917.
Lt. Donald T. Moore
Donald Moore served in the Australian army in the great war. In August 28th he embarked to Egypt. He fought at Anzac cove and was wounded at the battle of Lone Pine. At this time he was promted to Captain and in February 24, 1916 he left for France in March. He engage in the battles of Fleurbaix, Pozieres during the Amiens offensive and was wounded again at the battle of Mouquet farm. Later on he was again promoted to Lt. Colonel and continue to served in the third battalion. He fought at Bullecourt, 3rd battle of Ypres, Lys and at Hindenburg outpost.
The Battle of Lone Pine
The width of the front of the attack was 160 yards (150 m) and the distance between the two trench lines was about 60–100 yards (55–91 m). To reduce the distance to be crossed, the Australians projected a number of tunnels towards the Ottoman trenches from The Pimple. Immediately after the attack, one of these tunnels was to be opened along its length to make a communications trench through which reinforcements could advance without having to cross the exposed ground. Some of the attackers would have to make the advance over open ground from the Australian trench line.
To provide some measure of protection for these men, three mines were set by engineers to make craters in which they could seek shelter. The preliminary bombardment was stretched over three days--initially confined to a limited "slow shoot", building up to a final intense bombardment an hour before the assault--and was successful in cutting much of the barbed wire that the Ottomans had placed in front of their position.
The preparation stage of the attack began at 2:00 p.m. on 6 August, when the Australians detonated the three
mines they had dug in front of the Ottoman lines, in an attempt to create cover for the advancing troops. Two and a half hours later the final heavy preliminary bombardment commenced, with Australian, British and New Zealand artillery batteries firing on the Ottoman trench line, while naval gunfire support from the British cruiser HMS Bacchante provided counter-battery fire on Ottoman artillery positioned along Third Ridge. Retreating into tunnels which had been cut as part of mining operations, the majority of the forward Ottoman troops were able to find shelter from the bombardment that lasted for an hour. While the artillery prepared the ground for the attack, behind the Australian lines the assault formations moved up towards The Pimple.
Smith sited his brigade headquarters at a position called "Brown's Dip", which was about 200 metres (220 yd) south of the firing line. Due to the small front along which the attack was to be launched, the initial assault was to be undertaken in three waves by the 2nd, 3rd and 4th Battalions while the 1st Battalion was to remain back at Brown's Dip in reserve, ready to be brought up to consolidate any gains or respond in the event of a counterattack. Once the 1st Battalion had taken up its position, the assault battalions moved through them towards the forward line at The Pimple.
Once the attack was launched, half the force would go via tunnels that had been dug out into no man's land, while the other half would simply go "over the top". By 5:00 p.m. all the troops had taken up their positions and as the barrage came to a conclusion, the tunnels were opened and final preparations were made. Each soldier in the first two waves had been issued a total of 200 rounds of ammunition for his rifle, along with rations for one day, and miscellaneous equipment including a gas mask.
The third wave had received the same amount of ammunition, but was also issued entrenching equipment that would be used to construct positions to defend the initial gains against the inevitable Ottoman counterattack. In support, each battalion had four Vickers medium machine-guns, which had been issued with 3,500 rounds, and contributed a platoon whose job would be to throw the 1,200 grenades that the brigade had been allocated for the attack. A small section of engineers was also allocated to undertake demolitions. At 5:30 p.m. the Australian 1st Infantry Brigade attacked as the first wave of 1,800 men threw themselves forward.
To their north, the troops of the 2nd Infantry Brigade laid down suppressing fire on the supporting Ottoman troops at Johnston's Jolly, while the 3rd Infantry and 2nd Light Horse Brigades held the line opposite Sniper's Ridge. Half the force went via the prepared tunnels and half crossed the exposed ground between the trench lines. Dubbed the "Daisy Patch", it amounted to a distance of about 100 metres (110 yd) and it was raked with Ottoman artillery and small arms fire. From his headquarters overlooking the fighting, the senior Ottoman commander Esad Pasa, began to co-ordinate the response, passing orders for reinforcements to be brought up and calling down artillery.
Casualties among the first wave of attackers were "relatively light" as the defenders in the front line of Ottoman trenches were still sheltering from the preliminary bombardment and had not had time to return to their fire steps after it had been lifted. When the Australians reached the Ottoman trenches they found them roofed with pine logs with no easy entrance, which had not been identified by aerial reconnaissance during the planning stages. As the Ottoman defenders recovered from the artillery barrage, they began firing at the Australians through specially cut holes at point blank range.
As the second and third waves of the attack came up, some of the Australians fired, grenaded and bayoneted from above, while some found their way inside through gaps or by lifting the logs, which were in places as thick as 4 inches (10 cm) by 9 inches (23 cm). Others ran on past to the open communications and support trenches behind, where they were able to gain access to the trenches; about 70 Ottoman troops were captured as they attempted to escape and ran into the Australians entering the trenches. Small groups of Australians managed to push through to the cup where they were stopped by Ottoman troops who were hastily assembled to defend their regimental headquarters. In the ensuing fighting there, almost all of the Australians were killed, while a handful were taken prisoner.
In the Ottoman trenches, the darkness and cramped conditions led to considerable confusion amongst the attackers. Due to concerns of shooting their comrades, the Australians were unable to fire their rifles initially, and the fighting devolved into a melee as the soldiers attacked each other with bayonets and grenades. The first Australians to enter the position were picked off by the defenders, but as the Australians established themselves in strength, they were able to break into the position before the defenders that had been sheltering in the tunnels behind the front line were able to fully respond. Over the space of half an hour the Australians took control of the position and, after ejecting the remaining Ottomans from the main trench, they established a number of defensive positions along the line.
These amounted to positions in the communication trenches on the flanks of the captured ground and about seven or eight posts in the centre that were "isolated" but connected by hastily dug saps. For the Australians, the attack had been successful, as they had gained possession of the main Ottoman line, and after being halted at The Cup they began preparing to defend their gains. Hastily erecting sandbag barriers along the parapet, they settled down to wait for the first counterattack.
As they did so, the brigade reserve--the 1st Battalion--was brought up. Due to crowding in the tunnels that had been used for the attack, the reinforcements were sent via the open ground that had been in front of the old Ottoman positions; despite being behind the recently captured position, the ground was still subjected to heavy Ottoman artillery and machine-gun fire, which was being poured down from positions in over watch on the flanks. Nevertheless, in company lots, the 1st Battalion moved up and began filling in the gaps between the assault battalions, while engineers from the 2nd Field Company began the task of extending the tunnels from The Pimple towards the new Australian line.
Shortly after dark, around 7:00 p.m., the first Ottoman counterattack came after a group from the 1st Battalion, 57th Regiment, under Major Zeki Bey, arrived to reinforce the battalions of the 47th. Attacking with hand grenades, the fighting took place in the complicated maze of the former Ottoman trench system. The close quarters meant that some of the grenades would travel back and forth up to three times before exploding. The Australians held the old Ottoman fire trench and had footholds deeper in Ottoman lines. They blocked the Ottoman communications trenches as best they could, often with the bodies of the dead, to thwart raids. Other bodies were moved to unused communication trenches and saps, and where possible the wounded were evacuated, however, the fighting was so intense, the conditions so cramped and the men so exhausted that in many cases they were left to lie at the bottom of the trench.
Throughout the night of 6/7 August, the Ottomans brought up reinforcements from the 5th Division's 13th Regiment under Ali Riza Bey, which marched from Kojadere, south-east of the position known to the Australians as "Scrubby Knoll". The 9th Division, under German Colonel Hans Kannengiesser,also received orders to begin moving towards Lone Pine from its position between Helles and Anzac from Esad Pasa. Although the 9th Division was later diverted, after 8:00 p.m. the 15th Regiment, from the 5th Division, under the command of Ibrahim Sukru, was committed to the fighting, moving south from its position around the Kurt Dere, near Chunuk Blair. For the next three days the Ottomans continued to launch incessant and ultimately unsuccessful counterattacks in an effort to recapture the ground they had lost. In total three regiments were dispatched.
The Australians also brought up reinforcements, moving up men from two battalions from the 2nd and 3rd Infantry Brigades--the 7th and 12th Battalions--to hold the 1st Brigade's gains. Throughout 7 August, the fighting devolved into a series of hand grenade duels. To keep up the supply, Australians put about 50 soldiers to work at Anzac Cove manufacturing makeshift grenades out of empty jam tins: over 1,000 were sent up to the 1st Infantry Brigade late on 7 August. The fighting continued throughout the night of 7/8 August as the 47th Regiment, launched a determined counterattack; suffering heavy casualties, including the regimental commander, Tewfik Bey, the attack was unsuccessful in retaking the main front-line trenches, but succeeded in regaining some of the ground in the north and also pushed the Australians back a little way from The Cup.
As Ali Riza Bey, the commander of the 13th Regiment, took charge of the Ottoman effort around Lone Pine, the grenading continued into the next day as the Ottomans began to prepare for a large-scale counterattack. Throughout the morning the remaining Australian positions overlooking The Cup were abandoned before the fighting stopped briefly as both the Australians and Ottomans evacuated their wounded and removed the dead from the front-line. By this time the 1st and 2nd Battalions, which had been defending the heavily counterattacked southern flank, had suffered so many casualties that they were withdrawn from the line, with the 7th Battalion moving into their positions late in the afternoon. The 3rd, 4th and 12th Battalions remained holding the north and centre of the Australian line.
Further attacks were mounted by the Ottomans all along the Australian line after 3:00 p.m., but after dark they focused their efforts on the 7th Battalion's position in the south; there the Ottomans succeeded in taking part of the Australian line late in the night, and fierce hand-to-hand fighting followed until early in the morning of 9 August as the Australians retook these positions. More grenade attacks were launched by Ottoman troops later that morning and as the Australian trenches were brought under fire from the Ottoman positions around Johnston's Jolly, an attack was launched at the junctions between the Australian battalions.
Achieving a break-in in the centre, they reached the 1st Infantry Brigade's headquarters--which had advanced forward from Brown's Dip following the initial gains--where the brigade commander, Smith, joined the defense that eventually drove them back. Around midday the Ottomans put in another attack, but this too was repulsed. The positions on the southern Australian flank continued to be subjected to grenading, so the 5th Battalion was brought up to relieve the 7th. The 2nd Battalion, having received a brief respite, also came forward, replacing the 4th Battalion with the support of a dismounted squadron from the 7th Light Horse Regiment. As the fresh units settled in, the Australians prepared for renewed fighting along the line. In the end, the expected attack never came and finally, late in the afternoon of 9 August, the Ottoman commanders called off further attempts to dislodge the Australians. The next day, the fighting "subsided" as both the Ottomans and the Australians worked to consolidate their positions.
The Battle of Pozières
Rawlinson planned to deliver another attack on a broad front on 18 July involving six divisions between the Albert–Bapaume road in the north and Guillemont in the south. Haig decided to transfer responsibility for Pozières to the Reserve Army of Lieutenant General Hubert Gough which had been holding the line north of the road since shortly after the opening of the offensive on 1 July. The attack was postponed until the night of 22–23 July. To Gough's army were attached the three Australian divisions of I Anzac Corps, which had begun moving from the Armentières sector.
The Australian 1st Division reached Albert on 18 July and despite the postponement of the offensive, Gough, who had a reputation as a "thruster", told the division's commander, Major General Harold Walker, "I want you to go in and attack Pozières tomorrow night". Walker, an experienced English officer who had led the division since Gallipoli, would have none of it and insisted he would attack only after adequate preparation. Consequently, the attack on Pozières once more fell in line with the Fourth Army's attack on the night of 22–23 July. The plan called for the Australian 1st Division to attack Pozières from the south, advancing in three stages half an hour apart, while north of the Albert–Bapaume road, the 48th (South Midland) Division (X Corps), would attack the German trenches west of the village.
The village and surrounding area was defended by elements of the 117th Division. Early on 22 July the Australian 9th Battalion attempted to improve its position by advancing up the O.G. Lines towards the road but was repulsed. The preparation for the attack involved a thorough bombardment of the village and the O.G. Lines lasting several days. The bombardment included phosgene and tear gas. The infantry were scheduled to attack at 12:30 a.m. on 23 July, with the Australian 1st and 3rd Brigades. The infantry crept into no man's land, close behind the bombardment and when it lifted the German trenches were rushed. The first stage took the Pozières trench that ringed the village to the south.
The second stage saw the Australians advance to the edge of the village, amongst what remained of the back gardens of the houses lining the Albert–Bapaume road. The third stage brought the line to the Albert–Bapaume road. The few survivors from the German garrison retreated to the northern edge of the village or into the O.G. Lines to the east. It was also intended that the O.G. Lines would be captured as far as the road but here the Australians failed, partly due to strong resistance from the German defenders in deep dugouts and machine gun nests and partly due to the confusion of a night attack on featureless terrain. The weeks of bombardment had reduced the ridge to a field of craters and it was virtually impossible to distinguish where a trench line had run.
The failure to take the O.G. Lines made the eastern end of Pozières vulnerable and so the Australians formed a flank short of their objectives. On the western edge of the village, the Australians captured a German bunker known as "Gibraltar". During 23 July, some Australians went prospecting across the road, captured a number of Germans and with minimal effort occupied more of the village. That night the 8th Battalion of the Australian 2nd Brigade, which had been in reserve, moved up and secured the rest of the village.
The attack of the 48th Division on the German trenches west of Pozières achieved some success but the main attack by the Fourth Army between Pozières and Guillemont was a costly failure.
Success on the Somme came at a cost which at times seemed to surpass the cost of failure, and for the Australians, Pozières was such a case. As a consequence of being the sole British gain on 23 July, Pozières became a focus of attention for the Germans. Forming as it did a critical element of their defensive system, the German command ordered that it be retaken at all costs. Three attempts were made on 23 July but each was broken up by the British artillery or swept away by machine gun fire.
Communication was as difficult for the Germans as it was for the British, and it was not until 7:00 a.m. 24 July that they discovered that Pozières had been captured. With British activity now declining elsewhere on its front, the German IV Corps opposite Pozières, was able to concentrate most of its artillery against the village and its approaches. Initially the bombardment was methodical and relentless without being intense. The western approach to the village, which led from Casualty Corner near the head of Sausage Valley, received such a concentration of shellfire that it was thereafter known as "Dead Man's Road". The German bombardment intensified on 25 July, in preparation for another counterattack. The German IX Corps relieved IV Corps and the commander cancelled the planned counterattack, choosing to concentrate on the defense of the O.G. Lines, which were the next objective of the British.
The bombardment reached a climax on 26 July and by 5:00 p.m. the Australians, believing an attack was imminent, appealed for a counter-barrage. The artillery of I Anzac Corps, II Corps and the guns of the two neighboring British corps replied. This in turn led the Germans to believe the Australians were preparing to attack and so they increased their fire yet again. It was not until midnight that the shelling subsided. At its peak, the German bombardment of Pozières was the equal of anything yet experienced on the Western Front and far surpassed the worst shelling previously endured by an Australian division. The Australian 1st Division suffered 5,285 casualties on its first tour of Pozières. When the survivors were relieved on 27 July, one observer said "They looked like men who had been in Hell... drawn and haggard and so dazed that they appeared to be walking in a dream and their eyes looked glassy and starey". — E. J. Rule On 24 July, once Pozières had been secured, General Gough pushed for immediate moves against the O.G. Lines north and east of the village.
The first task was to take the lines up to the Albert– Bapaume road; the original objectives which had not been captured. Attacking in the dark, only the Australian 5th Battalion found either of the O.G. trenches and it was counter-attacked by the German 18th Reserve Division. Simultaneously on the Australian's right, the British 1st Division made an attempt to capture Munster Alley, the section of the Switch Line where it intersected the O.G. Lines. A tumultuous bomb fight developed but only a small section of trench was held. Before it was withdrawn, the Australian 1st Division had attempted to prepare a jumping-off line for the assault on the O.G. Lines. The Australian 2nd Division took over the sector on 27 July and General Gough, eager for progress, pressed for an immediate attack.
The division's commander, General Gordon Legge, lacked the experience and confidence of General Walker and succumbed to pressure from Gough. On the night of 28–29 July, in conditions far less favourable than those experienced by the 1st Division on the night of 22–23 July, the 2nd Division was expected to attack. The remorseless German bombardment made effective preparations virtually impossible. The dust raised by the shelling prevented the Australian artillery observers from directing their field guns which were tasked with cutting the barbed wire entanglements. An attack by the British 23rd Division on Munster Alley dragged in the Australian 5th Brigade -- the ensuing bomb fight saw the British and Australian infantry expend over 15,000 grenades.
The main attack went ahead, scheduled to start at 12:15 a.m. on 29 July but the Australian 7th Brigade was late in reaching its start line and its movement was detected by the German defenders; when the attack commenced, the Australians were met by a hail of machine gun fire. South of the road the 5th Brigade remained pinned down, unable to even get started. On their left, north of the road, the 7th Brigade encountered uncut wire. On the northern flank some minor progress was made by the 6th Brigade but everywhere else the attack was a failure. Including the attack and the preceding day of preparation the 2nd Division lost over 3,500 men; the 7th Brigade had to be withdrawn to reserve, so great were its losses.
General Haig was disparaging of the division's failure, telling Lieutenant General William Birdwood, the I Anzac Corps commander, "You're not fighting Bashi-Bazouks now." General Legge and the I Anzac staff resolved to do the job properly. To avoid the confusion of a night advance, the plan was to attack at 9:15 p.m. just before dark at which time the crest of the ridge and the mound of the Pozières windmill would still be discernible. However, to attack at dusk meant assembling by day which was only possible to do in the protection of trenches. Therefore, a system of approach and assembly trenches had to be dug at night. Whenever the Germans detected digging parties, they mistook them for troops assembling to attack and called down a barrage. Originally the attack was to be made at dusk on 2 August but the trenches were as yet incomplete, the digging either being disrupted or the completed trenches demolished by shellfire. The attack was first postponed to 3 August and then to 4 August when the trenches were finally deemed ready.
This careful planning and preparation delivered success and when the 2nd Division went in, both O.G. Lines were captured. South of and astride the Albert–Bapaume Road the O.G. Lines had been so thoroughly obliterated by prolonged shelling that the Australians ended up advancing beyond their objectives. From their vantage in the O.G. Lines on the eastern edge of the Pozières ridge, the Australians now looked over green countryside, the village of Courcelette close by and the woods around Bapaume 5 miles (8.0 km) distant. The German commander ordered "At any price Hill 160 Pozières ridge must be recovered." By 5 August the brigades of the 2nd Australian Division were exhausted and were to be relieved by the 4th Australian Division. While the relief was underway on the night of 5–6 August the Australians were subjected to an extreme bombardment, because the salient they occupied could be shelled by the Germans from all directions, including from Thiepval which lay to the rear.
On the morning of 6 August, a German counter-attack tried to approach the O.G. Lines but was met by machine gun fire and forced to dig in. The bombardment continued through the day, by the end of which most of the 2nd Division had been relieved. From its twelve days in the line, the division had suffered 6,848 casualties. At 4:00 a.m. on 7 August, shortly before dawn, the Germans launched their final counter-attack.
On a front of 400 yards (370 m) they overran the thinly occupied O.G. Lines, catching most of the Australians in shelters in the old German dugouts and advanced towards Pozières. For the Australians, the crisis had arrived. At this moment, Lieutenant Albert Jacka, who had won the Victoria Cross at Gallipoli, emerged from a dugout where he and seven men of his platoon had been isolated, and charged the German line from the rear.
His example inspired other Australians scattered across the plateau to join the action and a fierce, hand-to-hand fight developed. Jacka was badly wounded but as support arrived from the flanks, the Australians gained the advantage and most of the surviving Germans were captured. No more attempts to retake Pozières were made. Since taking over the Pozières sector, General Gough's plan had been to drive a wedge behind (east of) the German fortress of Thiepval. Having secured Pozières and the neighbouring section of the O.G. Lines, the attack now moved to the next phase; a drive north along the ridge towards the German strong point of Mouquet Farm which protected the rear of Thiepval.
I Anzac Corps would carry the advance along the ridge while, on their left, II Corps would keep in line, systematically reducing the Thiepval salient. Initially the task fell to the 4th Australian Division, which had already suffered 1,000 casualties, resisting the final German counter-attack but both the Australian 1st and 2nd Divisions would be called on again, followed once more by the 4th Division. When the Australian ordeal on Pozières ridge was over in September, they were replaced by the Canadian Corps who held the sector for the remainder of the battle. The O.G. Lines east of the village became the Canadian start line for the Battle of Flers–Courcelette.
After the battle it became apparent that General Birdwood had lost much of his Gallipoli popularity through his failure to oppose Gough's impetuous desire for "quick results" and his "lack of thought" at Pozières. Soon after, Australian troops rejected his personal appeal for the introduction of conscription, voting against this recommendation largely because of their reluctance to see additional men subjected to the horrors of piecemeal attacks.
The Australians had suffered many losses in the Battle for Pozières in six weeks, as they had in the Gallipoli Campaign. Wilfrid Miles, the Official Historian, praised the initiative shown by small subunits of men in clearing the Germans from positions in the village but at the same time attributed much of the severity of losses to Australian inexperience and their "reckless daring." In the fighting around Pozières the 48th Division lost 2,844 casualties from 16–28 July and 2,505 more from 13 August. The 1st Australian Division lost 7,700 men, the 2nd Australian Division had 8,100 casualties and the 4th Australian Division lost 7,100 men. From 27 July – 13 August the 12th Division had 2,717 losses.
The Battle of Mouquet Farm
During the night of 10 August, parties of the 4th Australian Division of the I Anzac Corps, attacked towards the farm and managed to establish advanced posts in the valley south of the farm and to the east. Attacks were then made from a foothold in Fabeck Graben (Fabeck Trench) to the northeast and to deepen the salient near the farm. By 22 August, the 2nd Australian Division had made several more attempts on the farm and had realized that the main defensive position was underground, where the Germans had excavated the cellars to create linked dug-outs. On 3 September, the 4th Australian Division attacked again with the 13th Brigade and captured much of the surface remains of the farm and trenches nearby, with hand-to-hand fighting in the ruins and underground. German counter-attacks repulsed the Australians except from a small part of Fabeck Graben, for a loss of 2,049 Australian casualties.
During the battle, the I Anzac Corps divisions, advanced north-west along the Pozières ridge, towards the German strong point of Mouquet Farm, with British divisions supporting on the left. The approaches to the farm were visible to German artillery observers, who directed artillery-fire on the attackers, from three sides of the salient that had developed in the lines. Many casualties were caused to the attackers as they approached the farm and in August and into September, the Australian divisions were repulsed three times from the farm. The Canadian Corps relieved the I Anzac Corps on 5 September.
The Canadians captured part of the farm on 16 September and were then repulsed by a counterattack. By 25 September, further attacks had captured part of the farm on the surface but the Germans still held the cellars, dug-outs and tunnels beneath. The farm was captured on 26 September by the 34th Brigade of the 11th Division, in the general attack of the Battle of Thiepval Ridge. The 9th Lancashire Fusiliers bombed the exits of the underground positions and also managed to reach the second objective, at the west end of Zollern Trench, where German machine-gun nests had held up previous attacks.
The 6th East Yorkshire (Pioneers) overwhelmed the last defenders with smoke grenades and took 56 prisoners. In the fighting around Pozières and Mouquet Farm, the I Anzac Corps suffered c. 6,300 casualties. During its second period on the Somme, the 1st Australian Division lost 2,654 men, having already had 5,278 casualties in August. The 2nd Australian Division had 6,846 losses from 25 July – 7 August and 1,267 casualties from 23–29 August. From 29 July – 16 August the 4th Australian Division had 4,761 losses and 2,487 casualties from 27 August – 4 September.
The American Moores
Many Moore(s) fought brave and courageous in the US army and Marines. Private William F. Moore was killed at the battle of Belleau wood. Harold A Moore fought at the battle of Chateau Thierry and was killed, Jesse H. Moore fought at the battle of Contigny and was killed, Corporal Clark and Scott Moore fought at the battle of Argonne forest. Clark was killed on October 17, 1918 and Scott was killed in September 28, 1918, and Henry R. Moore was wounded at the Battle of Soission but unfortunately he die of his wounds that he received in this battle.
The Battle of Belleau Woods
On the evening of 1 June, German forces punched a hole in the French lines to the left of the Marines' position. In response, the U.S. reserve--consisting of the 23rd Infantry Regiment, the 1st Battalion, 5th Marines, and an element of the 6th Machine Gun Battalion--conducted a forced march over 10 kilometres (6.2 mi) to plug the gap in the line, which they achieved by dawn. By the night of 2 June, the U.S. forces held a 20 kilometres (12 mi) front line north of the Paris-Metz Highway running through grain fields and scattered woods, from Triangle Farm west to Lucy and then north to Hill 142. The German line opposite ran from Vaux to Bouresches to Belleau. German commanders ordered an advance on Marigny and Lucy through Belleau Wood as part of a major offensive, in which other German troops would cross the Marne River.
The commander of the Marine Brigade, Army General James Harbord, countermanding a French order to dig trenches further to the rear, ordered the Marines to "hold where they stand". With bayonets, the Marines dug shallow fighting positions from which they could fight from the prone position. In the afternoon of 3 June, German infantry attacked the Marine positions through the grain fields with bayonets fixed. The Marines waited until the Germans were within 100 yd (91 m) before opening deadly rifle fire which mowed down waves of German infantry and forced the survivors to retreat into the woods. Having suffered heavy casualties, the Germans dug in along a defensive line from Hill 204, just east of Vaux, to Le Thiolet on the Paris-Metz Highway and northward through Belleau Wood to Torcy.
After Marines were repeatedly urged to turn back by retreating French forces, Marine Captain Lloyd W. Williams of the 2nd Battalion, 5th Marines uttered the now-famous retort "Retreat? Hell, we just got here". Williams' battalion commander, Major Frederic Wise, later claimed to have said the famous words. On 4 June, Major General Bundy--commanding the 2nd Division--took command of the American sector of the front. Over the next two days, the Marines repelled the continuous German assaults. The 167th French Division arrived, giving Bundy a chance to consolidate his 2,000 yards (1,800 m) of front.
Bundy's 3rd Brigade held the southern sector of the line, while the Marine brigade held the north of the line from Triangle Farm. At 03:45 on 6 June, the Allies launched an attack on the German forces, who were preparing their own strike. The French 167th Division attacked to the left of the American line, while the Marines attacked Hill 142 to prevent flanking fire against the French. As part of the second phase, the 2nd Division were to capture the ridge overlooking Torcy and Belleau Wood, as well as occupying Belleau Wood. However, the Marines failed to scout the woods. As a consequence, they missed a regiment of German infantry dug in, with a network of machine gun nests and artillery.
At dawn, the Marine 1st Battalion, 5th Marines--commanded by Major Julius Turrill-- was to attack Hill 142, but only two companies were in position. The Marines advanced in waves with bayonets fixed across an open wheat field that was swept with German machine gun and artillery fire, and many Marines were cut down. Captain Crowther commanding the 67th Company was killed almost immediately. Captain Hamilton and the 49th Company fought from wood to wood, fighting the entrenched Germans and overrunning their objective by 6 yards (5.5 m). At this point, Hamilton had lost all five junior officers, while the 67th had only one commissioned officer alive. Hamilton reorganized the two companies, establishing strong points and a defensive line.
In the German counter-attack, then-Gunnery Sergeant Ernest A. Janson--who was serving under the name Charles Hoffman--repelled an advance of 12 German soldiers, killing two with his bayonet before the others fled; for this action he became the first Marine to receive the Medal of Honor in World War I. Also cited for advancing through enemy fire during the counter-attack was then-Marine Gunner Henry Hulbert. The rest of the battalion now arrived and went into action.
Turrill's flanks lay unprotected and the Marines were rapidly exhausting their ammunition. By the afternoon, however, the Marines had captured Hill 142, at a cost of nine officers and most of the 325 men of the battalion. At 17:00 on 6 June, the 3rd Battalion 5th Marines (3/5)--commanded by Major Benjamin S. Berry, and the 3rd Battalion 6th Marines (3/6)--commanded by Major Tyler M. Meyer, on their right--advanced from the west into Belleau Wood as part of the second phase of the Allied offensive. Again, the Marines had to advance through a waist-high wheat field into deadly machine gun fire.
One of the most famous quotations in Marine Corps history came during the initial step-off for the battle when Gunnery Sergeant Dan Daly, a recipient of two Medals of Honor who had served in the Philippines, Santo Domingo, Haiti, Peking and Vera Cruz, prompted his men of the 73rd Machine Gun Company forward with the words: "Come on, you sons of bitches, do you want to live forever?" The first waves of Marines--advancing in well-disciplined lines--were slaughtered; Major Berry was wounded in the forearm during the advance.
On his right, the Marines of Major Meyer's 3/6 Battalion swept into the southern end of Belleau Wood and encountered heavy machine gun fire, sharpshooters and barbed wire. Marines and German infantrymen were soon engaged in heavy hand-tohand fighting. The casualties sustained on this day were the highest in Marine corps history up to that time. Some 31 officers and 1,056 men of the Marine brigade were casualties. However, the Marines now had a foothold in Belleau Wood. The battle was now deadlocked. At midnight on 7–8 June, a German attack was stopped cold and an American counter-attack in the morning of 8 June was similarly defeated. Meyer's battalion-- having sustained nearly 400 casualties --was relieved by the 1st Battalion, 6th Marines. Major Shearer took over the 3rd Battalion, 5th Marines for the wounded Berry.
On 9 June, an enormous American and French barrage devastated Belleau Wood, turning the formerly attractive hunting preserve into a jungle of shattered trees. The Germans counter-fired into Lucy and Bouresches and reorganized their defenses inside Belleau Wood. In the morning of 10 June, Major Hughes' 1st Battalion, 6th Marines--together with elements of the 6th Machine Gun Battalion--attacked north into the wood. Although this attack initially seemed to be succeeding, it was also stopped by machine gun fire. The commander of the 6th Machine Gun Battalion --Major Cole--was mortally wounded. Captain Harlan Major--senior captain present with the battalion--took command.
The Germans used great quantities of mustard gas. Wise's 2nd Battalion, 5th Marines was ordered to attack the woods from the west, while Hughes continued his advance from the south. At 04:00 on 11 June, Wise's men advanced through a thick morning mist towards Belleau Wood, supported by the 23rd and 77th companies of the 6th Machine Gun Battalion, and elements of the 2nd Battalion, 2nd Engineers and were cut to pieces by heavy fire. Platoons were isolated and destroyed by interlocked machine gun fire. It was discovered that the battalion had advanced in the wrong direction. Rather than moving northeast, they had moved directly across the wood's narrow waist. However, they smashed the German southern defensive lines. A German private, whose company had 30 men left out of 120, wrote "We have Americans opposite us who are terribly reckless fellows." Overall, the woods were attacked by the Marines a total of six times before
they could successfully expel the Germans.
They fought off parts of five divisions of Germans, often reduced to using only their bayonets or fists in hand-to-hand combat. On 26 June, the 3rd Battalion, 5th Marines, under command of Major Maurice E. Shearer, supported by two companies of the 4th Machine Gun Battalion and the 15th Company of the 6th Machine Gun Battalion, made an attack on Belleau Wood, which finally cleared that forest of Germans. On that day, Major Shearer submitted a report simply stating, "Woods now U.S. Marine Corps entirely,"ending one of the bloodiest and most ferocious battles U.S. forces would fight in the war. United States forces suffered 9,777 casualties, included 1,811 killed. Many are buried in the nearby Aisne-Marne American Cemetery. There is no clear information on the number of German soldiers killed, although 1,600 were taken prisoner.
After the battle, the French renamed the wood "Bois de la Brigade de Marine" ("Wood of the Marine Brigade") in honor of the Marines' tenacity. The French government also later awarded the 4th Brigade the Croix de guerre. An official German report classified the Marines as "vigorous, self-confident, and remarkable marksmen ..."General Pershing--commander of the AEF--even said, "The deadliest weapon in the world is a United States Marine and his rifle." Pershing also said "the Battle of Belleau Wood was for the U.S. the biggest battle since Appomattox and the most considerable engagement American troops had ever had with a foreign enemy." Legend and lore has it that the Germans used the term "Teufelshunde" ("devil dogs") for the Marines.
However this has not been confirmed, as the term was not commonly known in contemporary German. The closest common German term would be "Höllenhunde" which means "hellhound "Regardless of the term's origin, ten years after the battle, Lieutenant Colonel Ernst Otto, from the Historical Section of the German Army, wrote this about the Marine Corps, "Their fiery advance and great tenacity were well recognized by their opponents.
The Battle of Argonne Forest
The American attack began at 5:30 a.m. on September 26 with mixed results. The V and III Corps met most of their objectives, but the 79th Division failed to capture Montfaucon, the 28th "Keystone" Division was virtually ground to a halt by formidable German resistance, and the 91st "Wild West" Division was compelled to evacuate the village of Épinonville though it advanced eight kilometers. The green 37th "Buckeye" Division failed to capture Montfaucon d'Argonne. The subsequent day, September 27 most of 1st Army failed to make any gains. The 79th Division finally captured Montfaucon and the 35th "Sante Fe" Division captured the village of Baulny, Hill 218, and Charpentry, placing the division forward of adjacent units.
On September 29, six extra German divisions were deployed to oppose the American attack, with the 5th Guards and 52nd Division counterattacking the 35th Division, which had run out of food and ammunition during the attack. The Germans initially made significant gains but were barely repulsed by the 35th Division's 110th Engineers, 128th Machine Gun Battalion and Harry Truman's Battery D, 129th Field Artillery. In the words of Pershing, "We were no longer engaged in a maneuver for the pinching out of a salient, but were necessarily committed, generally speaking, to a direct frontal attack against strong, hostile positions fully manned by a determined enemy."
The German counterattack had shattered so much of the 35th Division, a poorly led division (most of its key leaders were replaced shortly before the attack) made up of National Guard units from Missouri and Kansas, that it had to be relieved early - though remnants of the division subsequently reentered the battle. Part of the adjacent French attack met temporary confusion when one of its generals died, however it was able to advance nine miles, penetrating deeply into the German lines, especially around Somme-Py (the Battle of Somme-Py (French: Bataille de Somme-Py)) and northwest of Reims (the Battle of Saint-Thierry (French: Bataille de Saint-Thierry)).
The initial progress of the French forces was thus faster than the two to five miles gained by the adjacent American units (however, the French units were fighting in a more open terrain, which is easier to attack). The second phase of the battle began on 4 October, during which time all of the original phase one assault divisions (the 91st, 79th, 37th and 35th) of the U.S. V Corps were replaced by the 32nd, 3rd and 1st Divisions. The 1st Division created a gap in the lines when it advanced one and a half miles against the 37th, 52nd, and 5th Guards Divisions. It was during this phase that the Lost Battalion affair occurred. The battalion was rescued due to an attack by the 28th and 82nd Divisions (the 82nd attacking soon after taking up its positions in the gap between the 28th and 1st Divisions) on October 7.
The Americans launched a series of costly frontal assaults that finally broke through the main German defenses (the Kriemhilde Stellung of the Hindenburg Line) between 14–17 October (the Battle of Montfaucon (French: Bataille de Montfaucon)). By the end of October, US troops had advanced ten miles and had finally cleared the Argonne Forest. On their left the French had advanced twenty miles, reaching the Aisne River. It was during the opening of this operation, on October 8, that Corporal (later Sergeant) Alvin York made his famous capture of 132 German prisoners near Cornay. By October 31, the Americans had advanced 15 kilometers and had finally cleared the Argonne Forest. On their left the French had advanced 30 kilometers, reaching the River Aisne.
The American forces reorganized into two armies. The First, led by General Liggett, would continue to move to the Carignan-Sedan-Mezieres Railroad. The Second Army, led by Lieutenant General Robert L. Bullard, was directed to move eastward towards Metz. The two U.S. armies faced portions of 31 German divisions during this phase. The American troops captured German defenses at Buzancy, allowing French troops to cross the River Aisne, whence they rushed forward, capturing Le Chesne (the Battle of Chesne (French: Bataille du Chesne)). In the final days, the French forces conquered the immediate objective, Sedan and its critical railroad hub (the Advance to the Meuse (French: Poussée vers la Meuse)), on November 6 and American forces captured surrounding hills. On November 11, news of the German armistice put a sudden end to the fighting.
Moores of WW2
Once again a world war began with Nazi Germany invading into Poland and continue to push all the way to France. While all of Europe, and Northern Africa is under Nazi control, while in Asia and pacific is under control by the Japaneses. The only hope for Europe survive is Great Britain. Britain is indeed the last of the free in Europe, and a desperate fight over British airspace. Arthur Robert Moore, Peter John Moore, William Roy Moore, William Storey Moore, and James Winter Carmichael More fought for the Royal Air force at the Battle of Britain. John Moore living in Glasgow during the Battle of Britain became a civilian ambulance and medic during this battle. He ran into building that were on fire and bombs being drop; he was rewarded with the George cross. James Newton Rodney Moore fought in ww2 as a general staff officer of the first guards armored division. He was at operation Overlord and Market Garden. There was a Len Moore who fought with the second battalion king's royal rifles, 2nd corps of North Africa from 1941 to 1943. He was at the battle of the second battle of El Alamein.
The Battle of Britain
Göring ordered attacks on aircraft factories on 19 August 1940; on 23 August 1940 he ordered that RAF airfields be attacked. That evening an attack was mounted on a tyre factory in Birmingham. Raids on airfields continued through 24 August, and Portsmouth was hit by a major attack. That night, several areas of London were bombed; the East End was set ablaze and bombs landed on central London. Some historians believe that these bombs were dropped accidentally by a group of Heinkel He 111s which had failed to find their target; this account has been contested. In retaliation, the RAF bombed Berlin on the night of 25–26 August, and continued bombing raids on Berlin. Göring's pride was hurt, as he had previously claimed the British would never be able to bomb the city. The attacks enraged Hitler, who ordered retaliatory attacks on London. From 24 August onwards, the battle was a fight between Kesselring's Luftflotte 2 and Park's 11 Group.
The Luftwaffe concentrated all their strength on knocking out Fighter Command and made repeated attacks on the airfields. Of the 33 heavy attacks in the following two weeks, 24 were against airfields. The key sector stations were hit repeatedly: Biggin Hill and Hornchurch four times each; Debden and North Weald twice each. Croydon, Gravesend, Rochford, Hawkinge and Manston were also attacked in strength. Coastal Command's East church was bombed at least seven times because it was believed to be a Fighter Command aerodrome. At times these raids caused some damage to the sector stations, threatening the integrity of the Dowding system. To offset some losses, some 58 Fleet Air Arm fighter pilot volunteers were seconded to RAF squadrons, and a similar number of former Fairey Battle pilots were used. Most replacements from Operational Training Units (OTUs) had as little as nine hours flying time and no gunnery or air-to-air combat training.
At this point, the multinational nature of Fighter Command came to the fore. Many squadrons and personnel from the air forces of the Dominions were already attached to the RAF, including top level commanders – Australians, Canadians, New Zealanders, Rhodesians and South Africans. In addition, there were other nationalities represented, including Free French, Belgian and a Jewish pilot from the British mandate of Palestine. They were bolstered by the arrival of fresh Czechoslovak and Polish squadrons. These had been held back by Dowding, who mistakenly thought non-English speaking aircrew would have trouble working within his control system: Polish and Czech fliers proved to be especially effective.
The prewar Polish Air Force had lengthy and extensive training, and high standards; with Poland conquered and under brutal German occupation, the pilots of No. 303 (Polish) Squadron, the highest-scoring Allied unit, were strongly motivated. Josef František, a Czech regular airman who had flown from the occupation of his own country to join the Polish and then French air forces before arriving in Britain, flew as a guest of 303 Squadron and was ultimately credited with the highest "RAF score" in the Battle of Britain.
The RAF had the advantage of fighting over home territory. Pilots who bailed out of their downed aircraft could be back at their airfields within hours, while if low on fuel and/or ammunition they could be immediately rearmed. One RAF pilot interviewed in late 1940 had been shot down five times during the Battle of Britain, but was able to crash land in Britain or bail out each time. For Luftwaffe aircrews, a bailout over England meant capture – in the critical August period, almost exactly as many Luftwaffe pilots were taken prisoner as were killed– while parachuting into the English Channel often meant drowning or death from exposure. Morale began to suffer, and [Kanalkrankheit] ("Channel sickness") – a form of combat fatigue – began to appear among the German pilots. Their replacement problem became even worse than the British.
The turning point was when the Germans stop attacking their objective and started to bomb the cities. The united States enter ww2 when Japan did a surprise attack on Pearl Harbor. It had killed over two thousand Americans including Clyder C., Douglas C., James C., Fred Kenneth Moore(s), Lionel Jay Moorhead, William Starks Moorhouse, and Russell Lee Moorman. All this did was to awaken a sleeping giant, which ended badly for the Axis forces.
War with Japan
At the same time the Japanese invaded the Philippines and many Americans fought the Japanese from taking over the Philippines. This battle was known as the Battle of Bataan. Major General George Fleming Moore and few other clansmen did everything they could to hold off the Japanese. Some were killed and some were taken prisoners and they went on a death march. There was also Ulvert Matthew Moore fought at the battle of Midway. MacAthur use the tactics of Island hoping. Lt. Paul Moore who fought at the battle of Guadalcanal, and another Terry Moore fought at the battle of Okinawa. Many Moores fought at the battle of Iwo Jima.
The Battle of Iwo Jima
The American amphibious invasion of Iwo Jima during World War II stemmed from the need for a base near the Japanese coast. Following elaborate preparatory air and naval bombardment, three U.S. marine divisions landed on the island in February 1945. Iwo Jima was defended by roughly 23,000 Japanese army and navy troops, who fought from an elaborate network of caves, dugouts, tunnels and underground installations.
Despite the difficulty of the conditions, the marines wiped out the defending forces after a month of fighting, and the battle earned a place in American lore with the publication of a photograph showing the U.S. flag being raised in victory.
The American amphibious invasion of Iwo Jima, a key island in the Bonin chain roughly 575 miles from the Japanese coast, was sparked by the desire for a place where B-29 bombers damaged over Japan could land without returning all the way to the Marianas, and for a base for escort fighters that would assist in the bombing campaign. Iwo Jima was defended by roughly 23,000 Japanese army and navy troops, and it was attacked by three marine divisions after elaborate preparatory air and naval bombardment (sixty-eight hundred tons of bombs, twenty-two thousand shells).
The battle was marked by changes in Japanese defense tactics–troops no longer defended at the beach line but rather concentrated inland; consequently, the marines experienced initial success but then got bogged down in costly attritional warfare. The Japanese fought from an elaborate network of caves, dugouts, tunnels, and underground installations that were difficult to find and destroy. Except for 1,083 prisoners (two of whom did not surrender until 1951) the entire garrison was wiped out. American losses included 5,900 dead and 17,400 wounded. Amongest those that were killed were Clarence E, Cletis O, Clyde S., Cornelius, Edward N. Jr, Frank J., Harris F, John T and John W, and Robert, all of their surname was Moore, and James R. Moorman.
War with Germany
While the Marines are fighting the Japs, the Army took on Germany. There was a Colonel Moore at the battle of Kasserine Pass. An elite group called the Devil's brigade was made up of Americans and Canadians in a joint special force group. There were Lt. Colonel Robert S. Moore, Captain Paul B. Moore Jr, and Lt J.D. Moore who fought in the Italian campaign. This was the beginning of the destruction of the Nazi empire, when the allies forces attack Normandy or as the operation nickname Overlord or D-Day. Captain Rory Moore, Bud Moore, private Ken Moore and other clansmen fought in this deadly battle.
Rory, Bud Moore and other clansmen landed at the beach of Utah beach, some on Omaha beach, sword beach and other landings. Captain Rory Moore Jr fought at the battles of D-Day landings, liberation of Angers, St. Calais, Verdan, and Fort Driant. There is also Mohrs who fought for Nazi, Germany but some Mohrs went into the German resistances.
Johann Mohr was a U-boat commander operating in the Atlantic ocean. He fought at the battle of Atlantic. Towards the end of the war for Germany; the Germans made a last efforts to push the allies back in a battle called the Battle of the Bulge. George Moore and few other Moores fought at the Battle of the Bulge.
The battle of Atlantic
Mohr joined the Reichsmarine in 1934. After serving as first Watch Officer (second-in command) to Georg- Wilhelm Schulz in U-124 on three patrols, in September 1941 he assumed command of the U-boat on six patrols, and sank 27 merchant ships, for a total of 129,292 GRT of Allied shipping. This includes four ships from Convoy ONS-92 sunk on the night of 12 May 1942, totalling 21,784 tons. Mohr also sank the British light cruiser HMS Dunedin and the Free French covette Mimosa. Mohr was killed when U-124 was sunk with all hands on 2 April 1943 about 500 km (270 nmi) west of Oporto, Portugal, by the British corvette HMS Stonecrop and the sloop HMS Black Swan.
After the end of world war two; a new threat is emerging known as the cold war. A war between communist and democratic. The Americans and their allies fought in Korea and Vietnam. Once again the Moore were at the front. There was also an Albert Moore who fought in the Boxer rebellion, while serving the US Marines in North China, and he fought at the battle of Peking.
The Korean War
The Korean war was actually a civil war between the North and the South to see, weather or not if communist or democratic will be the form of government they will have. The Chinese and Russians supports North Korea, while the US and it's allies support South Korea. There are supposely one hundred and twenty three Moores that were killed in Korea. There was a David Moore in a tank battalion at the battle of Chosin Reservoir. There was also a Colonel Devinis M. Moore. Also Johnny Moore fought at the battle of Pusan and also at the battle of Yalu river. There was a Robert H. Moore and Lonnie R. Moore were American aces.
Battle of Peking
The assault on Peking had taken on the character of a race to see which national army achieved the glory of relieving the Legations.The commanders of the four national armies agreed that each of them would assault a different gate. The Russians were assigned the most northerly gate, the Tung Chih (Dongzhi); the Japanese had the next gate south, the Chi Hua (Chaoyang); the Americans, the Tung Pein (Dongbien); and the British the most southern, the Sha Wo (Guangqui). The French apparently were left out of the planning. The gate assigned to the Americans was nearest to the Legation Quarter and they seemed to have the best opportunity to reach the legations first. However, the Russians violated the plan, although it is uncertain whether it was intentional or not. An advance Russian force arrived at the Americans' assigned gate, the Dongbien, about 3:00 a.m. on 14 August. They killed 30 Chinese soldiers outside the gate and blasted a hole in the door with artillery.
Once inside the gate, however, in the courtyard between the inner and outer doors, they were caught in a murderous crossfire that killed 26 Russians and wounded 102. The survivors were pinned down for the next several hours. When the Americans arrived at their assigned gate that morning they found the Russians already engaged there and they moved their troops about 200 yards south. Once there, Trumpeter Calvin P. Titus volunteered to climb the 30-foot-tall wall, which he did successfully. Other Americans followed him, and at 11:03 a.m. the American flag was raised on the wall of the Outer city. The Americans exchanged fire with Chinese soldiers on the wall and then climbed down the other side and headed west toward the Legation Quarter in the shadow of the wall of the Inner city.
Meanwhile, the Japanese had encountered stiff resistance at their assigned gate and were subjecting it to an artillery barrage. The British had an easier time of it, approaching and passing through their gate, the Shawo or Guangqui, with virtually no opposition. Both Americans and British were aware that the easiest entry into the Legation Quarter was through the so-called Water Gate, a drainage canal running beneath the wall of the Inner city. The British got there first. They waded through the muck of the canal and into the Legation Quarter and were greeted by a cheering throng of the besieged, all decked out in their "Sunday best". The Chinese soldiers ringing the Legation Quarter fired a few shots, wounding a Belgian woman, and then fled.
It was 2:30 p.m on 14 August. The British had not suffered a single casualty all day, except one man who died of sunstroke. About 4:30 p.m., the Americans arrived in the Legation Quarter. Their casualties for the day were one man killed and nine wounded, plus one man badly injured in a fall while climbing the wall. One of the wounded was Smedley Butler who would later become a general and the most famous Marine of his era. The Russian, Japanese and French forces entered Peking that evening as Chinese opposition melted away. The Siege of the Legations was over. The next morning, 15 August, Chinese forces – probably Dong Fuxiang's Gansu Muslim troops – still occupied parts of the wall of the Inner City and the Imperial and Forbidden Cities. Occasional shots were directed toward the foreign troops. General Chaffee, the American commander, ordered his troops to clear the wall and occupy the Imperial City.
With assistance from the Russians and French, American artillery blasted its way through a series of walls and gates into the Imperial City, halting the advance at the gates of the Forbidden City. American casualties for the day were seven killed and 29 wounded. One of those killed was Capt. Henry Joseph Reilly, 54 years old and born in Ireland, a renowned artilleryman. The Dowager Empress, Cixi, the emperor and several members of the court fled Peking in the early morning of 15 August, only a few hours before the Americans knocked up against the wall of the Forbidden City. She, dressed as a peasant woman, and the Imperial party slipped out of the city in three wooden carts. Chinese authorities called her flight to Shanxi province a "tour of inspection".
Remaining in Peking to deal with the foreigners, and holed up in the Forbidden City, were trusted aides to the Dowager, including Jung Lu (Ronglu), commander of the army and her friend since childhood. At Zhengyang Gate the Muslim Kansu Braves engaged in a fierce battle against the Alliance forces.The commanding Muslim general in the Chinese army, General Ma Fulu, and four cousins of his were killed in while charging against the Alliance forces while a hundred Hui and Dongxiang Muslim troops from his home village in total died in the fighting at Zhengyang.
After the battle was over, the Kansu Muslim troops, including General Fuxiang, were among those guarding the Empress Dowager during her flight. The future Muslim General Ma Biao, who led Muslim cavalry to fight against the Japanese in the Second Sino- Japanese war, fought in the Boxer Rebellion under General Ma Haiyan as a private in the Battle of Peking against the foreigners. General Ma Haiyan died of exhaustion after the Imperial Court reached their destination, and his son Ma Qi took over his posts. Ma Fuxing also served under Ma Fulu to guard the Qing Imperial court during the fighting. The relief of the siege at the Peitang did not take place until 16 August. Japanese troops stumbled across the Cathedral that morning but, without a common language, they and the besieged were both confused. Shortly, however, French troops arrived and marched into the Cathedral to the cheers of the survivors.
On 17 August, the representatives of the foreign powers met and recommended that "as the advance of the foreign troops into the Imperial and Forbidden Cities had been obstinately resisted by the Chinese troops", the foreign armies should continue to fight until "the Chinese armed resistance within the City of Peking and the surrounding country was crushed". They also declared "that in the crushing of the armed resistance lies the best and only hope of the restoration of peace". On 28 August, the foreign armies in Peking – swelled in numbers by the arrival of soldiers from Germany, Italy and Austria and additional troops from France – marched through the Forbidden City to demonstrate symbolically their complete control of Peking. Chinese authorities protested their entry. Foreigners and most Chinese were prohibited from setting foot in the Forbidden City. However, the Chinese gave way when the foreign armies promised not to occupy the Forbidden City but threatened to destroy it if their passage was disputed.
Battle of Hill 282
This battle took place on September 23 during the Korean war, and involved the 1st Battalion Argyll and Sutherland Highlanders in an assault on this position as part an operation by 27th British commonwealth Brigade on the Naktong River. On September 22, 1950, the Battalion of Argyll and Sutherland Highlanders moved up to attack Hill 282 near Songju. Starting before dawn on September 23, B and C Companies after an hour's climb seized the crest of Hill 282 surprising there a North Korean force at breakfast. Across a saddle, and nearly a mile away to the southwest, higher Hill 388 dominated the one they had just occupied. C Company started toward it. But North Korean troops occupying this hill already were moving to attack the one just taken by the British.
The North Koreans supported their attack with artillery and mortar fire, which began falling on the British.
The action continued throughout the morning with North Korean fire increasing in intensity. Shortly before noon, with American artillery fire inexplicably withdrawn and the five supporting U.S. tanks unable to bring the North Koreans under fire because of terrain obstacles, the Argylls called for an air strike on the North Korean-held Hill 388. Just after noon the Argylls heard the sound of approaching planes. ThreeF-51 Mustangs of the 18th fighter bomber wing circled Hill 282 where the British displayed their white recognition panels. The North Koreans on Hill 388 also displayed white panels.
To his dismay, Captain Radcliff of the tactical air control party was unable to establish radio contact with the flight of F-51's. Suddenly, at 12:15, the Mustangs attacked the wrong hill; they dropped napalm bombs onto the Argylls position and also strafed them with 50 calibre machine gun fire. The terrible tragedy was over in two minutes and left the hilltop a sea of orange flame.
Survivors plunged fifty feet down the slope to escape the burning napalm. Major Kenneth Muir, second in command of the Argylls, who had led an ammunition resupply and litter-bearing party to the crest before noon, watching the flames on the crest die down, noticed that a few wounded men still held a small area on top. Acting quickly, he assembled about thirty men and led them back up the hill before approaching North Koreans reached the top. There, two bursts of automatic fire mortally wounded him as he and Maj. A. I. Gordon-Ingram, B Company commander, fired a 2-inch mortar. Muir's last words as he was carried from the hilltop were "The Gooks will never drive the Argylls off this hill". But the situation was hopeless. Gordon-Ingram counted only ten men with him able to fight, and some of them were wounded. His three Bren guns were nearly out of ammunition. At 15:00 the survivors were down at the foot of the hill.
The next day a count showed 2 officers and 11 men killed, 4 officers and 70 men wounded, and 2 men missing for a total of 89 casualties; of this number, the mistaken air attack caused approximately 60. Kenneth Muir was rewarded with the highest honors; the victory cross.
The Vietnam War
Many Moore and other clansmen have fought in this war and many have given their lives. In all 195 Moore(s), 7 Muir, Moreland, Mora, four Moorhead, three Moorman, two Morelock and one Moorhouse were killed in Vietnam. Sargent Alexander D. Moore of the 2nd Bomb wing. Lt. General Hal Moore, and many other thousand Moore served and fought in Vietnam. There was a Ronald D. Moore fought at the battles of 1st Siagon, Hamburg Hill, Eastertide offensive, Sieges of Khe Sanh and the fall of Siagon.
The Battle of La Drang
At 10:48 on November 14, the first elements of Bravo Company of the 1st Battalion/7th Cavalry touched down at LZ X-Ray, following around 30 minutes of bombardment via artillery, aerial rockets, and air strikes. Accompanying Captain John Herren's Bravo Company were Moore and his command group. Instead of attempting to secure the entire landing zone with such a limited force, most of Bravo was kept near the center of the LZ as a strike force, while smaller units were sent out to reconnoiter the surrounding area. B3 Field Front Command fell for the subterfuge, decided to postpone the attack of Pleime camp and met the new threat with its 7th and 9th Battalions.
Following their arrival, Herren ordered Bravo to move west past the creek bed. Within approximately 30 minutes, one of his squads under Sergeant John Mingo surprised and captured an unarmed soldier of the 33rd PAVN Regiment. The prisoner revealed that there were three North Vietnamese battalions on the Chu Pong Mountain – an estimated 1,600 North Vietnamese troops compared to fewer than 200 American soldiers on the ground at that point. At 11:20, the second lift of the battalion arrived, with the rest of Bravo Company and one platoon of Alpha Company, commanded by Captain Tony Nadal.
Fifty minutes later, the third lift of American forces arrived, consisting of most of Alpha Company. Alpha took up positions to the rear and left flank of Bravo along the dry creek bed, and to the west and to the south facing perpendicular down the creek bed. At 12:15, the first shots were fired on Bravo Company's three platoons that were patrolling the jungle northwest of the dry creek bed. Five minutes later, Herren ordered his 1st Platoon under Lieutenant Al Devney and 2nd Platoon under Lieutenant Henry Herrick to advance abreast of each other, and the 3rd (under Lieutenant Dennis Deal) to follow as a reserve unit. Devney's platoon led approximately 100 yards (91 m) west of the creek bed, with Herrick's men to his rear and right flank. Just before 13:00, Devney's platoon was heavily assaulted on both flanks by the North Vietnamese, taking casualties and becoming pinned down in the process.
It was around this point that Herrick radioed in that his men were taking fire from their right flank, and that he was pursuing a squad of communist forces in that direction. In pursuit of the North Vietnamese on his right flank, Herrick's platoon was quickly spread out over a space of around 50 meters, and became separated from the rest of the battalion by approximately 100 meters. Soon, Herrick radioed in to ask whether he should enter or circumvent a clearing that his platoon had come across in the bush.
Herrick expressed concerns that he might become cut off from the battalion if he tried to skirt the clearing and therefore would be leading his men through it in pursuit of the enemy. An intense firefight quickly erupted in the clearing; during the first three or four minutes his platoon suffered no casualties and inflicted heavy losses on the North Vietnamese who streamed out of the trees. Herrick soon radioed in that the enemy were closing in around his left and right flanks. Captain Herren responded by ordering Herrick to attempt to link back with Devney's 1st Platoon. Herrick replied that there was a large force between his men and 1st Platoon.
The situation quickly disintegrated for Herrick's 2nd Platoon, which began taking casualties as the North Vietnamese attack persisted. Herrick ordered his men to form a defensive perimeter on a small knoll in the clearing. Within approximately 25 minutes, five men of 2nd Platoon were killed, including Herrick who radioed Herren that he was hit and was passing command over to Sergeant Carl Palmer. Herrick gave vital instructions to his men before he died, including orders to destroy the signals codes and call in artillery support. Sergeant Ernie Savage assumed command after Sergeant Palmer and Sergeant Robert Stokes were killed. The platoon was technically under the command of Sergeant First Class Mac McHenry, who was positioned elsewhere on the perimeter. Savage assumed command by virtue of being close to the radio and began the process of calling in repeated bombardments of artillery support around the platoon's position.
By this point, eight men of 2nd Platoon had been killed and 13 wounded. Under Savage's leadership, and with the extraordinary care of platoon medic Charlie Lose, the men held the knoll for the duration of the battle at X-Ray. Specialist Galen Bungum of Herrick's Platoon later said of the stand at the knoll: "We gathered up all the full magazines we could find and stacked them up in front of us. There was no way we could dig a foxhole. The handle was blown off my entrenching tool and one of my canteens had a hole blown through it. The fire was so heavy that if you tried to raise up to dig you were dead. There was death and destruction all around."Sergeant Savage later recalled of the repeated PAVN assaults: "It seemed like they didn't care how many of them were killed. Some of them were stumbling, walking right into us. Some had their guns slung and were charging bare-handed.
I didn't run out of ammo – had about thirty magazines in my pack. And no problems with the M16. An hour before dark three men walked up on the perimeter. I killed all three of them 15 feet away." With Herrick's platoon cut off and surrounded, the rest of the battalion fought to maintain a perimeter. At 13:32, Charlie Company under Captain Bob Edwards arrived, taking up positions along the south and southwest facing the mountain. At around 13:45, through his Operations Officer flying above the battlefield (Captain Matt Dillon), Moore called in air strikes, artillery, and aerial rocket artillery on the mountain to prevent the North Vietnamese from advancing on the battalion's position. Lieutenant Bob Taft's 3rd Platoon of Alpha Company confronted approximately 150 Vietnamese soldiers advancing down the length and sides of the creek bed (from the south) toward the battalion.
3rd Platoon's troops were told to drop their packs and move forward for the assault. The resulting exchange was particularly costly for 3rd Platoon -- its lead forces were quickly cut down. 3rd Platoon was forced to pull back, and Taft was killed. Sergeant Lorenzo Nathan, a Korean War veteran, took command and 3rd Platoon was able to halt the PAVN advance down the creek bed. The PAVN forces shifted their attack to 3rd Platoon's right flank in an attempt to flank Bravo. Their advance was quickly stopped by Lieutenant Walter Marm's 2nd Platoon (Alpha Company) situated on Bravo's left flank. Moore had ordered Captain Nadal to lend Bravo one of his platoons, in an effort to allow Herren to attempt to fight through to Herrick's position. From Marm's new position, his men killed some 80 PAVN troops with a close range machine gun, rifle, and grenade assault. The PAVN survivors who were not mown down made their way back to the creek bed, where they were cut down by additional fire from the rest of Alpha Company.
Lieutenant Taft's dog tags were discovered on the body of a PAVN soldier who had been killed by 3rd Platoon. Upset that Taft's body had been left on the battlefield amidst the chaos, Nadal and his radio operator, Sergeant Jack Gell, brought Taft and the bodies of other Americans back to the creek bed under heavy fire.At 14:30 hours, the last troops of Charlie Company arrived, along with the lead elements of Delta Company under Captain Ray Lefebvre. The insertion took place with intense PAVN fire pouring into the LZ, and the Huey crews and newly arrived Battalion forces suffered many casualties. The small contingent of Delta took up position on Alpha's left flank. Charlie Company, assembled along the south and southwest in full strength, was met within minutes by a head-on assault.
Edwards radioed in that an estimated 175 to 200 PAVN troops were charging his company's lines. With a clear line of sight over their sector of the battlefield, Charlie Company was able to call in and adjust heavy ordnance support with precision, inflicting devastating losses on the Vietnamese forces. Many PAVN soldiers were burned to death as they scrambled from their bunkers in a hasty retreat only to meet a second barrage of artillery shells. By 15:00 the attack had been quelled, and the PAVN ended up withdrawing from the assault approximately one hour after it had been launched. At approximately the same time, Alpha and the lead elements of Delta (which had accompanied Alpha at the perimeter in the vicinity of the creek bed) were met by a fierce PAVN attack.
Covering the critical left flank from being rolled up by the North Vietnamese were two of Alpha's machine gun crews positioned 75 yards (69 m) southwest of the company's main position. Specialist Theron Ladner (with his assistant gunner Private First Class Rodriguez Rivera) and Specialist 4 Russell Adams (with a-gunner Specialist 4 Bill Beck) had positioned their guns 10 yards (9.1 m) apart, and proceeded to pour heavy fire into the Vietnamese forces attempting to cut into the perimeter between Charlie and Alpha companies.
Moore later credited the two gun teams with preventing the PAVN from rolling up Alpha Company and driving a wedge into the battalion between Alpha and Charlie. Adams and Rivera were severely wounded in the onslaught. After the two were carried to the battalion's collection point at Moore's command post to await evacuation by air, Beck, Ladner, and Private First Class Edward Dougherty (an ammo-bearer) continued their close range suppression of the Vietnamese advance. Beck later said of the battle: "When Doc Nall was there with me, working on Russell, fear, real fear, hit me. Fear like I had never known before.
Fear comes, and once you recognize it and accept it, it passes just as fast as it comes, and you don't really think about it anymore. You just do what you have to do, but you learn the real meaning of fear and life and death. For the next two hours I was alone on that gun, shooting at the enemy." Delta's troops also experienced heavy losses in repelling the PAVN assault, and Captain Lefebvre was wounded soon after arriving to X-Ray. One of his platoon leaders, Lieutenant Raul Taboada was also severely wounded, and Lefebvre passed command to Staff Sergeant George Gonzales (who, unknown to Lefebvre, had also been wounded).
While medical evacuation helicopters were supposed to transport the battalion's growing casualties, only two were evacuated by medevacs before the pilots called off their mission under intense fire from the PAVN. Casualties were loaded onto the assault Hueys (lifting the battalion's forces to X-Ray), whose pilots carried load after load of wounded from the battlefield. Battalion intelligence officer Captain Tom Metsker (who had been wounded) was fatally hit when helping his wounded comrade Ray Lefebvre aboard a Huey.
Captain Edwards ordered Sergeant Gonzales to position Delta Company on Charlie's left flank, extending the perimeter to cover the southeast side of X-Ray. At 15:20, the last of the battalion arrived, and Lieutenant Larry Litton assumed command of Delta. It was during this lift that one Huey, having approached the LZ too high, crash-landed on the outskirts of the perimeter near the command post (those on board were quickly rescued by the battalion). With Delta's weapons teams on the ground, its mortar units were massed with the rest of the battalion's in a single station to support Alpha and Bravo. Delta's reconnaissance platoon (commanded by Lieutenant James Rackstraw) was positioned along the north and east of the LZ, establishing a 360-degree perimeter over X-Ray.
Had the PAVN forces circled around to the north of the U.S. positions prior to this point, they would have found their approach unhindered.As the PAVN attack on Alpha Company diminished, Moore organized for another effort to rescue Herrick's lost platoon. At 15:45, Moore ordered Alpha and Bravo to evacuate their casualties and pull back from engagement with the enemy. Shortly after, Alpha and Bravo began their advance toward Herrick's lost platoon from the creek bed. The force quickly suffered casualties. At one point, Bravo's advance was halted by a firmly entrenched North Vietnamese machine gun position at a large termite hill. After firing a light anti tank weapon into it with no effect, Lieutenant Marm attacked the position single-handedly. Under fire, Marm charged the Vietnamese gun, eliminating it with grenade and rifle fire. The following day, a dozen dead PAVN troops (including one officer) were found in the position.
Marm was wounded in the neck and jaw in the assault and was later awarded the medal of honor for his lone assault. The second push had advanced just over 75 yards (69 m) toward the lost platoon's position before reaching a stalemate with the PAVN. At one point, the PAVN were firing on Alpha's 1st Platoon (which was leading the advance and was at risk of becoming separated from the battalion) with an American M60 machine gun that had been taken off a dead gunner of Herrick's platoon. The stalemate lasted between 20 and 30 minutes before Nadal and Herren requested permission to withdraw back to X-Ray (to which Moore agreed).
Near 17:00 hours the lead elements of Bravo Company of the 2nd Battalion/7th Cavalry (the "sister battalion" of the 1st/7th under Moore) arrived at LZ X-Ray to reinforce the embattled battalion. In preparation for a defensive position to last the night, Moore ordered Bravo's (2nd/7th) commander Captain Myron Diduryk to place two of his platoons between Bravo (1st/7th) and Delta on the northeast side of the perimeter. Diduryk's 2nd Platoon was used to reinforce Charlie Company's position (which was stretched over a disproportionately long line). By nightfall, the battle had taken a heavy toll on Moore's battalion. Bravo had taken 47 casualties (including one officer), and Alpha had taken 34 casualties (including three officers).
Charlie Company was comparatively healthy (having taken only four casualties).
The American forces were placed on full alert throughout the night. Under the light of a bright moon, the Vietnamese probed every company on the perimeter (with the exception of Delta) in small squad-sized units. The Americans exercised some level of restraint in their response. The M60 gun crews, tactically positioned around the perimeter to provide for multiple fields of fire, were told to hold their fire until otherwise ordered (so as to conceal their true location from the PAVN). The lost platoon under Sergeant Savage's command suffered three sizable assaults of the night (one just before midnight, one at 03:15, and one at 04:30). The PAVN, using bugles to signal their forces, were repelled from the knoll with artillery, grenade, and rifle fire. The lost platoon survived the night without taking additional casualties.
Just before dawn at 06:20, Moore ordered his companies to put out reconnaissance patrols to probe for North Vietnamese forces. At 06:50, patrols from Charlie Company's 1st Platoon (under Lieutenant Neil Kroger) and 2nd Platoon (under Lieutenant John Geoghegan) had advanced 150 yards (140 m) from the perimeter before coming into contact with PAVN troops. A firefight broke out, and the patrols quickly withdrew to the perimeter. Shortly after, an estimated 200-plus North Vietnamese troops charged 1st and 2nd platoons on the south side of the perimeter. Heavy ordnance support was called in, but the PAVN were soon within 75 yards (69 m) of the battalion's lines.
Their fire began to cut through Charlie Company's positions and into the command post and the American lines across the LZ. 1st and 2nd platoons suffered significant casualties in this assault, including Kroger and Geoghegan. Geoghegan was killed while attempting to rescue one of his wounded men, Private First Class Willie Godboldt (who died of his wounds shortly thereafter).
Two M60 crews (under Specialist James Comer and Specialist 4 Clinton Poley, Specialist 4 Nathaniel Byrd, and Specialist 4 George Foxe) were instrumental in suppressing the North Vietnamese advance from completely overrunning Geoghegan's lines. Following this attack, Charlie's 3rd Platoon was soon met with a PAVN assault. Captain Edwards was wounded, and Lieutenant John Arrington assumed command of the company and was himself quickly wounded. Command then passed to Platoon Sergeant Glenn A. Kennedy. At 07:45, the PAVN launched an assault on Crack Rock, near its connection with the beleaguered Charlie Company. Enemy fire started to penetrate the battalion command post, which suffered several wounded (including Moore's own radio operator, Specialist 4 Robert Ouellette). Under heavy attack on three sides, the battalion fought off repeated waves of PAVN infantry.
It was during this battle that Specialist Willard Parish of Charlie Company, situated on Delta's lines, earned a silver star for suppressing an intense Vietnamese assault in his sector. After expending his M60 ammunition, Parish resorted to his .45 sidearm to repel PAVN forces that advanced within 20 yards (18 m) of his foxhole. After the battle, over 100 dead North Vietnamese troops were discovered around Parish's position.
As the battle along the southern line intensified, Lieutenant Charlie W. Hastings (USAF liaison forward air controller), was instructed by Moore (based on criteria established by the USAF) to transmit the code phrase "Broken Arrow", which relayed that an American combat unit was in danger of being overrun. In so doing, Hastings was calling on all available support aircraft in the country to come to the battalion's defense, drawing on a significant arsenal of heavy ordnance support.
On Charlie Company's broken lines, PAVN troops walked the lines for several minutes, killing wounded Americans and stripping their bodies of weapons and other items. It was around this time, at 07:55, that Moore ordered his lines to throw colored smoke grenades over the lines to identify the battalion's perimeter. Aerial fire support was then called in on the PAVN at close range – including those along Charlie Company's lines. Shortly after, Moore's command post was subjected to a friendly fire incident. Two F-100 Super Sabre jets approached X-Ray to drop napalm inadvertently on American lines. Seeing the approaching F-100's about to drop their bombs dangerously close on the American positions, Hastings frantically radioed for the two jets to abort the attack and change course.
The pilot of the second approaching F-100 complied and disengaged, but the ordnance from the first F-100 had already been dropped. Despite Hastings' best efforts, several Americans were wounded and killed by this air stike. Reporter Joe Galloway who helped carry one of the wounded men, who died two days later, to an aid station tried to attach a name to the death occurring around him, discovering that this particular soldier's name was PFC Jimmy Nakayama of Rigby, Idaho, who had been a second lieutenant in the National Guard. Galloway would later share how that same week Nakayama became a father.
Galloway also noted "[a]t LZ XRay 80 men died and 124 were wounded, many of them terribly," and that the death toll for the entire battle was 234 Americans killed and perhaps as many as 2,000 North Vietnamese soldiers. At 09:10, the first elements of Alpha Company of the 2nd Battalion of the 7th Cavalry under Captain Joel Sugdinis arrived at X-Ray. Sugdinis' forces reinforced the remains of Charlie Company's lines. By 10:00, the North Vietnamese had begun to withdraw from the battle – although occasional fire continued to harass the battalion. Charlie Company, having inflicted scores of losses on the PAVN, had suffered 42 Killed in action (KIA) and 20 wounded in action (WIA) over the course of the two-and-ahalf-hour assault. Lieutenant Rick Rescorla of Diduryk's Bravo Company later remarked after having policed up the battlefield in Charlie Company's sector following the assaults: "There were American and PAVN bodies everywhere.
My area was where Lieutenant Geoghegan's platoon had been. There were several dead PAVN around his platoon command post. One dead trooper was locked in contact with a dead PAVN, hands around the enemy's throat. There were two troopers – one black, one Hispanic – linked tight together. It looked like they had died trying to help each other." Given the tempo of combat at LZ X-Ray and the losses being suffered, other units of the 1st Cavalry Division planned to land nearby and then move overland to X-Ray. The 2nd Battalion of the 5th Cavalry was to be flown into LZ Victor, about 3.5 kilometers east-southeast of LZ X-Ray.
They flew in at 08:00 and quickly organized to move out, the trip taking about 4 hours. Most of this was uneventful until they were approaching X-Ray. At about 10:00, some 800 yards (730 m) to the east of the LZ, the 2nd/7th's Alpha company received some light fire and had to set up a combat front. At 12:05, Lt. Col Tully's forces of the 2nd/5th battalion had arrived at the LZ.
Because the 2nd/5th Battalion stealthily closed in the battlefield by foot instead of by heli-lift, B3 Field Front was unaware that the opponent troop ratio had switched from 2:2 to 3:2. Using a plan devised by Moore, Tully commanded Bravo/1st/7th and his own Alpha/2nd/5th and Charlie/2nd/5th companies in a third major effort to relieve the lost platoon under Sergeant Ernie Savage. Making use of fire support, the relief force slowly but successfully made its way to the knoll without encountering PAVN elements. 2nd Platoon had survived but at a significant cost; out of the 29 men, nine were KIA and a further 13 WIA. At around 15:30, the relief force began to encounter sniper fire and began the process of carrying the wounded and dead of the lost platoon back to X-Ray.
The expanded force at XRay, consisting of Moore's weakened 1st Battalion of the 7th, Tully's 2nd Battalion of the 5th, and one company of the 2nd Battalion of the 7th consolidated at X-Ray for the night. At the LZ, the wounded and dead were evacuated, and the remaining American forces dug in and fortified their lines. At precisely 16:00, B-52's first wave of carpet bombings fell at YA 8702 (about 7 kilometers west of LZ X-Ray) and would carry on for 5 consecutive days at YA 8607, YA 9007, YA 8600 and YA 9000 on the same day; at YA 8305, YA 8505 and YA 8400 on November 16; at YA 9401 (LZ X-Ray), YA 9301, YA 8900 and YA 8901 on November 17; at YA 9201, YA 9208 and YA 9408 on November 18; at YA 9009, YA 9208, YA 90069 and YA 9206 on November 19; at YA 8306, YA 8506, YA 8303 and YA 8503 on November 20.
This Arc Light operation at Chu Pong had been on J3/MACV study desk since September 1965. It was executed by General DePuy, J3 Chief/MACV in coordination with II Corps Command. While the American lines at X-Ray were harassed at various times during the night by PAVN probes, it was shortly before 04:00 that grenade booby traps and trip flares set by Captain Diduryk's Bravo Company began to erupt. At 04:22, the PAVN launched a fierce assault against Diduryk's men. Bravo fought off this attack by an estimated 300 PAVN in minutes. A decisive factor in this stand, in addition to rifle and machine gun fire from Bravo's lines, was the skilled placement of artillery strikes by Diduryk's forward observer, Lieutenant Bill Lund.
Making use of four different artillery batteries, Lund organized fire into separate concentrations along the battlefield, with devastating consequences for the waves of advancing PAVN. The PAVN repeated their assault on Diduryk's lines some 20 minutes after the first, as flares dropped from American C-123 Provider aircraft flying above illuminated the battlefield to Bravo's advantage. For around 30 minutes, Bravo fought off the PAVN advance with a combination of small arms and Lund's skilled organization of artillery strikes. Shortly after 05:00, a third attack was launched against Diduryk's forces, which was repelled by Lieutenant James Lane's platoon within 30 minutes.
At almost 06:30, the PAVN launched yet another attack on Diduryk's men – this time in the vicinity of the company command post. Again, Lund's precision in ordering artillery strikes cut down scores of PAVN forces, while Diduryk's men repelled those who survived with rifle and machine gun fire. At the end of these attacks, with daybreak approaching, Diduryk's Bravo Company had only six lightly wounded among its ranks – with none killed. By the morning of November 16, around 10:30 a.m., 1st/7th Cav. received order to withdraw from the battle zone while the 2nd/7th Cav. and 2nd/5th Cav. took up defensive positions for the night.
The intention was to reassure the PAVN side in seeing that the opponent troop ratio has been reverting to 2:2. At the LZ X-Ray battle, the PAVN did not have anti-aircraft weapons and heavy mortars and had to resort to using the "human waves" tactic: "The enemy has lost nearly all their heavy crew-served weapons during the first phase ... Their tactics relied mostly on the "human waves"". The battle was ostensibly over. The PAVN forces had suffered hundreds of casualties and were no longer capable of a fight. U.S. forces had suffered 79 killed and 121 wounded and had been reinforced to levels that would guarantee their safety.
Given the situation there was no reason for the U.S. forces to stay in the field, their mission was complete and arguably a success. Moreover, Col. Brown, in overall command, was worried about reports that additional PAVN units were moving into the area over the border. He wanted to withdraw the units, but General Westmoreland demanded that the 2nd/7th Cav. and 2nd/5th Cav stay at X-Ray to catch the enemy by surprise with a B-52 airstrike. The U.S. reported the bodies of 634 NVA soldiers were found in the vicinity. The U.S. estimated that 1,215 NVA were killed a distance away by artillery and airstrikes.
Six North Vietnamese soldiers were captured. Six PAVN crew-served weapons and 135 individual weapons were captured, and an estimated 75–100 weapons were destroyed. The normal ratio of enemy soldiers killed to weapons captured as later established by the Department of Defense was 3 or 4 to one. The next day, the two remaining battalions abandoned LZ X-Ray and began a tactical march to new landing zones, 2nd/5th under Lt. Col. Bob Tully to LZ Columbus about 4 km (2 mi) to the northeast, and 2nd/7th under Lt. Col. Robert McDade to LZ Albany about 4 km (2 mi) to the northnortheast, close to the Ia Drang. Air Force B-52 were on their way from Guam, and their target for the 3rd day of bombing was the slopes of the Chu Pong massif and LZ X-Ray itself. The U.S. ground forces had to move outside a two-mile (3 km) safety zone by midmorning to be clear of the bombardment. Tully's men moved out at 09:00; McDade's followed ten minutes later.
The first indication of enemy presence was observed by the point units of the American column, the point squad of the reconnaissance platoon under Staff Sergeant Donald J. Slovak, who saw "Ho Chi Minh sandal foot markings, bamboo arrows on the ground pointing north, matted grass and grains of rice."After marching about 2,000 meters, Alpha Company leading the 2nd/7th headed northwest, while the 2nd/5th continued on to LZ Columbus. Alpha Company came upon some grass huts which they were directed to burn.
At 11:38, Bob Tully's men, the 2nd/5th, were logged into its objective, LZ Columbus. Communist troops in the area consisted of the 8th Battalion, 66th Regiment, the 1st Battalion 33rd Regiment, and the headquarters of the 3rd Battalion, 33rd Regiment, of the PAVN. While the 33rd Regiment's battalions were understrength from casualties incurred during the battle at the Special Forces Plei Me camp, the 8th was General Chu Huy Man's reserve battalion, fresh and rested.
Alpha Company soon noticed the sudden absence of air cover and their commander, Captain Joel Sugdinis wondered where the aerial rocket artillery choppers were. He soon heard the sound of distant explosions to his rear; the B-52's were making their bombing runs on the Chu Pong massif. Lieutenant D. P. (Pat) Payne, the recon platoon leader, was walking around some termite hills when he suddenly came upon a North Vietnamese soldier resting on the ground. Payne jumped on the PAVN trooper and took him prisoner. Simultaneously, about ten yards away, his platoon sergeant captured a second PAVN soldier. Other members of the PAVN recon team may have escaped and reported to the headquarters of the 1st Battalion, 33rd Regiment.
The North Vietnamese then began to organize an assault on the American column. As word of the capture reached him, Lt. Col. McDade ordered a halt as he went forward from the rear of the column to interrogate the prisoners personally. The POWs were policed up about a hundred yards from the southwestern edge of the clearing called Albany, the report of which reached division forward at Pleiku at 11:57.
McDade then called his company commanders forward for a conference; most of whom were accompanied by their radio operators. Alpha Company moved forward to LZ Albany; McDade and his command group were with them. Following orders, the other company commanders were moving forward to join McDade. Delta Company, which was next in the column following Alpha Company, was holding in place; so was Charlie Company which was next in line. Battalion Headquarters Company followed, and Alpha Company of the 1st Battalion, 5th Cavalry brought up the rear of the column. The American column was halted in unprepared, open terrain, and strung out in 550-yard (500 m) line of march.Most of the units had flank security posted, but the men were worn out from almost sixty hours without sleep and four hours of marching. The elephant grass was chest-high so visibility was limited. The column's radios for air or artillery support were with the company commanders.
An hour and ten minutes after the PAVN recon soldiers were captured, Alpha Company and McDade's command group had reached the Albany clearing. McDade and his group walked across the clearing and into a clump of trees. Beyond that clump of trees was another clearing. The remainder of the battalion was in a dispersed column to the east of the LZ. Battalion Sergeant Major James Scott and Sergeant Charles Bass then attempted to question the prisoners again. While they were doing this, Bass heard Vietnamese voices, and the interpreter confirmed that these were PAVN talking. Alpha Company had been in the LZ about five minutes. Right about then, small arms fire erupted.
Lt. Pat Payne's reconnaissance platoon had walked to within 200 yards (180 m) of the headquarters of PAVN's 3rd Battalion, 33rd Regiment; the 550-man strong 8th Battalion, 66th Regiment had been bivouacked off to the northeast of the American column. As the Americans rested in the tall grass, North Vietnamese soldiers were coming towards them by the hundreds. It was 13:15.
The close quarters, intense battle lasted for sixteen hours. North Vietnamese forces first struck at the head of the 2nd Battalion column and rapidly spread down the right or east side of the column in an L-shaped ambush. PAVN troops ran down the length of the column, with units peeling off to attack the outnumbered Americans, engaging in intense, brutal close-range and hand-to-hand combat. McDade's command group made it into the clump of trees between the two clearings that constituted LZ Albany.
They took cover from rifle and mortar fire within the trees and termite hills. The reconnaissance platoon and the Alpha Company 1st Platoon provided initial defense at the position. By 13:26, they had been cut off from the rest of the column; the area whence they had come was swarming with PAVN soldiers. While they waited for air support, the Americans holding Albany drove off assaults by PAVN troopers and sniped at the exposed enemy wandering around the perimeter. It was later discovered that North Vietnamese were mopping up, looking for Americans wounded in the tall grass and killing them.
All the while the noise of battle could be heard in the woods as the other companies fought for their lives. The 2nd Battalion, 7th Cavalry had been reduced to a small perimeter at Albany composed of survivors of Alpha Company, the recon platoon, survivors from the decimated Charlie and Delta Companies and the command group. There was also a smaller perimeter at the rear of the column about 500–700 yards due south: Captain George Forrest's Alpha Company, 1st Battalion, 5th Cavalry. Captain Forrest had run a gauntlet all the way from the conference called by McDade back to his company when the PAVN mortars started coming in.
Charlie and Alpha companies lost a combined 70 men in the first minutes. Charlie Company suffered 45 dead and more than 50 wounded, the heaviest casualties of any unit that fought on Albany. Air Force A-1E Skyraiders soon provided much-needed support, dropping napalm bombs. However, because of the fog of war and the inter-mixing of both American and North Vietnamese troops, it is likely that the air and artillery strikes killed not just PAVN, but Americans as well. At 14:55, Bravo Company, 1st Battalion, 5th Cavalry under Captain Buse Tully began marching from LZ Columbus to the rear of the 2nd Battalion, 7th Cavalry column that was about two miles (3 km) away. By 16:30, they came into contact with the Alpha Company perimeter under Captain Forrest. A one-helicopter landing zone was secured, and the wounded were evacuated.
Captain Tully's men then began to push forward towards where the rest of the ambushed column would be. PAVN troopers contested their advance, and the Americans came under fire from a wood line. Tully's men assaulted the tree line and drove off the North Vietnamese. At 18:25, orders were received to secure into a twocompany perimeter for the night. They planned to resume the advance at daybreak. At around 16:00, Captain Myron Diduryk's Bravo Company, 2nd Battalion, 7th Cavalry, veterans of the fight at LZ X-Ray, got the word that they would be deployed in the Battalion's relief. At 18:45 the first helicopters swept over the Albany clearing and the troopers deployed into the tall grass.Lieutenant Rick Rescorla, the sole remaining platoon leader in Bravo Company, led the reinforcements into the Albany perimeter, which was expanded to provide better security.
The wounded at Albany were evacuated at around 22:30 that evening, the helicopters receiving intense ground fire as they landed and took off. The Americans at Albany then settled down for the night. The next day, Friday, November 18 dawned on the battlefield. The Americans began to police up their dead. This task took the better part of the day and the next, as American and North Vietnamese dead were scattered all over the field of battle. Rescorla described the scene as, "a long, bloody traffic accident in the jungle."While policing the battlefield, Rescorla recovered a large, battered, old French army bugle from a dying PAVN soldier. The Americans finally left Albany for LZ Crooks at 13°40′5.6″N 107°39′10″E, six miles (10 km) away, on November 19, and started Operation Silver Bayonet II in support of Operation Than Phong 7 conducted by the ARVN Airborne Group comprising 5 battalions.
The battle at LZ Albany cost the Americans 155 men killed or missing and 124 wounded.One American, Toby Braveboy, was recovered on November 24 when he waved down a passing H-13 scout helicopter. About half of some 300 American deaths in the 35-day Operation Silver Bayonet happened in just this one fight that lasted 16 hours. The U.S. reported 403 PAVN troops were killed in this battle and an estimated 150 were wounded. Weapons captured included 112 rifles, 33 light machine-guns, three heavy machine-guns, two rocket launchers, and four mortars. There were two battlefronts at the Chu Pong massif areas: a ground force operation conducted by the 1st Air Cavalry (reported by Kinnard in Pleiku campaign) and an air force operation conducted by the B-52 bombers (reported by McChristian in Pleime-Chupong campaign). The first one gave support to the second one by setting up and fixing the targets with Operations All the Way and Silver Bayonet I for Arc Light strikes.
The 5-day Arc Light operation was subsequently supported by the 2nd Air Cavalry Brigade conducting Operation Silver Bayonet II in conjunction with the ARVN Airborne Group conducting Operation Than Phong 7, which was conducted after the fighting at Ia Drang Valley had been over. A 1966 PAVN Central Highlands Front report claimed that in five major engagements with US forces, PAVN forces suffered 559 soldiers killed and 669 wounded. PAVN histories claim the United States suffered 1,500 to 1,700 casualties during the Ia Drang Campaign. The US military confirmed 305 killed and 524 wounded (including 234 killed and 242 wounded between 14 and 18 November 1965), and claimed 3,561 PAVN were killed and more than 1,000 were wounded during engagements with the 1st Cavalry.
According to ARVN intelligence source, each of the three PAVN regiments' initial strength was 2,200 soldiers: 1st Bn 500, 2nd Bn 500, 3rd Bn 500, Mortar Co 150, Anti-Aircraft Co 150, Signal Co 120, Transportation Co 150, Medical Co 40, Engineer Co 60, Recon Co 50. On November 17, after 3 days of B-52 airstrike, ARVN intelligence source through radio intercepts revealed that B3 Field Front Command reported "2/3 of their strength had been wiped off", or 6 out of 9 battalions; still combat effective were the 635th and 334th Battalions of the 320th Regiments and the 5 companies of the remnant 33rd and 66th Regiments that were to be decimated at the battle of LZ Albany.
As a matter of fact, when the ARVN Airborne, comprising 5 battalions, entered into action, they only encountered two PAVN battalions. ARVN's II Corps Command recapitulates the losses of PAVN from 18 October to 26 November as follows: KIA (bc) 4,254, KIA (est) 2,270, WIA 1293, CIA 179, weapons (crew served) 169, (individual) 1,027. PAVN casualty figures advanced by II Corps Command were relied especially on PAVN regimental command posts' own loss reports (as indicated by Major General Kinnard), intercepted by ARVN radio listening stations. Furthermore, they include PAVN troop casualties caused by the 5 day Arc Light airstrike that the PAVN and US sides fail to take into account. As outcome of the entire campaign, ARVN claimed the PAVN were unable to achieve their objectives of overrunning the camp and destroying the relief column at Pleime and ARVN source reported that the entire B3 Field Force strength was wiped-off and the survivors pushed-off over the Cambodian border. Both sides (US and PAVN) probably inflated the estimates of their opponent's casualties.
Lewy states that, according to DOD officials, US "body count" claims of communist casualties were inflated at least 30 percent for the Vietnam War as a whole. The U.S. claim of 403 North Vietnamese battle dead at Landing Zone Albany seems an overestimate. Col. McDade later claimed he did not report any estimate of North Vietnamese casualties at LZ Albany and had not seen even 200 bodies of North Vietnamese soldiers. Similarly, Col. Moore also realized that the PAVN casualties figures in the fight at LZ X-Ray were inaccurate.
He lowered the original body count figure of 834 submitted by his men to 634, regarding the former number was too high. This battle can be seen as a blueprint for tactics by both sides. The Americans used air mobility, artillery fire and close air support to accomplish battlefield objectives. The PAVN and Viet Cong forces learned that they could neutralize that firepower by quickly engaging American forces at very close range.
The North Vietnamese Colonel Nguyen Huu An included his lessons from the battle at X-ray in his orders for Albany, "Move inside the column, grab them by the belt, and thus avoid casualties from the artillery and air."
Both Westmoreland and An thought this battle to be a success. This battle was one of the few set piece battles of the war and was one of the first battles to popularize the U.S. concept of the "body count" as a measure of success, as they claimed that the kill ratio was nearly 10 to 1. Commenting later on the battle battalion commander Harold G. Moore said, The "peasant soldiers [of North Vietnam] had withstood the terrible high-tech fire storm delivered against them by a superpower and had at least fought the Americans to a draw. By their yardstick, a draw against such a powerful opponent was the equivalent of a victory." The Battle of Hamburg Hill They had made no significant contacts in its area of operations, and at midday on May 13, the brigade commander, Colonel Conmy, decided it would move to cut off North Vietnamese reinforcement from Laos and to assist Honeycutt by attacking Hill 937 from the south.
Its Bravo company was heli-lifted to Hill 916, but the remainder of the battalion made the movement on foot, from an area 4 kilometers (2.5 mi) from Hill 937, and both Conmy and Honeycutt expected the 1/506th to be ready to provide support no later than the morning of May 15. Although Bravo Company seized Hill 916 on May 15, it was not until May 19 that the battalion as a whole was in position to conduct a final assault, primarily because of nearly impenetrable jungle. The 3/187 conducted multi-company assaults on May 14 and May 15, incurring heavy casualties, while the 1/506th, led by 1st. Lt. Roger Leasure, made probing attacks on the south slopes of the mountain on May 16 and May 17. The difficult terrain and well organized North Vietnamese forces continually disrupted the tempo of U.S. tactical operations on Hills 916, 900, and 937.
Steep gradients and dense vegetation provided few natural landing zones (LZs) in the vicinity of the mountain and made helicopter redeployments impractical. The terrain also masked the positions of the NVA 29th Regiment, making it nearly impossible to suppress anti-aircraft fire, while the jungle covered the movement of North Vietnamese units so completely that it created a nonlinear battlefield. NVA soldiers, able to maneuver freely around the LZs, shot down or damaged numerous helicopters with small arms fire, rocket-propelled grenades, and crew-served weapons.
The North Vietnamese also assaulted nearby logistical support LZs and command posts at least four times, forcing deployment of units for security that might otherwise have been employed in assaults. Attacking companies had to provide for 360-degree security as they maneuvered, since the terrain largely prevented them from mutually supporting one another. NVA platoon- and company-sized elements repeatedly struck maneuvering U.S. forces from the flanks and rear. The effectiveness of U.S. maneuver forces was limited by narrow trails that funneled attacking companies into squad or platoon points of attack, where they encountered PAVN platoons and companies with prepared fields of fire. With most small arms engagements thus conducted at close range, U.S. fire support was also severely restricted. Units frequently pulled back and called in artillery fire, close air support, and aerial rocket artillery, but the North Vietnamese bunkers were well-sited and constructed with overhead cover to withstand bombardment.
During the course of the battle the foliage was eventually stripped away and the bunkers exposed, but they were so numerous and well constructed that many could not be destroyed by indirect fire. Napalm, recoilles rifle fire, and dogged squad and platoon-level actions eventually accounted for the reduction of most fortifications, though at a pace and price thoroughly unanticipated by American forces. U.S. battle command of small units was essentially decentralized. Though Honeycutt constantly prodded his company commanders to push on, he could do little to coordinate mutual support until the final assaults, when the companies maneuvered in close proximity over the barren mountain top. Fire support for units in contact was also decentralized. Supporting fires, including those controlled by airborne forward air controllers, were often directed at the platoon level. Eventually human error led to five attacks by supporting aircraft on the 3/187th, killing seven and wounding 53. Four of the incidents involved Cobra gunship helicopters, which in one case were more than 1 kilometer (0.62 mi) away from their intended target.
On May 16, associated press correspondent Jay Sharbutt learned of the ongoing battle on Hill 937, traveled to the area and interviewed Zais, in particular asking why infantry, rather than firepower, was used as the primary offensive tool on Hill 937. More reporters followed to cover the battle, and the term "Hamburger Hill" became widely used. The U.S. brigade commander ordered a coordinated twobattalion assault for May 18, 1/506th attacking from the south and 3/187th attacking from the north, trying to keep the 29th NVA Regiment from concentrating on either battalion. Fighting to within 75 meters (246 ft) of the summit, Delta Company 3/187th nearly carried the hill but experienced severe casualties, including all of its officers. The battle was one of close combat, with the two sides exchanging small arms and grenade fire within 20 meters (66 ft) of one another.
From a light observation helicopter, the battalion commander attempted to coordinate the movements of the other companies into a final assault, but an exceptionally intense thunderstorm reduced visibility to zero and ended the fighting. Unable to advance, 3/187 again withdrew down the mountain.
The three converging companies of 1/506th struggled to take Hill 900, the southern crest of the mountain, encountering heavy opposition for the first time in the battle. Because of the heavy casualties already sustained by his units and under pressure from the unwanted attention of the press, Zais seriously considered discontinuing the attack but decided otherwise. Both the corps commander and the MACV commander, General Creighton W. Abrams, publicly supported the decision. Zais decided to commit three fresh battalions to the battle and to have one of them relieve the 3/187th in place. The 3/187th's losses had been severe, with approximately 320 killed or wounded, including more than sixty percent of the 450 experienced troops who had assaulted into the valley. Two of its four company commanders and eight of twelve platoon leaders had become casualties.
The battalion commander of the 2/506th, Lt. Col. Gene Sherron, arrived at Honeycutt's CP on the afternoon of May 18 to coordinate the relief. 3/187th was flying out its latest casualties, and its commander had not yet been informed of the relief. Before any arrangements were made, Zais landed and was confronted by Honeycutt, who argued that his battalion was still combat effective. After a sharp confrontation, Zais relented, although he assigned one of Sherron's companies to Honeycutt as reinforcement for the assault. Two fresh battalions--the 2/501st Infantry and ARVN 2/3d Infantry-- were airlifted into LZs northeast and southeast of the base of the mountain on May 19. Both battalions immediately moved onto the mountain to positions from which they would attack the following morning. Meanwhile, the 1/506 for the third consecutive day struggled to secure Hill 900.
The 3rd Brigade launched its four-battalion attack at 10:00 on May 20, including two companies of the 3/187 reinforced by Alpha Company 1/506. The attack was preceded by two hours of close air support and ninety minutes of artillery prep fires. The battalions attacked simultaneously, and by 12:00 elements of the 3/187 reached the crest, beginning a reduction of bunkers that continued through most of the afternoon. Some PAVN units were able to withdraw into Laos, and Hill 937 was secured by 17:00.
The Falkland Island War
The Falkland war, was based on when Argentina invaded the Island, and defeated the small British forces. The British responded with military forces. was a ten-week war between Argentina and the United Kingdom over two British overseas territories in the South Atlantic: the Falkland Island, South Georgia and the south Sandwich Islands. It began on Friday, 2 April 1982, when Argentina invaded and occupied the Falkland Islands; they were try to claimed sovereignity over them.
The conflict lasted 74 days and ended with the Argentine surrender on 14 June 1982, returning the islands to British control. In total, 649 Argentine military personnel, 255 British military personnel, and three Falkland Islanders died during the hostilities. The conflict was a major episode in the protracted confrontation over the territories' sovereignty. Argentina asserted (and maintains) that the islands are Argentine territory, and the Argentine government thus characterised its military action as the reclamation of its own territory. The British government regarded the action as an invasion of a territory that had been a Crown colony since 1841.
Falkland Islanders, who have inhabited the islands since the early 19th century, are predominantly descendants of British settlers, and favour British sovereignty. Neither state, however, officially declared war (both sides did declare the Islands areas a war zone and officially recognised that a state of war existed between them) and hostilities were almost exclusively limited to the territories under dispute and the area of the South Atlantic where they lie. The conflict has had a strong impact in both countries and has been the subject of various books, articles, films, and songs. Patriotic sentiment ran high in Argentina, but the outcome prompted large protests against the ruling military government, hastening its downfall.
In the United Kingdom, the Conservative Party government, bolstered by the successful outcome, was re-elected the following year. The cultural and political weight of the conflict has had less effect in Britain than in Argentina, where it remains a continued topic for discussion. Relations between the United Kingdom and Argentina were restored in 1989 following a meeting in Madrid, Spain, at which the two countries' governments issued a joint statement. No change in either country's position regarding the sovereignty of the Falkland Islands was made explicit. In 1994, Argentina's claim to the territories was added to it's constitution. The conflict lasted 74 days and ended with the Argentine surrender on 14 June 1982, returning the islands to British control. In total, 649 Argentine military personnel, 255 British military personnel, and three Falkland Islanders died during the hostilities.
Major General Jeremy Moore
He later served as Housemaster of the Royal Marines school of music in Deal, Kent in 1954, as an instructor at the NCO's School, as adjutant with 45 commando from 1957 to 1959, spending much time in operations against EOKA in Cyprus, and then as an instructor at the Royal Military Academy, Sandhurst until 1962. He was posted to Brunei to join 42 commando, as a company commander and later adjutant. While a company commander, he was awarded a bar to the Military Cross in December 1962 when he led an attack against rebels holding the town of Limbang in the Sarwak area of Borneo , rescuing British and Australian hostages.
He and his men were ferried across a river by Royal Navy Lieutenant Jeremy Black, who went on to command HMS Invincible in the Falklands War. He led the 42nd Commando on a tour of duty in the then Provisional Irish Republican Army (IRA) stronghold of New Lodge.
On promotion to lieutenant colonel in 1971, Moore was appointed in command of 42 Commando, completing two tours of duty in Northern Ireland, including participation in the highprofile Operation Motorman to eliminate areas proclaimed by the IRA as "no-go" to the Army and police. He was appointed an officer of the order of the British Empire in 1973.
Moore commanded the Royal Marines School of Music from 1973 to 1975, and then studied at the Royal college of Defense studies in 1976. He commanded 3rd Commando Brigade from 1977 until he was promoted to major general in 1979 and took command of all Royal Marine commando forces. He was appointed a Companion of the Order of the Bath in 1982, and was on the verge of retirement when the Commandant General Royal Marines, Lieutenant General Sir Steuart Pringle, was badly injured by a bomb planted by the IRA. Moore remained as Major General Commando Forces to cover for Pringle while he recovered.
Moore was handing over to the recuperated Pringle when Argentina invaded the Falkland Islands on 2 April 1982. He joined the task force planning team at Northwood before flying south to take command of land forces in theatre. His planning post was taken by Lieutenant General Richard Trant. Moore relieved Brigadier Thompson as ground commander when he arrived shortly before the 5th Infantry Brigade, travelling ahead on the HMS Antrim to reach the islands on 30 May. Moore implemented the plans proposed by Thompson, with the British soldiers forced to march across the inhospitable islands in the absence of sufficient helicopters and against Argentine resistance. He accepted the surrender of the Argentinian commander, General de Brigada Mario Menendez in Port Stanley on 14 June 1982.
Moore was advanced to Knight commander of the order of the Bath on 11 October 1982 "in recognition of service within the operations in the South Atlantic", and left the Marines in 1983. He became Director General of the Food Manufacturers Federation, but left 18 months later. Later in life, he raised money for research into liver diseases after having a liver transplant.
He was Colonel Commandant of the Royal Marines from 1990 to 1993, and joined the parade to commemorate the 25th anniversary of the Falklands War at Horse Guards parade and the mall on 17 June 2007. He fought at the battles of Operation Sutton, San Carlos, Bluff Cove air attacks and Argentina's surrender.
Operation Sutton During the night, 3rd commando brigade along with attached units of the Parachute regiment were landed from the liner SS Canberra and the LPD HMS Fearless. There was very limited enemy resistance on the ground.The Argentine army force on site was a section from the 25th Infantry Regiment named Combat team Güemes, or EC Güemes, located at Fanning Head. After the British fleet was spotted at 02:50, EC Güemes opened fire 81mm motars and two 105mm recoiless rifles. The British warships replied with naval gunfire, and a 25-man SBS team also returned fire. During the firefight, two British Army helicopters, a Sea King and a Gazelle passed overhead, and the Argentine troops fired at them with machine guns.
The Gazelle's pilot, Sergeant Andy Evans, was hit and fatally injured, but he managed to ditch the aircraft into the sea. Evans and the other crewman, Sergeant Ed Candlish, were thrown out of the aircraft, and Argentine troops shot at them for about 15 minutes as they struggled in the water, ignoring orders to cease fire from their commanding officer. When the firing stopped, Candlish managed to drag Evans to shore, where he died. Minutes later, a second British Gazelle helicopter, following the same route as the first, was raked by machine-gun fire from the Argentine platoon and shot down, killing the crew; Lt Ken France and Lance-Cpl Pat Giffin.
The Argentinians eventually retreated from Fanning Head, abandoning their communications equipment. At least eight members of another Argentinian platoon who fled the scene were left behind and captured by the British. Argentine commandos of the 601 commando company shot down a GR3 Harrier on a reconnaissance mission on Port Howard with a Blowpipe missile.
The pilot, Flight Lieutenant Glover, bailed out, breaking his arm and collar bone in the process. He was taken prisoner by Argentine soldiers shortly afterward, and flown to a military hospital in Comodoro Rivadavia, Argentina. Six Argentine pilots were killed during the operation. The invasion, part of the overall Operation Corporate, sparked a strong reply from the Argentine Air Force and the Argentine Naval Aviation which lead to the battle of San Carlos.
Battle of Bluff Cove
While unloading on 8 June, the British ships were attacked by two waves of A-4 Skyhawks from the Argentine Air Force's 5th Air Brigade, each of them loaded with three 500 lb retarding tail bombs of Spanish design. The fighters departed from Rio Gallegos airbase, which at the time was monitored by the nuclear submarine HMS Splendid. The first package, originally made of eight aircraft, was reduced to five when three Skyhawks returned to base due to refuelling problems. The nuclear submarine HMS Valiant, on picket duty off Rio Grande, was able to track six Dagger fighters taking off from the airbase there for a complementary mission and sent an early warning signal, but the report from the submarine failed to reach the British forces at Bluff Cove.
Another four Mirages carried out a decoy mission over the north of the islands, while the Argentine destroyer ARA Santisima Trinidad broadcast interference to jam the frequencies used by the Royal Navy's air controllers directing the Sea Harrier operations. At approximately 14:00 local time the ships RFA Sir Tristram and RFA Sir Galahad were badly damaged by five A-4Bs of Grupo 5. Three A-4s targeted Sir Galahad, which was hit by three bombs from First Lieutenant Carlos Cachón.
The second Skyhawk was unable to drop its bombs, and the third overshot the British ship. The remaining two aircraft attacked Sir Tristram, which was struck by two bombs released by package leader Lieutenant Daniel Gálvez; the bombs of the last A-4 fell short. The explosions and subsequent fires killed 48 men aboard Sir Galahad and two crew members from Sir Tristram. At 16:50 a second wave, composed by four A-4Bs of Grupo 5 hit and sank a Landing craft Utility from HMS Fearless, ferrying the vehicles of the 5th Brigade's headquarters from Darwin to Bluff Cove in Choiseul sound with the loss of six Royal Marines.
However, the Sea Harrier combat air patrol was already on scene and responded; three Skyhawks were shot down and their pilots, First Lieutenant Danilo Bolzan, Lieutenant Juan Arrarás, and Ensign Alfredo Vazquez, were killed. Bolzan's aircraft was shot down by Lieutenant David Smith, while the remaining Skyhawks fell victims to Flight Lieutenant David Morgan. The fourth aircraft suffered combat damage and lost a large amount of fuel, but returned to the mainland, assisted by a KC-130 tanker. A third wave, by A-4Cs of Grupo 4, arrived minutes later and struck ground targets without visible success. In a separate incident, the frigate HMS Plymouth endured the sudden attack of the six Daggers from Rio Grande, which struck her with four 1,000-pound bombs.
The warship sustained severe damage, and five crewmen were injured. Although all the bombs were duds, the attack caused the explosion of at least one depth charge on her flight deck. A total of 56 British servicemen were killed, and 150 wounded. BBC television cameras recorded images of Royal Navy helicopters hovering in thick smoke to winch survivors from the burning landing ships. These images were seen around the world. However, General Menendez, commander of Argentine forces on the islands, was told that hundreds of men had been killed.
He expected a drop in British morale, and their advance to slacken. Sir Galahad was damaged beyond repair, but her sister ship survived to be re-built post-war. American author Robert Bolia blames the disaster to the use of large LST ships instead of LCUs and other small vessels. Brigadier Julian Thompson;[5 Brigade] actually hadn't seen the Argentine Air Force work, 'cause for the five days they'd been there, the bad weather had kept the Argentine Air Force away; so they hadn't seen how deadly those guys could be. I can tell you, if I'd have been on board that ship I would have swam ashore rather than stay there Among the wounded was Simon Weston, who later featured in a BBC documentary showing his treatment for the appalling injuries he received.
Weston endured 75 operations in 22 years, after 25% of his skin suffered third degree burns. In a subsequent documentary, filmed in Argentina, he met the pilot who bombed his ship, Carlos Cachón, then retired with the rank of Captain.
After a later visit of Cachón and his family to Weston's home in Liverpool, they have become great friends. Carlos Cachón was born near Balcarce and raised in Mar del Plata, where he currently lives. He is the chief of the security staff in the local offices of the Argentina national bank. Cachón was awarded the honorific title of "Illustrious Citizen" by the city council of Mar del Plata on 25 February 2010.After the war, a memorial for the British soldiers killed in the attack was erected at Fitzroy.On 8 June 2007, Welsh Guards veterans of the Falklands War held a memorial for the Welsh Guards killed on board Sir Galahad.
The battle of Mount Longdon
3 PARA made a desperate march across the hills north of Mount Simon to seize the key piece of high ground above the settlement of Estancia, also known as Estancia House. The weather conditions were atrocious, with the Paras marching through steep slippery hillocks to the objective. Nick Rose was a private in 6 Platoon under Lieutenant Jonathan Shaw: The terrain dictated exactly how we advanced.
A lot of the time if we were going along on tracks – what few we did go on – we used Indian file, which is staggered file on either side of the track, like a zig-zag. But there are great rivers of rock – big white boulders – and you have to cross them and then there's the heather and the gorse and its constantly wet. So the wind chill factor was – I think somebody said minus 40 degrees – and storm force winds and horizontal rain – a nightmare scenario. ...
We are horrible, we're miserable as sin, all of us – we're missing home, want a dry fag [cigarette], warm, dry boots, a cheese and onion sandwich and a bottle of blue top milk. I used to dream of these. Captain Matthew Selfridge of 3 PARA set up a patrol base near Murrell Bridge, two kilometres west of Mount Longdon on 3 June. From there he sent out patrols from D Company to scout out the Argentine positions on Mount Longdon. Terry Peck, a former FIDF member also carried out patrolling, and in one occasion while pretending to have gotten lost while riding his motorbike, he chatted to a group of five conscripts (under Corporal Geronimo Diaz of Baldini's 1st Platoon) that had been tasked with guarding provisions that had been helicoptered forward and were relaxing in the sun after drinking several cans of beer on the eastern end of Mount Longdon.
An example of a British snatch patrol that failed to obtain a prisoner was provided by 3 PARA on the night of 4–5 June 1982. A three-man patrol from D Company consisting of Corporal Jerry Phillips and Privates Richard Absolon and Bill Hayward was sent out to the northern slopes of Mount Longdon. The small party was detailed to penetrate Sub-Lieutenant Juan Baldini's 1st Platoon on the western slopes to secure a prisoner, supported to their rear by a battery of six 105 mm field guns, under cover of which the specialist snipers shot at Baldini while another fired a 66mm anti-tank rocket at one of the 1st Platoon mortar pits under Corporal Óscar Carrizo.
The Argentine commanders reacted vigorously, and the sniper team found themselves under prompt and accurate machinegun, artillery and mortar fire. There were no Argentine casualties. One British participant nevertheless claimed to have shot and killed two Argentines and demolished one mortar crew with a rocket at close range. On the Argentine side, it was soon realised that the 7th Infantry Regiment Reconnaissance Platoon soldiers on the surrounding Wireless Ridge position were ill equipped to carry out their own patrolling. Thus, the Argentine Commando units, normally used for deep-recce [reconnaissance] had to take on this role.
They were able to do so with some success and in the early hours of 7 June a combined patrol of the 601st Commando Company and 601st National Gendarmerie Special Forces Squadron, investigating reports from Major Jaimet of enemy activity around Murrell Bridge was seen approaching the bridge. After several nights in the area Corporals Peter Hadden and Mark Brown and their patrols had just arrived at the bluff on the western bank of the Murrell river which Sergeant Ian Addle's patrol had been using as a base. Within a short period of time a sentry reported moving figures down near the bridge. The Paras opened up and a confused firefight developed in the darkness, with small arms, machinegun, LAW rockets and Energa rifle grenades being exchanged.
The Commando patrol under Captain Rubén Teófilo Figueroa was very aggressive and before dawn had forced the Paras to withdraw, having to leave behind much of their equipment. Only one Argentine NCO (Drill Sergeant Rubén Poggi), was slightly wounded during the Argentine counterambush. From then on British patrols had to be mounted closer to their own lines. As the official history of the Parachute Regiment acknowledged: They were forced to evacuate their position rapidly, leaving behind their packs and radio, but succeeded in withdrawing without suffering any casualties. The location was checked on the evening of 8 June by another patrol, but there was no sign of the packs or radio, which meant the battalion's radio net could have been compromised. Nevertheless, Colonel Pike and his company commanders on the eve of battle still held the Argentine commanders in low regard and did not expect them to put up much resistance.
For this reason the British hoped to surprise the Argentine commanders by advancing as close to their forward platoon as possible under cover of darkness, before storming into their trenches with fixed bayonets. The three major objectives – 'Fly Half', 'Full Back' and 'Wing Forward' – were named after positions in rugby football. B Company would attack through 'Fly Half' and proceed to 'Full Back', while A Company, followed by C Company if necessary, would do the same on Wireless Ridge. But morale was still reasonable in the 7th Regiment. Private Fabián Passaro of B Company served on Longdon with the 1st Platoon and remembers life at the time: Most of us had adjusted to what we'd been landed in, we'd adjusted to the war.
Some boys [identified in the book "Two Sides Of Hell/Los Dos Lados Del Infierno"] were still very depressed and, in many cases, were getting worse all the time. Of course, we were very fed up with wearing the same clothes for so many days, going without a shower, being so cold, eating badly. It was too many things together, quite apart from our natural fear of the war, the shelling and all that. But I think some of us were adapting better than others. There were kids who were very worried; and I tried to buoy them up a bit. 'Don't worry,' I told them. 'Nothing will happen, we're safe here.
'Don't you see they could never get right up here? There's one thousand of us; if they try to climb, we'll see them, we'll shoot the shit out of them." When 3 PARA's B Company (under Major Mike Argue) fixed bayonets to storm the Argentine 1st Platoon positions on Mount Longdon, they found themselves running into a minefield. British sappers subsequently counted some 1,500 antipersonnel mines laid along the western and northern slopes of Mount Longdon, but only two exploded recalled Corporal Peter Cuxson,because the rest were frozen. Otherwise the final battle for Port Stanley would have been an altogether different story, concludes the NCO who took an Argentine machine-gun position that night. As dusk set-in, 3 PARA moved to their start lines and, after a brief stop, began to make the fourhour-long advance on their objectives.
As B Company approached Mount Longdon, Corporal Brian Milne stepped on a mine, which after a very silent approach, alerted Sub-Lieutenant Baldini's platoon of conscripts.
More than 20 Argentinan soldiers emerged from their tents to lay down fire but most of the platoon was still struggling out of its sleeping bags when Lieutenant Ian Bickerdike's No. 4 Platoon was among them, machinegunning and grenading the helpless Argentines. Corporal Stewart McLaughlin was in the thick of the action, clearing out an Argentine 7.62mm machinegun from the high ground overlooking the western slopes. He mustered his section, ordered them to fix bayonets and then led them up the hill into a hail of machinegun fire.
Lieutenant Jonathan Shaw's No. 6 Platoon, on the right flank of B Company, captured the summit of 'Fly Half' with no fighting. However, they had missed half a dozen Argentine conscripts of the 3rd Platoon, having grenaded several abandoned bunkers, and they launched a fierce attack on the unsuspecting platoon, resulting in a number of casualties before the area was cleared. For three hours the hand-to-hand combat raged in the 1st Platoon sector, until the Paras drove out the defenders.
All around the 1st Platoon position, small groups of soldiers were fighting for their lives. Privates Ben Gough and Dominic Gray managed to crawl undetected up to an Argentine bunker and crouched beside it as the Marine conscripts inside blasted away into the night. In unison the two Paras each pulled the pin out of a grenade and 'posted' them through the firing slit of the bunker. The instant the grenades exploded, the two jumped in the bunker and started to bayonet the two Marines. Private Gray killed a Marine by sticking his bayonet through his eye socket. They were both mentioned in despatches. Marine Corporal Carlos Rafael Colemil was part of the forward defence and fought as a sniper:
A British soldier climbed over the rock which supported the accommodation bunker of the 105mm gun crew, and from here he was silhouetted. He screamed like he was giving out orders, I aimed and fired and he fell, then Conscript Daniel Ferrandis alerted me to the approach of three British soldiers on the flank. I observed with the night sight, they were very close, I saw one of them was carrying a gun with bipod; he fell at the first shot and shouted. Another man approached him and I fired again and also got him ... Many people fell to the ground screaming, but soon the enemy was aware of my presence and every time I fired a shot I received a great deal of fire in response. Not long after my main action I was wounded ... We could also hear the cries for help from the Rasit radar operator Sergeant Roque Nista, who was wounded.
I could hear Sergeant Omar Cabral, who was a sniper he was also firing. According to the account of Private Victor José Bruno, Baldini was killed as he tried to unjam a machinegun. "The Lieutenant pushed us back and stood up trying to unlock the barrel but then he was shot in his belly by enemy fire", he recalled in an interview with Eduardo César Gerding of the Nottingham Malvinas group. Corporal Dario Ríos was found lying dead with his platoon commander, which disproves Private Carbone's claim that Baldini "died alone". Baldini's weapon and boots were removed for the use of British soldiers. A photo of the dead Argentine officer appeared in the original hardback edition of the book Operation Corporate:
The Falklands War, 1982 (Viking Press, 1985) and an artist illustration of the photo appears in the frontcover of the book De La Plata a Malvinas written by Raúl Eugenio Daneri, the adjutant of the 7th Regiment in the Falklands. Also killed in the initial fighting was Cavalry Sergeant Jorge Alberto Ron (according to Private Altieri who was wounded in the blast that killed the NCO) and the Argentine forward artillery observation officer, Lieutenant Alberto Rolando Ramos, whose last message was that his position was surrounded. Sub-Lieutenant Baldini was awarded the Argentine Nation to the Valour in Combat medal Just as it seemed as if the Paras would overwhelm 2nd Lieutenant Enrique Neirotti's 3rd Platoon on the southern half and Staff Sergeant Raúl González's 2nd Platoon on the northern half of the mountain, reinforcements from 2nd Lieutenant Hugo Quiroga's 1st Platoon, 10th Engineer Company on 'Full Back' arrived to help Neirotti and González.
Throughout the initial fighting in this sector, most of the Argentine positions on the saddle of the mountain held, the newly arrived engineers using headmounted nightsights, proving particularly deadly to the Paras. The battle was going badly for Major Mike Argue. Argentine resistance was strong and well organized. At the centre of the mountain were Marine conscripts Jorge Maciel and Claudio Scaglione in a bunker with a heavy machinegun and Marine conscripts Luis Fernández and Sergio Giuseppetti with night-scope equipped rifles. Lieutenant Bickerdike, a signaller and Sergeant Ian McKay and a number of other men in No. 4 Platoon were attempting to perform reconnaissance on the Marine positions; in doing so, the platoon commander and signaller were wounded. Sergeant McKay realising something needed to be done, decided to attack the Marine heavy machinegun position that was causing so much damage.
The assault was met by a hail of fire. Corporal Ian Bailey was seriously wounded, a Private was killed and another wounded. Despite these losses Sergeant McKay, with complete disregard for his own safety for which he was to win a posthumous Victoria Cross, continued to charge the enemy position alone. Peter Harclerode who was granted open access to the war diary of the 3rd Battalion, and subsequently wrote PARA! (Arms & Armour Press, 1993), pointed out that McKay and his team cleared several Marine riflemen in the position but failed to neutralize the heavy machinegun. Corporal McLaughlin managed to crawl to within grenade-throwing range of the Marine heavy machinegun team, but despite several efforts with fragmentation grenades and 66 mm rockets, he was unable to silence it.
Major Carrizo-Salvadores on 'Full Back' had remained in touch with the Argentine commanders in Port Stanley: Around midnight I asked RHQ for infantry reinforcements, and I was given a rifle platoon from Captain Hugo García's C Company.
First Lieutenant Raúl Fernando Castañeda gathered the sections of his platoon, hooked around First Sergeant Raúl González's 2nd Platoon that was already fighting and delivered a counterattack [at about 2 am local time]. The Platoon fought with great courage in fierce hand-to-hand combat and the battle raged for two more hours, but gradually the enemy broke contact and withdrew while being engaged by artillery strikes. It was now the turn of the Argentines to counterattack. Major CarrizoSalvadores manoeuvred Castañeda's reinforced platoon to close with 4 and 5 Platoons and meanwhile under the direction of an NCO, part of Castañeda's platoon converged on the British aid post.
Colour Sergeant Brian Faulkner, seeing that more than 20 wounded Paras on the western slopes of the mountain were about to fall into the hands of one of the sections of Castañeda's platoon, deployed anyone fit enough to defend the British Regimental Aid Post. "I picked four blokes and got up on this high feature, and as I did so this troop of twenty, or thirty Argentines [in fact a reinforced section of fifteen riflemen] were coming towards us. We just opened fire on them. We don't know how many we killed, but they got what they deserved, because none of them were left standing when we'd finished with them." said Faulkner. Things were so bad that Major Argue's company ceased firing and devoted their full efforts to withdrawing from 'Fly Half'.
Peter Harclerode, a noted British historian of the Parachute Regiment, went on record, saying that: under covering fire, Nos. 4 and 5 Platoons withdrew, but another man was killed and others wounded in the process. At that point, Lieutenant Colonel Hew Pike and his 'R' Group arrived on the scene and Major Argue briefed him on the situation. Shortly afterwards, Company Sergeant-Major Weeks reported that both platoons had pulled back to a safe distance and that all the wounded had been recovered.
The dead, however, had to be left where they had fallen. Meanwhile, on the southern slope of the objective, the wounded from No. 6 Platoon were being evacuated while the rest remained under cover of the rocks. The British 3rd Commando Brigade commander, Brigadier Thompson was reported as having said: "I was on the point of withdrawing my Paras from Mount Longdon. We couldn't believe that these teenagers disguised as soldiers were causing us to suffer many casualties." By the time the 21 survivors of Castañeda's 46-man platoon had worked their way off the mountain, they were utterly exhausted. One of them, Private Leonardo Rondi, was sporting a maroon beret – taken from a dead Parachute Regiment soldier.
Private Rondi, having dodged groups of Paras to deliver messages to Castañeda's section leaders, had found a Para behind a rock (it may have been Sergeant McKay) and took his red beret and SLR which he later gave to the Argentine commanders as trophies. Following the unexpectedly fierce fighting on 'Fly Half', Maj. Argue pulled back Nos. 4, and 5 Platoons, and 29 Commando Regiment directed artillery fire at the mountain from Mount Kent, after which the area was flanked from the left. Under heavy fire, the remnants of 4 and 5 Platoons, under Lieutenant Mark Cox advanced upon their objective of 'Full Back', taking some casualties from Casteñeda's platoon as they did so. As he was clearing the Argentine position, Private Grey was injured from a headshot but refused to be evacuated until Maj. Argue had consolidated his troops properly in their positions on 'Fly Half'.
Private Kevin Connery personally dispatched three wounded Argentines in this action. The Paras could not move any further without taking unacceptable losses and so were pulled back to the western end of Mount Longdon, with the orders for Major David Collett's A Company to move through B Company and assault, from the west, the eastern objective of 'Full Back', a heavily defended position, with covering fire being given from Support Company. Second Lieutenants John Kearton and Ian Moore mustered their platoons near the western summit and had briefed them on how to deal with the enemy.
They then attacked the position, clearing it of its Argentine garrison with rifle, grenade and bayonet in close quaters combat . As A Company was clearing the final positions, Corporal McLaughlin was injured by a Czekalski recoilles rifle round fired from Wireless Ridge, he was subsequently killed by a mortar bomb fired from RI 7's C Company on Wireless Ridge as he made his way to the aid post. The Argentines rigorously defended 'Full Back'.
Although already wounded, Corporal Manuel Medina of Castañeda's platoon took over a recoilless rifle detachment and personally fired along the ridge at Support Company, killing three Paras, including Private Peter Heddicker, who took the full force of a 105 mm artillery round, three others were also wounded. Major Carrizo-Salvadores abandoned his command bunker on 'Full Back' only when a Milan missile smashed into some rocks just behind him. In the command bunker Major Collett found 2,000 cigarettes which he gave to the smokers in his company.The swearing in English on the part of the conscripts, and the discovery of several dead Argentine Marine conscripts dressed in camouflaged uniforms at first led the Paras to believe they had encountered mercenaries from the United States on Mount Longdon.
War on Terrorism
There are many Moore(s) and the variant of the spelling fought against the Islam in Iraq and Afghanistan. Islam is a growing threat to the free world and I believe it is the new crusades. On 9/11 there were one or two Moore who were killed during the terrorist attack. Because the actions involved in the "war on terrorism" are diffuse, and the criteria for inclusion are unclear, political theorist Richard Jackson has argued that "the 'war on terrorism' therefore, is simultaneously a set of actual practices-- wars, covert operations, agencies, and institutions--and an accompanying series of assumptions, beliefs, justifications, and narratives--it is an entire language or discourse.
" Jackson cites among many examples a statement by John Ashcroft that "the attacks of September 11 drew a bright line of demarcation between the civil and the savage".
Administration officials also described "terrorists" as hateful, treacherous, barbarous, mad, twisted, perverted, without faith, parasitical, inhuman, and, most commonly, evil. Americans, in contrast, were described as brave, loving, generous, strong, resourceful, heroic, and respectful of human rights. Even to this day many of our clansmen will continue to fight for thier clan and country.
Battle of Mogadishu
At 13:50, Task Force Ranger analysts received intelligence of Salad's location. There was a Jason Moore.At 15:42, the MH-6 assault Little Birds carrying the Delta operators hit the target, the wave of dust becoming so bad that one was forced to go around again and land out of position. Next, the two Black Hawks carrying the second Delta assault team came into position and dropped their teams as the four Ranger chalks prepared to rope onto the four corners surrounding the target building.
Chalk Four being carried by Black Hawk callsign Super 67, piloted by CW3 Jeff Niklaus, was accidentally put a block north of their intended point. Declining the pilot's offer to move them back down due to the time it would take to do so, leaving the helicopter too exposed, Chalk Four intended to move down to the planned position, but intense ground fire prevented them from doing so. The ground convoy arrived ten minutes later near the Olympic Hotel and waited for Delta and Rangers to complete their mission (target building). During the operation's first moments, Ranger PFC Todd Blackburn, from Chalk Four, fell while fast-roping from his Black Hawk Super 67 while it was hovering 70 feet (21 m) above the streets.
Blackburn suffered an injury to his head and back of his neck and required evacuation by SGT Jeff Struecker's column of three Humvees.
While taking PFC Todd Blackburn back to base, SGT Dominick Pilla, assigned to SGT Struecker's Humvee, was killed instantly when a bullet entered his head. When SGT Struecker's Humvee column reached the base and safety, all three vehicles were riddled with bullet holes and smoking. At about 16:20, one of the Black Hawk helicopters, callsign Super 61 piloted by CW3 Cliff "Elvis" Wolcott and CW3 Donovan Briley, was shot down by an RPG. Both pilots were killed in the resulting crash and two of the crew chiefs were severely wounded. SSG Daniel Busch and SGT Jim Smith, both Delta snipers, survived the crash and began defending the site.
An MH-6, call sign Star 41 and piloted by CW3 Karl Maier and CW5 Keith Jones, landed nearby and Jones left the helicopter and carried Busch to the safety of the helicopter while Maier provided cover fire from the Little Bird's cockpit, repeatedly denying orders to lift off while his co-pilot was not in the Bird. He nearly hit Chalk One's LT DiTomasso arriving with Rangers and Delta operators to secure the site. Jones and Maier evacuated SSG Busch and SGT Smith, though SSG Busch later died of his injuries, being shot four times while defending the crash site. A Combat Search and Rescue (CSAR) team, led by Air Force Para-rescueman TSgt Scott Fales, were able to fast rope down to Super 61's crash site despite an RPG hit that crippled their helicopter, Super 68, piloted by CW3 Dan Jollota. Despite the damage, Super 68 did make it back to base.
The CSAR team found both the pilots dead and two wounded inside the crashed helicopter. Under intense fire, the team moved the wounded men to a nearby collection point, where they built a makeshift shelter using Kevlar armor plates salvaged from Super 61's wreckage. There was confusion between the ground convoy and the assault team. The assault team and the ground convoy waited for 20 minutes to receive their orders to move out. Both units were under the mistaken impression that they were to be first contacted by the other. During the wait, a second Black Hawk helicopter, call sign Super 64 and piloted by CW3 Michael Durant, was shot down by an RPG at around 16:40. Most of the assault team went to the first crash site for a rescue operation. Upon reaching the site, about 90 Rangers and Delta Force operators found themselves under heavy fire.
Despite air support, the assault team was effectively trapped for the night. With a growing number of wounded needing shelter, they occupied several nearby houses and confined the occupants for the battle's duration. Outside, a stiff breeze stirred up blinding, brown clouds of dust. At the second crash site, two Delta snipers, MSG Gordon and SFC Randy Shughart, were inserted by Black Hawk Super 62 – piloted by CW3 Mike Goffena. Their first two requests to be inserted were denied, but they were finally granted permission upon their third request.
They inflicted heavy casualties on the approaching Somali mob. Super 62 had kept up their fire support for MSG Gordon and SFC Shughart, but an RPG struck Super 62. Despite the damage, Super 62 managed to go to the New Port and safety. When MSG Gordon was eventually killed, SFC Shughart picked up Gordon's CAR-15 and gave it to Super 64 pilot CW3 Michael Durant. SFC Shughart went back around the chopper's nose and held off the mob for about 10 more minutes before he was killed.
The Somalis then overran the crash site and killed all but Durant. He was nearly beaten to death, but was saved when members of Aidid's militia came to take him prisoner. Repeated attempts by the Somalis to mass forces and overrun the American positions in a series of firefights near the first crash site were neutralized by aggressive small arms fire and by strafing runs and rocket attacks from AH-6J Little bird helicopter gunships of the night stalkers, the only air unit equipped and trained for night fighting. A relief convoy with elements from the Task Force 2-14 infantry, 10th Mountain Division, accompanied by Malaysian and Pakistani U.N. forces, arrived at the first crash site at around 02:00. No contingency planning or coordination with U.N. forces had been arranged prior to the operation; consequently, the recovery of the surrounded American troops was significantly complicated and delayed.
Determined to protect all of the rescue convoy's members, General Garrison made sure that the convoy would roll out in force. When the convoy finally pushed into the city, it consisted of more than 100 U.N. vehicles including Malaysian forces' German-made Condor APCs, four Pakistani tanks, American humvees and several M939 five-ton flatbed trucks. This two-mile-long column was supported by several other Black Hawks and Cobra assault helicopters stationed with the 10th Mountain Division. Meanwhile, Task Force Ranger's "Little Birds" continued their defense of Super 61's downed crew and rescuers. The American assault force sustained heavy casualties, including several killed, and a Malaysian soldier died when an RPG hit his Condor vehicle. Seven Malaysians and two Pakistanis were wounded.
The battle was over by 06:30 on Monday, 4 October. U.S. forces were finally evacuated to the U.N. base by the armored convoy. While leaving the crash site, a group of Rangers and Delta operators led by SSG. John R. Dycus realized that there was no room left in the vehicles for them and were forced to depart the city on foot to a rendezvous point on National Street. This has been commonly referred to as the "Mogadishu Mile". U.S. forces suffered one casualty during the mile, Sgt. Randal J. Ramaglia, after he was hit by a bullet in the back, and successfully evacuated. In all, 18 U.S. soldiers were killed in action during the battle and another 73 were wounded in action.
The Malaysian forces lost one soldier and had seven injured, while the Pakistanis suffered two injured. Somali casualties were heavy, with estimates on fatalities ranging from 315 to over 2,000 combatants. The Somali casualties were a mixture of militiamen and local civilians. Somali civilians suffered heavy casualties due to the dense urban character of that portion of Mogadishu. Two days later, a mortar round fell on the U.S. compound, killing one U.S. soldier, SFC Matt Rierson, and injuring another twelve. A team on special mission to Durant's Super 64 helicopter had 2 wounded, Boxerman and James on 6 October. Two weeks after the battle, General Garrison officially accepted responsibility.
In a handwritten letter to President Clinton, Garrison took full responsibility for the battle's outcome. He wrote that Task Force Ranger had adequate intelligence for the mission and that their objective (capturing targets from the Olympic Hotel) was met. There was a James L. Moore of the United States Marine corp. He fought in the battle of Fallujah was killed in a helicopter crash in Iraq. Seventeen Moore(s) and Mora(s) were killed in Operation Iraqi Freedom, one Mora died in Operation New Dawn, and Three Moore(s) and 1 Mora died in Operation Enduring Freedom.
Maine Historical and Genealogical Recorder . NOTES FOR A GENEALOGY OF THE MOORE
In a previous paper we gave some account of a considerable number of members of several families of that ilk in England mostly from 1066 to about 1600. We now add a few brief records concerning others of the name to about 1650. If it be remarked that the list embraces principally those who became eminent by civil or military service or selects from the ranks of the nobility the suggestion is made that the ancient records dealgenerally with no others the memory of the undistinguished finding no biographers. The list immediately following presents another English group to be succeeded later by a batch of Scotch cousins 1601 Nov 9 Mr F Moore, MP Nov 20 Sir George Moore, MP and to 1626 or later often in debate May 19th of this latter year Sir George was committed for utterances disrespectful to the king.
His words were We were born free and must continue free if the king would keep his kingdom Four days later he was set free and returned to the House of Commons. There was a George Moore Esq of Mayds Morton baronet Buckinghamshire.
1602 John Moore sheriff London 1612 Francis and John More serjeants at law. The same year a Mr Moore with sixty people landed at Bermuda and builded a city. The record says “They builded the chief Towne there called St George together with 8 or 9 Forts.”
1613 William son of Rafe Moore gentleman St Albans. This year an official call of serjeants at law in London disclosed eleven among whom were Francis and John Moore the latter of Ipswich 1614 Henry Moore Lincolnshire philosopher and theologian.
1617 In this year was born Sir Jonas Moore Lancashire celebrated as one of the founders of the Royal Society. He was at one time a surveyor general of ordnance under Cromwell.
1626 Sir Richard Moore Esq Aylesbury Kent He 1 in 1644.
162 7 Henry Moore was created a baronct.
163o Sir Edward Moore Southampton.
1635 Jan 2 Mr Richard Moore of the Old Jury died in London.
164o Thomas Moor Esq MP John Moore of Bank Hall.
1642 Paynings Moore created a baronet. He was of Loseley Surrey and June 22 1649.
1646 J0hn Moore of Suffolk and William of New Brentford.
I648 John Moore Esq MP afterwards famous as one of the Lancashire Colonels under Fairfax See Comments.
1649 The town of Drogheda was taken by storm by the troops under Cromwell and all who were found in arms were butchered including the governor. As the Drogheda Moores were loyal to the king's cause the career of more than one ancestor was summarily ended See Comments .
1653 Samuel Moore from Bishops Castle. MP About this time Thomas Moore was an officer in the custom house and his brother was governor of Ludlow Castle. There were several Moores in Parliament from Bishops Castle from 1653 to 1695 or later including Richard Robert and Arthur.
1659 Edward Moore Esq Moore Hall Lancaster baronet. There was also an estate called Moores Exeter and Moore Parke Hertfordshire.
“EXPLANATORY COMMENTS “ John Moore Esq and C01 in Parliament in 1648 had an eventful history He was one of the Commissioners of the Court for the trial of Charles I He wasa Colonel in Cromwell's army and at one time commanded the Parliamentary Guard With Col Rigby he bore a conspicuous part in the siege of Latham l louse successfully defended for two years by the Countess of Derby one of the most heroic defenses in the annals of any nation.
The particulars of this most memorableorable siege are accessible and need not be here recounted Col Moore is known to have cast his vote for the condemnation of Charles and to have signed his death warrant The original warrant is now in possession of the House of Lords Moore died about 1650 and in 1660 with Cromwell Ireton and others though dead he was specially exempted from pardon and his estates and person made subject to penalties and forfeiture His association with Alexander Rigby gives an added interest to the scanty knowledge we have of him His residence at the date of the siege 1644 was at Bank Hall sometimes called Moore Hall After the siege was raised he was returned to Parliament from Liverpool and the Commons granted him 21 gratuity of four pounds weekly See the Moore Rental For additional particulars concerning him see Notes and Queries for July 6 l872 where MJ Thom's account of the regicides will be found Fellowe's Sketches Josiah Ricroft's Survey Stiles Judges Nelson's Hist Trial of Charles I Noble's Hist Regicides 2 vols
At the storming of Drogheda in I649 Cromwell commanded in Person The defence was stubborn the loss heavy and the troops were wild with rage Var ing accounts are given of the atrocities committed by the victorious assailants but there is no oubt the scenes enacted were frightful The mildest account admits that no less than every tenth soldier was butchered and the rest sent to Barbadoes It is noteworthy that among the lists of rebels sent to Barbadoes were quite a number of Moores The Bishops Castle Moores were evidently of more than common consequence They were said to be of great antiquity dating back as early as the 13th century and its members were prominent in the armyas well as in Parliament It is perhaps worthy of note that one of the Bishops Castle Moores was named Jasper This brings to our mind the query Was little Jasper Moore brought over in the Mayflower by Carver a descendant of this house or merely a namesake How near the dates are the poor Mayflower bud which never lived to open upon our bleak shores 1620 the noble Jasper l613 Little Jasper left behind him a brother Richard of whom more anon.
Clan Muir's Hall of Fame
These are Clan Muir's most famous and Notable clansmen that played a major role, as well who left their mark on clan Muir.
Máel Muire, Earl of Atholl- Jump to: navigation, search
Máel Muire of Atholl was Mormaer of Atholl at the beginning of the 12th century, until sometime perhaps in the 1130s. According to the Orkneyinga Saga, Máel Muire was a son of king Donnchad I and a younger brother of King Máel Coluim III. A Malmori d' Athótla is mentioned in a charter relating to a year after 1130, contained within the Book of Deer. If the first part is true, and the second part refers to the same Máel Muire, then this Máel Muire lived for more than 90 years, between the death of King Donnchad I in 1040 and the 1130s. It seems likely that his paternal grandfather Crínán was also Mormaer of Atholl. Máel Muire then probably inherited the Mormaerdom in compensation for not inheriting the Kingship. ( https://en.wikipedia.org/wiki/M%C3%A1el_Muire,_Earl_of_Atholl)
Roman Commander Decio Mure- In the territory of Sentinum; was fought a battle in which the coalition of Samnites, Umbrians, Etruscans, and Gauls were defeated by the Roman army under the consul of Q. Fabio Rulliano and P. Decio Mure, who was killed on the battlefield in 295 B.C
John Moore of the United Irishsmen fought at the following battles during the war of the United Irishmen Rebellion of 1798. The battles John Moore was engage at was the Battle of Oulart Hill, the battle of the Three Rocks, The battle of Vinegar Hill, Kilcumney Hill. When general Humbert had declared that Connacht was henceforth a republic and appointed John Moore as President. He was destined to pay dearly for this- being captured after the rebellion collasped and dying in prison in Waterford.
John Muir- John Muir also known as "John of the Mountains" and "Father of the National Parks", was an influential Scottish-American naturalist, author, environmental philosopher, glaciologist, and early advocate for the preservation of wilderness in the United States of America. Places and trails named after John Muir
1.John Muir Way ( Scotland)- A 134-mile, coast-to-coast trail has officially opened in Scotland, and it has an appropriately outdoorsy name: John Muir Way. Named for the famed conservationist who was born in Dunbar, Scotland, the trail links his hometown and Helensburgh, passing through Edinburgh along the way.
2. John Muir Trail ( California, USA)- Stretching 211 miles from Yosemite Valley to the summit of the contiguous United States’ highest peak, Mount Whitney, it rambles through some of the most breathtaking mountain scenery that the heart and mind could conceive. Most of your days are spent above 10,000 feet, where you’ll experience the High Sierras in all of it’s grandeur and beauty.
3. John Muir woods National Monument- This boardwalk is part of the Muir Woods Main Loop trail. If you follow the raised boardwalk to the right it will lead to an accessible gift shop, café and restroom facility. Signage is provided. If you choose to continue into the forest, the accessible boardwalk will continue for several hundred feet to Founders Grove. There are several informational waysides along the boardwalk. If you proceed past the boardwalk you will encounter an asphalt trail which is usable; however, it contains potholes and severe cracks due to heaving tree roots. As funding and resources allow, we will continue to replace the existing asphalt with an accessible raised boardwalk.
4. John Muir Wilderness Trail- This trail follows the Hiwassee River along the path that famed naturalist John Muir took on his “Thousand Mile Walk to the Sea.” Great trail for wildflowers, birding, and river views. Moderate 20 mile hike beginning at Childers Creek in Reliance and ending near the TN / NC line.
Thomas Muir (24 August 1765 – 26 January 1799),[1] often known as Thomas Muir the Younger of Huntershill, was a Scottish political reformer. Also known as father of Scottish democracy", is one of five men commemorated on the Political Martyrs' Monument on Calton Hill, Edinburgh.
William Muir- as a Scottish Orientalist, scholar of Islam, and colonial administrator.
John Moore (Lord Mayor)- became a merchant in London, was active in the lead business, then in trade with East India, and became Master of the Grocer's company. Originally a non-conformist, he entered the Church of England, and was consequently able to take a seat as alderman for Walbrook. He was knighted in 1672, and elected Sheriff that same year. He was a representative of the Court party in the reign of Charles II, and active in supporting its influence in the City of London. He was elected one of the representative from the city to the 1685 Parliament.
Samuel More- In the English civil war Samuel More fought for Parliament and commanded a garrison at Hopton castle in Shropshire. Hopton Castle was one of the few castles to be held for Parliament in that county. Samuel More was commandant of the castle when, in 1644, it was besieged by a force of Cavaliers led by Sir Michael Woodhouse, with a force of about 500. Samuel More’s garrison numbered around 30 men, and the end result of such an action was inevitable. Without external support, More would be forced to surrender.
It seems that Colonel Samuel More was offered quater (the option of a surrender) twice and refused. After this accounts differ. Samuel’s own account states that he finally surrendered once the Cavaliers had breached the castle walls, whereupon his men were brutally slaughtered. Other accounts state that, after a three-week siege, More delayed surrendering until the bailey had been taken and the entrance to the keep was on fire. Under the laws of war as they were practised at that time, such a surrender was at the discretion of the besieging forces, who had taken significant casualties. More had apparently waited too long to surrender. It seems that Sir Michael Woodhouse choose not to accept the surrender and ordered (or at least did not prevent) the killings. As his men were being killed, Samuel More was taken to Ludlow and was later given his freedom in a prisoner exchange.
Marquis de Mores- De Morès began life as a soldier, graduating in 1879 from St. Cyr, the leading military academy of France. Among his classmates was Philippe Petain, famous French general of WW1 and the ill-fated future leader of the Vichy France government in WW2. Upon his return, he would be embroiled in political controversies for the remainder of his life.
Philip Henry Moore -He served in the local militia, which formed a company of the 4th Bedford battalion, and he took a prominent part in the battle at Moore’s Corner in the rebellion of 1837 for which he was officially thanked by Sir John Colborne, commander in chief. Charged by some with taking too much credit for the success of the battle, he produced documents, printed in the Montreal Herald in March 1838, which confirmed that he had indeed directed his party to the extent he had claimed.
Enoch Moore- Enoch's political alignment seemed to swing from one extreme to the other throughout his lifetime. He was born in a Loyalist refugee camp in New York City and was evacuated with his Quaker family, about 1784, to the Annapolis Valley, Nova Scotia where his father, Samuel Moore, became a leader in the Quaker community. He moved to Upper Canada about 1811, where he served as a dispatch rider in the Canadian militia during the War of 1812 against the Americans. His commanding officer was Col. Joseph Ryerson. By 1830, Enoch Moore, had gained the respectable status of school trustee.
One of the teachers in his employ was Egerton son of Col. Joseph Ryerson, who became the founder of the public school system in Ontario. Enoch's first son, James Moore, is buried beside Col. Joseph Ryerson in the Methodist cemetery in Woodhouse Township, Norfolk County, Ontario. Even though he was raised in a Loyalist and Quaker home, Enoch was elected Captain of the rebels at Malahide, Ontario during the rebellions of 1837. Enoch and his brothers comprised one of the most active Loyalist families to join the rebels. Court records show that Enoch was arrested and jailed in London on Dec. 21, 1837, convicted of high treason, sentenced to death, then reprieved on May 19, 1838.
Hundreds of his neighbors signed the petition for clemency in the case of Enoch, his brother John, and neighbor Harvey Bryant. His sentence was first commuted to transportation to a penal colony on Van Diemen's land (Tasmania) for life, and then relaxed to 14 years of penal servitud but he was eventually pardoned and released on a peace bond on Oct. 5, 1838. His brother, Elias Moore, was released after a short stay in jail because the key witness absconded. Elias then returned to his seat in the 13th Parliament of Upper Canada.
Saint Thomas More-Sir Thomas More (7 February 1478 – 6 July 1535),venerated by Catholic as Saint Thomas More, was an English Lawyer, Social philosopher, author, statesman and the noted renaissance humanist. He was also a concillor to Henery VIII and lord high chancellor of England. More opposed the Protestant reformation. More opposed the king's seperation from the Catholic church, refusing to acknowledge Henry as Surpreme head of the church of England. After refusing to take the oath of Supremacy, he was convicted of treason and beheaded.
Fergus Mór – One of the great O'Mordha's from Ireland eventually establishing the Dalridia, the Gaelic Kingdom. The historical record, such as it is, consists of an entry in the Annals of Tigernach, for the year 501, which states: Feargus Mor mac Earca cum gente Dal Riada partem Britaniae tenuit, et ibi mortuus est. (Fergus Mór mac Eirc, with the people of Dál Riata, held part of Britain, and he died there.) However, the forms of Fergus, Erc and Dál Riata are later ones, written down long after the 6th century. The record in the Annals has given rise to theories of invasions of Argyll from Ireland, but these are not considered authentic. Fergus is also found in the king lists of Dál Riata, and later of Scotland, of which the Senchus Fer n- Alban and the Duan Albanach can be taken as examples.
The Senchus states that Fergus Mór was also known as Mac Nisse Mór. These sources probably date from the 10th and 11th centuries respectively, between 30 and 40 generations after Fergus may have lived. The Senchus and the Duan name Fergus's father as Erc son of Eochaid Muinremuir. A Middle Irish genealogy of the kings of Alba gives an extensive genealogy for Fergus: [Fergus] m. h-Eircc m. Echdach Muinremuir m. Óengusa Fir m. Feideilmid m. Óengusa m. Feideilmid m. Cormaicc, and a further forty-six generations here omitted. While it was suggested some believe Fergus claimed lineage to Arthur, the historian John Morris has suggested, instead, that Fergus was allowed to settle in Scotland as a federate of Arthur, as a bulwark against the Picts. These sources, while they offer evidence for the importance of Fergus Mór in Medieval times, are not evidence for his historical career.
Indeed, only one king in the 6th century in Scotland is known from contemporary evidence, Ceretic of Alt Clut, and even this identification rests upon a later gloss to Saint Patrick's Letter to Coroticus. The first kings of Dál Riata whose existences are reasonably sure are Fergus's grandsons Gabran mac Domangairt and Comgall, or perhaps his great-grandson Aedan mac Gabrain. Andrew of Wyntoun's early 15th century Orygynale Cronykil of Scotland says that Fergus was the first Scot to rule in Scotland, and that Cináed mac Ailpín was his descendant. In addition, he writes that Fergus brought the Stone of Scone with him from Ireland, that he was succeeded by a son named Dúngal.
A list of kings follows which is corrupt but bears some relation to those found in earlier sources. If Wyntoun's account adds little to earlier ones, at the end of the 16th century George Buchanan in his Rerum Scoticarum Historia added much, generally following John of Fordun. In this version, the Scots had been expelled from Scotland when the Romans under one Maximus conquered all of Britain. His father Eugenius had been killed by the Romans, and Fergus, Fergusius II according to Buchanan's count, was raised in exile in Scandinavia. He later fought with the Franks, before eventually returning to Scotland and reconquering the Scottish lands.
He was killed in battle against Durstus, king of the Picts, and was succeeded by his son Eugenius. Buchanan's king, James VI, shared the scholar's view of the origins of his line, describing himself in one of many verses written to his wife Anne of Denmark, as the "happy Monarch sprung of Ferguse race". Nor was James VI the last ruler to share this belief. The Great Gallery of the Palace of Holyrood house in Edinburgh was decorated with eighty-nine of Jacob de Wet's portraits of Scottish monarchs, from Fergus to Charles II, produced to the order of James's grandson. James II's Irish partisans welcomed the king at Kilkenny during the Williamite war, declaring, "We conducted a Fergus to Scotland; we welcome in James the Second the undoubted heir of Fergus by the lineal descent of one hundred and ten crowned heads".
James Muir- Who was hanged for his beliefs on Feberurary 22,1684 in Edinburgh. Gun Fighters of the West:
Lester Moore - A gunman who was killed in Tombstone, Arizona.
Thomas Moore - A gunman in the Lincoln County War of New Mexico, he rode with the posse that killed John
Tunstall on February 18, 1878.
Charlie Moore - A member of Selman’s Scouts following the turmoil of the Lincoln County War in New Mexico. He was robbed and killed by unknown persons in the White Sands, New Mexico Territory in December, 1878.
Jim Moore (18??-1875) - A hardened killer, Moore had allegedly killed seven people before he murdered Officer William Spivey. He was hanged at Fort Smith, Arkansas on September 3, 1875.
William Moore, aka: Outlaw Bill (18??-1881?) - An outlaw, Moore rode with John Casey in New Mexico stealing horses and committing murder. He later fled to Alaska.
William "Gad” Moore - A road agent in Montana and thought to have been a member of Henry Plummer's gang of Innocents. He was hanged by Montana Vigilantes.
William Moore- The British Pirate that served with William.... the Kid from Yemen but later took several small ships. His refusal two months later to attack a Dutch ship nearly brought his crew to mutiny, and in an angry exchange Kidd mortally wounded his gunner, William Moore.
Maurice Moore (1897 – 28 April 1921) was an Irish republican who fought in the Irish war of Independence. In April 1921 Moore was executed at Cork City Goal after being captured in the aftermath of the Clonmult Ambush. Moore was born at Ticnock, Cobh, Country Cork in 1897. He was educated at the local Presentation Brothers National School and after school began work as a plumber's mate at Haulbowline dockyard (then a British naval establishment). His family had strong republican connections and he joined Irish volunteers in Cobh in 1916. Three of his brothers were also members and they all subsequently served with the Irish Republican Army as members of the 4th Battalion, Cork No.1 Brigade. As a member of the Cobh Company of the IRA Moore took part in the capture of Carrigtwohill, Royal Irish Constabulary (RIC) barracks which was the first police barracks captured by republicans in the War of Independence.
He was later involved in the capture of Cloyne RIC barracks and numerous other actions of the local IRA against British crown forces. In February 1921 Moore was one of a flying column of over 20 IRA men billeted in an old farmhouse at Clonmult, near Midleton under Commandant Diarmuid Hurley . They were tracked down and surrounded by a company of the Hampshire regiment of the British army and RIC, Black and Tans and Auxiliaries. In the ensuing gunfight 12 of the republicans were killed and eight captured, including Maurice Moore. The group were given a military court-martial and all were sentenced to death. Seven of them later had their sentences commuted but two, Moore and his lifelong friend Paddy O'Sullivan were executed Victoria barracks, Cork on 28 April 1921.
William Moore- was a pirate and served with Captain Kidd.
Monsieur Duncan Mure- a Luietenent to the King of France guard
The European Mores
More of France
Ancient History
Ile de France is an ancient historical region of France situated in the center of the Paris Basin.
It is believed that this is where the surname More originated. It comprised all the actual
provinces of the Paris region and part of the provinces of Oise, Aisne and Maine. Ile de
France was the birthplace of the Capetian Monarchy. The dialect which was spoken there
superseded over all other dialects in the neighborhood and thus became the language of the
Kingdom of France. Hugues I was the founder of the third dynasty of the Kings of France:
the Capetians.
Before the arrival of the Capetians, the region was once ruled by Robert le Fort succeeded by
his two sons, Eudes who reigned from 888 to 898 and from 922 to 923 the other son, Robert I
took over. The son-in-law of the latter, Rodolphe of Bourgogne fought for the throne with
the Carolingians and they reigned under the name of 'Robertiens'. The Capetian dynasty then
settled with Hugues Capet, son of Hugues le Grand and grand-son of Robert I. Their leader
was at first chosen through vote but soon every sovereign elected and crowned his eldest son
until 1179. In 987 the Capetians inherited a much diminished domain. The name More was
found in Ile-de-France, where the family has held a family seat since ancient times.
Spelling Variations
Throughout the course of history most surnames have undergone changes in spelling, for
many different reasons. Many spelling variations arose during the times when names were
first being recorded in written form: scribes, priests, or other recorders, would phonetically
represent names as they heard them, according to their own spelling preferences and
interpretations of various accents and dialects.
Prefixes or suffixes attached to names came and went through the centuries; in some cases to identify a distinct family branch; sometimes to signify a political or religious adherence. Hence, there exist many variations of this name,More, including Moret, Morez, Moré, Morais, Morey, Moraie, Moraies, Mauret, Maurez, Maurais, Maurey, Mauraie, Mauraies, Morret, Maurret, Morrez, Morré, Morrais, Maurrais, Morrey, Maurrey, Morraie, Maurraie, Morraies, Maurraies, Mouré, Mouret, Mourez, Mourière, de Moret and du Moret, but these all seem to have evolved from the same basic origins.
The family name More was found in Ile-de-France, where the family originated from the
little town called Moret. This noble family produced several honored and noted members.
Antoine de Bourbon, Count of Moret, was the illegitimate son of King Henri IV and
Jacqueline de Bueil, born at Fontainebleu in 1607, and was likely killed at the Battle of
Castelnaudary in 1632. The family included the Lords of Moret, from the Houses of Bec-
Crespin and Mascureau, and Pierre, Sieur of La Fayolle, a noted scholar, who was born in 1630
and died near the end of the seventeenth century. The family branched to Pourthenu in
Dauphiné, Bournonville in Ile de France, Pagas in Languedoc, and Valbonnais in Dauphiné
where several members held the title of Marquis Valbonnais.
Settlers Early History
During the reigns of Philippe I (1060-1108), Louis VI le Gros (1108-1137) and Louis VII le
Jeune (1137-1180) the small domain of the Capetians grew larger. They annexed the Gatinais in
1069, the French Vexin in 1082, and Berry in 1100. From 1180 to 1223 Philippe II Auguste
continued the extension and the latter acquired Artois in 1180 through marriage. In 1191 he
took away the Vermandois and the land of Auvergne from the Plantagenets. From the
Plantagenets he also acquired Anjou, Maine, Normandy, Poitou, Saintonge and Touraine in
1203. He additionally arranged for the marriage of the heiress of Brittany with Pierre I of
Dreux thus setting up the Capetian House in Brittany.
In the meantime Orient Pierre II de Courtenay, grand-son of Louis VI became the first Oriental Emperor of the Capetian House. The Capetian branch of Bourbon originated from the marriage of Robert de Clermont with Beatrice of Bourgogne-Bourbon. From 1295 to 1314 Philippe le Bel extended the royal domain up to Champagne, Navarre, Angoumois and to the County of Lyon, thus reinforcing the regal authority.
The family name More was found in Ile-de-France, where the family originated from the
little town called Moret. This noble family produced several honored and noted members.
Antoine de Bourbon, Count of Moret, was the illegitimate son of King Henri IV and
Jacqueline de Bueil, born at Fontainebleu in 1607, and was likely killed at the Battle of
Castelnaudary in 1632. The family included the Lords of Moret, from the Houses of Bec-
Crespin and Mascureau, and Pierre, Sieur of La Fayolle, a noted scholar, who was born in 1630
and died near the end of the seventeenth century. The family branched to Pourthenu in
Dauphiné, Bournonville in Ile de France, Pagas in Languedoc, and Valbonnais in Dauphiné
where several members held the title of Marquis Valbonnais.
More of Austria- Germany
Origins
The region that comprises the modern state of Austria is the ancient homeland of the More
family. Austria, which was originally home to a Celtic people, was conquered by the Roman
Empire in about 15 BC. Following the fall of Rome, Austria was repeatedly invaded by
barbarian tribes, such as the Vandals, Visigoths, and Huns, who swept in from the east.
During the 5th and 6th centuries, the Alemanni, Avars and Slavs settled Austria. The Avars
were defeated in 785 by the Frankish emperor Charlemagne, who set up the East Mark, which
later became known as the Österreich. Austria was ruled by the Babenburger dynasty until
1278, when they were succeeded by the Hapsburg dynasty, which ruled Austria until the 20th
century.
Ancient History
The distinguished surname More has been traced to Austria, which was occupied by the Celts
and then the Romans. Between the 3rd and 5th centuries a series of invasions by the Vandals,
Goths, Huns, and Alemans swept in from the east and from the north. In the 9th century, the
Holy Roman Emperor Charlemagne made this territory an eastern border region, as a
bulwark against the determined Hungarian and Slavic invasions. Otto the Great finally
defeated the Hungarian forces in 955, and Austria, a word meaning "Kingdom of the East,"
became a Bavarian protectorate.
Research into the history of this name brings us to Austria and the Rhineland, where the name
became noted for its many branches within the region, each house acquiring a status and
influence which was envied and enrolled by the princes of the region. In their later history the
family became a power unto themselves and were elevated to the ranks of nobility as they grew
into this most influential family.
Spelling Variations
Throughout history most surnames have gone through changes in spelling, even between
generations. Often a name was recorded by a scribe simply by its sound, thus changing the
name's written form. If the name change had been recorded in contracts or legal proceedings,
this spelling often became a part of standard usage. Depending on the region, a name's
spelling may vary quite considerably. Among such variations of the name are Mohr, More,
Morher, Mohrer, Mor and Moor, to name a few examples.
Austria faced in the 16th century the religious troubles of the Reformation and the expansion
of the Turkish Empire. Austria became the Catholic center of the Counter-Reformation, and
despite Ferdinand's expanding power, the Turks laid siege to Vienna in 1529. The Treaty of
Westphalia (1648) put an end to the Thirty Years War and divided up the Empire. The Turks
invaded Austria again in 1699, only to be driven back by Prince Eugene of Savoy, who
conquered large parts of the Balkans, acquiring Transylvania. However, after the Spanish and
Austrian lines of Habsburg died out in 1700 and 1740, Maria Theresa became the only woman
to be Empress on a German throne. They also became Kings of Hungary, which became the
basis for the powerful Austro-Hungarian Empire.
Meanwhile, the surname More has been traced to the Rhineland and Austria, which were
established as the primary origins of the family name. The more ancient branch stemmed from
Austria, and their origins are shrouded in mystery and legend. Johann Conrad Mohr was a
major in Steinsberg in 1299 and from him stemmed the dynasty of counts von Mohr in Tirol.
Joseph Mohr was bishop of Chur in 1627, and Johann Mohr was a general who achieved great
fame at the end of the 16th century in the Hungarian wars. Rhineland chronicles first mention
the Mohr von Wald family as early as the 14th century. By the 17th century they were very
prominent in the military, for instance Johann Friedrich Mohr (d.1704), who was General of
the garrison of Coblenz and Comthur of the Teutonic Order.
In Austria, another prominent branch was Mohr von Mohrenhelm, who later moved to Erfurt and were ennobled in 1665 in Frankfurt. The family was brought to Frankfurt from Erfurt by Jost Mohr, a Doctor of Law and Notarius, who died in 1613. His brother, Johann Mohr, was High Chamberlain of Erfurt and was raised to the nobility by King Gustav Adolph of Sweden. Another branch that remained in Austria was Mohr von und zu Sonnegg. They were ennobled by the Holy Roman Emperor Ferdinand I in 1557 in the person of Hieronymus Mohr.
Early History
The Babenberger dynasty ruled Austria until 1278, when the house of Habsburg rose to power
and began its territorial expansion, not by going to war, but by going to the altar; by
marrying into various influential houses, the Habsburgs acquired Tyrol, the Krain region,
Styria, Trieste, and the Alemanian Voralberg. They also gained the Netherlands from the
Dukes of Burgundy in 1482, and married into the Spanish royal family. Charles V left his
Austrian territories to his brother Ferdinand I, who acquired Hungary and Bohemia in 1526.
Early Notables
Notable among the name More in this early period are J.C.B. Mohr, who founded a well-
known publishing house in 1801. Karl Friedrich Mohr (1806-1879) was the leading scientific
pharmacist of his time in Germany. He invented various new analytical processes and the
"Mohr's balance" for determining specific weights and measurements. Charles Theodore
Mohr (1824-1901), a U.S. botanist, was born in Wuerttemberg, Germany. Among various
accomplishments, he explored Dutch Guiana and joined the California gold rush.
The Great Migration
Following the defeat of Napoleon in 1815, Vienna was chosen as the site of the famous
Congress of Vienna, at which the victors decided how the nations of Europe were to share the
spoils. Following this period Austria reached the peak of its prestige. Vienna loosened its hold
on its widespread possessions, particularly in the rebellious Balkan regions. In 1914, the
assassination of the Archduke Ferdinand in Sarajevo, Serbia, started the Great War. The
empire was broken up by the Treaty of Versailles in 1919, when Austria became a republic, its
Sudeten Germans now citizens of the new nation of Czechoslovakia. Hitler's forces annexed
it in 1938 and made it a part of greater Germany, and after the war Austria became a
democratic republic.
Spain:
1. The Tower of Hercules ( Galicia)- Built by the Milesian tribe. The Muir clan are descendants from the Milesian royal line.
2. Castell de Mur Castle- Around 1055 Ramon V from Pallars gave the castle to the Mur family in which they occupied and controlled for several centuries.
3. Toledo Castle- owned by the Moore family.
4. Montsona Castle- At one time, the Moore family owned this castle.
5. Guardia de Noguera Castle- At one time, the Moore family owned this castle.
Belgium:
1. Male Castle- The castle was consecrated in 1166 by Thomas Moore, Archbishop of Canterbury, and served mainly as a court for the Counts of Flanders.
Italy:
1. Taranto Castle- from 1699 the Counts von Mohr and later on the Giovanelli.
France:
1. De la Mare Castle- owned and built by the de la Mare
Germany:
1. Mittelmuhr Castle- Built by Herrn von Mur and controlled by the Mur family.
2. Neuenmuhr Castle- One of many castle control and built by the Mur family and this castle was affected by the thirty years war.
3. Altenmuhr Castle- Built by Herrn von Mur and controlled by the Mur family.
4. Turmhugelburg Castle- Herren von Mur build first castles of the Mur family.
5. Kellerhaus Castle- Built by Herrn von Mur and controlled by the Mur family.
Ancient History
Ile de France is an ancient historical region of France situated in the center of the Paris Basin.
It is believed that this is where the surname More originated. It comprised all the actual
provinces of the Paris region and part of the provinces of Oise, Aisne and Maine. Ile de
France was the birthplace of the Capetian Monarchy. The dialect which was spoken there
superseded over all other dialects in the neighborhood and thus became the language of the
Kingdom of France. Hugues I was the founder of the third dynasty of the Kings of France:
the Capetians.
Before the arrival of the Capetians, the region was once ruled by Robert le Fort succeeded by
his two sons, Eudes who reigned from 888 to 898 and from 922 to 923 the other son, Robert I
took over. The son-in-law of the latter, Rodolphe of Bourgogne fought for the throne with
the Carolingians and they reigned under the name of 'Robertiens'. The Capetian dynasty then
settled with Hugues Capet, son of Hugues le Grand and grand-son of Robert I. Their leader
was at first chosen through vote but soon every sovereign elected and crowned his eldest son
until 1179. In 987 the Capetians inherited a much diminished domain. The name More was
found in Ile-de-France, where the family has held a family seat since ancient times.
Spelling Variations
Throughout the course of history most surnames have undergone changes in spelling, for
many different reasons. Many spelling variations arose during the times when names were
first being recorded in written form: scribes, priests, or other recorders, would phonetically
represent names as they heard them, according to their own spelling preferences and
interpretations of various accents and dialects.
Prefixes or suffixes attached to names came and went through the centuries; in some cases to identify a distinct family branch; sometimes to signify a political or religious adherence. Hence, there exist many variations of this name,More, including Moret, Morez, Moré, Morais, Morey, Moraie, Moraies, Mauret, Maurez, Maurais, Maurey, Mauraie, Mauraies, Morret, Maurret, Morrez, Morré, Morrais, Maurrais, Morrey, Maurrey, Morraie, Maurraie, Morraies, Maurraies, Mouré, Mouret, Mourez, Mourière, de Moret and du Moret, but these all seem to have evolved from the same basic origins.
The family name More was found in Ile-de-France, where the family originated from the
little town called Moret. This noble family produced several honored and noted members.
Antoine de Bourbon, Count of Moret, was the illegitimate son of King Henri IV and
Jacqueline de Bueil, born at Fontainebleu in 1607, and was likely killed at the Battle of
Castelnaudary in 1632. The family included the Lords of Moret, from the Houses of Bec-
Crespin and Mascureau, and Pierre, Sieur of La Fayolle, a noted scholar, who was born in 1630
and died near the end of the seventeenth century. The family branched to Pourthenu in
Dauphiné, Bournonville in Ile de France, Pagas in Languedoc, and Valbonnais in Dauphiné
where several members held the title of Marquis Valbonnais.
Settlers Early History
During the reigns of Philippe I (1060-1108), Louis VI le Gros (1108-1137) and Louis VII le
Jeune (1137-1180) the small domain of the Capetians grew larger. They annexed the Gatinais in
1069, the French Vexin in 1082, and Berry in 1100. From 1180 to 1223 Philippe II Auguste
continued the extension and the latter acquired Artois in 1180 through marriage. In 1191 he
took away the Vermandois and the land of Auvergne from the Plantagenets. From the
Plantagenets he also acquired Anjou, Maine, Normandy, Poitou, Saintonge and Touraine in
1203. He additionally arranged for the marriage of the heiress of Brittany with Pierre I of
Dreux thus setting up the Capetian House in Brittany.
In the meantime Orient Pierre II de Courtenay, grand-son of Louis VI became the first Oriental Emperor of the Capetian House. The Capetian branch of Bourbon originated from the marriage of Robert de Clermont with Beatrice of Bourgogne-Bourbon. From 1295 to 1314 Philippe le Bel extended the royal domain up to Champagne, Navarre, Angoumois and to the County of Lyon, thus reinforcing the regal authority.
The family name More was found in Ile-de-France, where the family originated from the
little town called Moret. This noble family produced several honored and noted members.
Antoine de Bourbon, Count of Moret, was the illegitimate son of King Henri IV and
Jacqueline de Bueil, born at Fontainebleu in 1607, and was likely killed at the Battle of
Castelnaudary in 1632. The family included the Lords of Moret, from the Houses of Bec-
Crespin and Mascureau, and Pierre, Sieur of La Fayolle, a noted scholar, who was born in 1630
and died near the end of the seventeenth century. The family branched to Pourthenu in
Dauphiné, Bournonville in Ile de France, Pagas in Languedoc, and Valbonnais in Dauphiné
where several members held the title of Marquis Valbonnais.
More of Austria- Germany
Origins
The region that comprises the modern state of Austria is the ancient homeland of the More
family. Austria, which was originally home to a Celtic people, was conquered by the Roman
Empire in about 15 BC. Following the fall of Rome, Austria was repeatedly invaded by
barbarian tribes, such as the Vandals, Visigoths, and Huns, who swept in from the east.
During the 5th and 6th centuries, the Alemanni, Avars and Slavs settled Austria. The Avars
were defeated in 785 by the Frankish emperor Charlemagne, who set up the East Mark, which
later became known as the Österreich. Austria was ruled by the Babenburger dynasty until
1278, when they were succeeded by the Hapsburg dynasty, which ruled Austria until the 20th
century.
Ancient History
The distinguished surname More has been traced to Austria, which was occupied by the Celts
and then the Romans. Between the 3rd and 5th centuries a series of invasions by the Vandals,
Goths, Huns, and Alemans swept in from the east and from the north. In the 9th century, the
Holy Roman Emperor Charlemagne made this territory an eastern border region, as a
bulwark against the determined Hungarian and Slavic invasions. Otto the Great finally
defeated the Hungarian forces in 955, and Austria, a word meaning "Kingdom of the East,"
became a Bavarian protectorate.
Research into the history of this name brings us to Austria and the Rhineland, where the name
became noted for its many branches within the region, each house acquiring a status and
influence which was envied and enrolled by the princes of the region. In their later history the
family became a power unto themselves and were elevated to the ranks of nobility as they grew
into this most influential family.
Spelling Variations
Throughout history most surnames have gone through changes in spelling, even between
generations. Often a name was recorded by a scribe simply by its sound, thus changing the
name's written form. If the name change had been recorded in contracts or legal proceedings,
this spelling often became a part of standard usage. Depending on the region, a name's
spelling may vary quite considerably. Among such variations of the name are Mohr, More,
Morher, Mohrer, Mor and Moor, to name a few examples.
Austria faced in the 16th century the religious troubles of the Reformation and the expansion
of the Turkish Empire. Austria became the Catholic center of the Counter-Reformation, and
despite Ferdinand's expanding power, the Turks laid siege to Vienna in 1529. The Treaty of
Westphalia (1648) put an end to the Thirty Years War and divided up the Empire. The Turks
invaded Austria again in 1699, only to be driven back by Prince Eugene of Savoy, who
conquered large parts of the Balkans, acquiring Transylvania. However, after the Spanish and
Austrian lines of Habsburg died out in 1700 and 1740, Maria Theresa became the only woman
to be Empress on a German throne. They also became Kings of Hungary, which became the
basis for the powerful Austro-Hungarian Empire.
Meanwhile, the surname More has been traced to the Rhineland and Austria, which were
established as the primary origins of the family name. The more ancient branch stemmed from
Austria, and their origins are shrouded in mystery and legend. Johann Conrad Mohr was a
major in Steinsberg in 1299 and from him stemmed the dynasty of counts von Mohr in Tirol.
Joseph Mohr was bishop of Chur in 1627, and Johann Mohr was a general who achieved great
fame at the end of the 16th century in the Hungarian wars. Rhineland chronicles first mention
the Mohr von Wald family as early as the 14th century. By the 17th century they were very
prominent in the military, for instance Johann Friedrich Mohr (d.1704), who was General of
the garrison of Coblenz and Comthur of the Teutonic Order.
In Austria, another prominent branch was Mohr von Mohrenhelm, who later moved to Erfurt and were ennobled in 1665 in Frankfurt. The family was brought to Frankfurt from Erfurt by Jost Mohr, a Doctor of Law and Notarius, who died in 1613. His brother, Johann Mohr, was High Chamberlain of Erfurt and was raised to the nobility by King Gustav Adolph of Sweden. Another branch that remained in Austria was Mohr von und zu Sonnegg. They were ennobled by the Holy Roman Emperor Ferdinand I in 1557 in the person of Hieronymus Mohr.
Early History
The Babenberger dynasty ruled Austria until 1278, when the house of Habsburg rose to power
and began its territorial expansion, not by going to war, but by going to the altar; by
marrying into various influential houses, the Habsburgs acquired Tyrol, the Krain region,
Styria, Trieste, and the Alemanian Voralberg. They also gained the Netherlands from the
Dukes of Burgundy in 1482, and married into the Spanish royal family. Charles V left his
Austrian territories to his brother Ferdinand I, who acquired Hungary and Bohemia in 1526.
Early Notables
Notable among the name More in this early period are J.C.B. Mohr, who founded a well-
known publishing house in 1801. Karl Friedrich Mohr (1806-1879) was the leading scientific
pharmacist of his time in Germany. He invented various new analytical processes and the
"Mohr's balance" for determining specific weights and measurements. Charles Theodore
Mohr (1824-1901), a U.S. botanist, was born in Wuerttemberg, Germany. Among various
accomplishments, he explored Dutch Guiana and joined the California gold rush.
The Great Migration
Following the defeat of Napoleon in 1815, Vienna was chosen as the site of the famous
Congress of Vienna, at which the victors decided how the nations of Europe were to share the
spoils. Following this period Austria reached the peak of its prestige. Vienna loosened its hold
on its widespread possessions, particularly in the rebellious Balkan regions. In 1914, the
assassination of the Archduke Ferdinand in Sarajevo, Serbia, started the Great War. The
empire was broken up by the Treaty of Versailles in 1919, when Austria became a republic, its
Sudeten Germans now citizens of the new nation of Czechoslovakia. Hitler's forces annexed
it in 1938 and made it a part of greater Germany, and after the war Austria became a
democratic republic.
Spain:
1. The Tower of Hercules ( Galicia)- Built by the Milesian tribe. The Muir clan are descendants from the Milesian royal line.
2. Castell de Mur Castle- Around 1055 Ramon V from Pallars gave the castle to the Mur family in which they occupied and controlled for several centuries.
3. Toledo Castle- owned by the Moore family.
4. Montsona Castle- At one time, the Moore family owned this castle.
5. Guardia de Noguera Castle- At one time, the Moore family owned this castle.
Belgium:
1. Male Castle- The castle was consecrated in 1166 by Thomas Moore, Archbishop of Canterbury, and served mainly as a court for the Counts of Flanders.
Italy:
1. Taranto Castle- from 1699 the Counts von Mohr and later on the Giovanelli.
France:
1. De la Mare Castle- owned and built by the de la Mare
Germany:
1. Mittelmuhr Castle- Built by Herrn von Mur and controlled by the Mur family.
2. Neuenmuhr Castle- One of many castle control and built by the Mur family and this castle was affected by the thirty years war.
3. Altenmuhr Castle- Built by Herrn von Mur and controlled by the Mur family.
4. Turmhugelburg Castle- Herren von Mur build first castles of the Mur family.
5. Kellerhaus Castle- Built by Herrn von Mur and controlled by the Mur family.